
Video Walkthrough

Introduction
The 3C Connect Dashboard is the home base for daily dispatching. From here, you can get to other areas and features of the app and see all appointments scheduled across your company.
Navigating in 3C Connect
Let’s look at how to navigate around the dashboard and use some common app features.
Navigation Bar
To access other app features and lists, use the navigation bar to the left of the screen. You’ll also find the Create button here.
To use space more efficiently, you can also collapse this bar at any time using the arrow buttons at the bottom left
Create Button
To create customers, appointments, and more, click the blue Create button at the left of the screen. Depending on the page you’re on, you can hover on this button to create something even more quickly and efficiently.
For Example: When viewing the site of an existing customer, you can hover on the Create button to set up an appointment using that site’s information.
Search
To search for customers, sites, and work orders, use the search bar at the top of the page. Once you begin typing, results will appear. You can filter the results to show customers, sites, or work orders. The icon next to each result indicates which of these 3 types it is.
Alerts
To view alerts, click on the bell icon at the top right of the screen. This icon will move and turn red when there are new alerts. It is mainly used for:
Updates on customer SMS confirmations.
Updates about payments accepted by technicians on customer invoices.
Alerts about QuickBooks synchronization failures with work orders.
Connection Warning
If you become disconnected from your network connection, you will see a warning at the top right of the screen. When you are disconnected, data will not update. 3C Connect will automatically try to reconnect, but you can also click “Refresh Now” once you’re reconnected to the internet.
Help
To find assistance, including help articles and support, click on the blue icon at the bottom right of the screen.
Profile
To log out or switch to sandbox mode, click on your profile photo and name at the top right of the screen.
Settings
To access your account settings, click the settings cog at the top right of the screen.
Action Bar
When the page you’re on has certain actions available, you’ll see an action bar at the bottom of the screen.
For Example: When viewing a work order, you can edit by clicking the buttons in the action bar. Whenever you finish editing, you’ll need to save in order to keep your changes.
Schedule
Let’s look at how to monitor progress on your team’s appointments.
Date Selection
You can navigate to different dates in 2 different ways:
Arrows: Use the left and right arrows to go back and forth between days.
Date Picker: Click the calendar icon to select a specific date to jump to.
A Today button will also appear when on a different day to easily jump back to the current day.

Board Selection
Your company may have technicians sorted into different boards that you can toggle between. For example: your install and sales teams may be on different boards for clearer scheduling and sorting.
Zoom Level
You can select a different zoom level so that appointments take up more or less of the screen depending on your preferences.
Extra Settings
Click on the icon of 3 dots at the top right of the schedule to access extra settings and features including:
Horizontal/Vertical View: Depending on the size of computer monitor you use, a horizontal view will show you more hours in a day without scrolling, while a vertical view will show you more of your team members without scrolling.
Print: Print a table of all your appointments for the selected day across all boards. This can be especially helpful to print in advance if you anticipate not having access to a computer or a power/internet service interruption.
Teammates
Your teammates’ names and photos are shown next to their swim lane of assigned appointments.
Time
The current time is indicated on today’s date with a dark gray line across the schedule board.
Appointment Time
The start time for the appointment is shown at the top left of each appointment card.
Status Indicators
Each appointment card will have a colored bar and text showing what the current status of the appointment is. There are 6 stages that a call can move through and 2 additional states:
Scheduled: Appointment scheduled but not yet been sent to the mobile app.

Sent to App: Appointment released to mobile app and viewable by technician.

Arrived: Technician has arrived on site and started the appointment.

Departed: Technician indicated their departure from the appointment.

Completed: The appointment work order has been submitted.

Processed: The appointment work order has been marked as processed.

Blocked: Blocked time has been scheduled for a technician. This can be done by creating a Block Time.

Deleted: Appointments with a deleted status will not appear on your schedule dashboard but will appear on the site and customer pages.

Appointment Preview
To quickly see a preview of the appointment and to view full appointment details, click on the icon with an arrow at the top right of the appointment card.
This appointment preview panel will show you appointment details and allow you to quickly add appointment notes. You can also view the site and customer details and a detailed site history of past appointments and work orders.
At the bottom of the preview panel, there are options relevant to the appointment, including to view the full appointment details page or to send or remove the appointment from the mobile app.
Zone
If your company uses zones to differentiate sites that fall in different service areas, it will be indicated at the bottom left of the appointment card.
Indicator Icons
Several other indicator icons may be displayed at the bottom right of the appointment card. Hovering on them will provide more details. These indicators include:
Sent/Not Yet Sent to Mobile App
Agreement status
Appointment incomplete
Appointment type
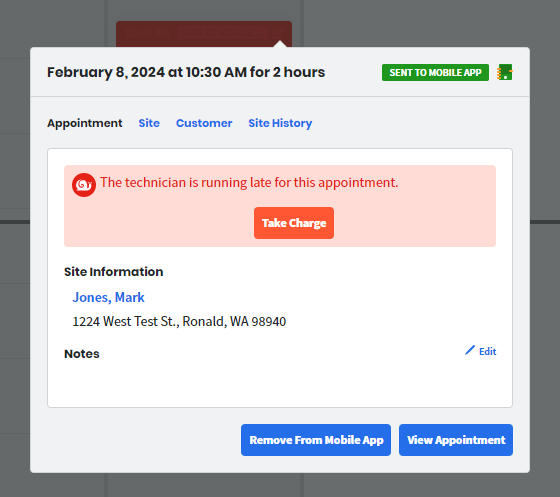
Late Arrival
In cases where the appointment start time has passed and the technician hasn’t yet started the appointment from their mobile device, a late arrival notice will cover the appointment card. This provides an opportunity for dispatchers to proactively take charge by calling and checking in with the technician and customer.
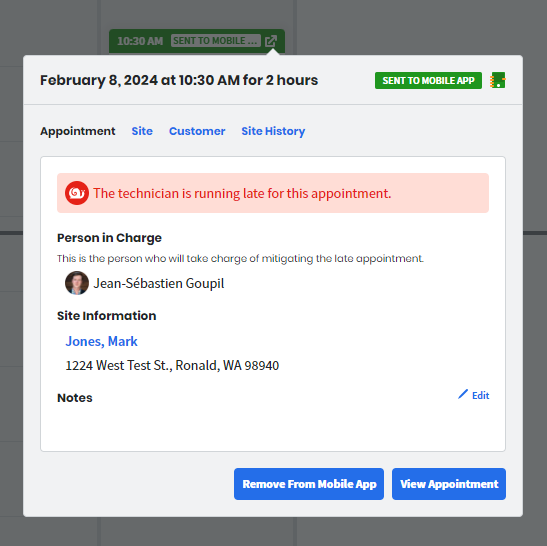
To take charge, click on the appointment preview icon and click the Take Charge button. Taking charge indicates who the person in charge is so that multiple teammates aren’t stepping in to follow up at the same time. Once someone has taken charge, they can’t change and set another person to be in charge of the late arrival.
See also