
Managing Special Orders with Callaway Connect helps you automates the Special Order process by eliminating the need for double entry, reducing mistakes, and providing timely updates to your members. To check out our introductory video to see how it works, Click Here.
In this article, we will discuss creating and managing special orders with Callaway Connect, and further automating the special order process.
For details on connecting your Callaway Connect account and managing the Callaway Connect Integration Callaway Connect Integration.
Enter Special Orders in Callaway Connect:
After connecting your Callaway Connect account, you are ready to create your first special order utilizing the Callaway Connect integration. Follow these instructions:
Go to Callaway Connect and start your order from the "Place Order" menu.
When Selecting items in Callaway Connect, you will typically have two options (as shown below):

Stock Order: When using "Stock Order," limited order details will be added to
your Golf Shop Special Order (e.g. order number, PO#, quantity, wholesale and shipping details).
Custom Order (Recommended Option): When using "Custom Order," complete order details will be imported into your Golf Shop Special Order (e.g. order number, PO#, shipping details, SKU, wholesale, quantity, item category, item field values (i.e., loft, lie, shaft, etc.).
Select "Custom Order" to start customizing the item.
Select the available attributes for the item.
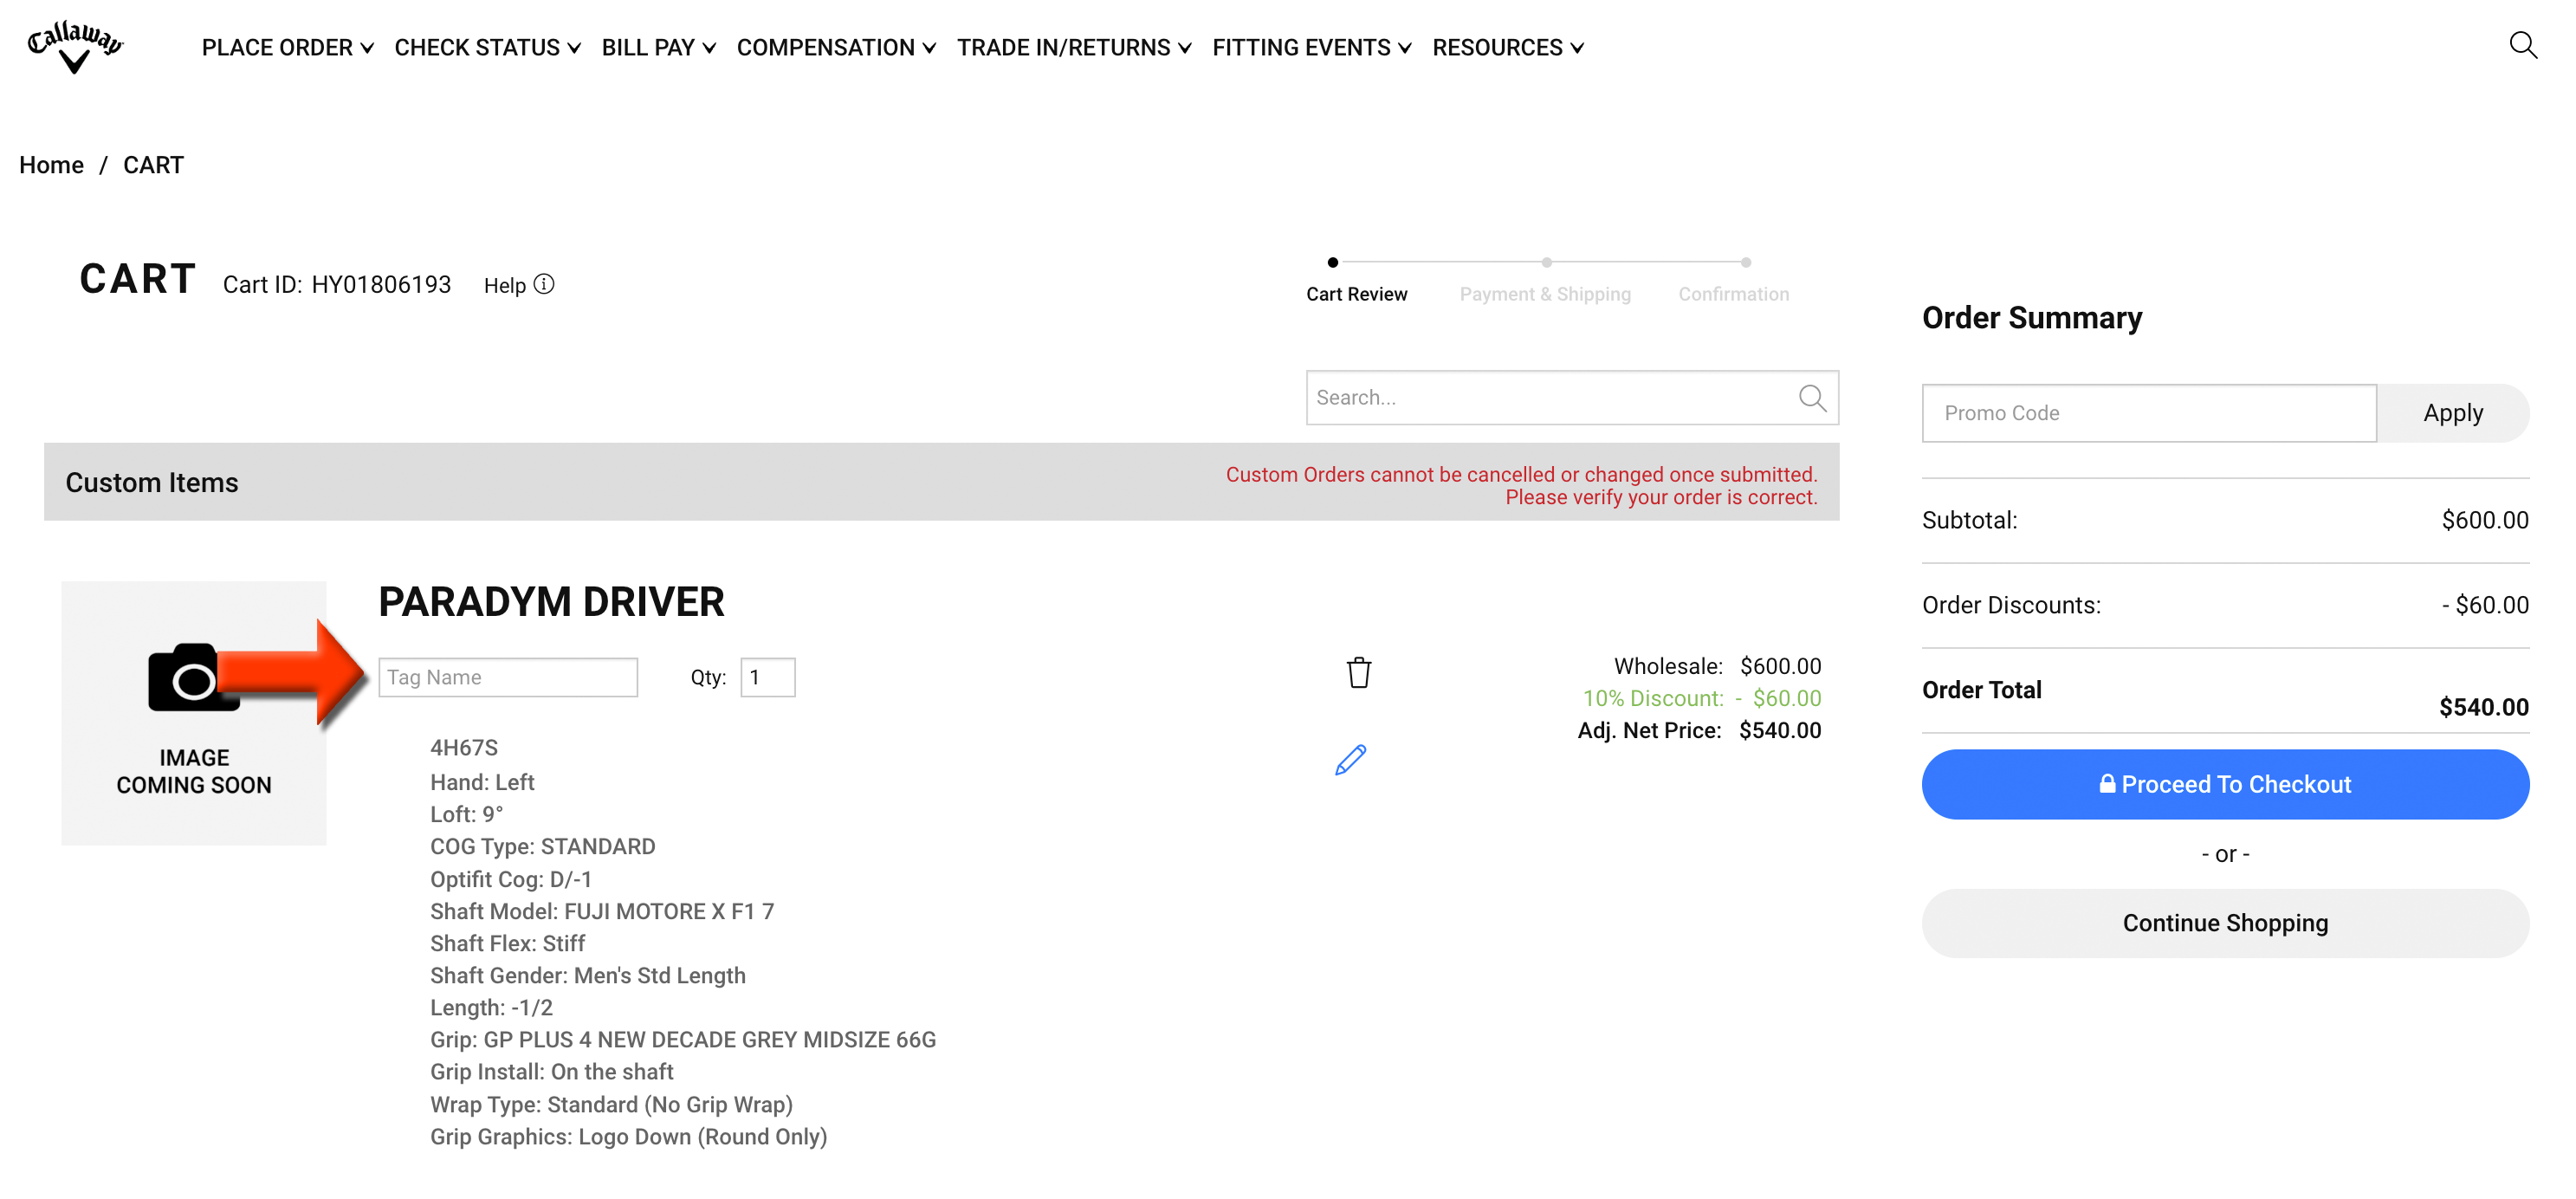
Optionally, in the attribute "Tag Name," enter the member's name or member number as it appears in Golf Shop (as shown below).
When a member's name or member number is entered in this field, Golf Shop will attempt to automatically assign the member to the special order.
If a member's name or number is not entered in this field, you will be able to manually assign the member to the special order in Golf Shop.

Click "Add to Cart" to place the custom item in the cart.
If you are placing orders for additional items to be added to the same PO#, repeat these steps to add them to the same cart in Callaway Connect. If the items are for a different PO#, complete the first order and then repeat the steps for a new order.
After adding all the necessary items to your Callaway Connect cart, please review the cart to ensure all the information about your custom items are accurate. Further, if you forgot to assign a member or number to the "Tag Name," you will have the opportunity to do it from the cart (as shown below).

After reviewing the cart, click "Proceed to Checkout."
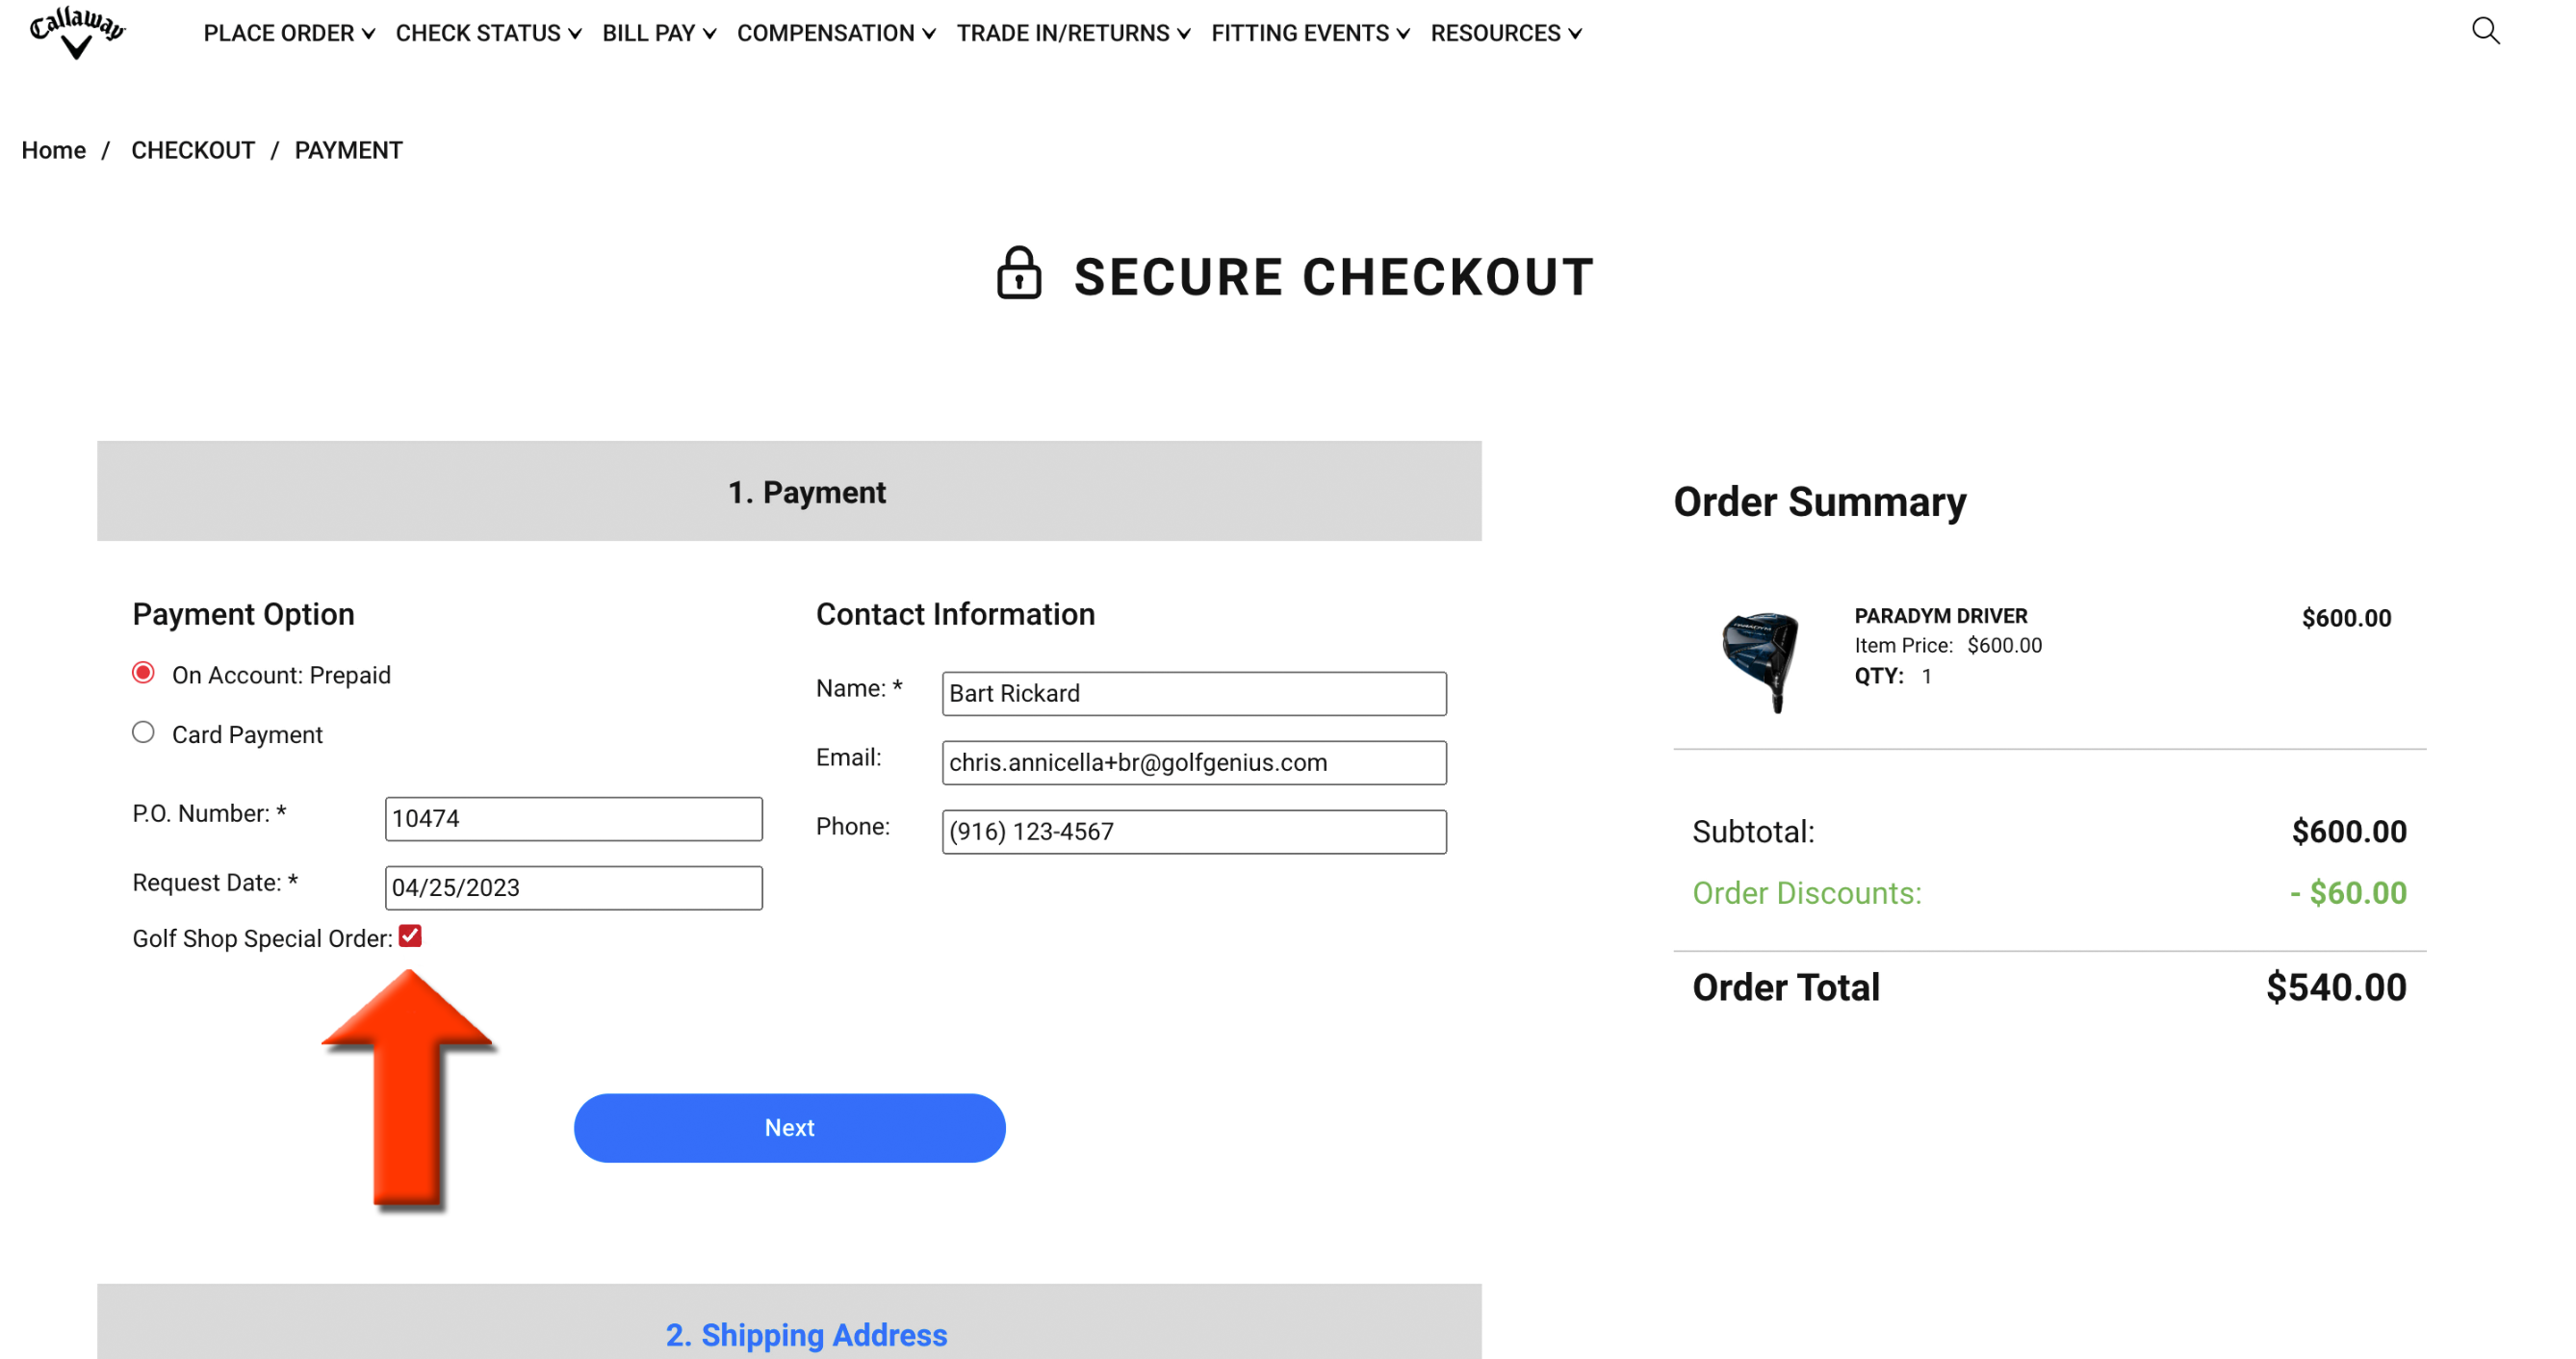
When in checkout, select the option "Golf Shop Special Order" (as shown below).

Click "Next" to complete your order in Callaway Connect.
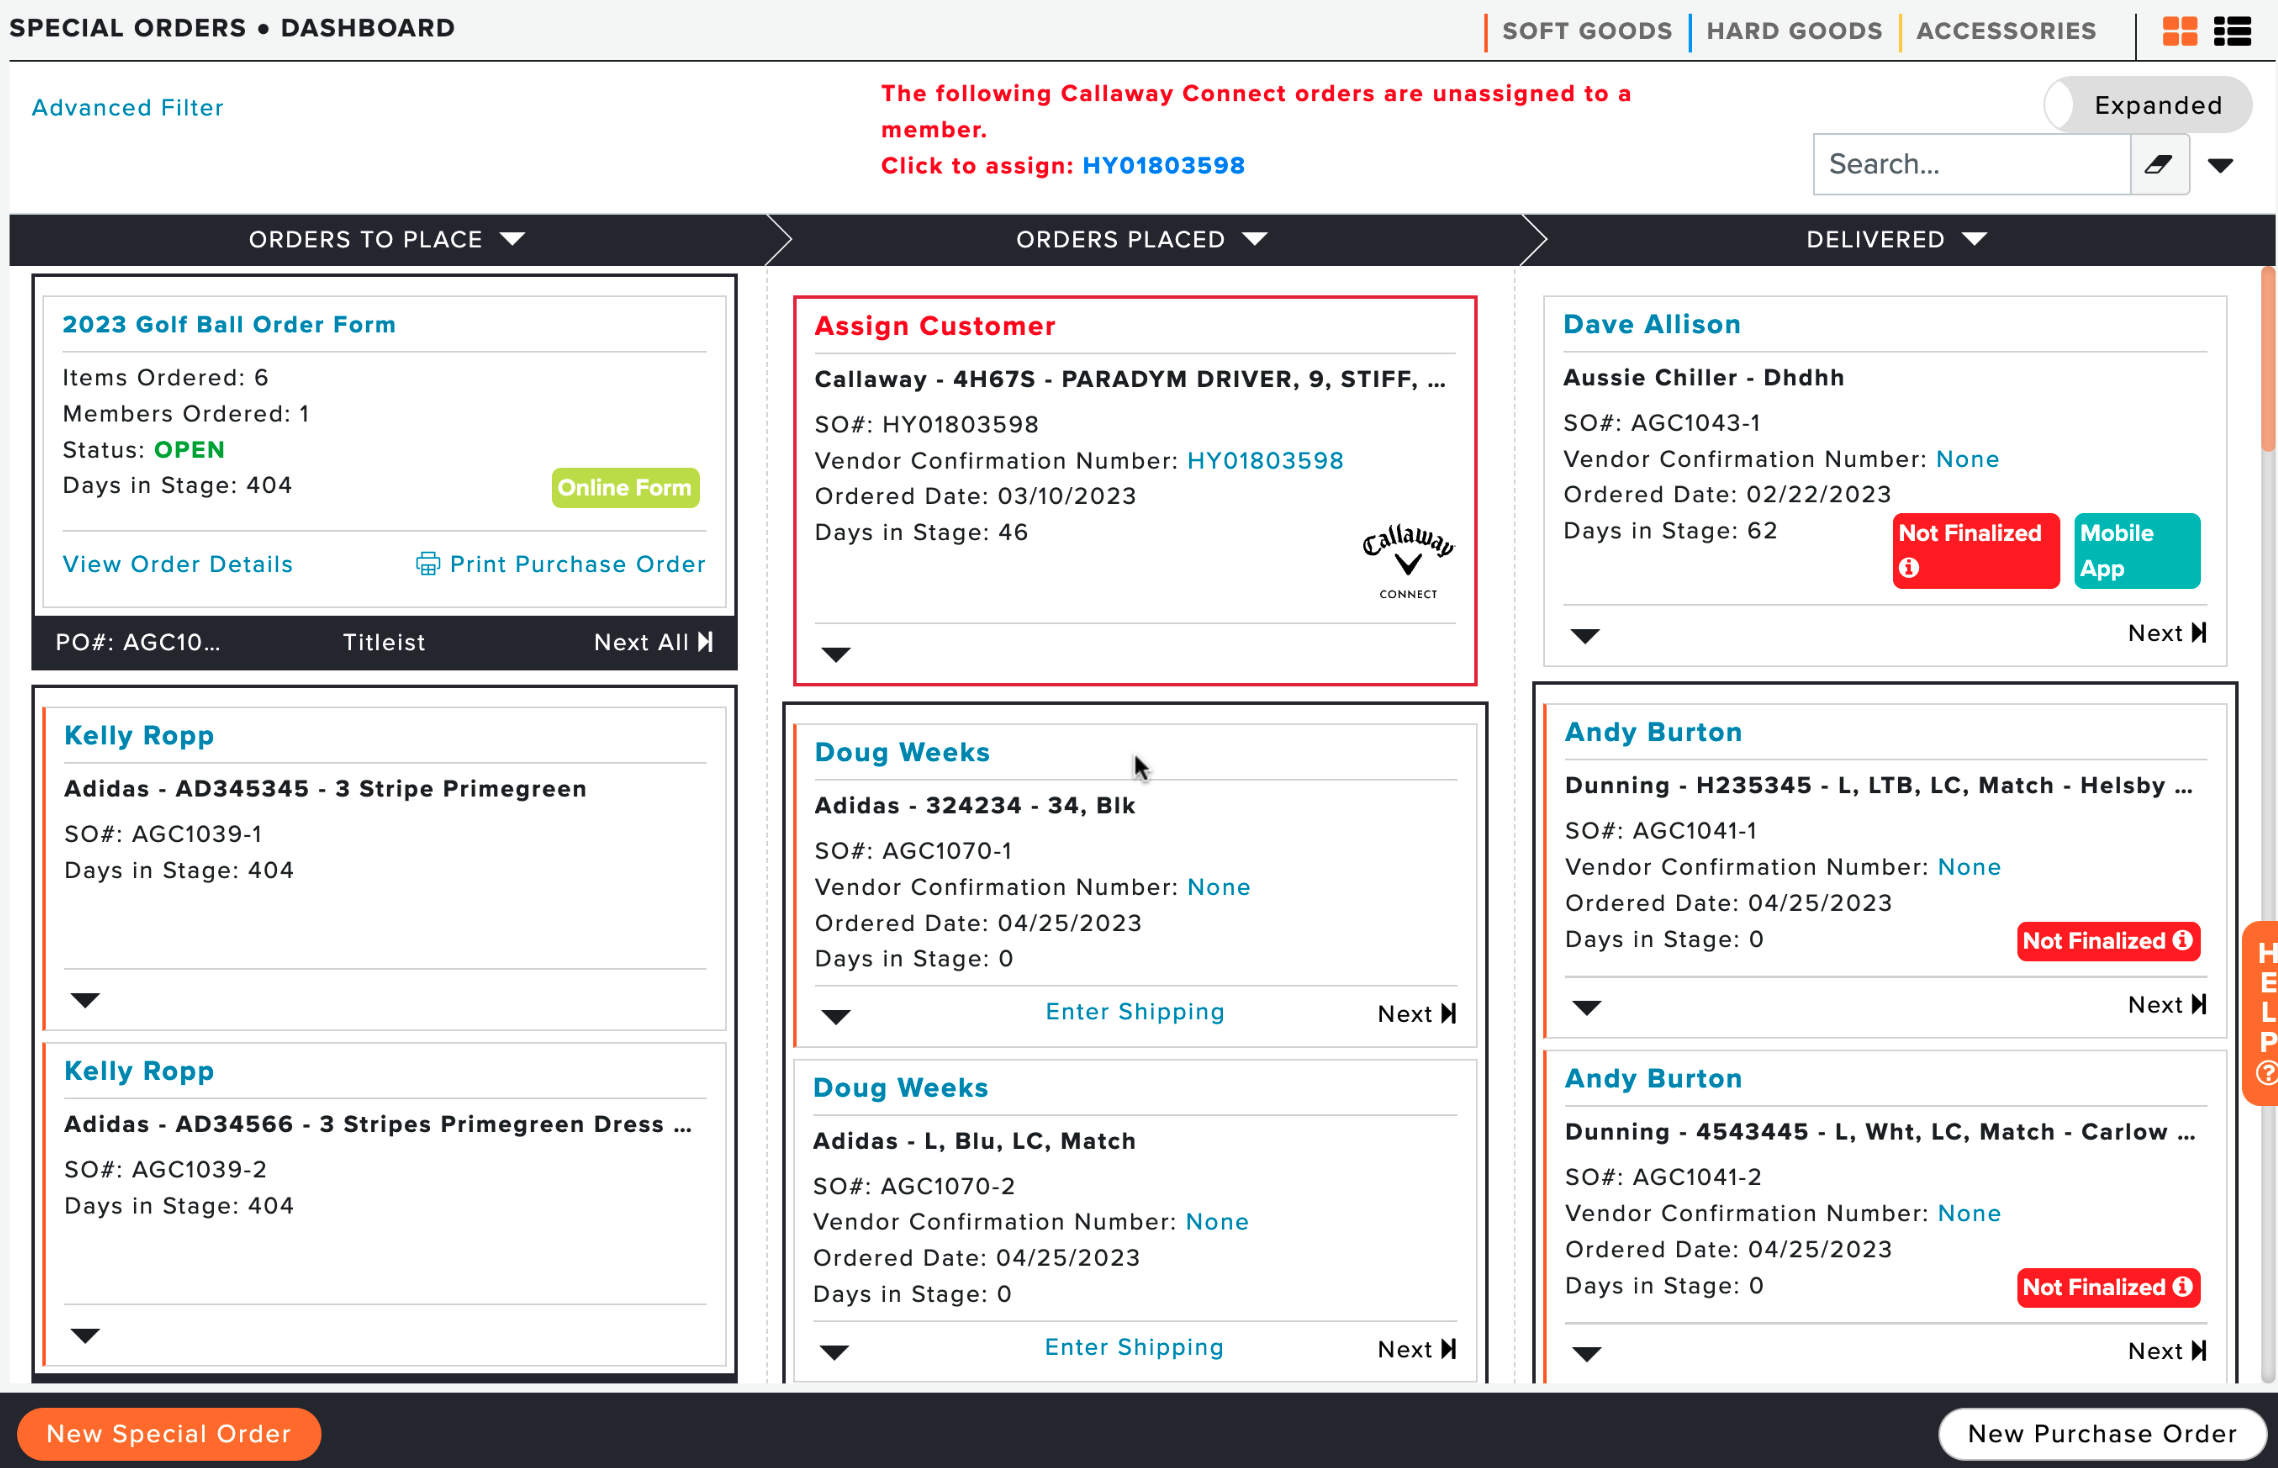
After submitting the order in Callaway Connect and it is confirmed by Callaway, the order will be created in Golf Shop and placed in the "Orders Placed" stage and flagged as a "Callaway Connect" Order (as shown below). It should also be noted:
If a member was assigned in the "Tag Name" attribute in Callaway Connect, the Golf Shop will attempt to assign the member to the special order.
If a member was not assigned in the "Tag Name" attribute in Callaway Connect, you will need to assign a customer to the order in Golf Shop.

If a member has not been assigned to the order, click "Assign Customer" to add a member or guest to the order (if one is not already assigned). Note: If a member was not assigned or Golf Shop was not able to assign a member, the selected manager will receive an email notification that a member was not assigned to the special order. For more details on assigning which manager should receive this notification, Click Here.
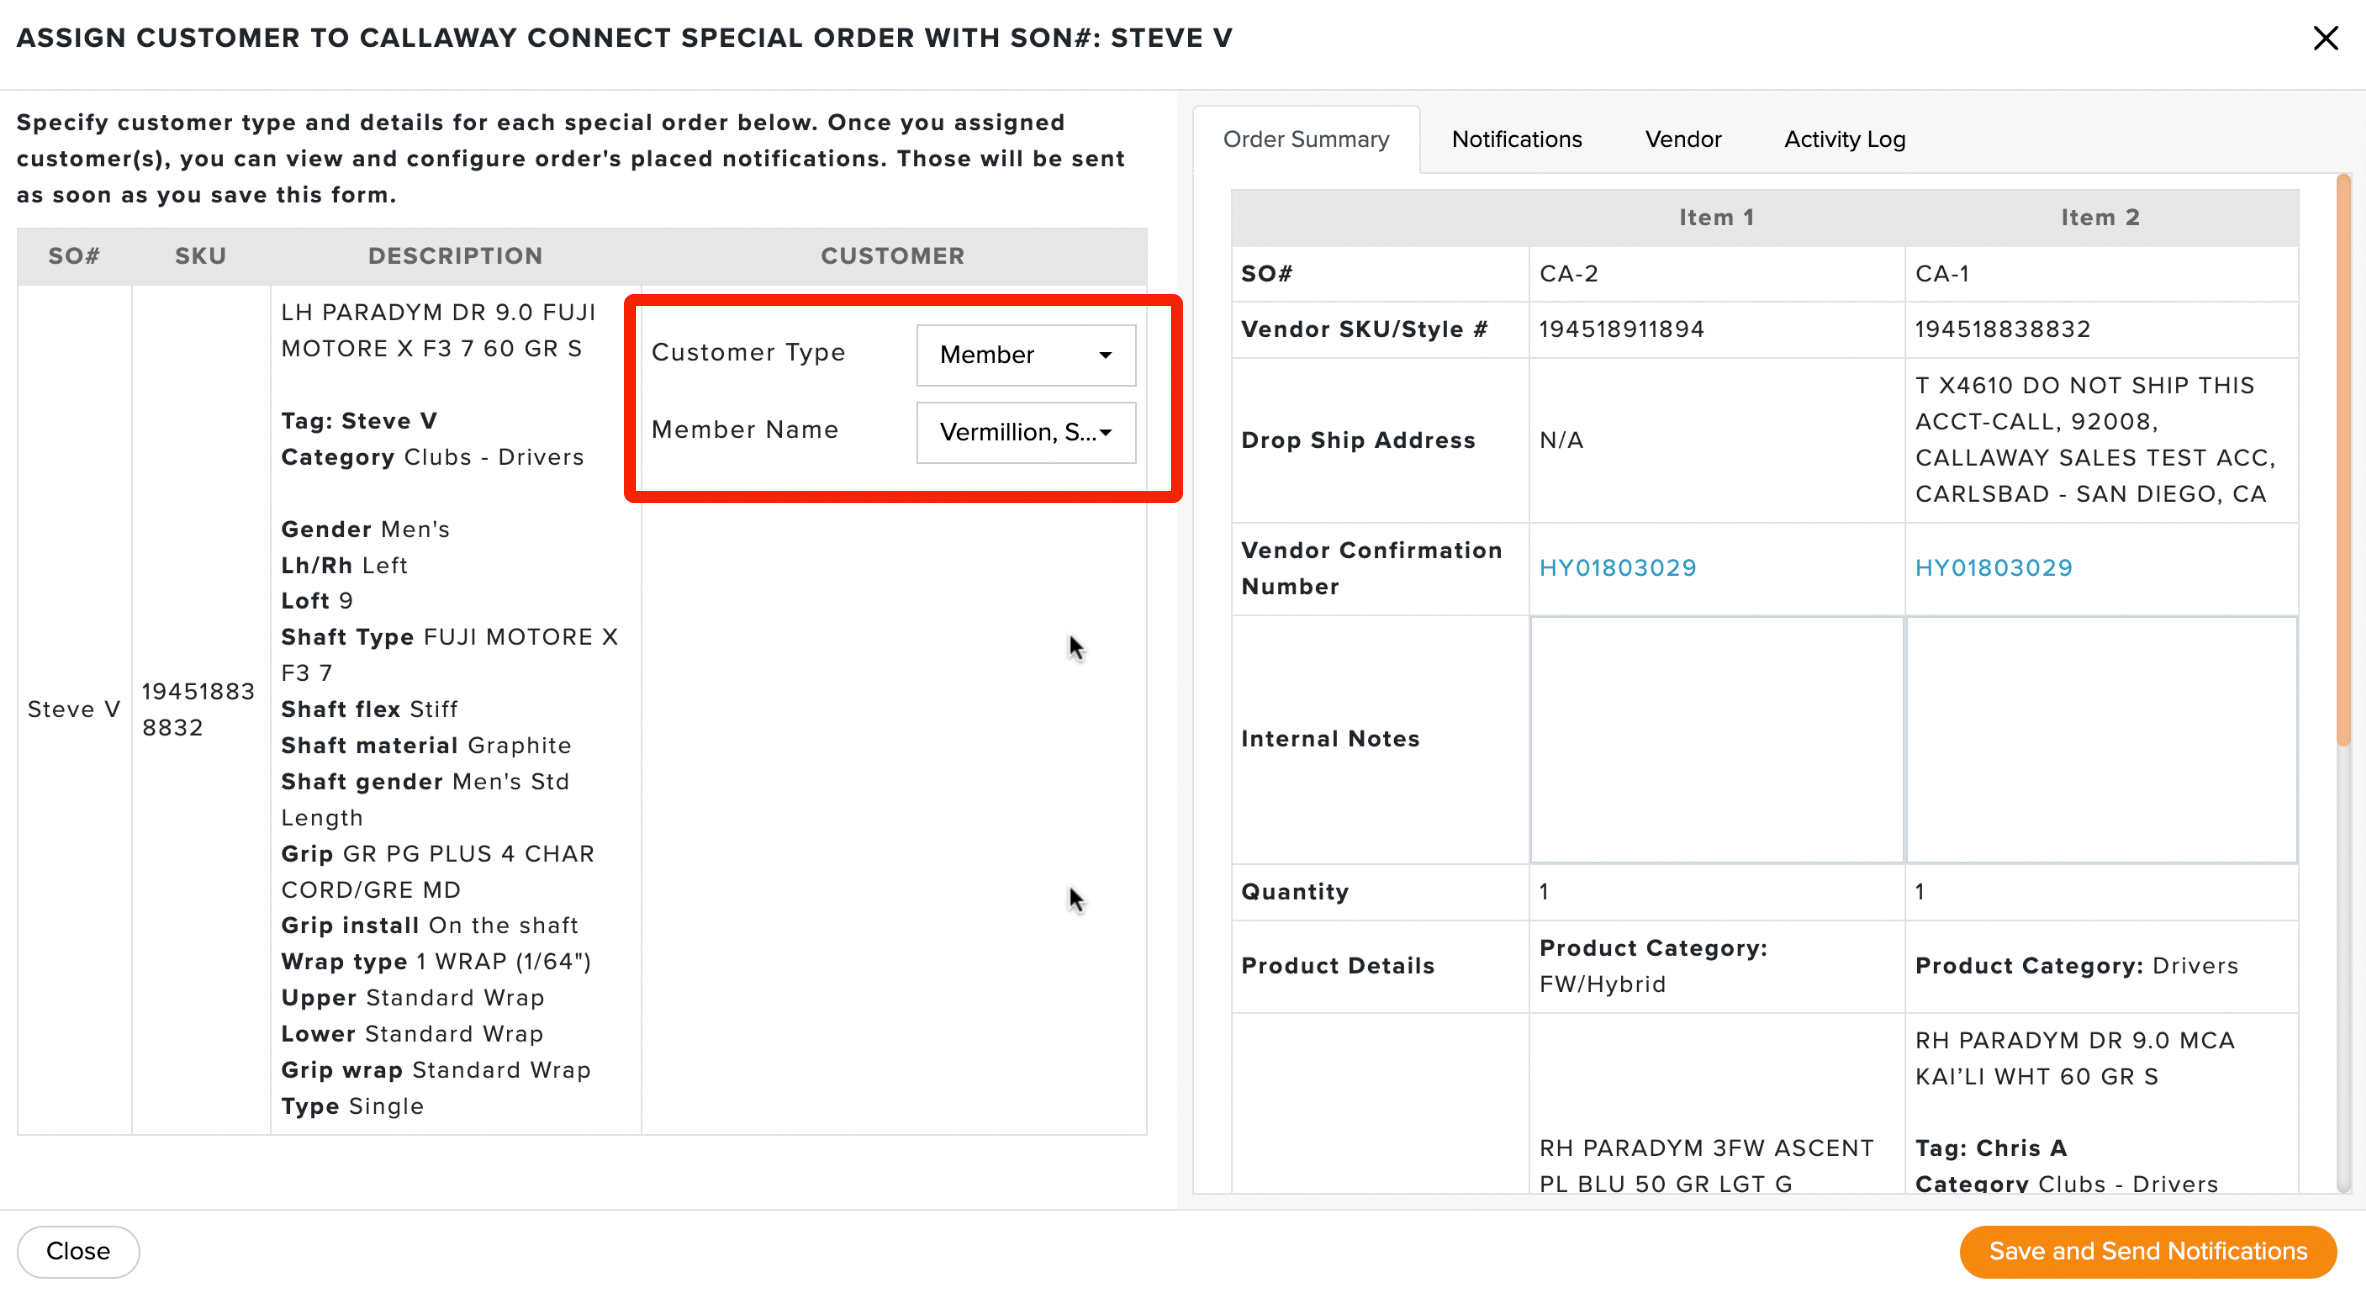
When assigning a customer, select the following (as shown below):

Customer Type: Select between:
Member: When selecting a member, select a member from the "Member Name" dropdown.
Guest: When selecting Guest, fill in the additional details:
Guest First Name
Guest Last Name
Guest Email
Guest Cell Phone
If necessary, enable or disable the customer's text message and email notification on the right-hand side.
Click "Save and Send Notification."

Multiple Item Order Placement in Callaway Connect:
If multiple items are included in the Callaway Connect Order, Golf Shop will automatically create a separate special order for each additional item using the same PO numbers. The Special Order numbers for the additional items will be generated as they usually are (e.g., 1234-1, 1234-2, etc.).
When assigning a customer with multiple special orders, you can assign customers to each special order individually or assign customer(s) to all the special orders in one page.
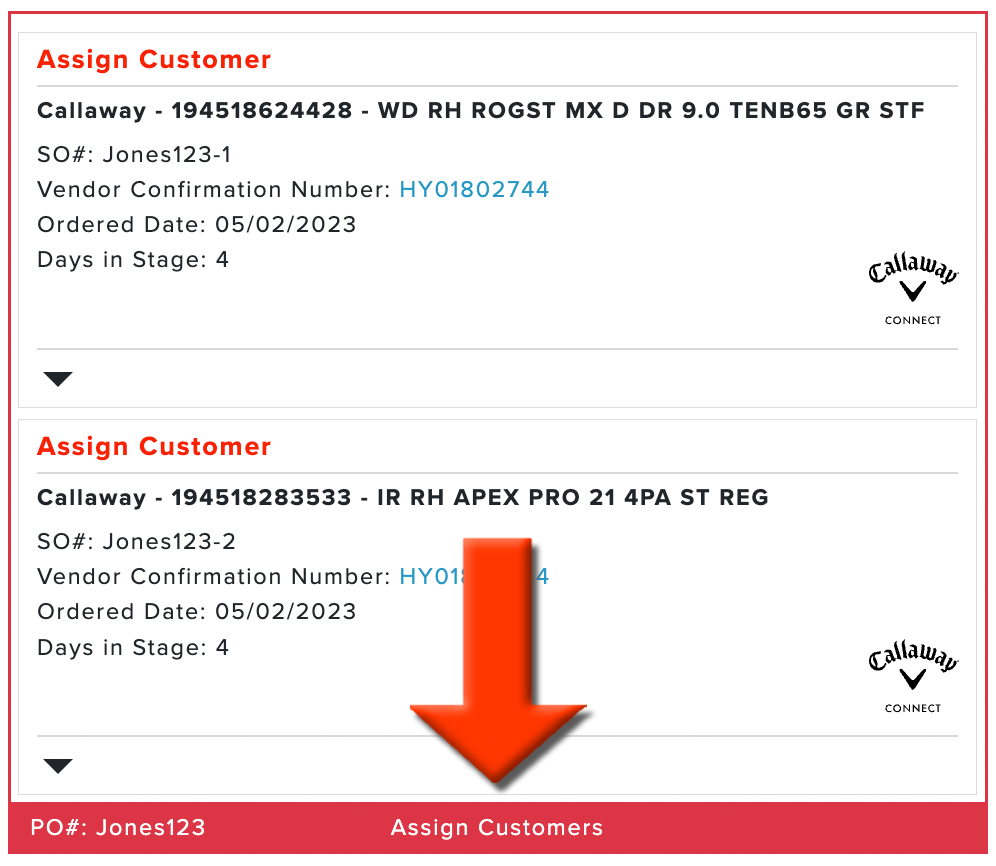
To assign customer(s) to all the unassigned special orders in on PO, click "Assign Customer" at the bottom of the PO block containing multiple special orders (as shown below).
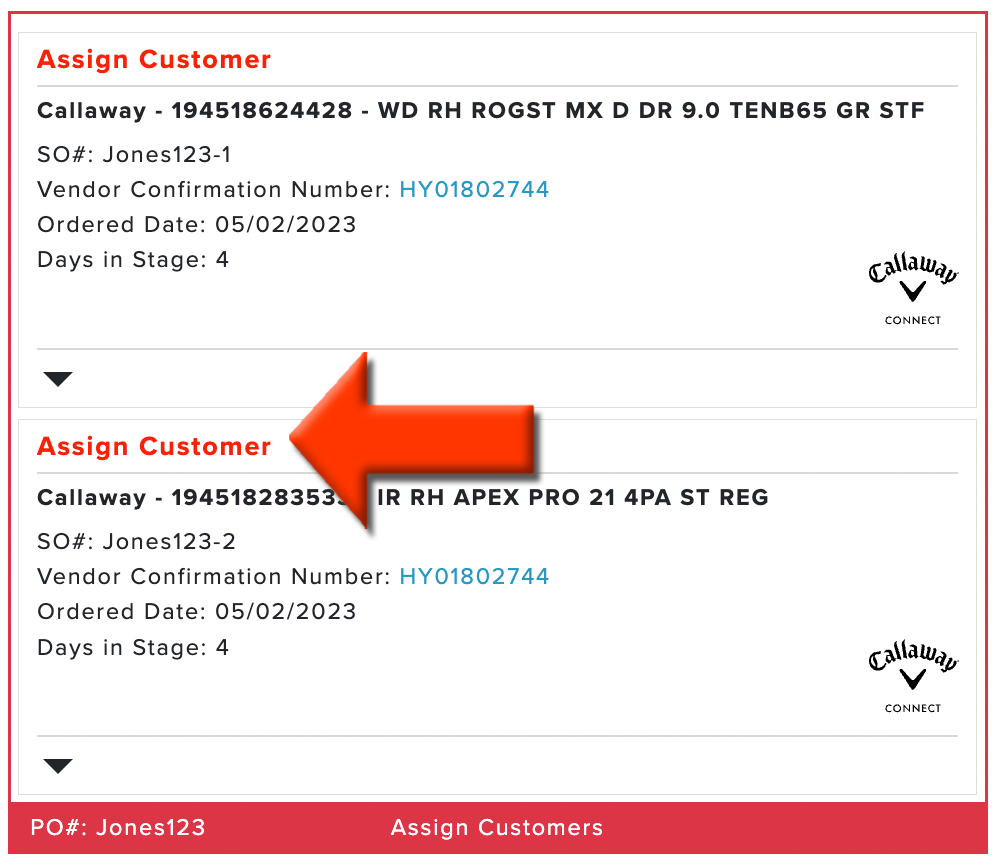
To assign each special order within a multi-item PO individually, click "Assign Customer" within the Special Order block (as shown below).
Automatic Updates for Orders in "Orders Placed" Stage:
Callaway Connect can provide additional information, allowing automatic order updates.
Expected Ship Date: When an expected ship date is available with the shipping information from Callaway Connect, the expected ship date will populate in the respected respective Golf Shop special orders.
Shipping Information: When shipping information is entered into Callaway Connect, the carrier and tracking number will populate in the respective Golf Shop special orders, triggering member notifications (if enabled).
Further, if the enable automatic order transition option is enabled for shipping updates in your Special Order General Settings, the order will automatically move from the "Orders Placed" stage to the "Delivered" stage once it arrives at its destination. When the order moves between stages, the customer will receive an email notification (if enabled) and text message notification (if enabled) confirming that their order has been delivered.