
Every automated email has a default message that can be changed and customized if necessary. In this article, we will discuss accessing and customizing automated emails.
Accessing and Editing Automated Emails
To access and edit automated emails, follow these directions:
Navigate to Communication > Emails > Automated Emails.
Select to view the automated emails for a feature (i.e., Special Order, Demo Club, etc).
Click the "Edit" button for the automated email you wish to edit.
Toggle the "Customize Email" switch (as shown below).

Edit the email where necessary. A rich text editor is available to format the body of the email. You can also add any of the available fields listed on the right.
Click "Refresh Preview" to preview the email.
Click "Save" to apply the settings.
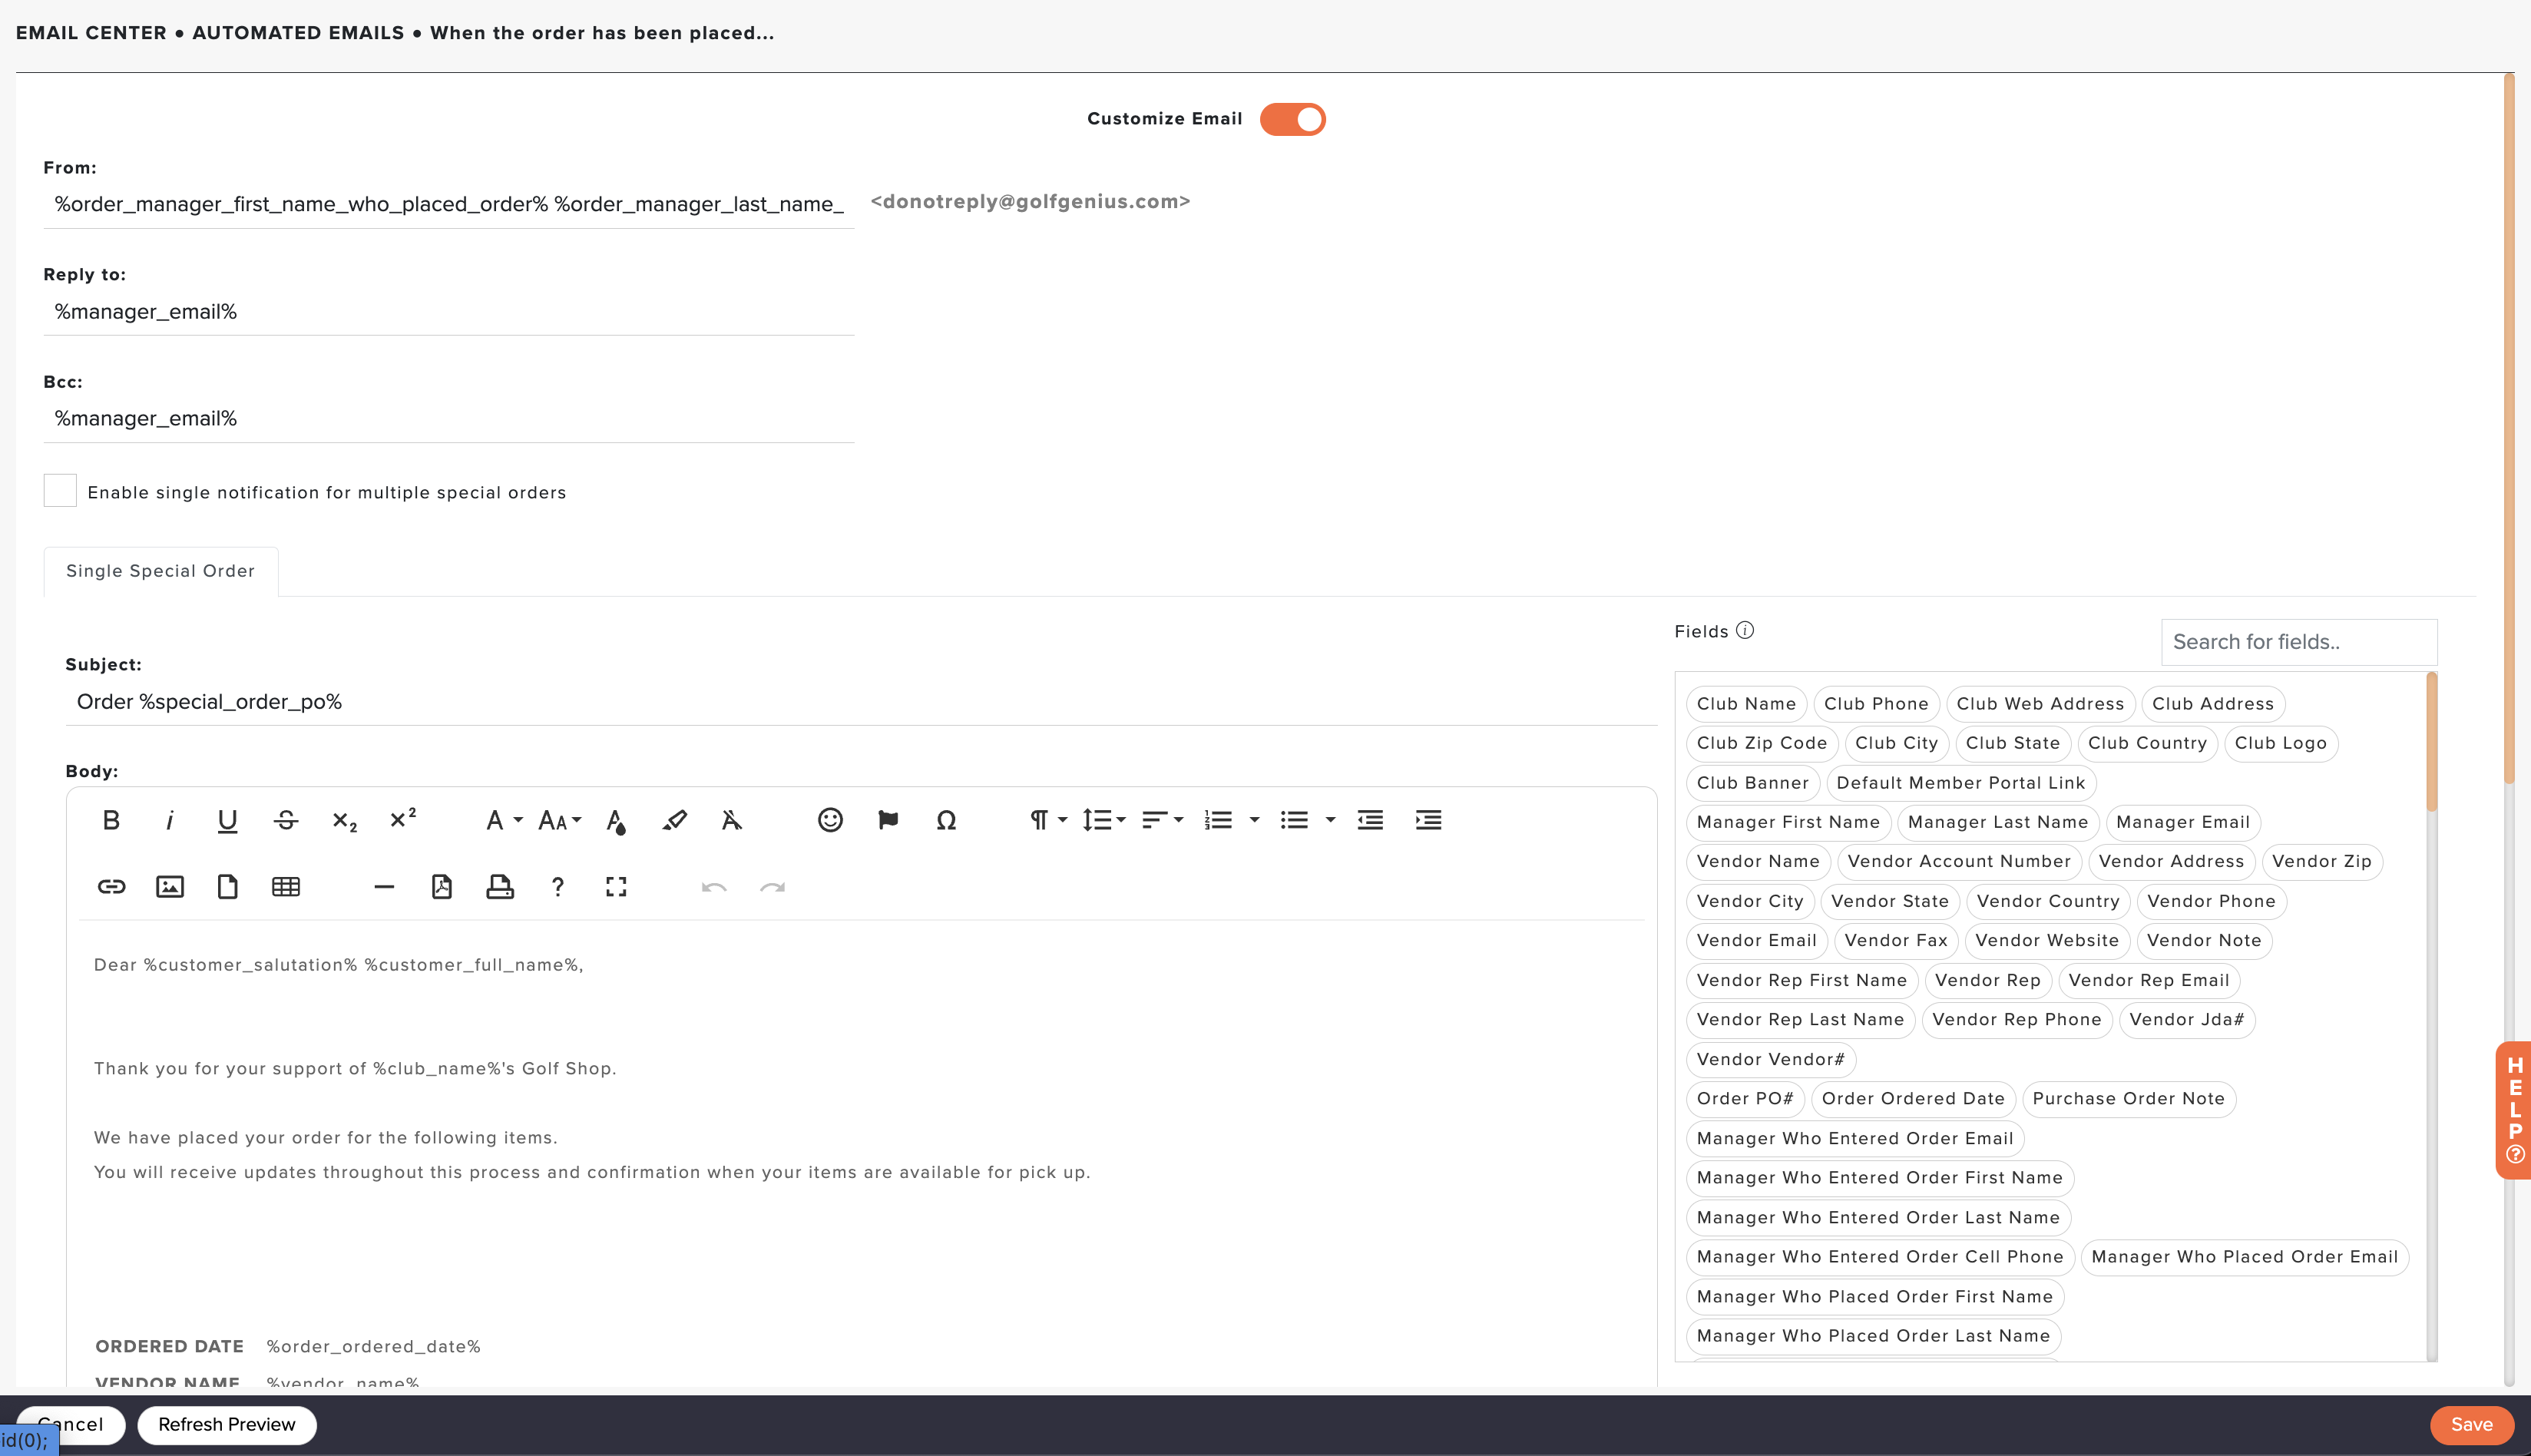
The default automated email message will be saved and applied to future notifications.
Customizable Content for Automated Emails
When customizing an automated email, you can edit the following:
From: When an email is sent, you can modify the text that shows up before the system email (donotreply@golfgenius.com). For example, you could have the from line show your club name, the sender name, or both.
Reply to: Enter the email address that should receive replies from the recipient.
Bcc: Enter any additional email addresses that should receive a copy of this email.
Enable Single Notification for multiple special orders (Emails to Customer): Check this box to group notifications into one email when a member has multiple special orders for the same vendor. For more details, Click Here.
Subject: Modify the subject to suit your club's needs. Custom fields may be used to populate the subject line.
Body: Update the body of the email to include more details or custom fields.
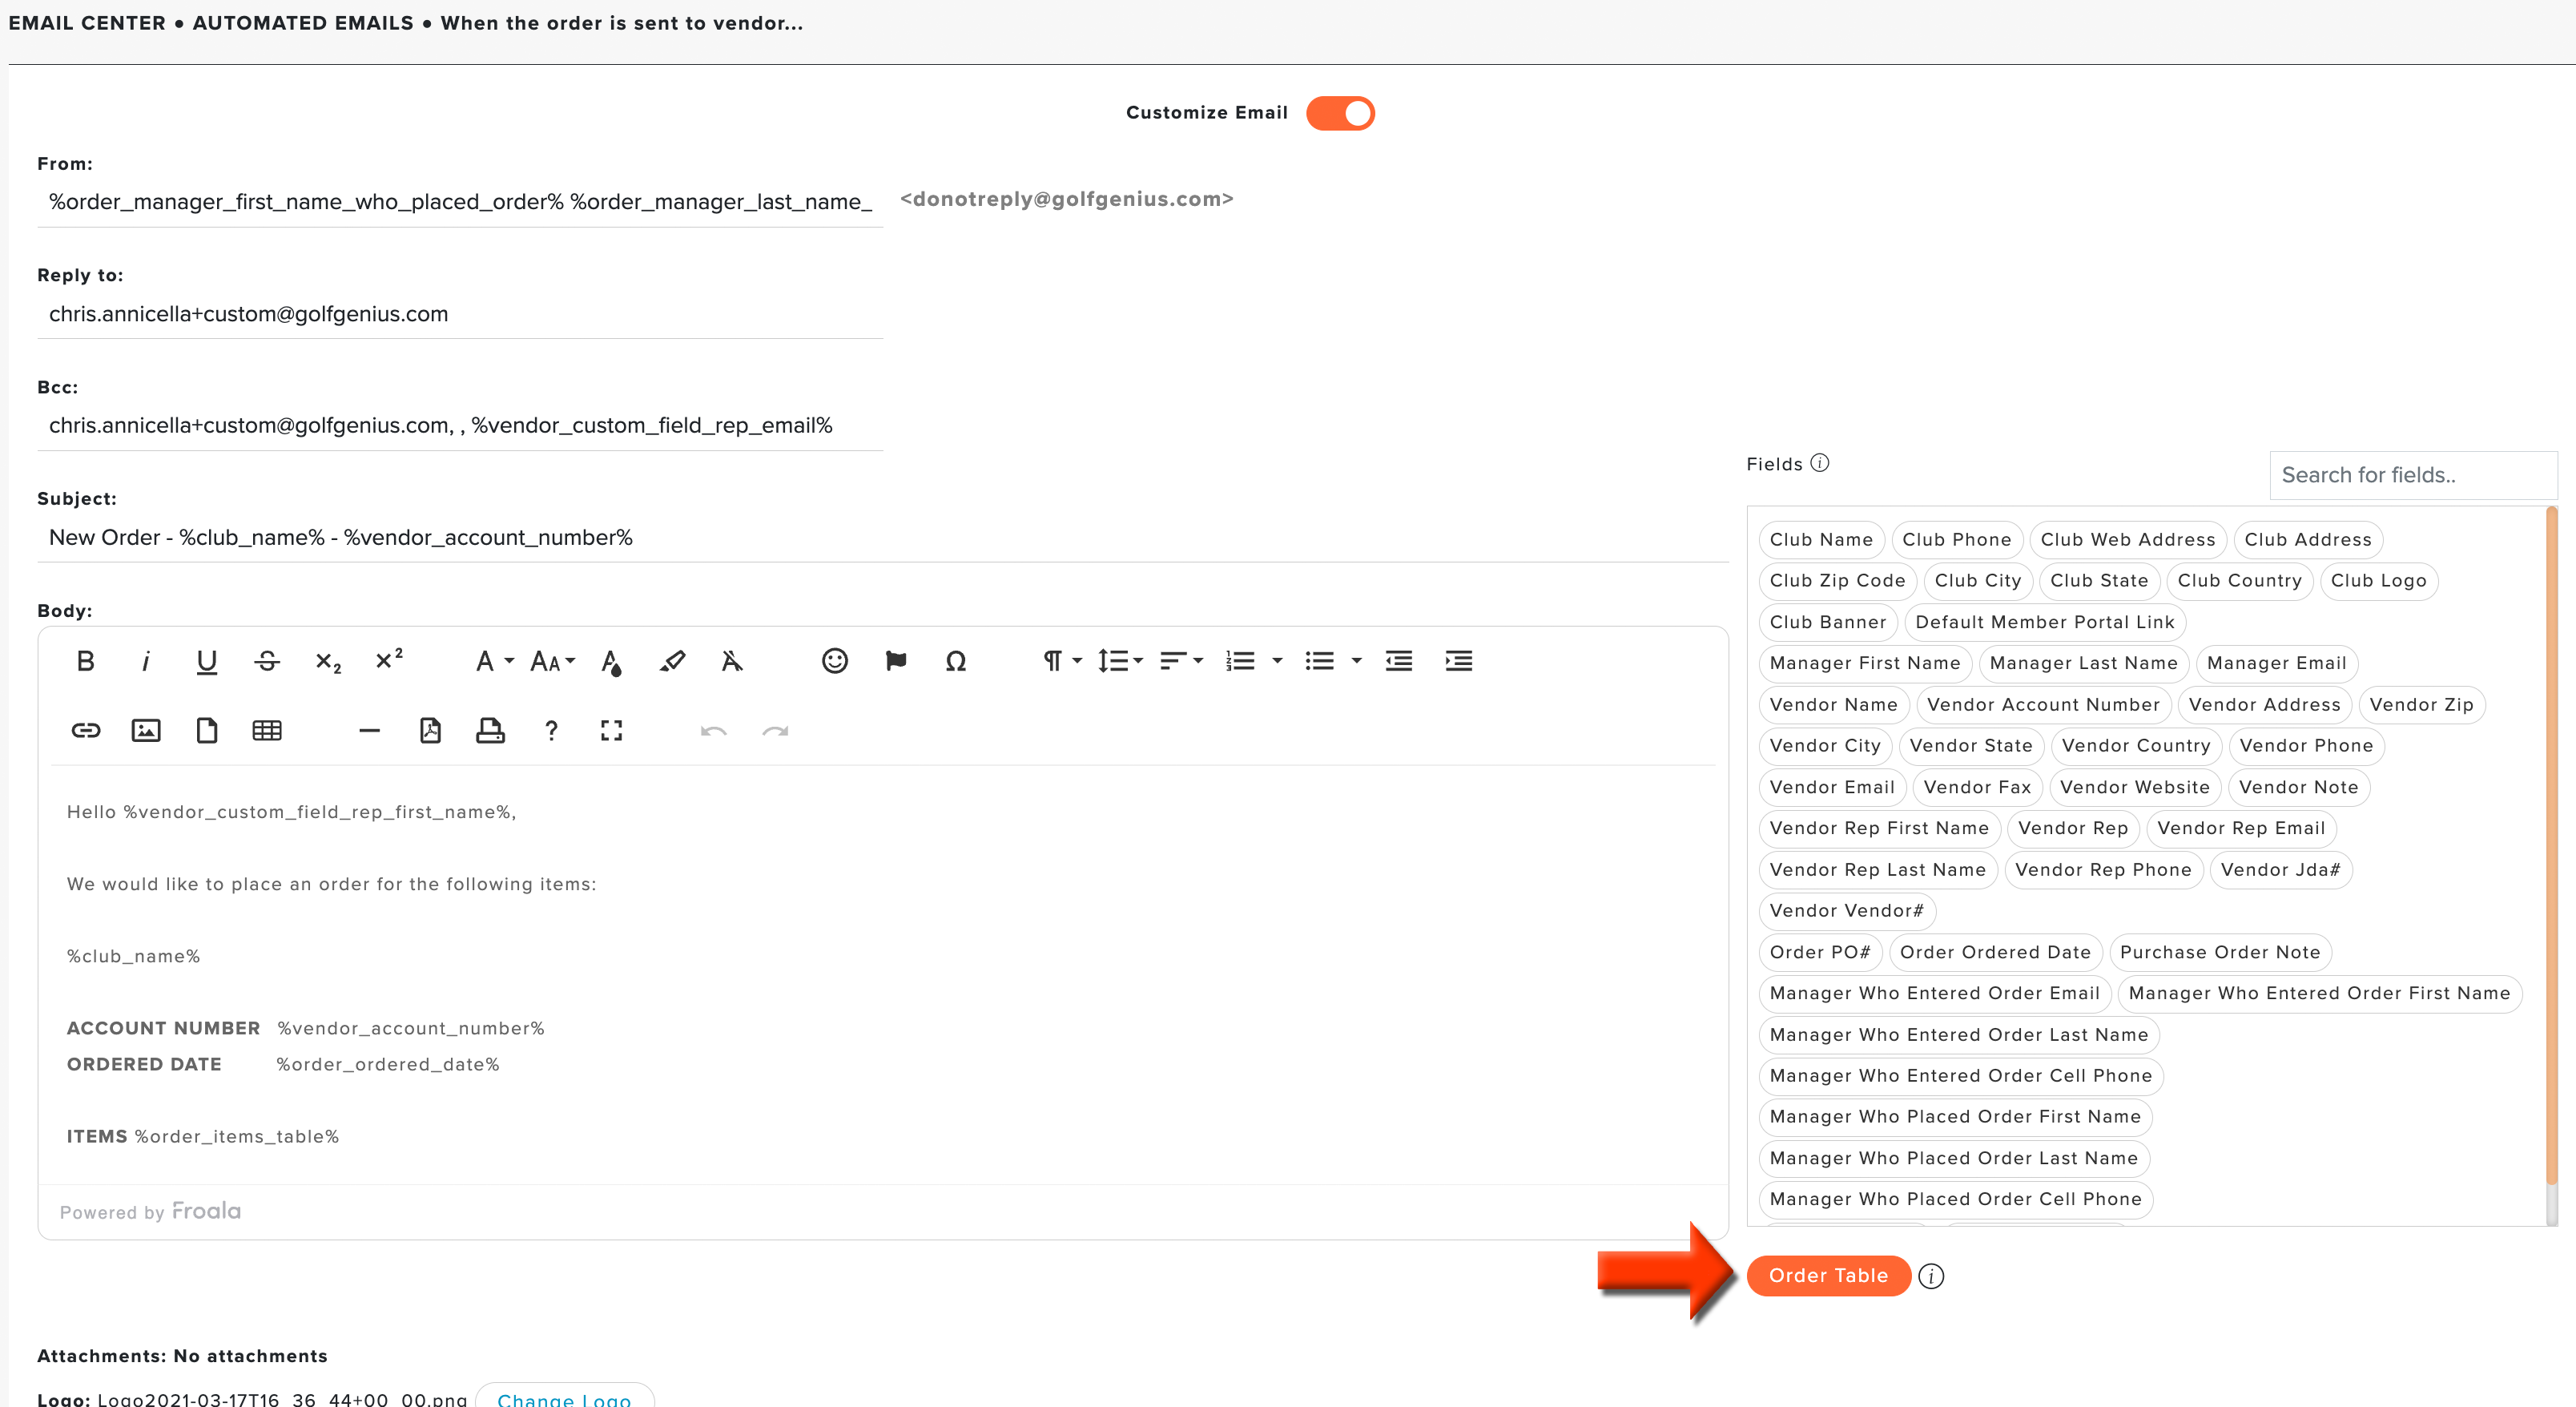
Order Table: The Order Table is an available custom field that can be included in your email templates. This field is a table with useful information for every item in the order. You can customize the information displayed by clicking the "Order Table" button below the custom fields. For complete details, Click Here.
Attachments: Some automated emails allow you to include an attachment. Check the box for the attachment you would like to add.
Logo: Change the logo used for the email.
Banner: Change the banner used for the email.
Adding the Customer Name to Special Order Vendor Emails
When a vendor replies about an order, matching it by PO number takes time. Adding the customer's name to the subject or body of the email sent to the vendor makes each order easy to identify at a glance.
To add the customer name to the vendor email, follow these directions:
Navigate to Communication > Emails > Automated Emails > Special Orders.
Click "Edit" for the "When the order is sent to vendor" email.
Toggle the "Customize Email" switch.
Place your cursor in the Subject or Body and add one of the following fields from the list on the right (as shown below):
Customer Full Name
Customer First Name
Customer Last Name
[Screenshot needed: AEC - Customer Name Fields — the "When the order is sent to vendor" edit screen with the customer name fields visible in the fields list]
Click "Refresh Preview" to review the email.
Click "Save" to apply the settings.
Note: The customer name fields fill in only when every order on the purchase order is for a customer with the same name, whether Member or Guest. If a purchase order includes orders for customers with different names, these fields are left blank. Write the subject or body so it still reads clearly when the name is blank.
Editing the Special Order Item "Order Table"
When sending a special order, a table is included that displays the fields of the special order (as shown below).
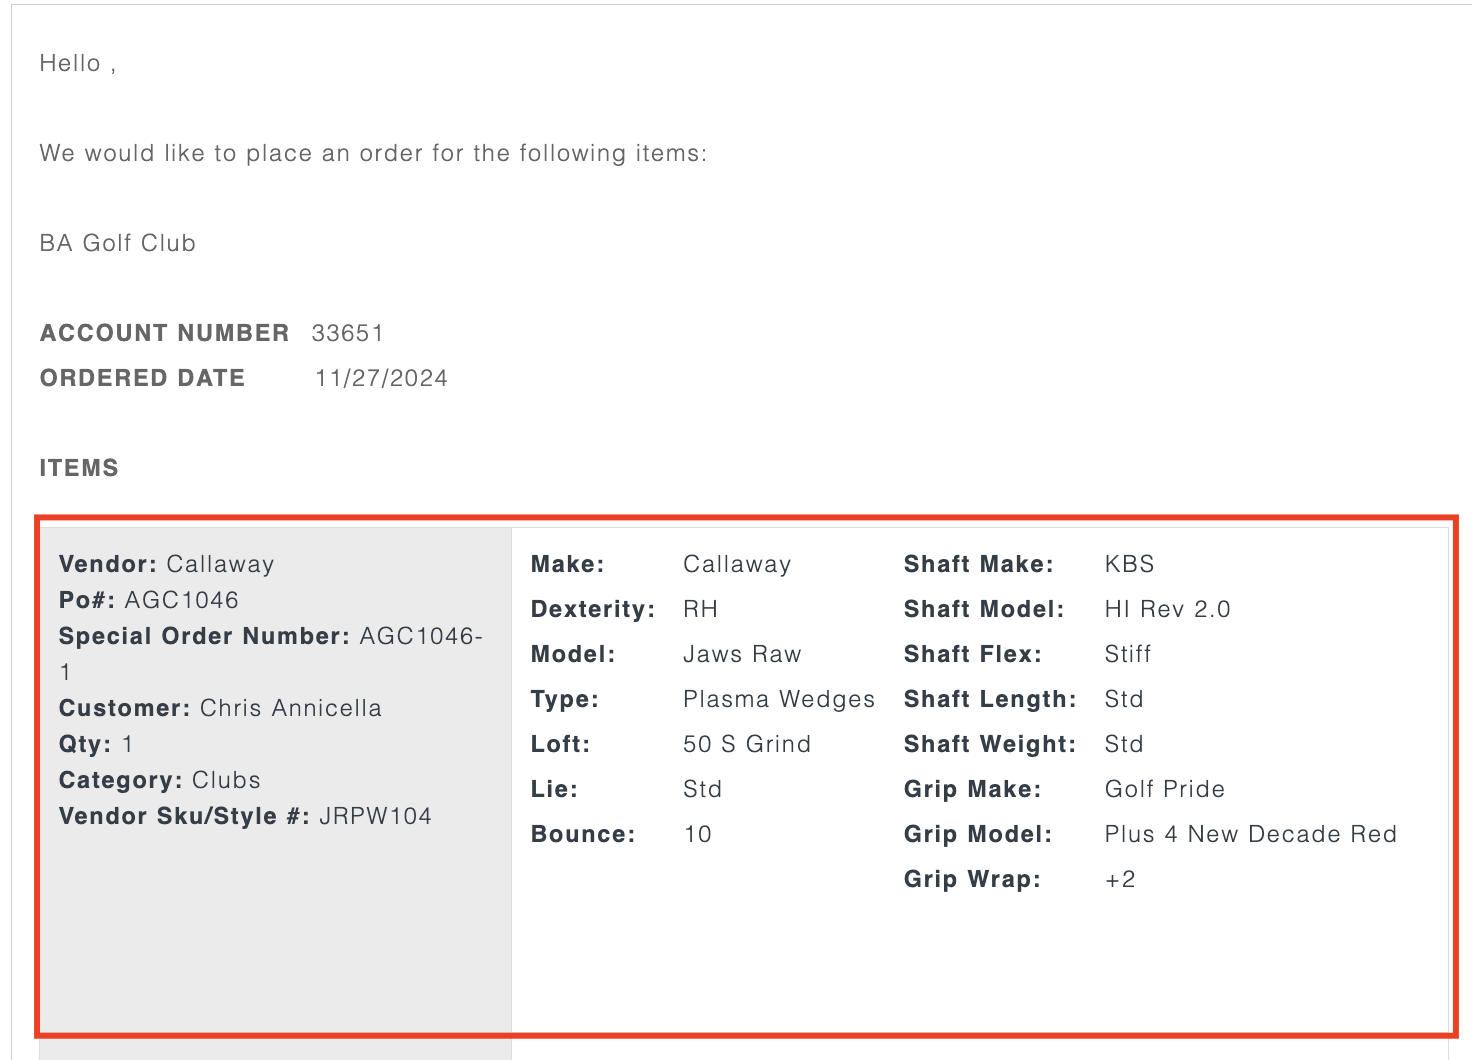
You can modify the contents of this table by clicking the "Order Table" button below the fields list (as shown below). For complete details, Click Here.
Including an Order Confirmation to Members when an Order has Been Placed
After placing a special order, an automated email can be sent to the member/guest notifying them that the order has been placed. The title of this automated email is "Order has Been Placed." When sending this email, you can optionally attach an Order Confirmation PDF (as shown below).
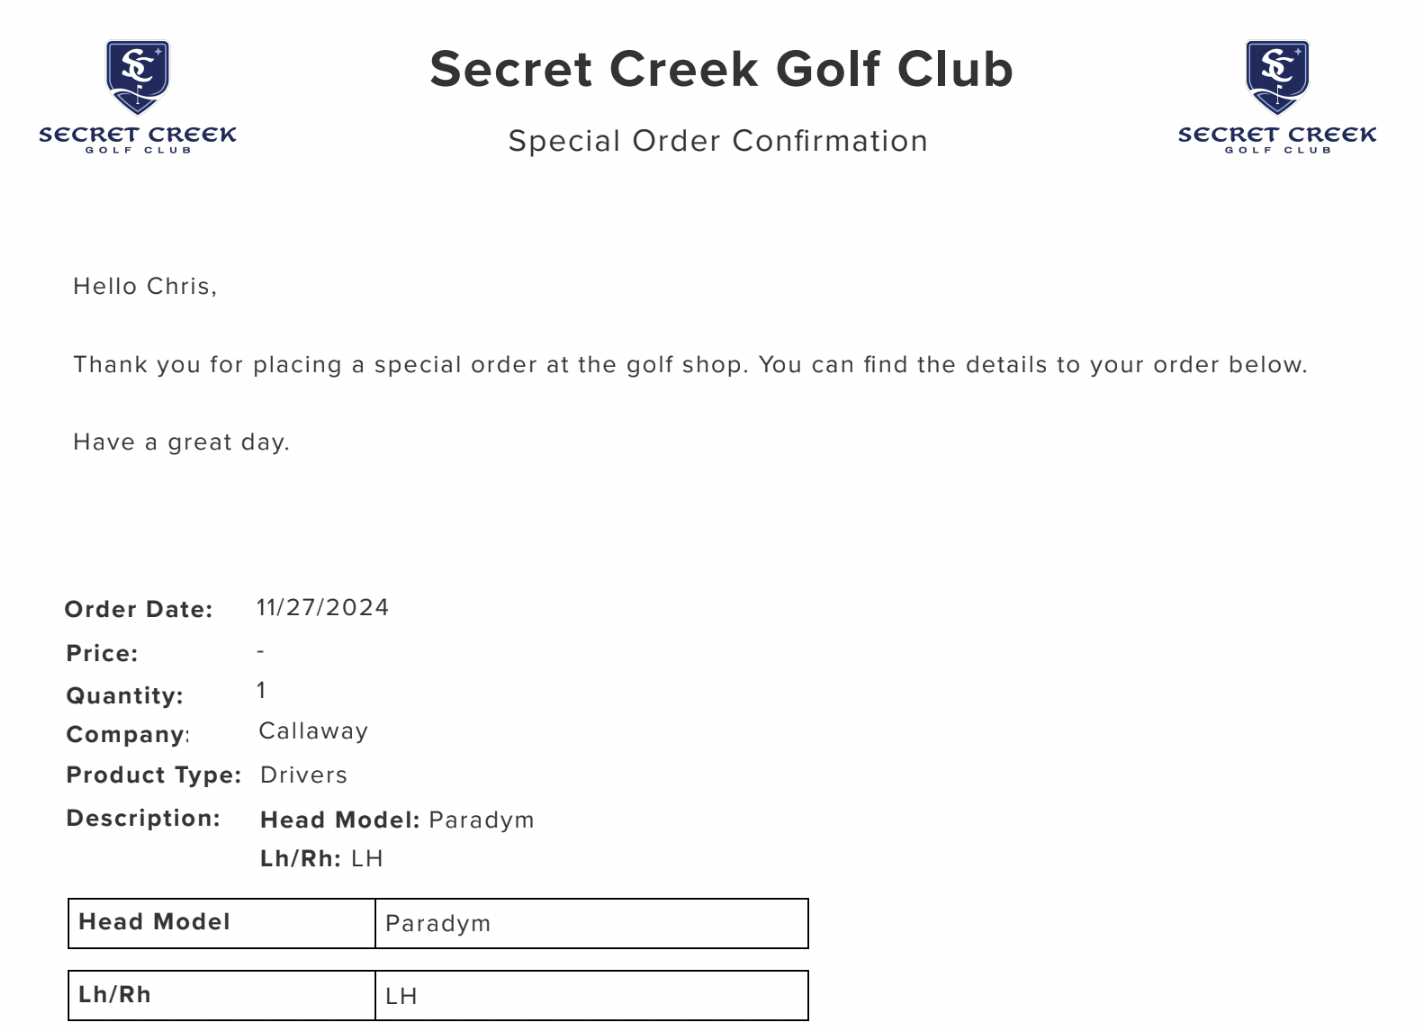
This PDF is customizable and is contained in the Report Center. For more details, Click Here.
Recommended Content to Add to Your Automated Emails
Adding additional content to your emails creates a custom and personalized touch. Here are some recommendations for content to add to your Automated Emails:
Holiday Greetings
Special Sales
Club Website
Reservation Page
Golf Genius Golf Hub
Tournament Directory Link
and more.
Note: If you add any seasonal or temporary content, revisit your automated emails once that content has passed to update the email.