
This Member Portal Tile allows you to display customizable pages to highlight golf shop hours, news, staff biographies, and other information. The collage page includes elements such as rectangles, text, and photo uploads (as shown below).

After adding the tile, you can then begin creating the content. The tools to add and modify the content will be listed above the canvas. The body or canvas of the Collage Page will be below (as shown below).
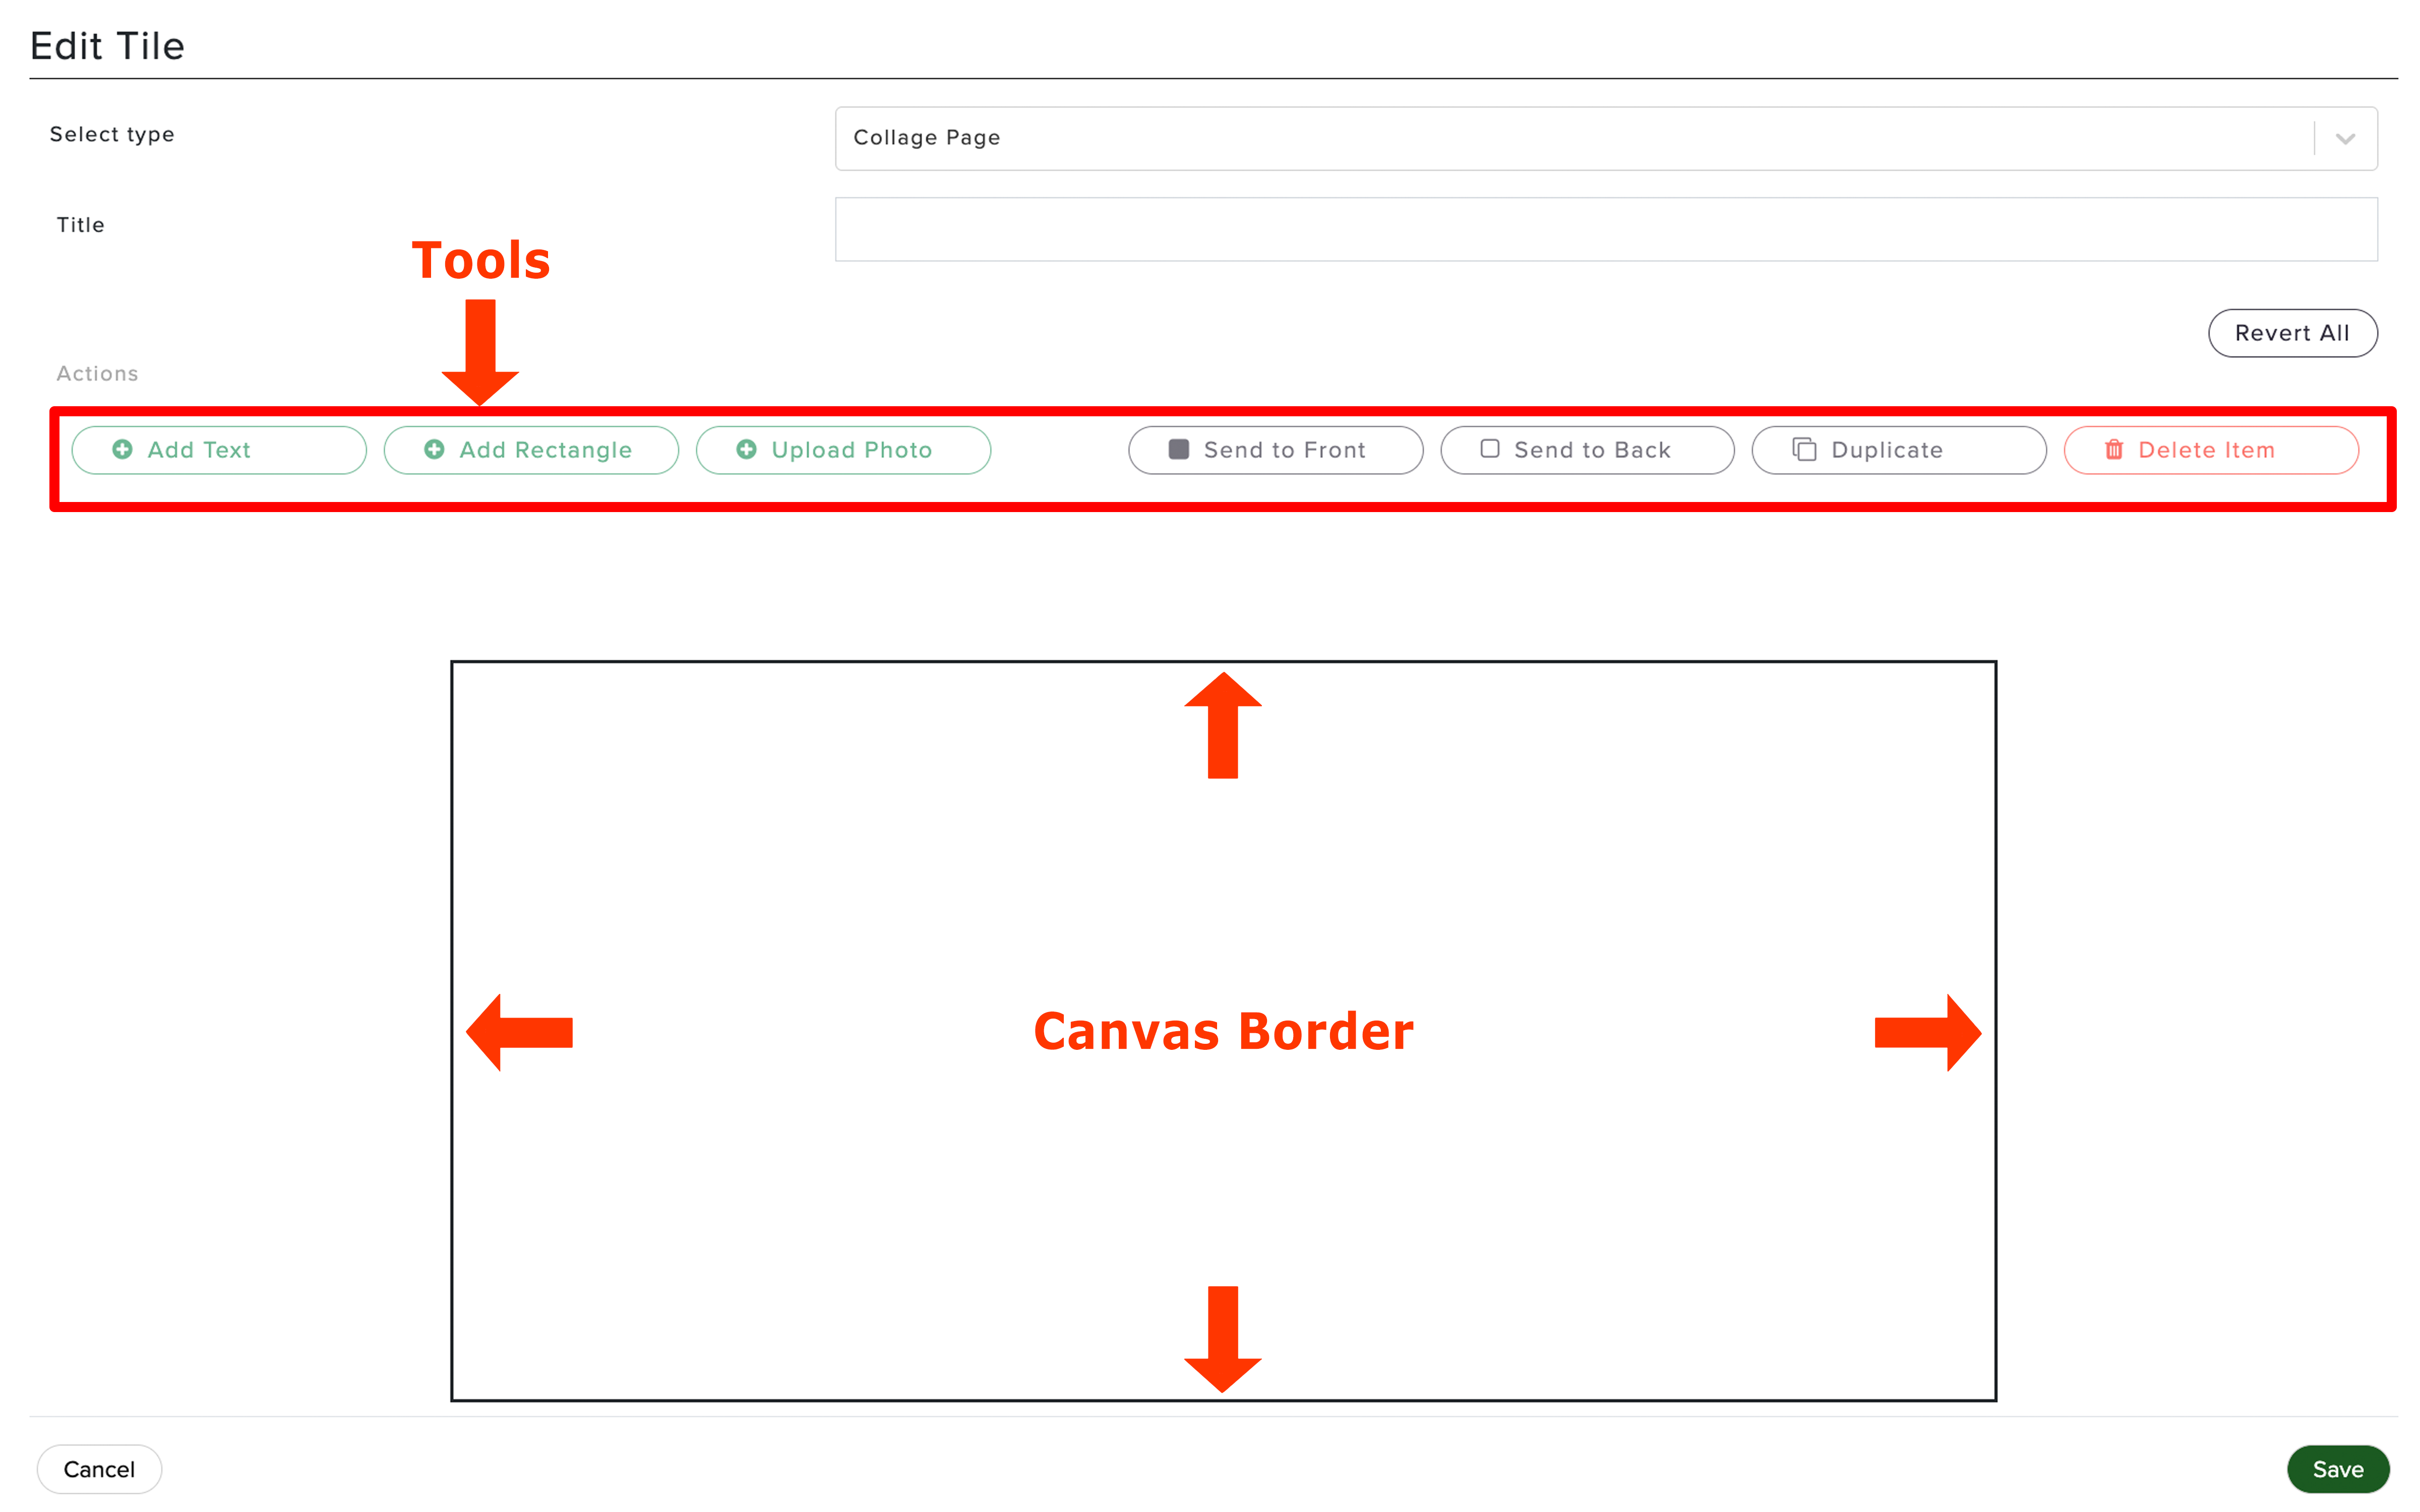
The border of the Collage page can be extended vertically by "Saving" and then expanding the tile size by dragging the bottom border. Then you can continue editing the collage with the new border height. The width of the border is fixed and cannot be adjusted.
Tools:
In this section, we will discuss the tools that can be used to create the collage.
Add Text: You can add text to Collage Pages with this tool. Enter and format (e.g., font size, type, color, etc.) the text using the text editor. Apply the text changes. A text block will then be created with the text you've entered. Click and drag the text box anywhere on the Collage Page.
Upload Photo: You can add one or more images to the collage tile directly from your computer, to be placed anywhere on the canvas you'd like. Select the image from your computer and upload it on the Collage Page. After uploading, click and drag the image to the desired area on the Collage Page. You can change the size of the image by clicking on the corner of the image. You can also change the opacity of the image using the slider above. This allows you to create the image as a watermark.
Add Rectangle: You can add a rectangle to the Collage Page, typically used to create boxes and borders within the Collage Page. Add the rectangle, move it to the desired area on the Collage Page, and re-size it by clicking on the corner and dragging the rectangle. You can also select various formatting options above (e.g., border type, color, width, and more). Use the "Send to Back" tool (discussed later in this article) to keep the rectangle from blocking other content in the Collage Page.
Send to Front/Back: When multiple content items (text, images, rectangles) are added to Collage pages, they often overlap. You will notice that content will be blocked when other content is placed on top of it. You can move content from the front/back to select what item should be visible.
Duplicate: Take any content already on the Collage Page and duplicate it. Select the content, click "Duplicate," and move and re-size the content wherever you'd like on the Collage Page.
Delete Item: Delete any content item already on the Collage Page by selecting the content and clicking "Delete Item."
The Collage Page feature is a great option for adding customized content. If our editor does not provide you with enough customization, you can always create your content somewhere else (e.g., Microsoft Word, Photoshop) and upload the content as a photo.