
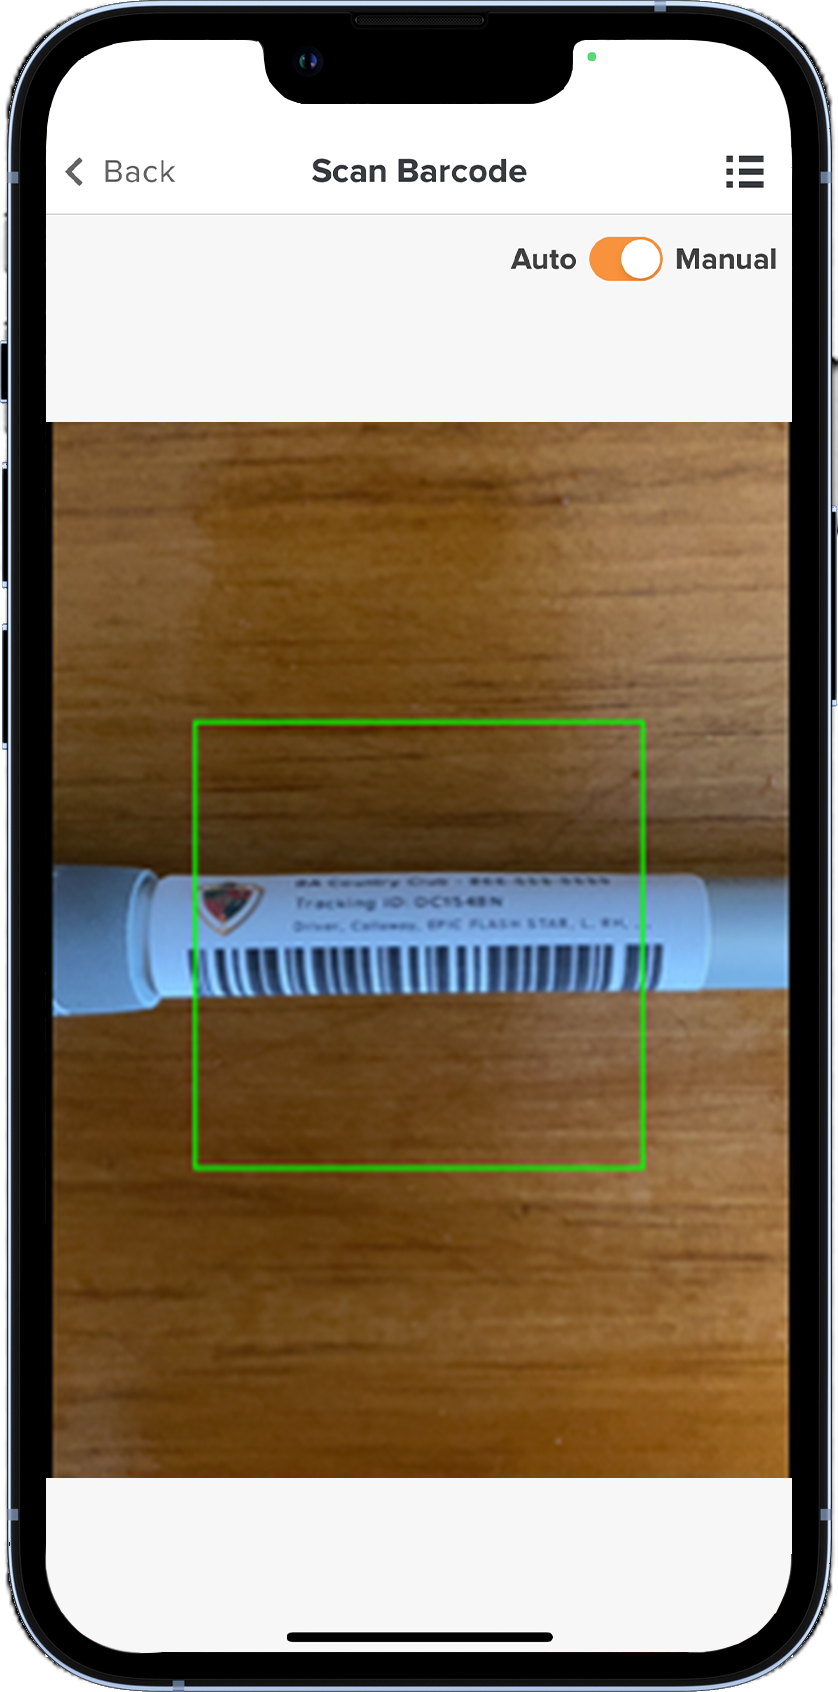
Upon navigating to the "Scan Demo/Rental" button on the mobile app, the manager is directed to a screen with a barcode scanner (as shown below).
In this article, we will discuss the barcode scanner and the available options to help you utilize the scanner on the mobile app.
Barcode Scanner Modes
The barcode scanner has two modes that can be toggled between with the switch in the upper right-hand corner:
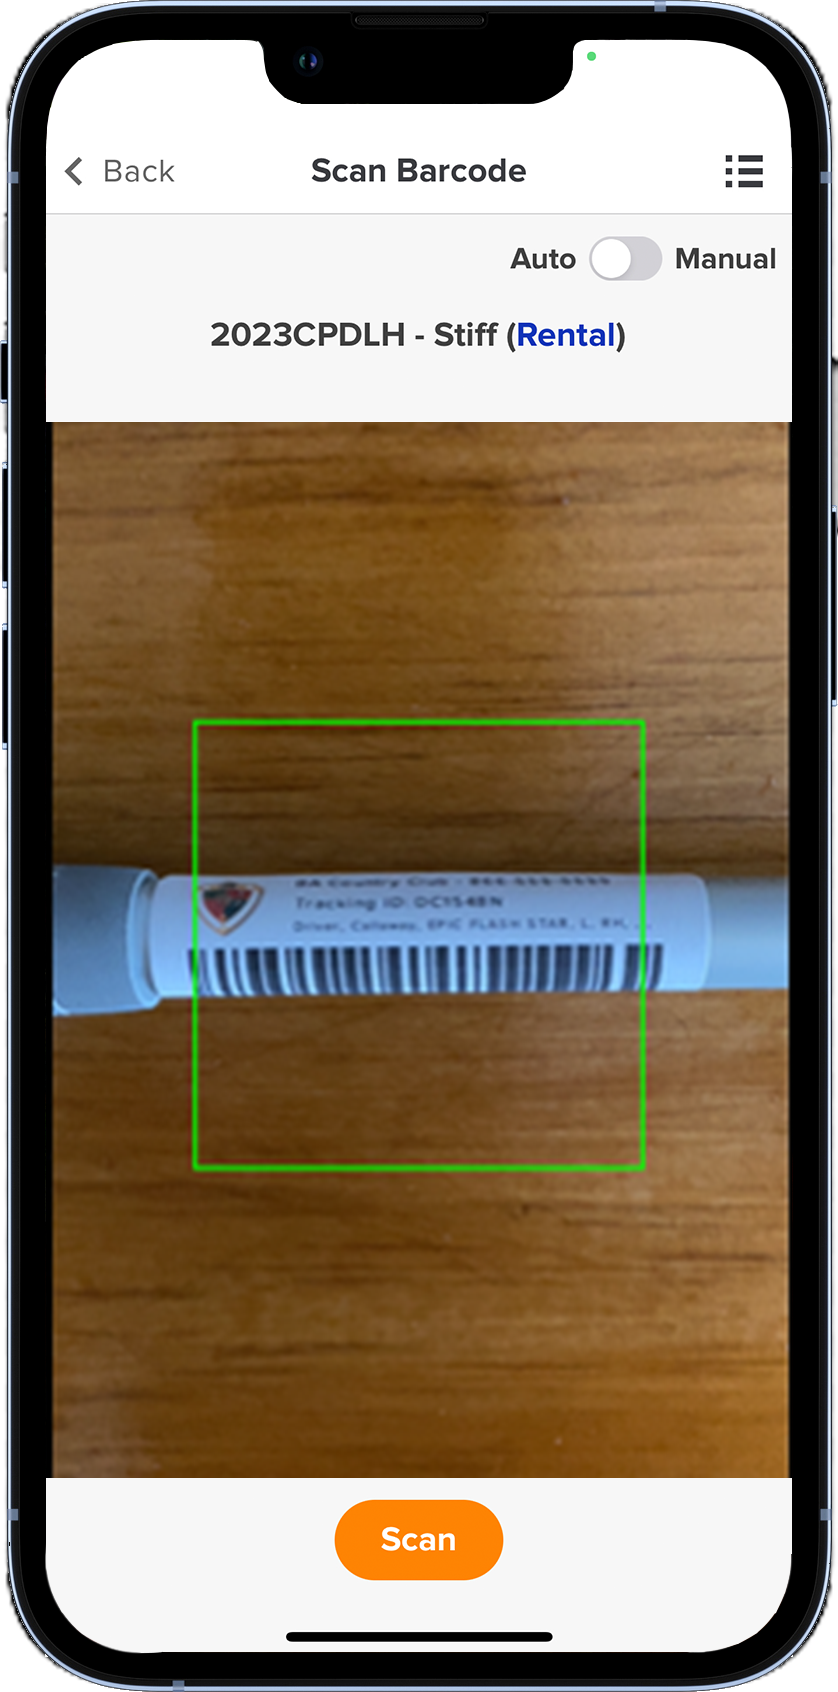
Manual: In manual mode, a "scan" button will be displayed at the bottom of the page (as shown below). If the current demo/rental item scanned is the proper item, the user can press the scan button, and that item will be used to redirect you to the corresponding form (e.g., issue/return demo, issue/return rental).

Auto: In auto mode, the first barcode scanned will be used to redirect you to the corresponding form (e.g., issue/return demo, issue/return rental).
When scanning demo/rental barcodes, you have the following options:
Issue demo clubs and rentals, or
Return issued demo clubs and rentals.
Checking out a New Demo Club/Rental
If a member/guest would like to check out a demo/rental, follow these instructions:
Log in to the mobile app.
Press "Scan Demo/Rental."
Scan the barcode for the demo/rental you would like to issue.
Select the customer type:
Member: Select the member's name from the member dropdown.
Guest: Enter the guest details (e.g., Guest of, first/last name, email, cell phone).
The "Club Type" and "Select From Inventory" dropdown should already be filled out with the scanned demo/component or rental. Please note the following for each type:
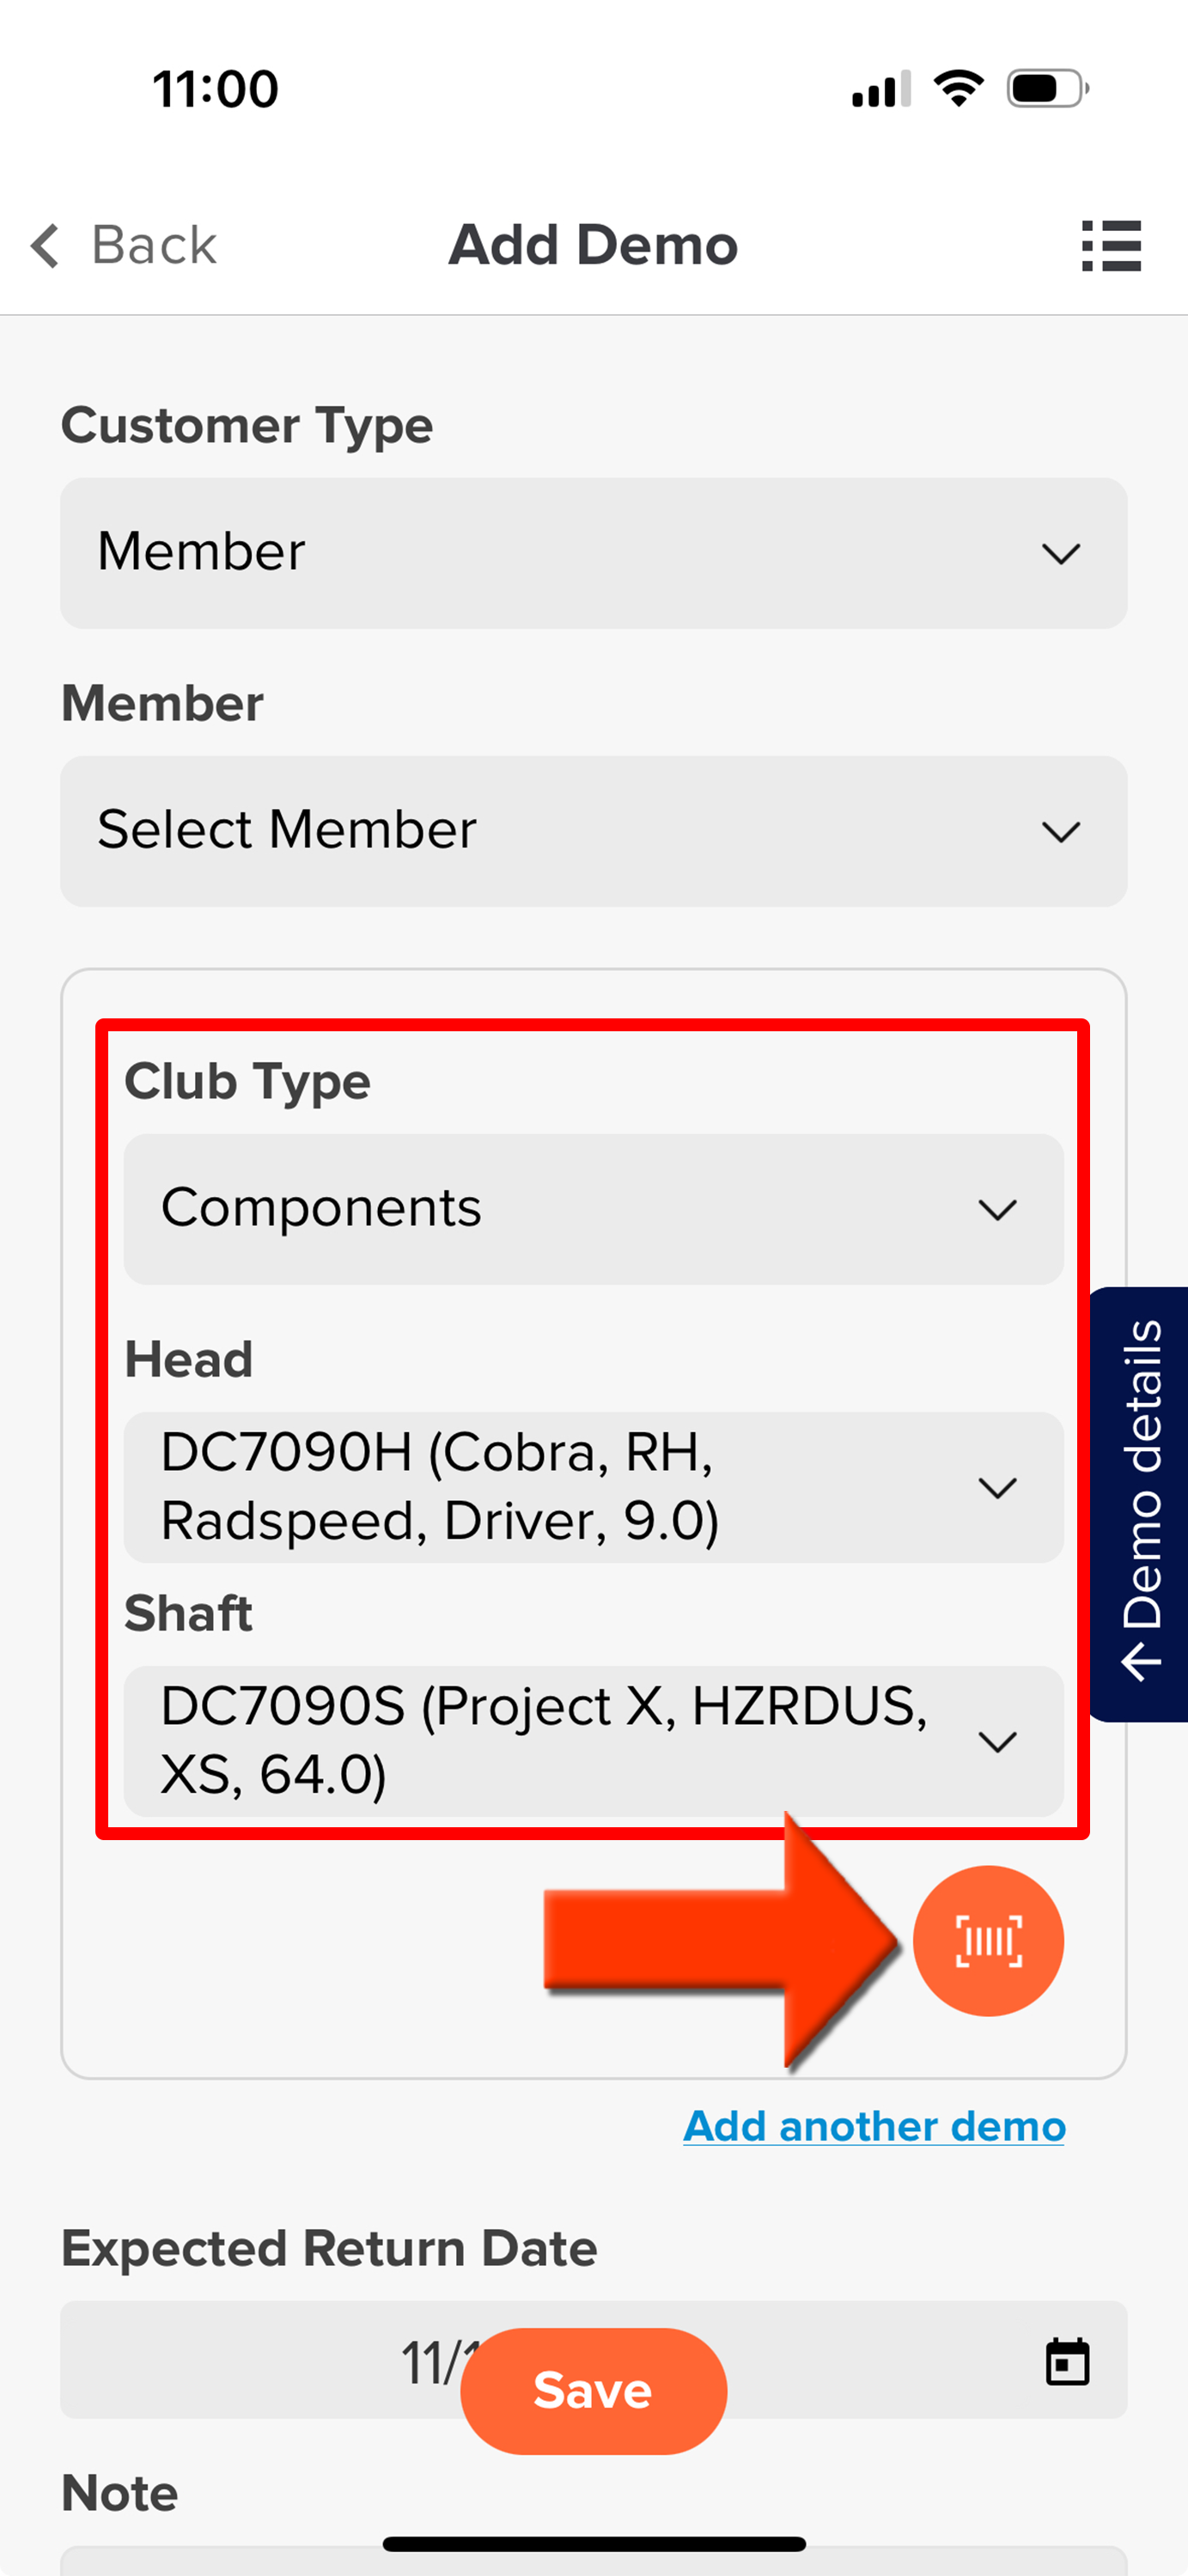
Demo Components: If you are checking out two demo components (i.e., Head and Shaft), click the barcode icon to scan a label or select it from the appropriate dropdown to add the second component to the order (as shown below).

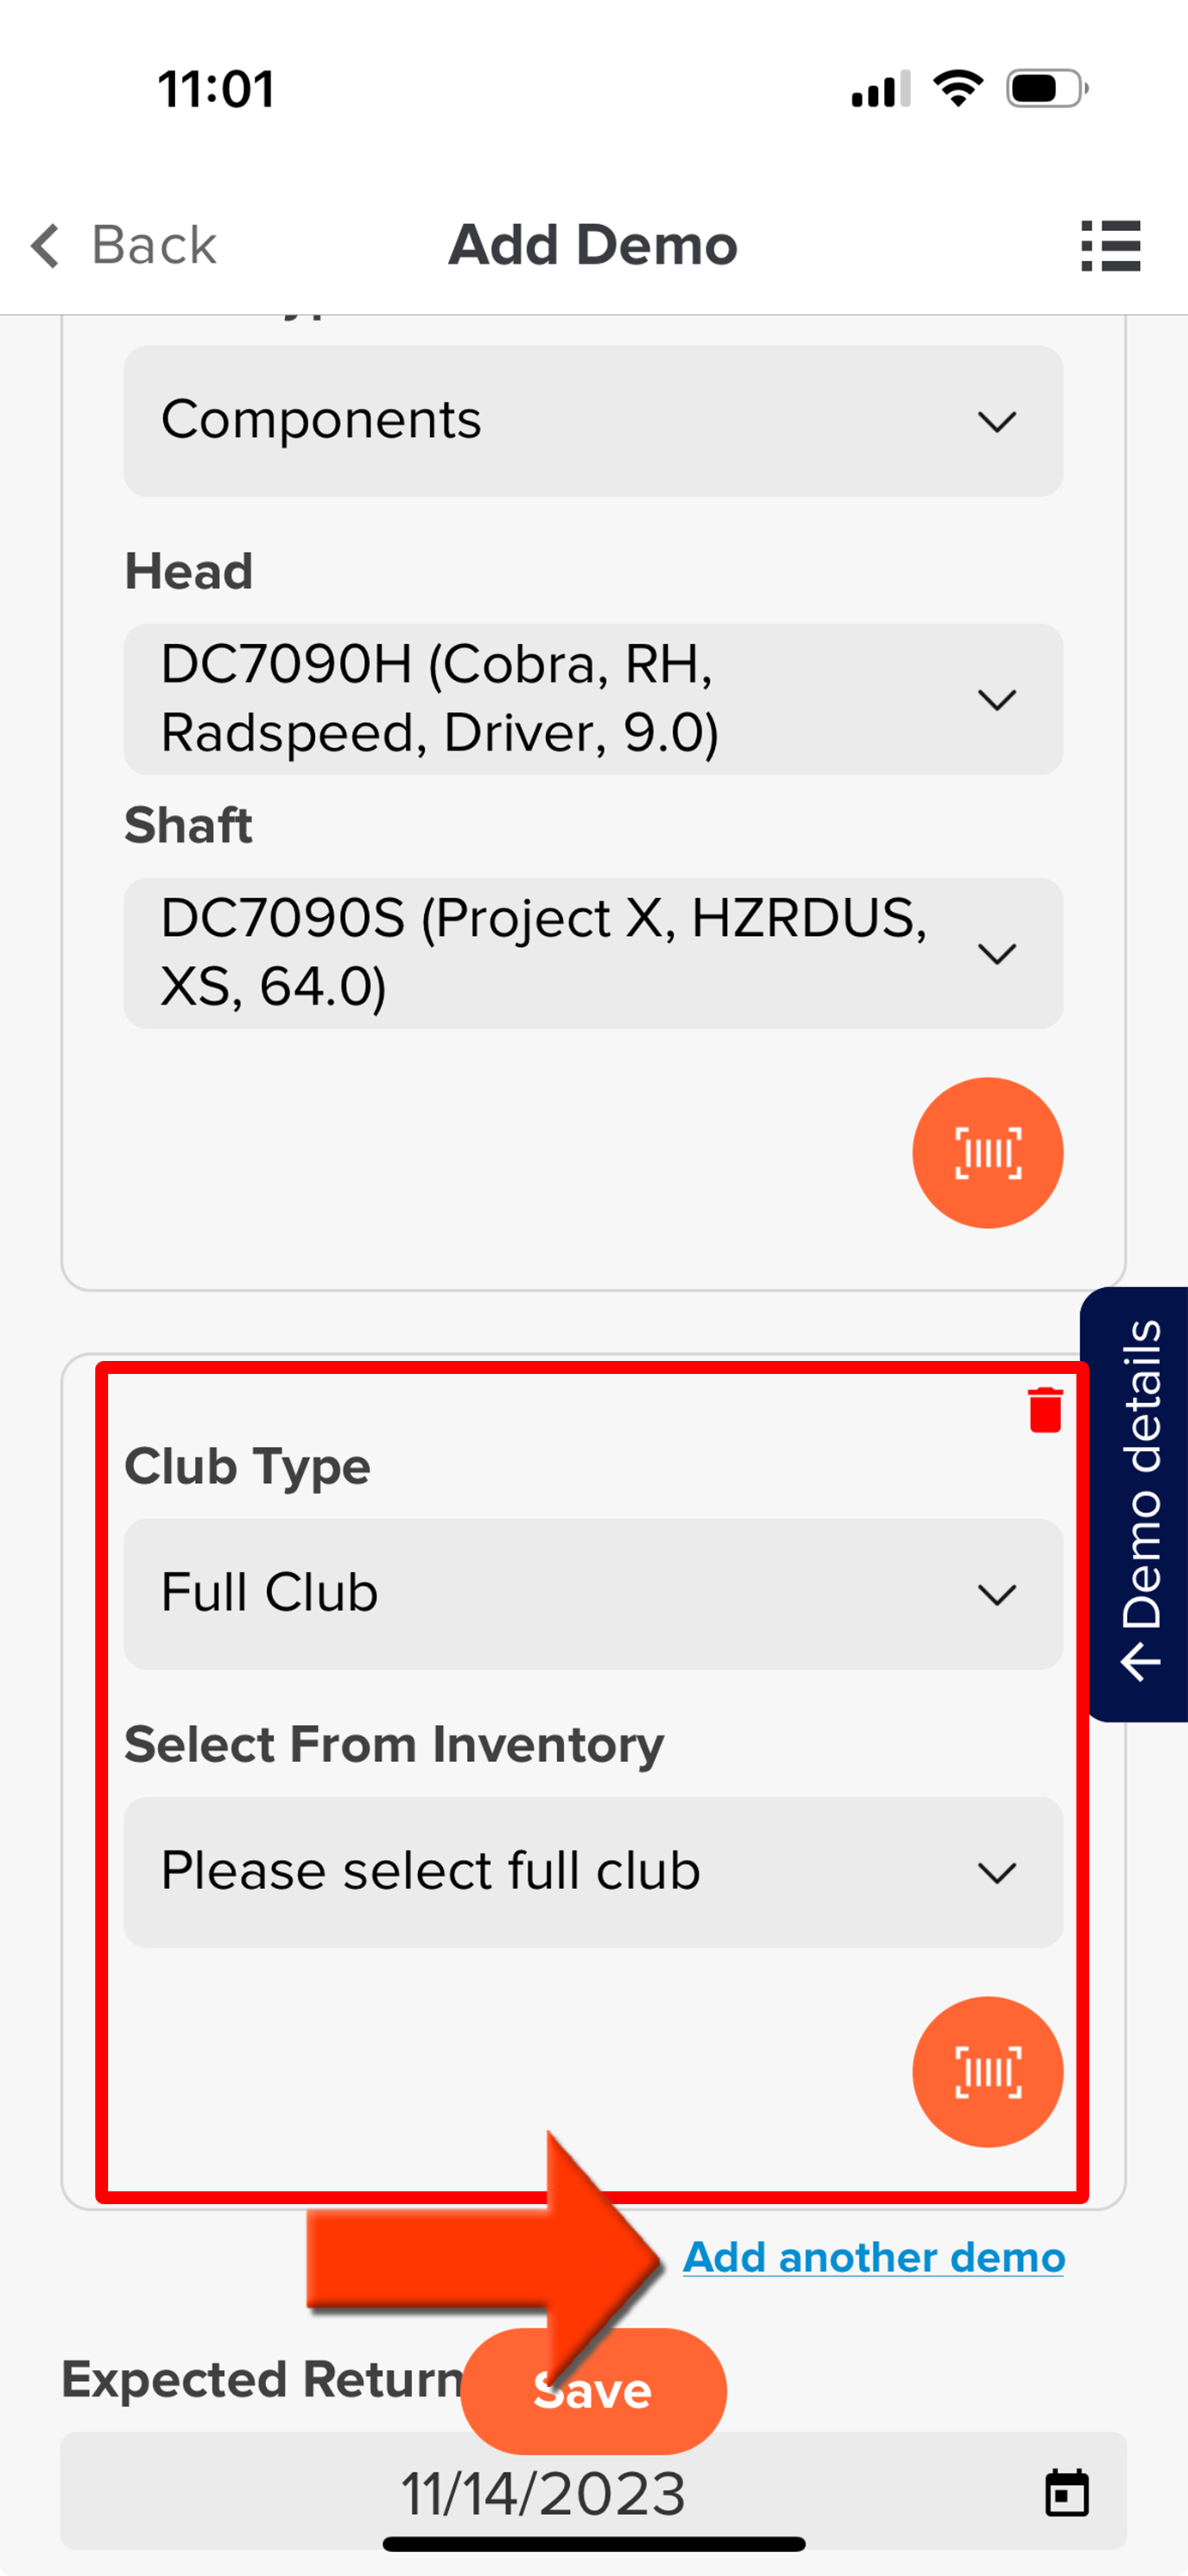
Multiple Full Clubs / Multiple Similar Components Demo: If you are checking out multiple full clubs, or multiple similar components (e.g, 2 head or 2 shafts), you can click "Add another demo." A second demo tile will be displayed where you can scan a label or select it from the dropdown to add another demo/component (as shown below).

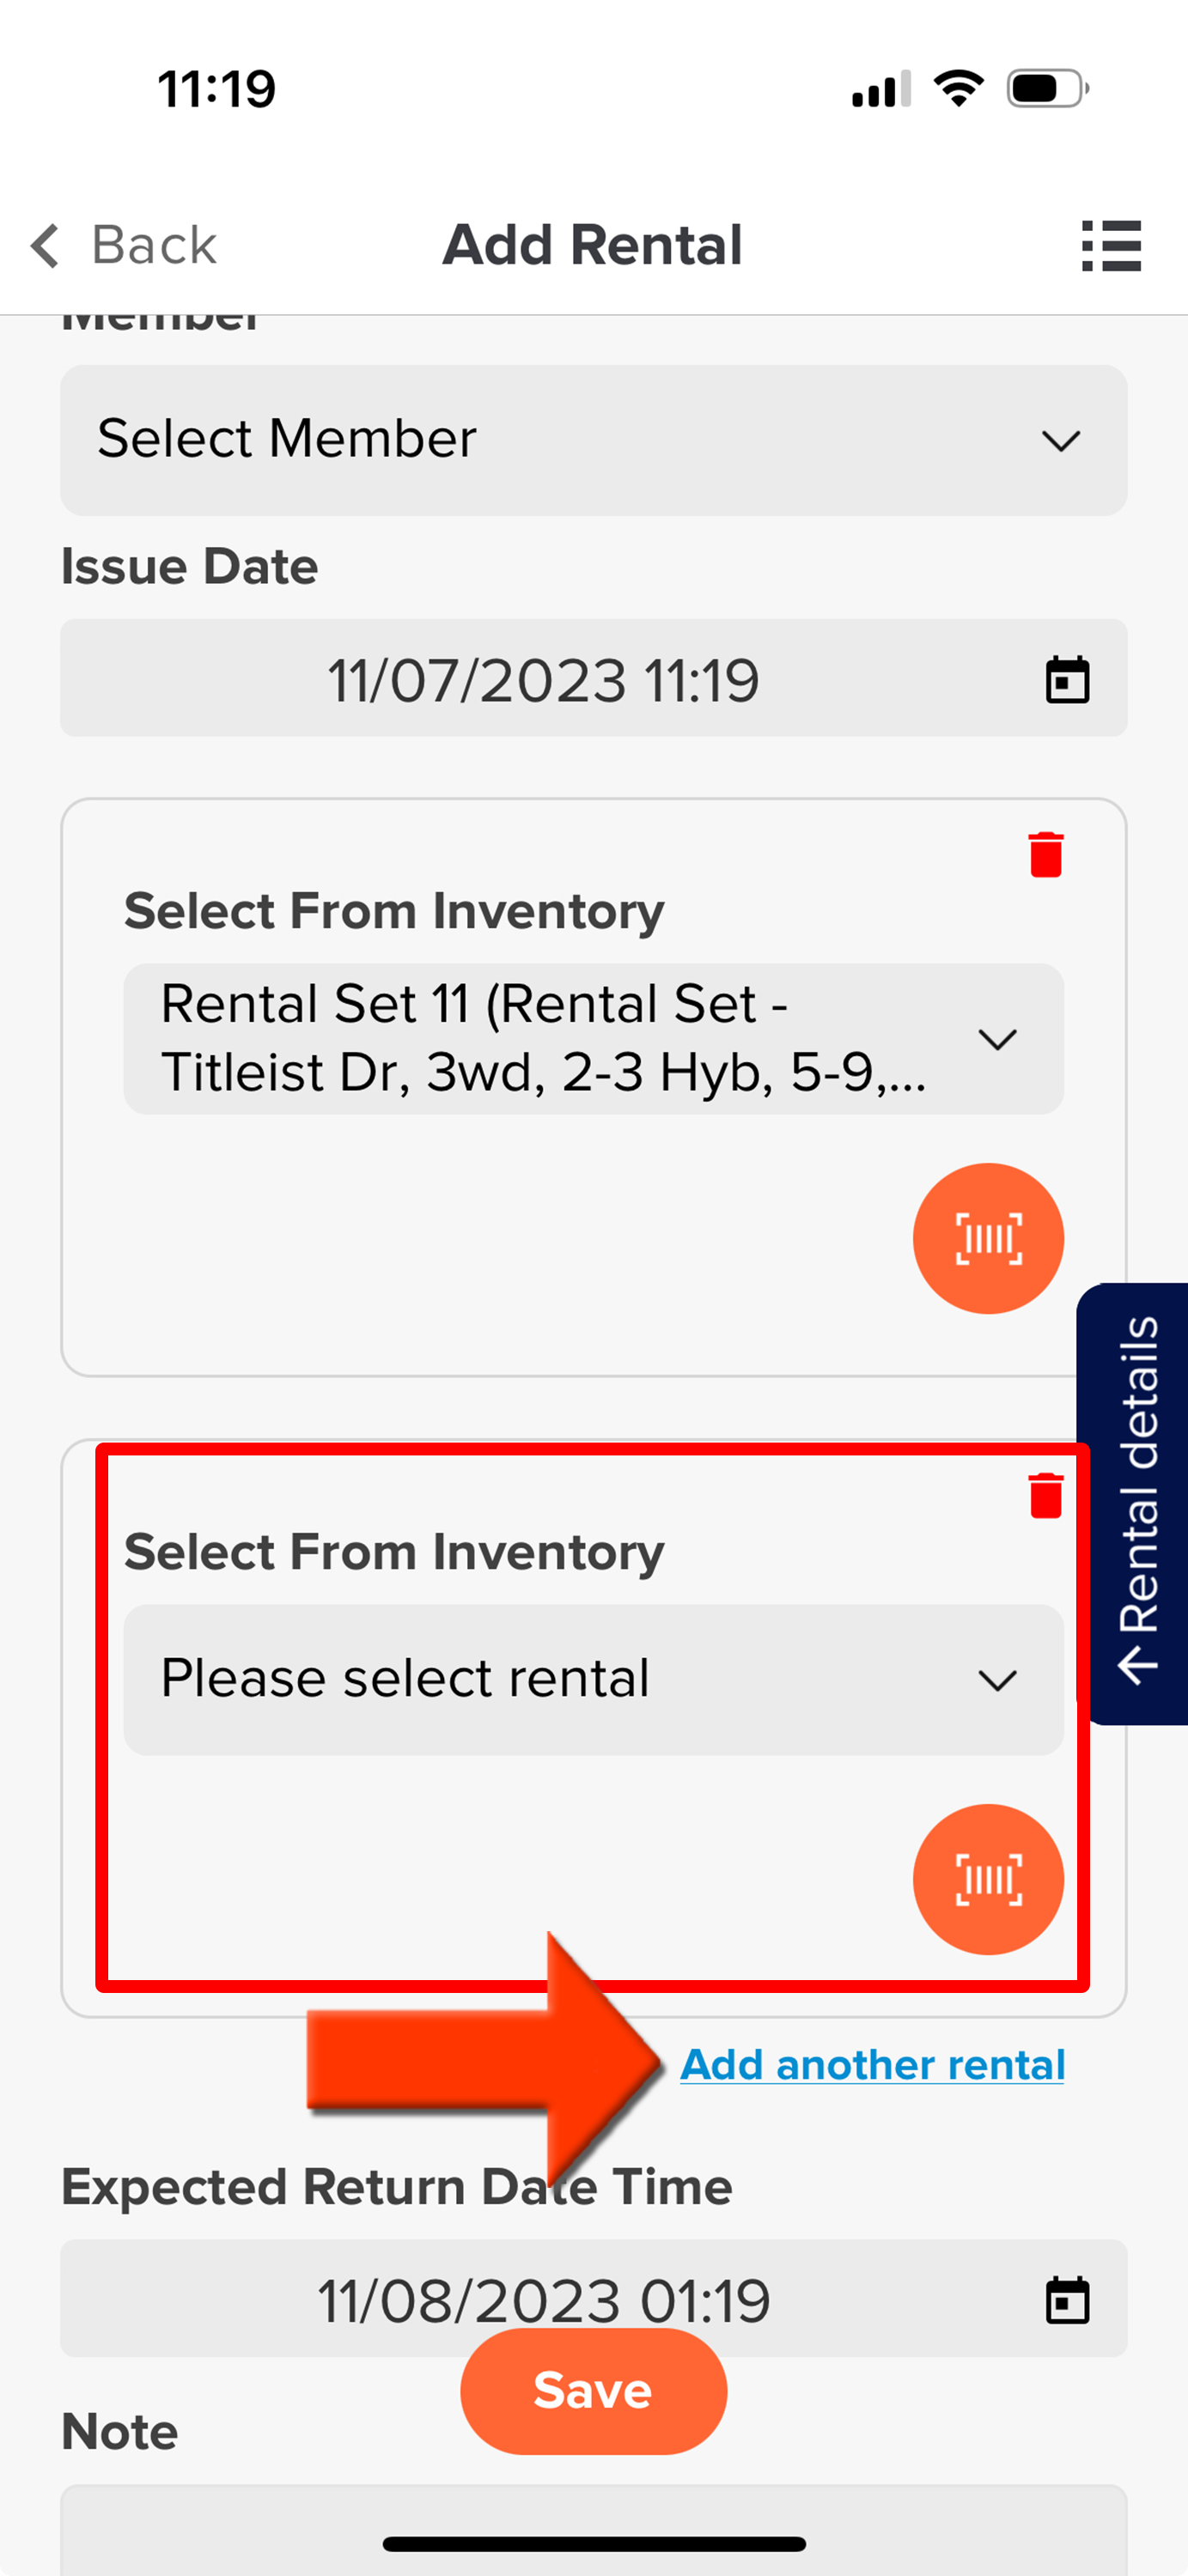
Multiple Rentals: If you are checking out multiple rental sets, you can click "Add another rental." A second rental tile will be displayed where you can scan a label or select it from the dropdown to add another (as shown below).

Set the expected return date/time.
Add notes if necessary.
Click "Save" and the order will be added to the current demo/rentals.
The process below shows us checking out two demo components (i.e., head and shaft) and a full club using the mobile app.

Note: If you do not obtain the desired results, you can always press the "Back" button at the top left to return to the previous page or use the navigation button on the top right to access the landing page.
Returning an Issued Demo/Rental
When returning an issued demo/rental using the mobile app, follow these instructions:
Log in to the mobile app.
Press "Scan Demo/Rental."
Scan the barcode for the item you are returning.
Click "Finalize Demo / Return Rental."