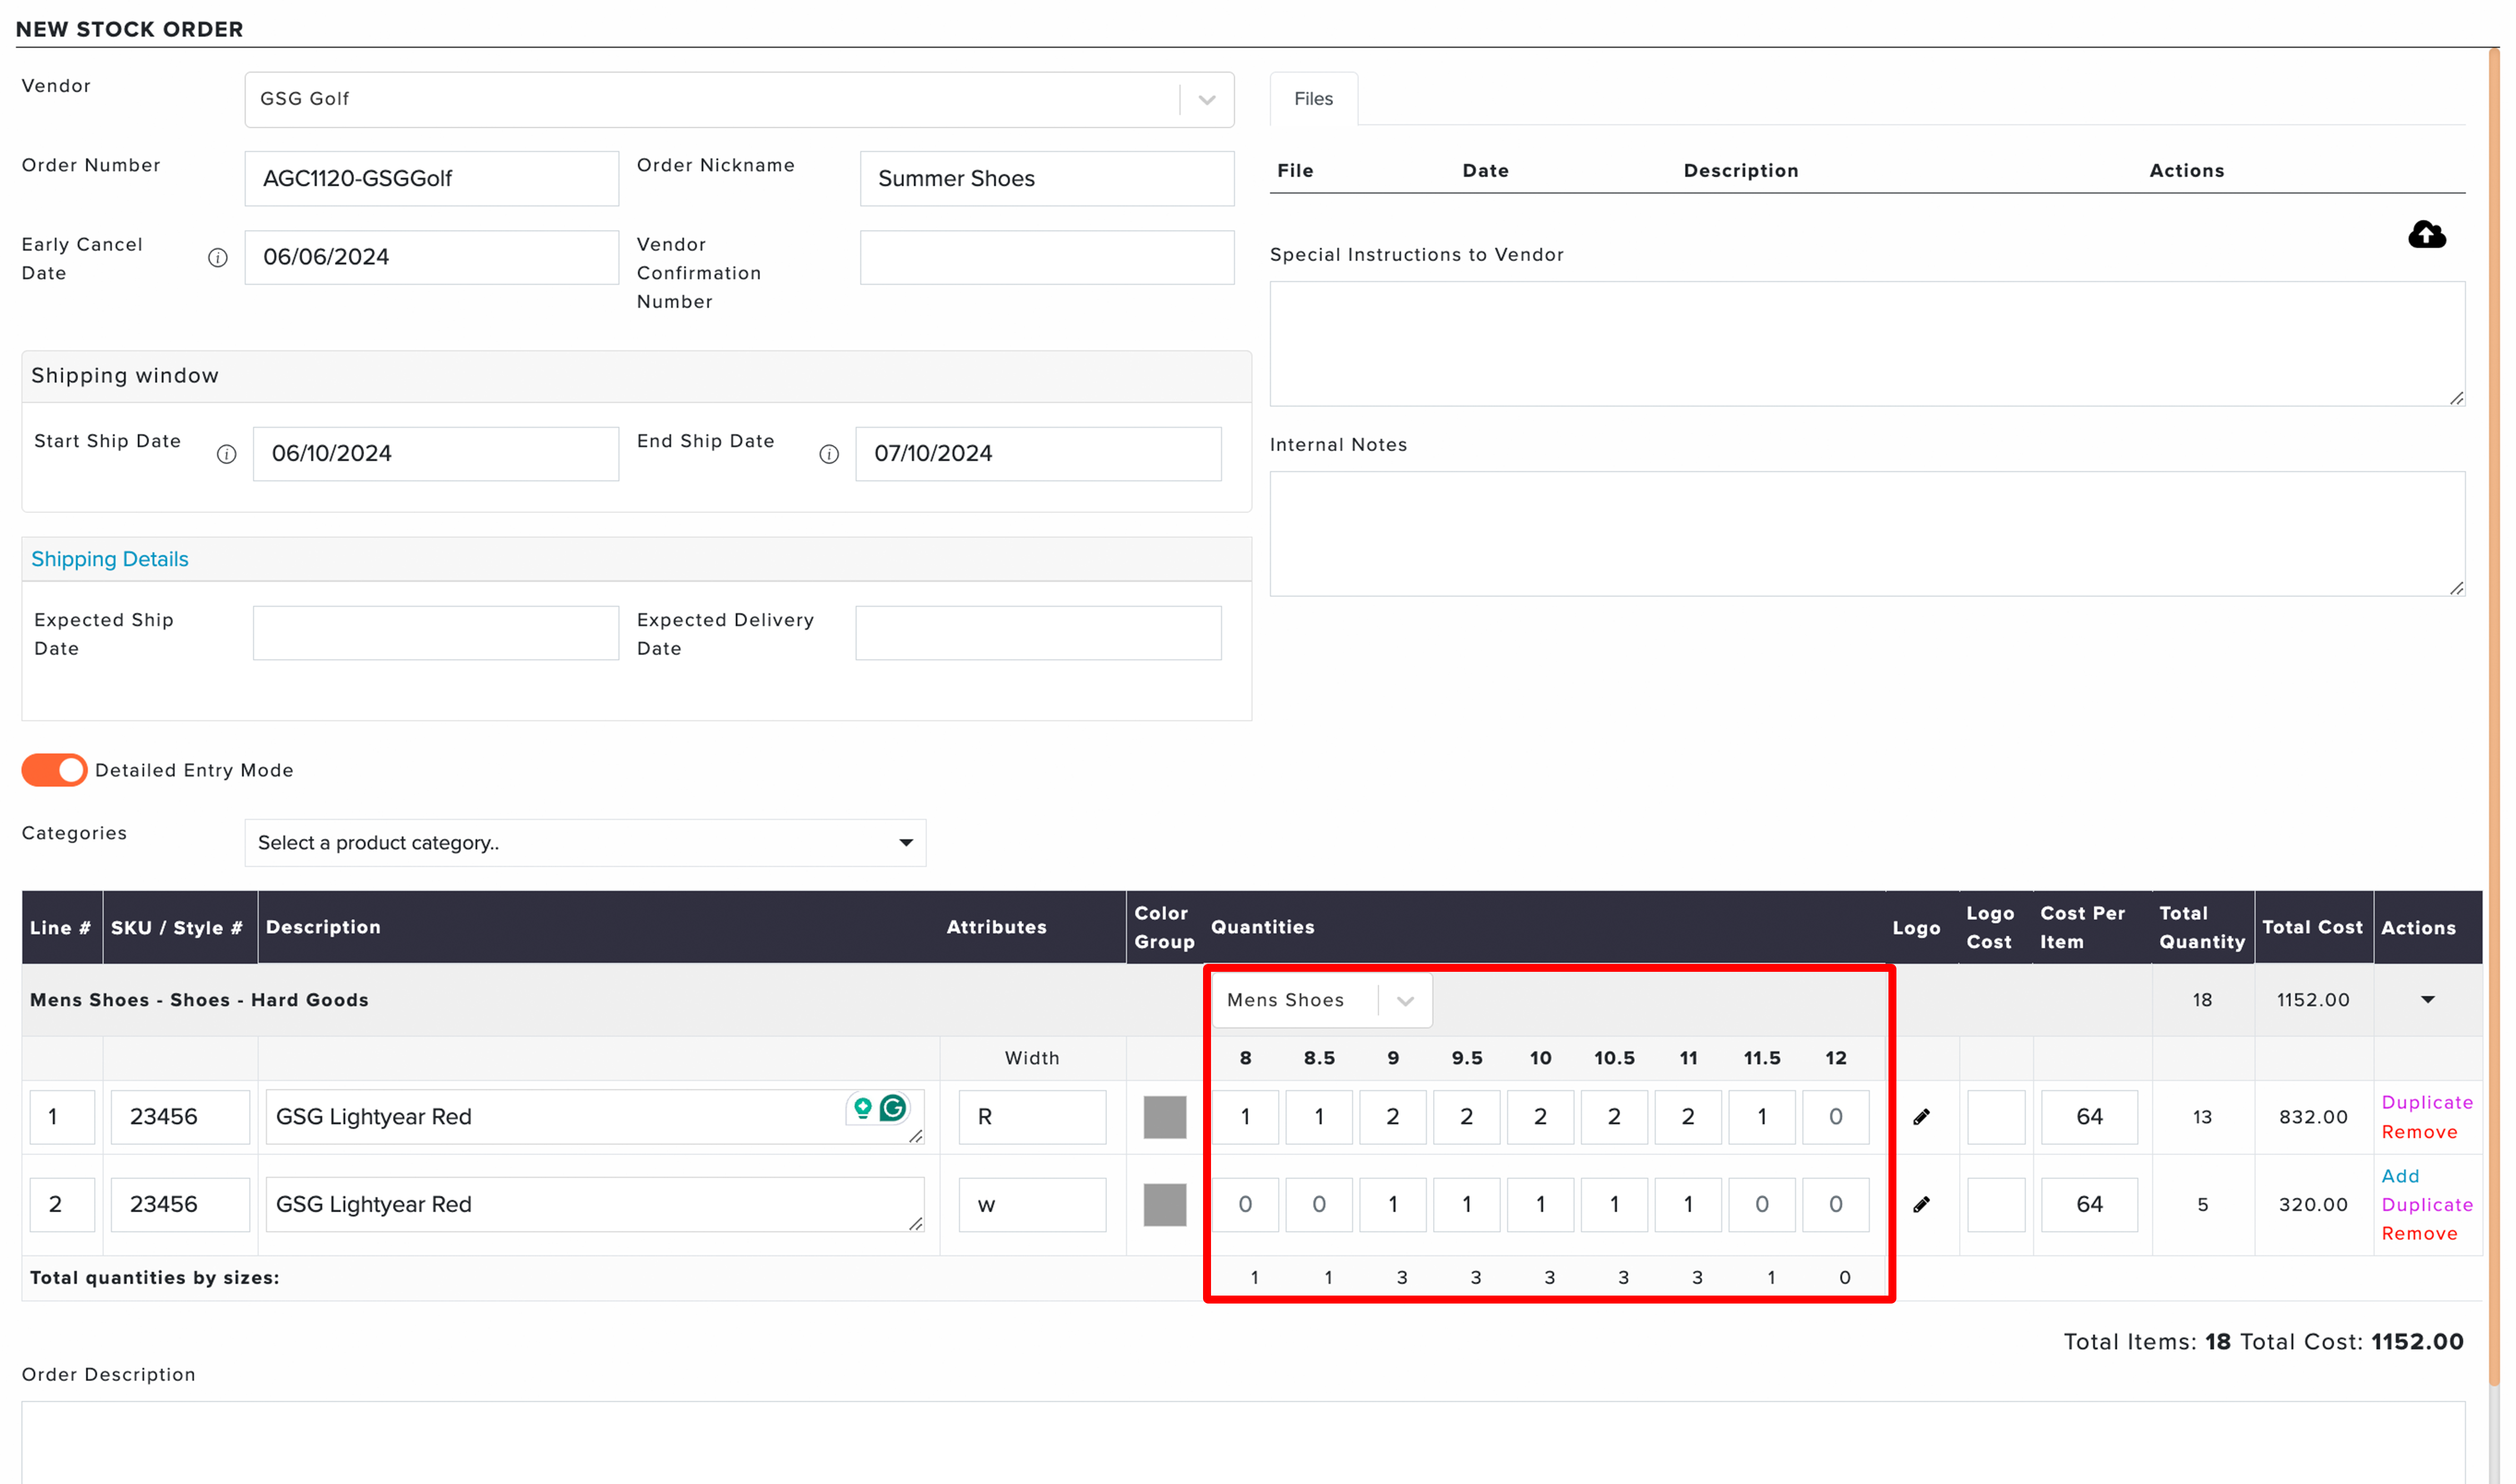
When entering a detailed stock order, sizing tables allow you to enter sizes for each line item within the category (as shown below) without having to write the size of each item. You can assign a default sizing table for each product category, or select from your available sizing table to be used for the selected product category.
We provide you with a default list of sizing tables to select from. However, you have complete control over customizing each table, so you can:
Add New Sizing Tables
Remove Sizing Tables
Set Sizing Tables as Default for select Categories
Rename Sizing Tables
Edit Existing Sizing Tables
In this article, we will discuss how you can customize your sizing tables to meet your club's preferences.
Managing Sizing Tables:
To view and customize your sizing tables, go to Orders > Stock Orders > Sizing Tables (as shown below).
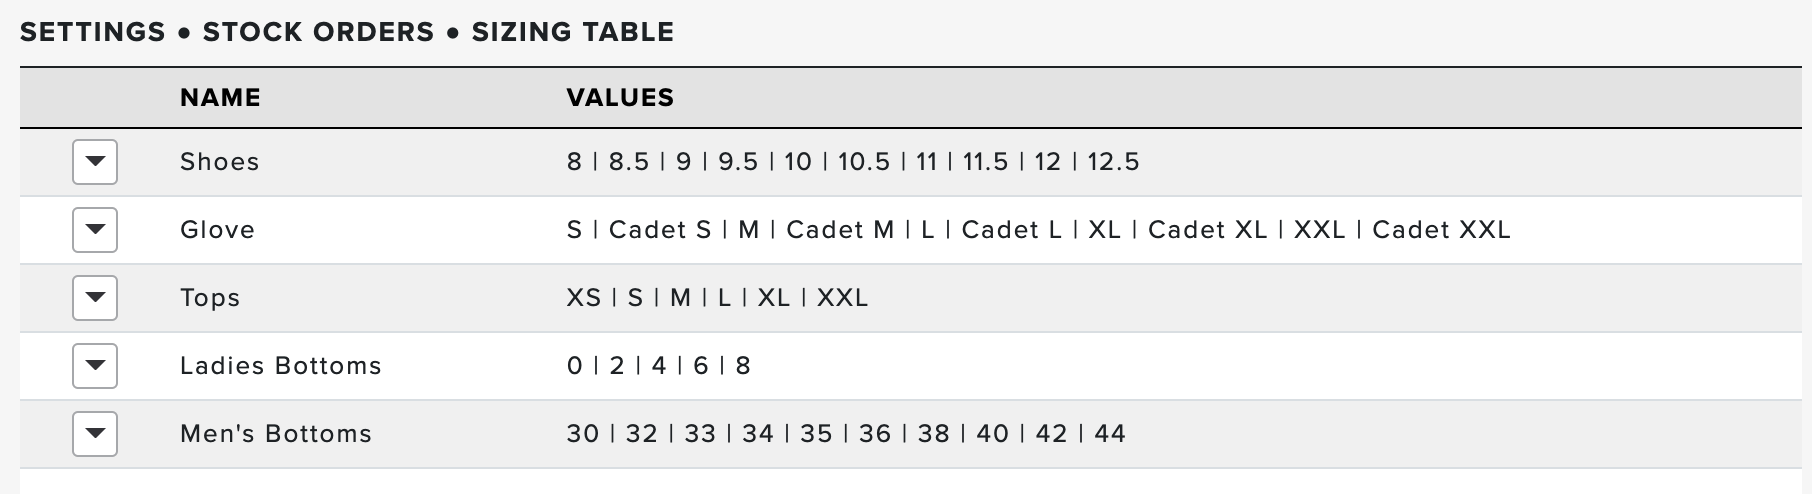
Your current sizing tables will be listed by name, with the possible values within each sizing table displayed.
Adding Sizing Tables
To add a new sizing table, follow these directions:
Go to Orders > Stock Orders > Sizing Table.
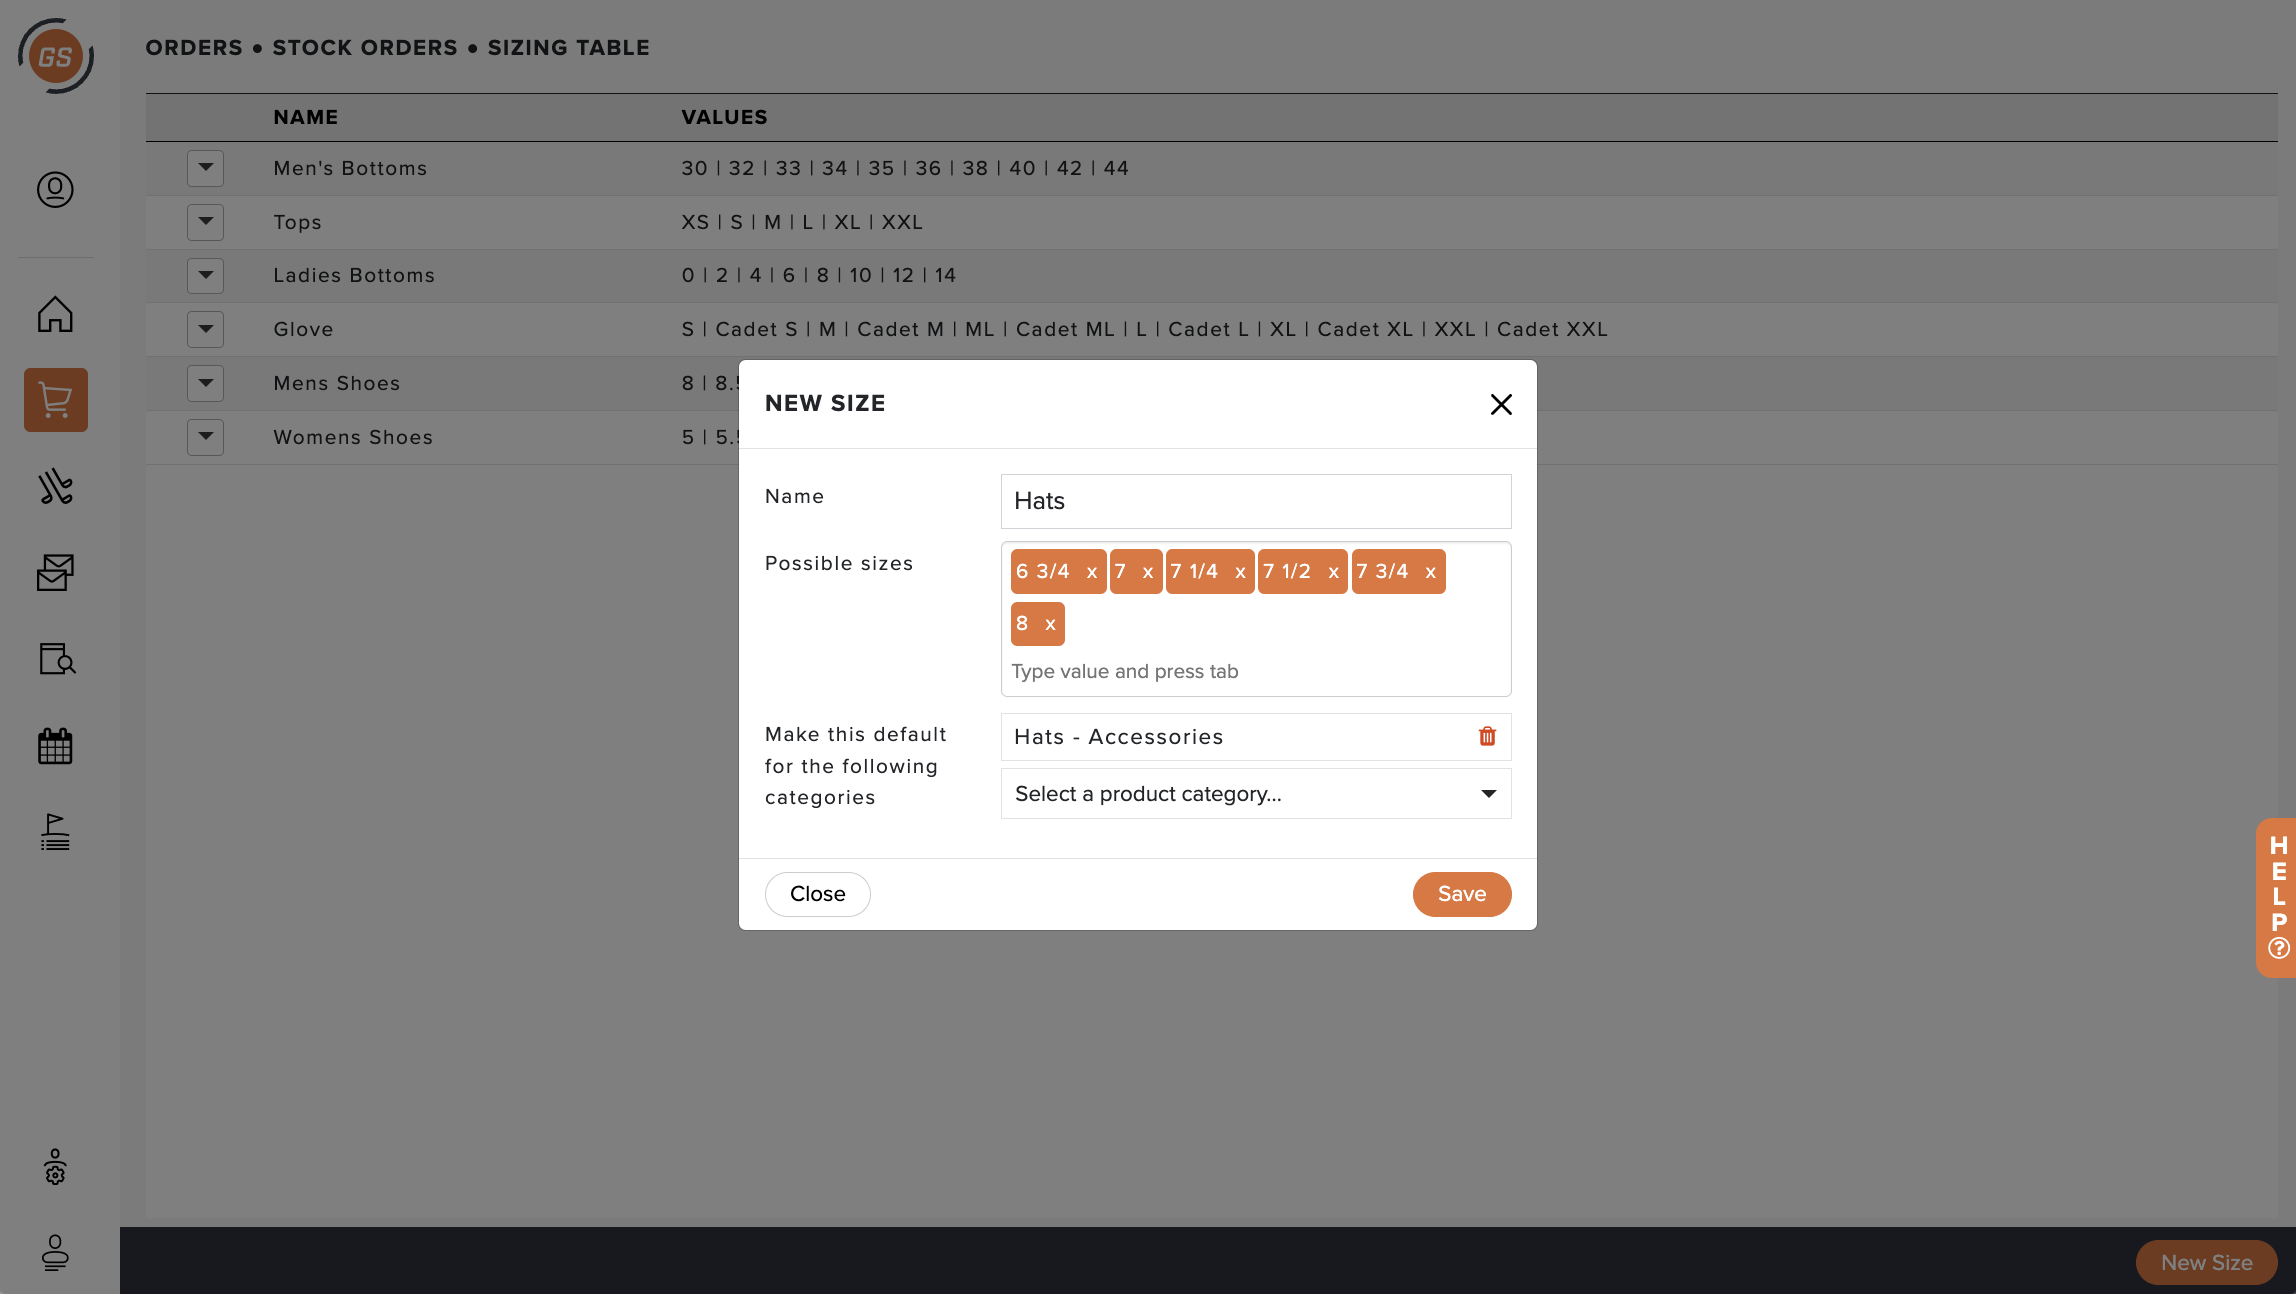
Click "New Size" (as shown below).
Enter the name of the size table.
Enter the possible sizes by pressing tab after you enter each possible size (as shown below). Note: You can drag and drop to reorder the sizes.
Select which categories this size table should be the default for. Note: Multiple categories can be selected.
Click "Save."
Editing Sizing Tables
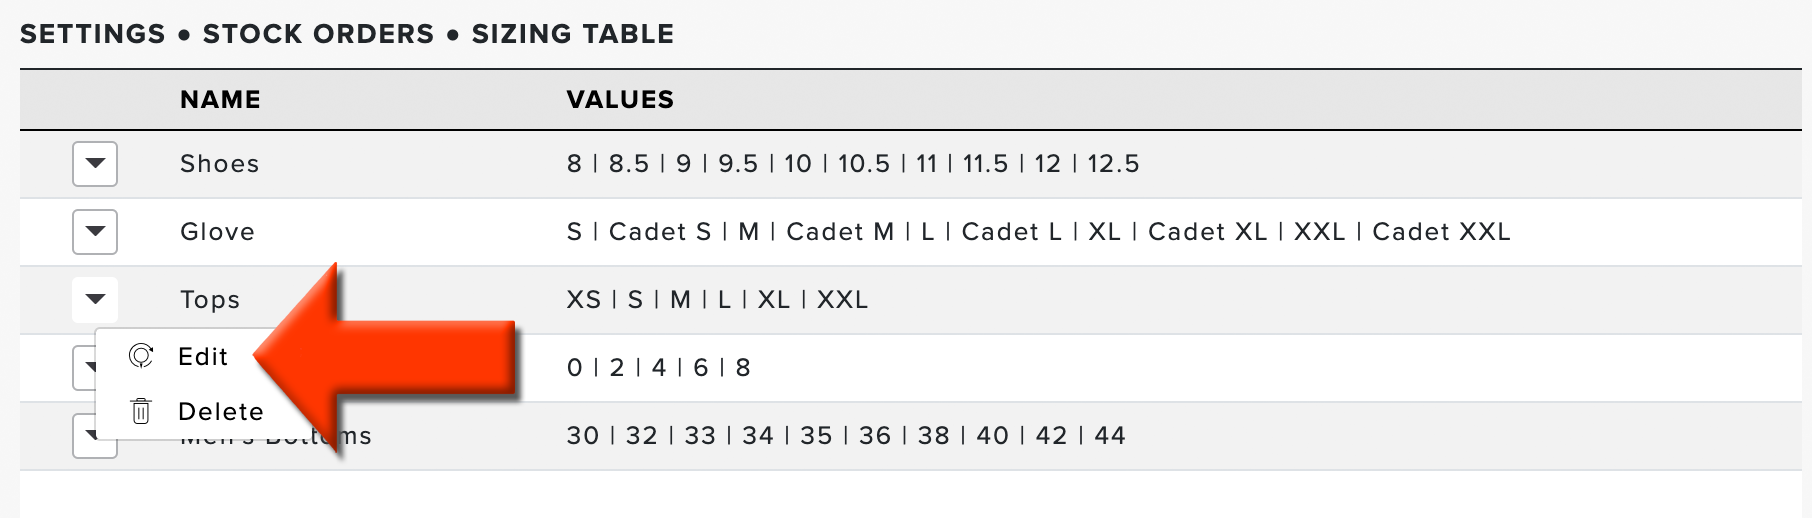
If you'd like to edit a table to change the named, add default categories, or add additional sizes, click the action dropdown and select "Edit" (as shown below).
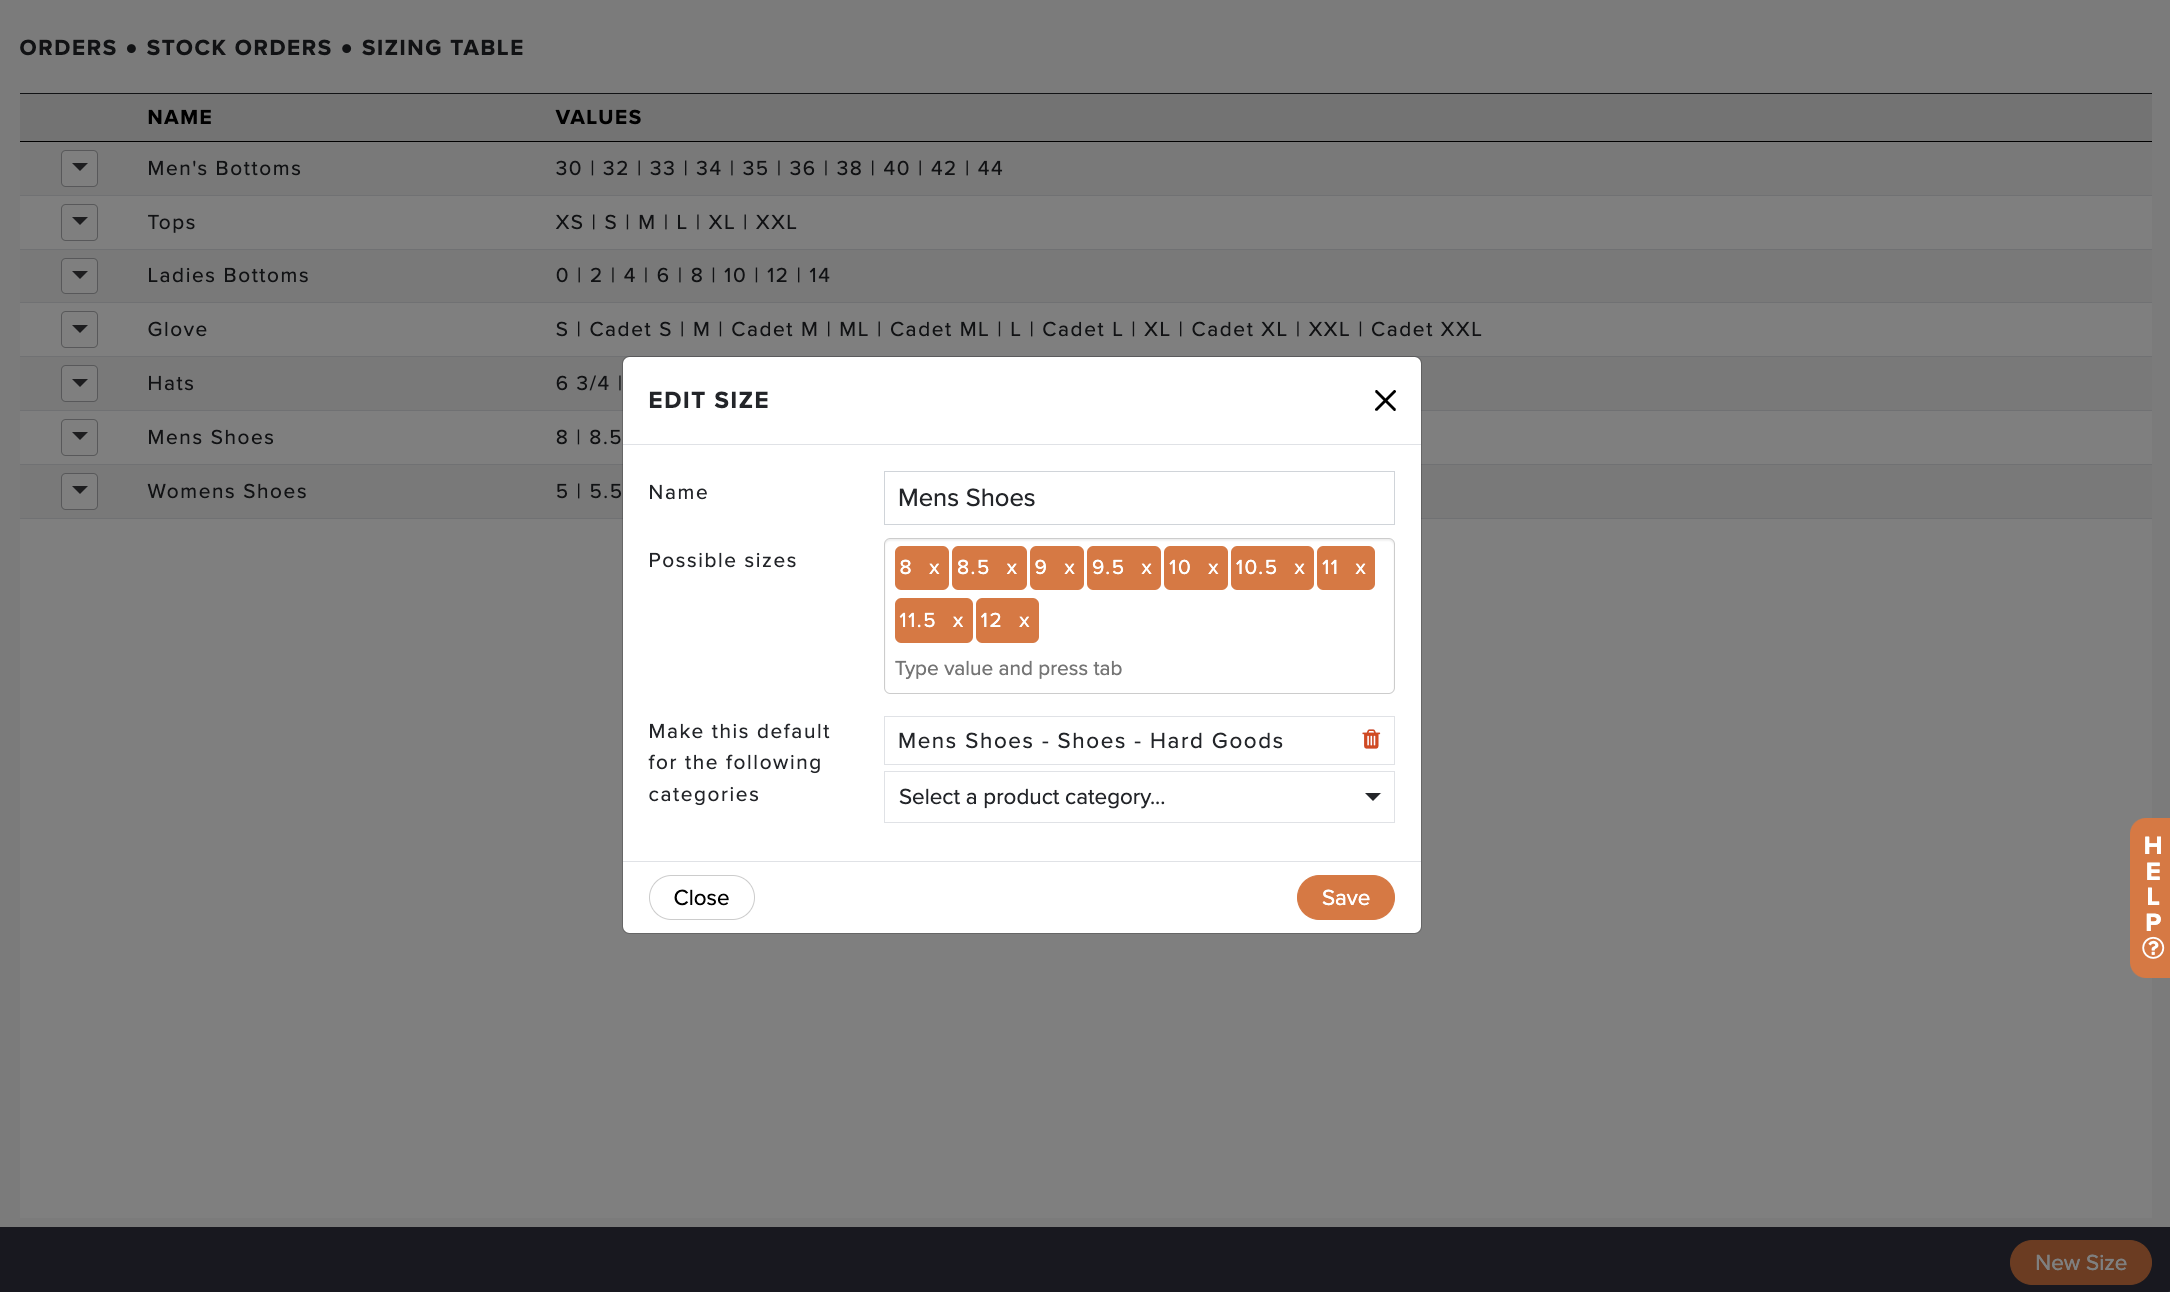
You can then change the name or add/remove possible sizes, as well as drag and drop to manage the order in which the sizes are listed (as shown below).
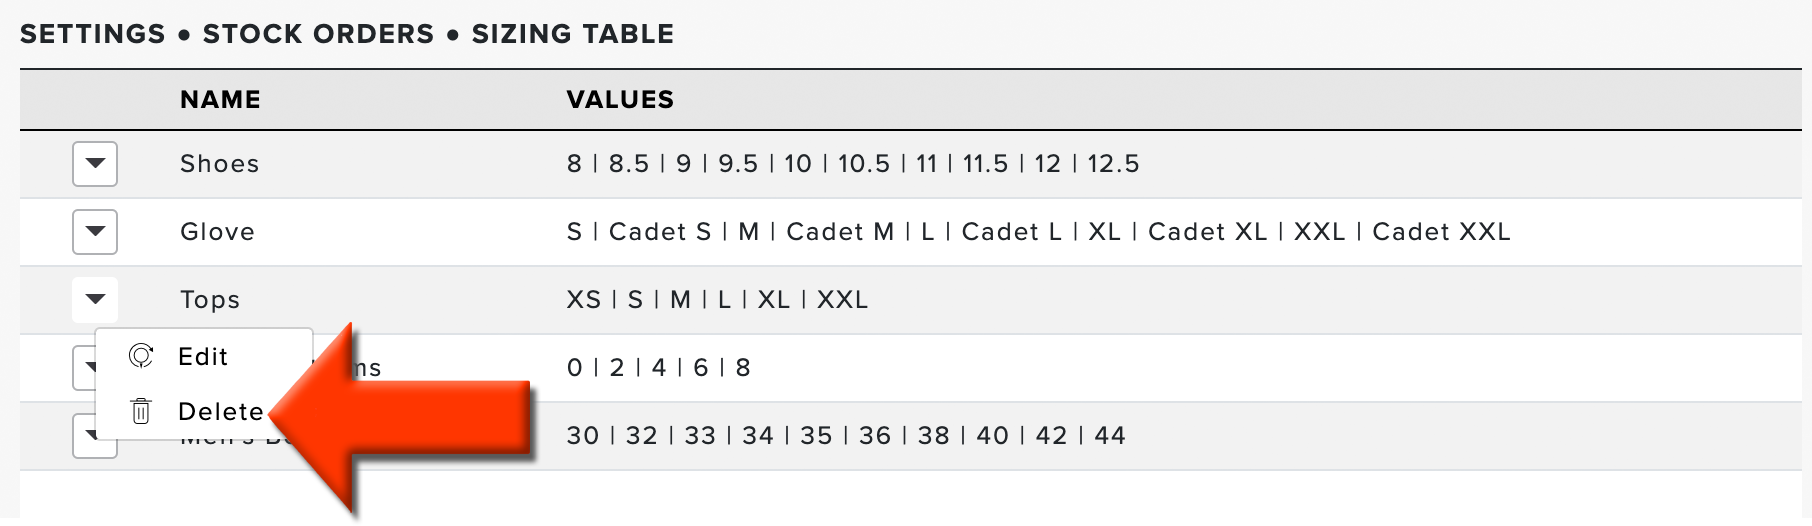
Deleting Sizing Tables
If you need to delete an unused sizing table permanently, click the action dropdown and "Delete" (as shown below).