
Shop Tasks offers a variety of settings to help you tailor the experience to your specific needs and optimize your workflow. The following Task Settings are available:
Task Tags
Staff Groups
Default Due Time
By effectively utilizing the settings options in Tasks, you can:
Improve Task Organization: Create meaningful task tags to categorize tasks and make them easier to find.
Streamline Task Assignment: Use staff groups to efficiently assign tasks to multiple staff members.
Maintain Consistent Due Dates: Set a default due time to ensure tasks are consistently assigned due dates.
In this article, we will discuss the available settings and how to adjust them.
Accessing Task Settings:
To access the Tasks General Settings, go to Staff > Tasks > Settings.
Task Tags:
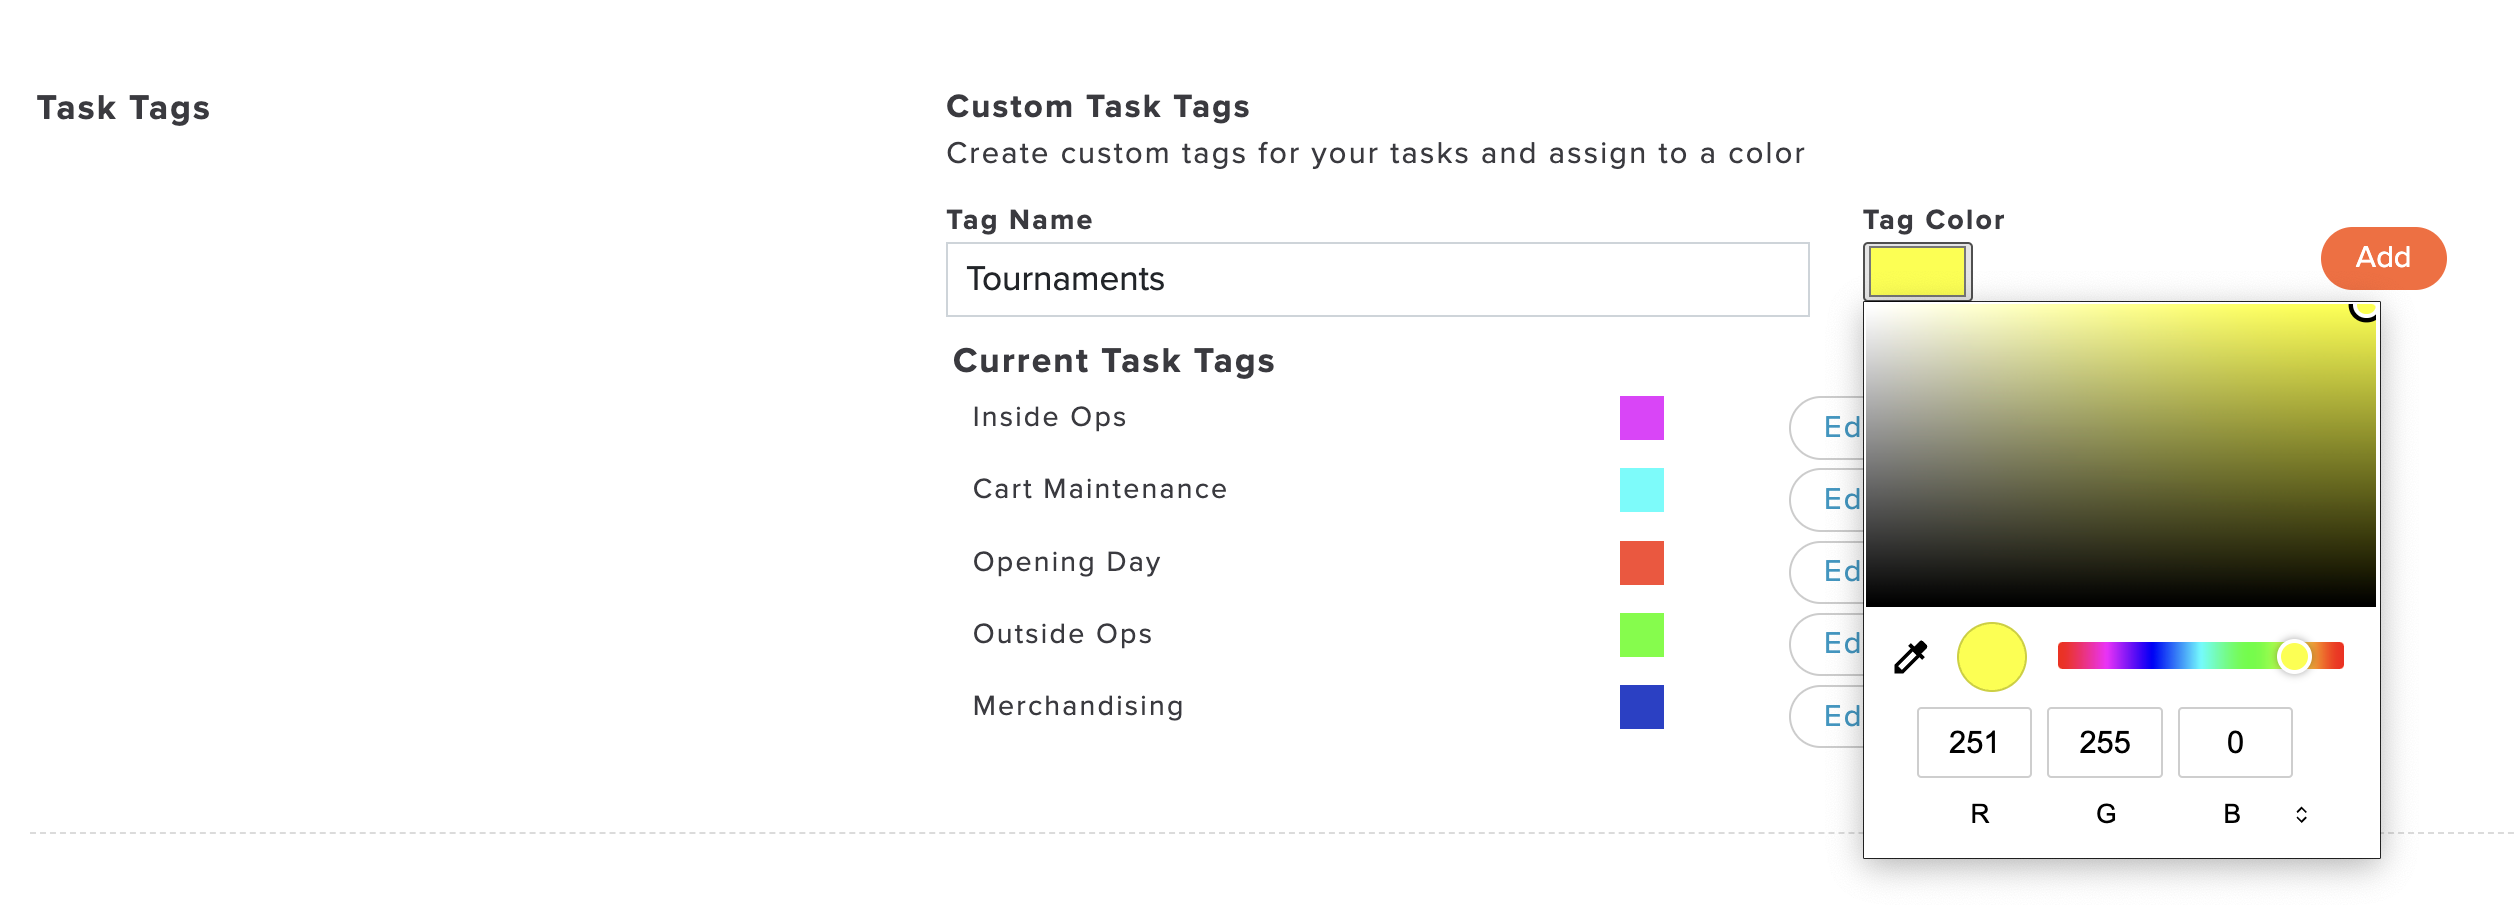
Task tags are a powerful tool for categorizing and organizing your tasks. To create a task Tag, follow these directions:
Enter the tag's name in the text box titled "Tag Name." Note: Try to keep the tag names short and simple.
Click the Color block next to the "Tag Name."
Select a color using the color code picker, where you can enter RGB, HSL, or HEX color code values to find a specific color (as shown below).

To add the tag, click "Add" to the right of the color box.
Additionally, you can edit or remove any existing task tag:
To edit a Task Tags:
Click the "Edit Button."
You can make the following changes:
Name: Change the name of the tag.
Color: Change the tag color.
Click "Update" to apply the changes.
To remove a task tag:
Click the "Remove" button for the tag you wish to remove.
Click "OK," and the tag will be removed.
Note: Use caution when removing the task tag, as the tag will be removed from all existing and past tasks and cannot be recovered.
Staff Groups:
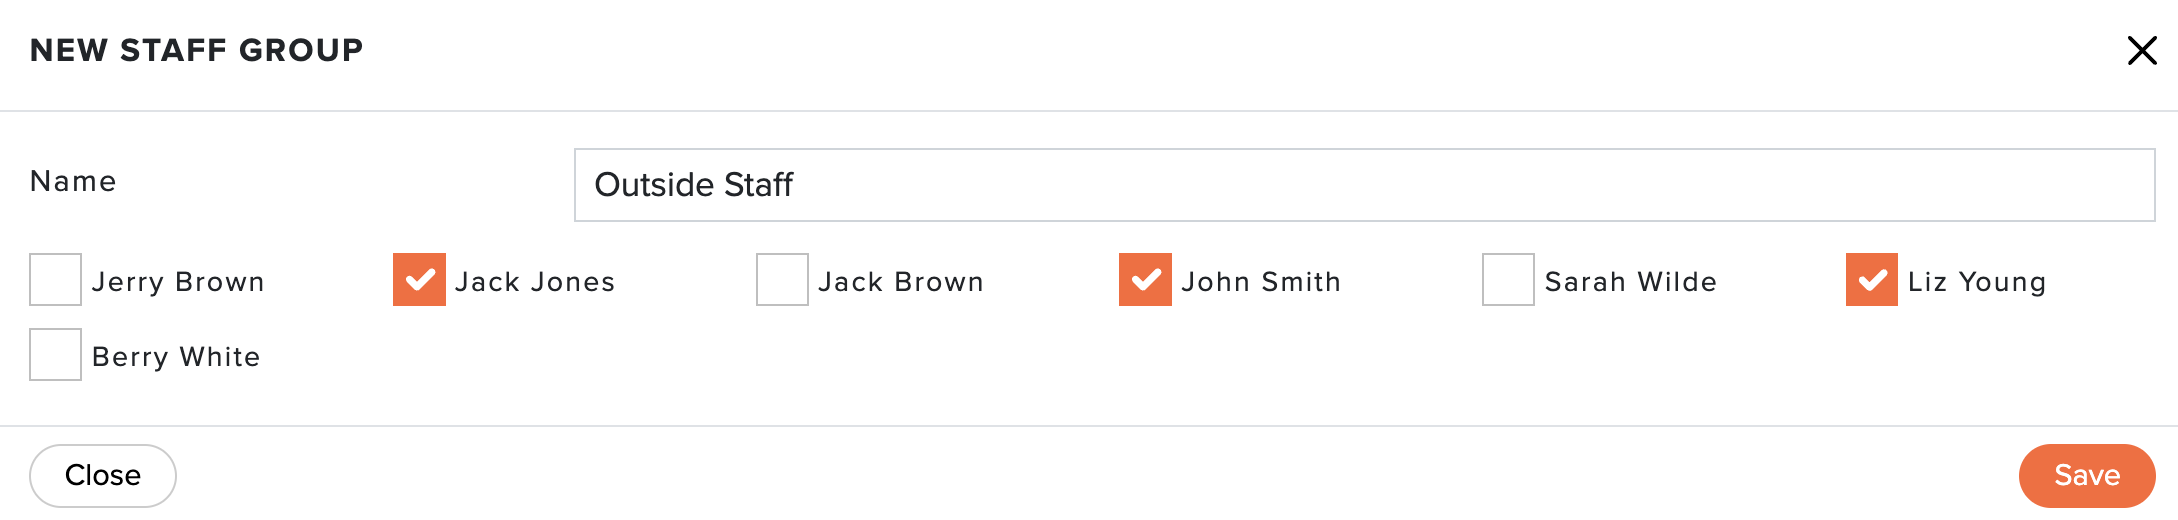
Staff groups provide a convenient way to assign tasks to multiple staff members quickly. To create a staff group, follow these directions:
Click "Create Staff Group."
Enter the group's name in the text box titled "Name."
Select the managers that should be included in the staff group (as shown below). Note: Technicians are not included.

Click "Save," and the staff group will be created.
Additionally, you can edit or remove any existing group:
To edit a Staff Group:
Click the "Edit Button."
You can make the following changes:
Name: Change the name of the group.
Selected Staff: Add or remove staff from the group.
Click "Save" to apply the changes.
To remove a Staff Group:
Click the "Remove" button for the group you wish to remove.
Click "OK," and the group will be removed.
Note 1: Staff must be added to your Golf Shop Account to be assigned tasks and receive notifications. For details on adding staff to your Golf Shop Account, Click Here.
Note 2: Use caution when removing Staff Group, as the group will be removed from all existing and past tasks, and the group cannot be recovered.
Default Due Time:
You can set a default due time when creating a task, making it easier to assign the time of day the task is due. To update the default due time, follow these directions:
Click on the time.
Use the time picker to select your preferred default due time.
Click "Update" to apply the change (as shown below).
