Vendor Fields are standard fields already stored in the vendor list (address, website, account number, etc). For details on managing vendors, Click Here. However, you can also create and store custom vendor fields (as shown below).
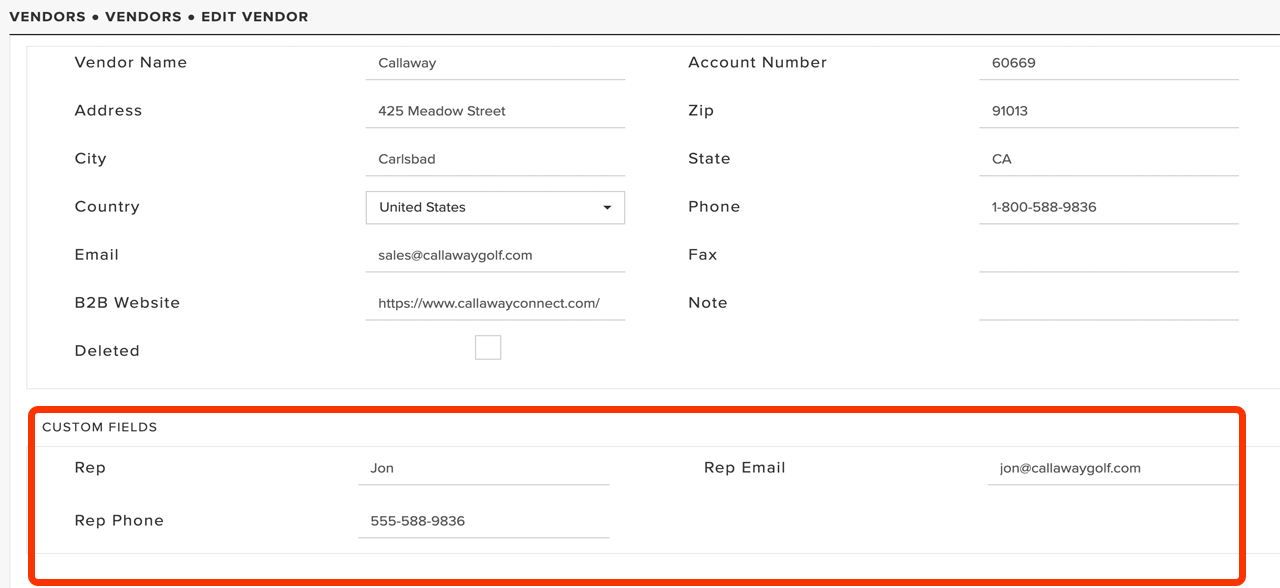
Custom fields are useful in cases where you need to store additional vendor information that is not available as a standard field. For instance, in the example above, custom fields are used to store sales rep contact information.
Custom fields are also available as data fields for automated text message and email templates.
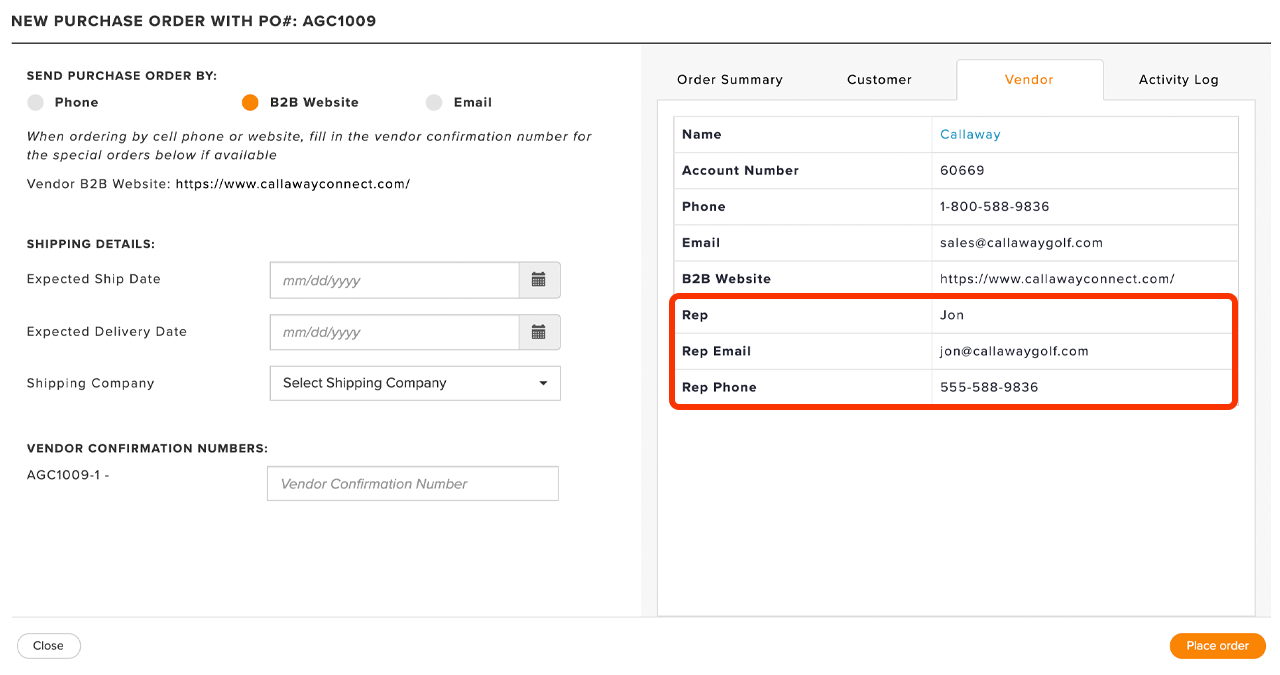
You can also have custom field data displayed when placing an order (as shown below).
In this article, we will discuss creating and editing vendor custom fields.
Creating Vendor Custom Fields:
During your onboarding process, your account manager may or may not have uploaded vendor custom fields for you. Either way, you can always add more custom fields if necessary. You can create custom fields manually using the following instructions:
Go to Club Details > Vendors > Custom Field > New Custom Field.
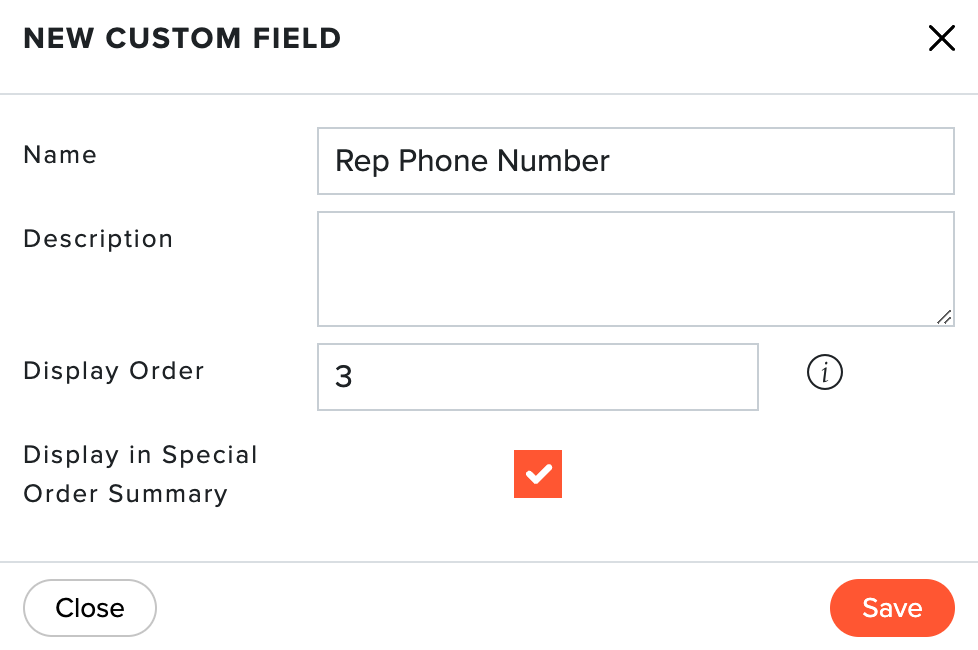
Enter the following:
Name
Description: Enter the custom field description. This will be displayed internally when editing the custom field.
Display Order: Select the order in which the field is displayed in the custom field area of the vendor form. Every custom field should have a unique number to determine the display order.
Display in Special Order Summary: Select this option if you would like this field displayed when placing a special order.
Click "Save" (as shown below).
The custom field will then be created and added to your vendor custom fields list.
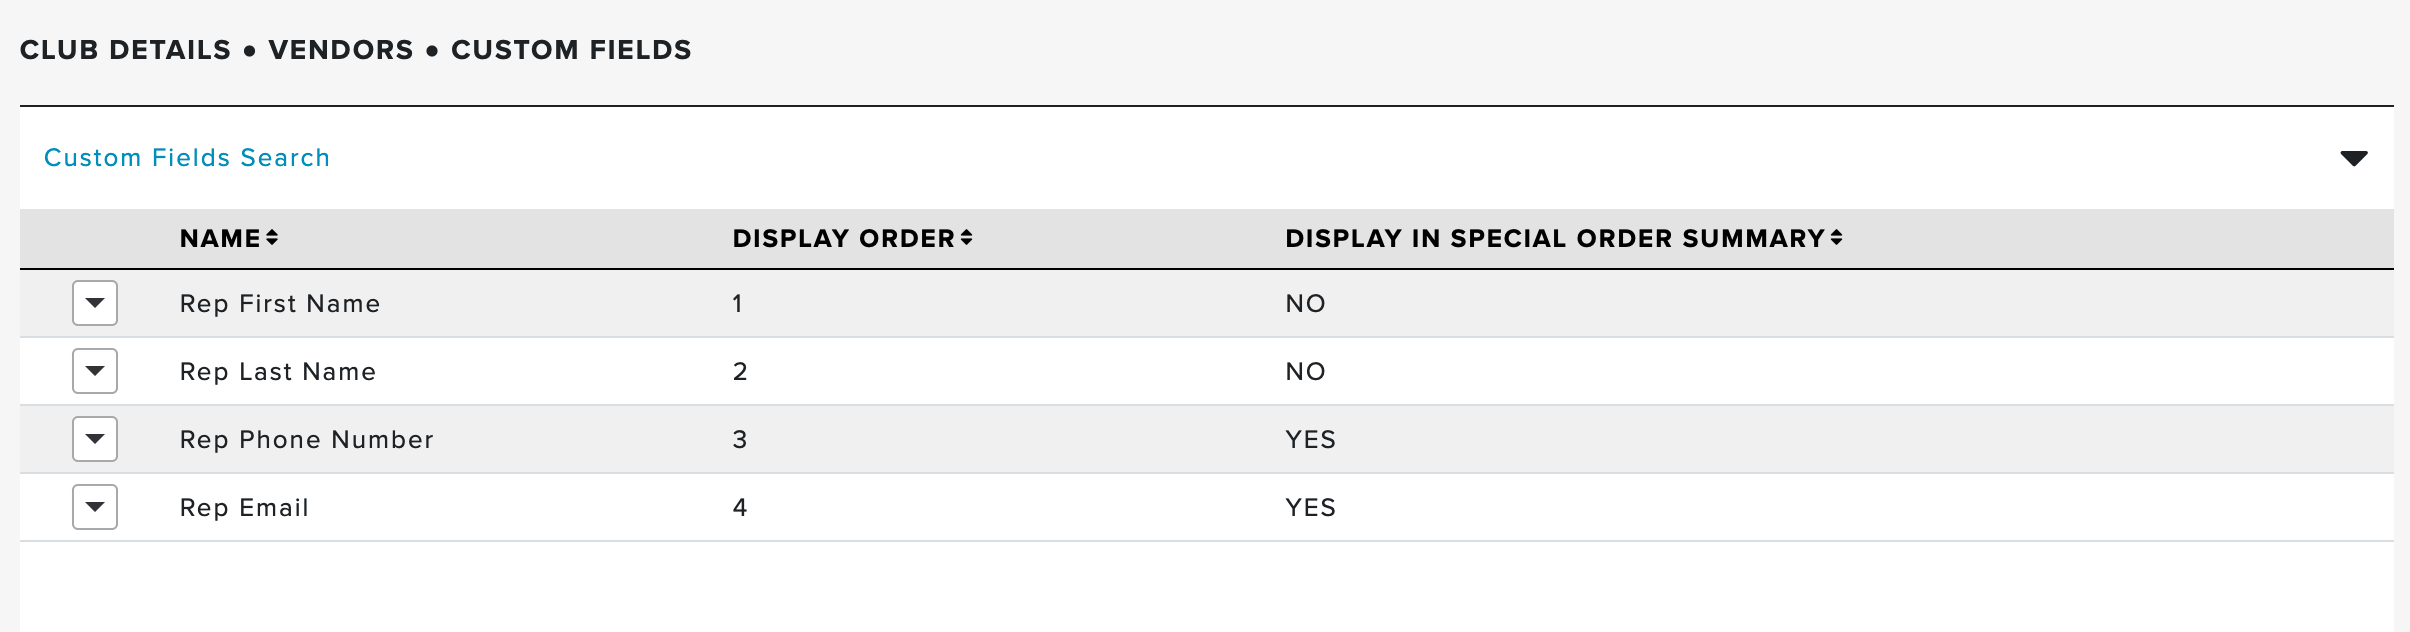
Editing Existing Vendor Custom Fields:
You can view and edit current custom fields by going to Club Details > Vendors > Custom Fields (as shown below). Use the action drow-down to edit or delete an existing custom field.