
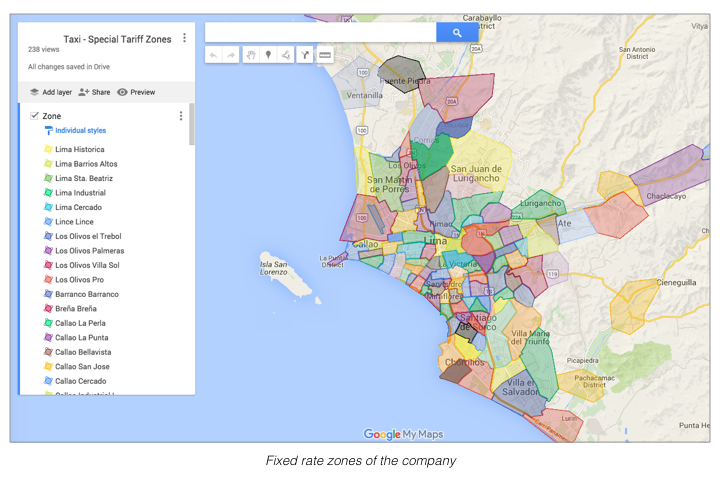
Fixed fare zones is a solution that helps the company to charge set prices for moving from zone to zone. You can charge fixed rates for an airport trips, or trips between districts. More details are in Fixed rates between zones.
NB! To get the necessary documents to draw your zones and set Fixed fares for them write to support@onde.app (for Lolo: support@ridelolo.com). Configuration fee applies.
One has to fill out 2 documents (to be shared by support@onde.app):
Draw fixed rate zones on the Map
Set fares for fixed rate zones
1. Draw fixed rate zones on the Map
Before drawing zones on the Map make sure to check your working zones set-up in the Operational area.
If one needs for Fixed fares to apply from zone A to zone B and back, etc, one has to draw all the Fixed rate zones inside the working zones of the operational area of the company.
In case a Fixed rate zone A is drawn inside the preset working zones in the operational area of the company, but zone B is drawn outside the preset working zones there can be 2 scenarios:
If a customer travels from A to B the fixed fare rate will apply, as the pick-up is within the working zones preset in My hub
If a customer travels from B to A the fixed fare rate will NOT apply, as the pick-up is OUTSIDE the working zones preset in My hub. The app will show "No service in the area" message.
Now, let's start drawing your Fixed rate zones on the Map.
To start rounding your areas, open you Map document and choose "draw a line" function. Please do not use more than 30 dots for one zone. After zone is ready you can check its square/border length and color them in different colors.
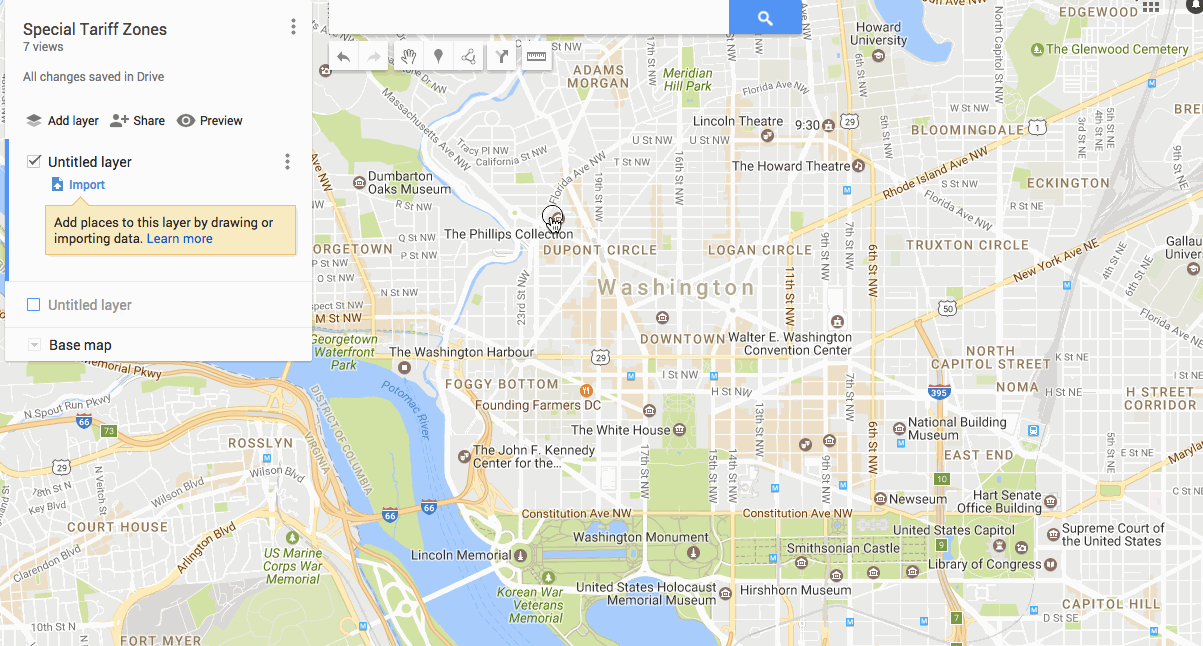
Drawing fixed rate zones
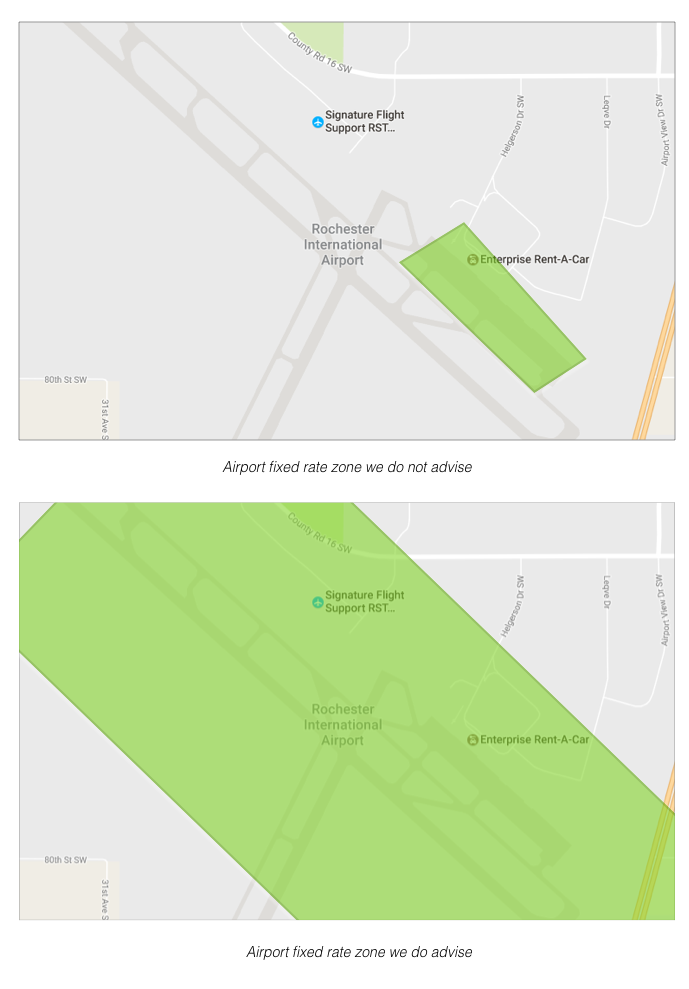
Before rounding particular territories we advise to check Google map markers. For example if you type Rochester International Airport, Google map will localize this address in the middle of Rochester airport runways. So in case airport runways are not included in the “Airport” zone and client types Rochester International Airport as the pick up/drop off location, he/she will be charged according to taximeter. We advise make zones slightly bigger and include surrounding areas in it.
Avoid overlapping zones
While setting particular zones it is important to not overlap neither leave extended spaces between them. In a given territory only one zone rate can have a priority, so basically overlappings do not make sense. As for the spaces between zones, we advise to make them the smallest. It prevents your customers from the “gap” situations when being between zones a client can pay according to taximeter rate only.

Use common names for your fixed rate zones
As you have seen already, while drawing on the map you will need to title each zone. So the names you provide in the pricing document should be the same. Remember that these titles will be shown to the customers. So we advise to use commonly used names which are clear and understandable for the people of your city/town.
2. Set fares for fixed rate zones
Now one has to add the Fixed fares for the services of the company. Access the Fixed Price Fares document shared with you. Proceed to tab "Areas" and add the names of your zones in column B "Area names". Make sure that the names are exactly the same as on the Map.
Once all area names are added, proceed to the tab "Fares".
Here you can set prices for the trips between particular zones for each service. Prices should be set in both directions, e.g. from City Center to the Airport and from the Airport to the City Center for each service you need fixed rates to work for.
In case one of the directions is not added to the list, the system will calculate price for such a ride according to the taximeter. Prices between the same zones but in different directions may vary (you can set 30 USD for a ride from the City Center to the Airport and 35 USD from the Airport to the City Center).
Please, mind that default service names (ex: Classic) are used in the "Fares" not the custom names you gave your services (ex: Airport transfer).
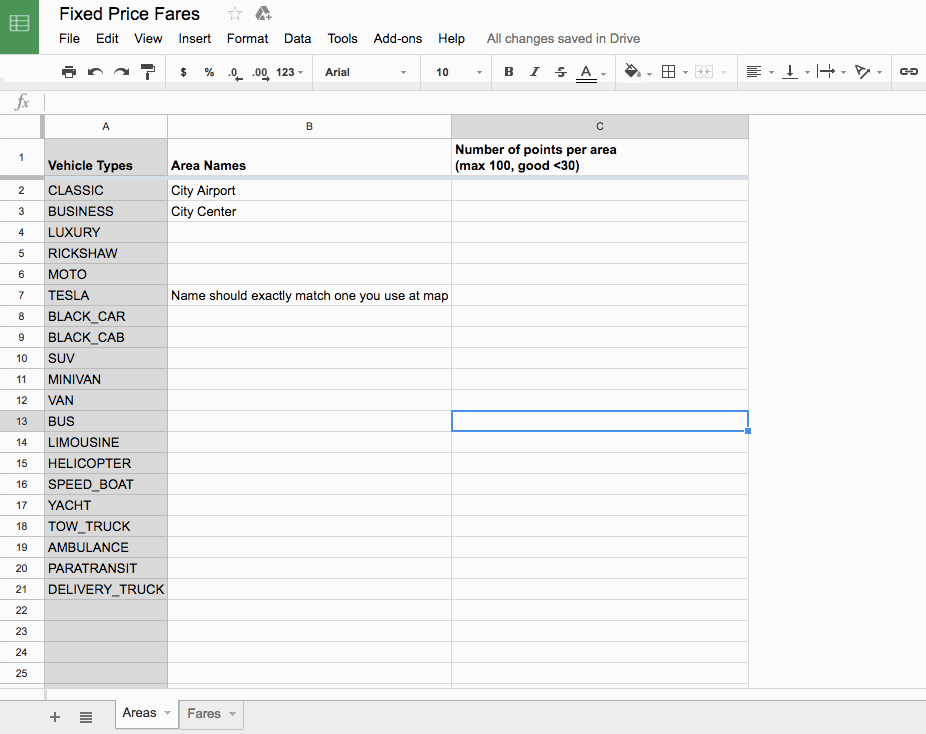
Should you need to set a fixed price for rides within a given zone, put zone name in both columns of the pricing document, e.g. City Center and City Center.

So in this case if pick up and drop off locations of the customer lie within this zone, the ride will cost 25 USD.
Check your zones
After completion of drawing zones, you can check them on your own. To do so you need to do several simple steps:
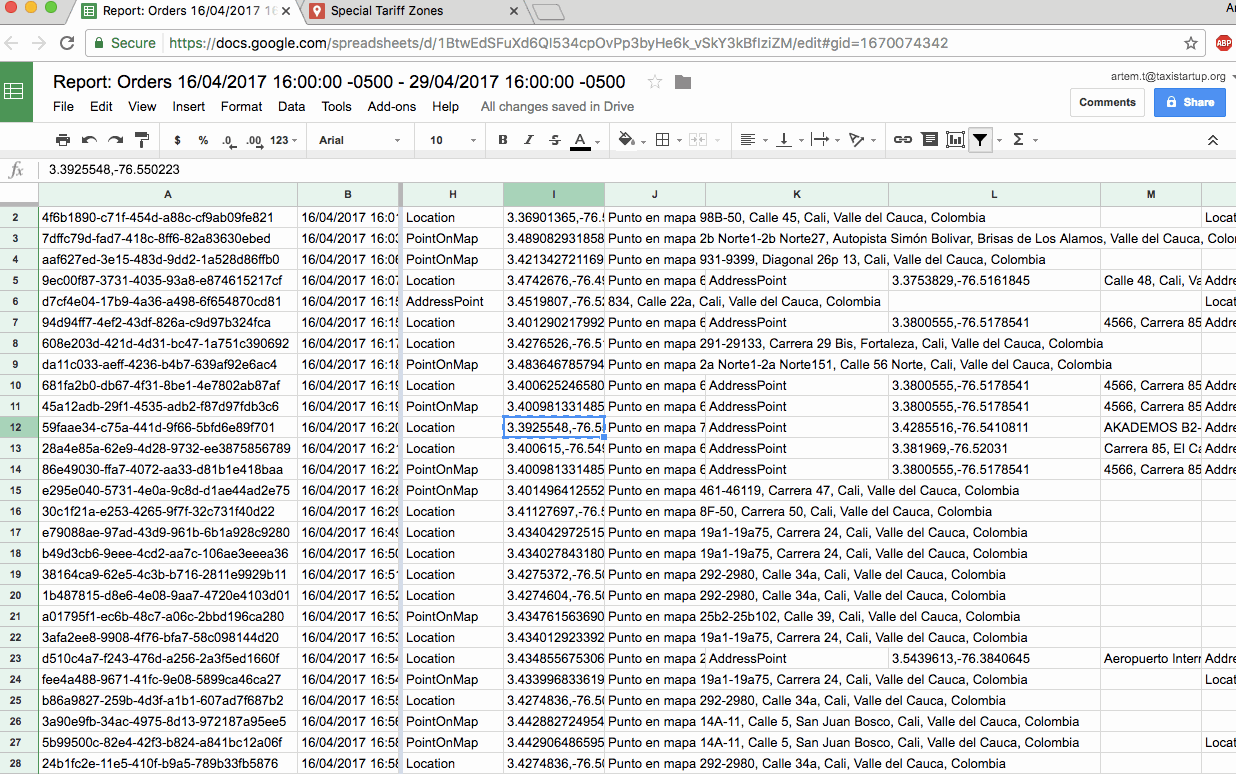
Download your order report and choose trips with the most convenient pickup and drop-off locations. Verify if these points fit to your zones.
Copy origin location (column I) and insert it into the search tab of your fixed rate zones map. Pick up location should be inside any of your zones.
Copy drop-off location (column O) and insert it into the search tab of your fixed rate zones map. Drop-off location should be inside any of your zones.
Please remember, that drop-off location is required to make the system calculate the total according to fixed rate zones algorithm. So if K column of a trip in the report is blank, it means initially the client did not choose destination point so the system calculated the price according to taximeter.

Voila, everything is ready. Now drop us a message on support and we will make your configurations live.