Download PDF → PanelDetailsandActions.pdf
1. Navigate to https://app.getflowpath.com/work-orders
2. Click "Dashboards"

3. Click "View Details" of any panel in a dashboard.

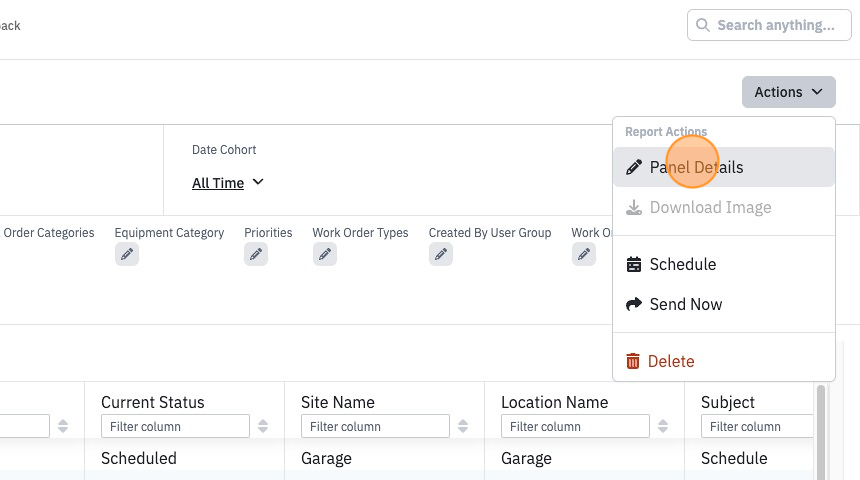
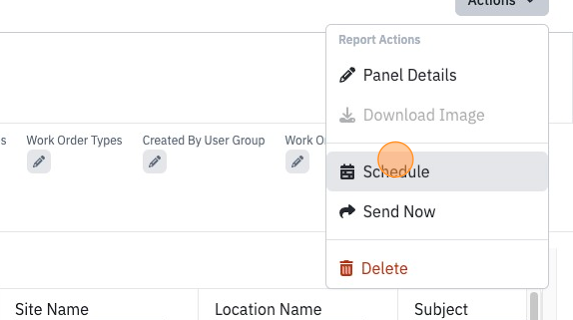
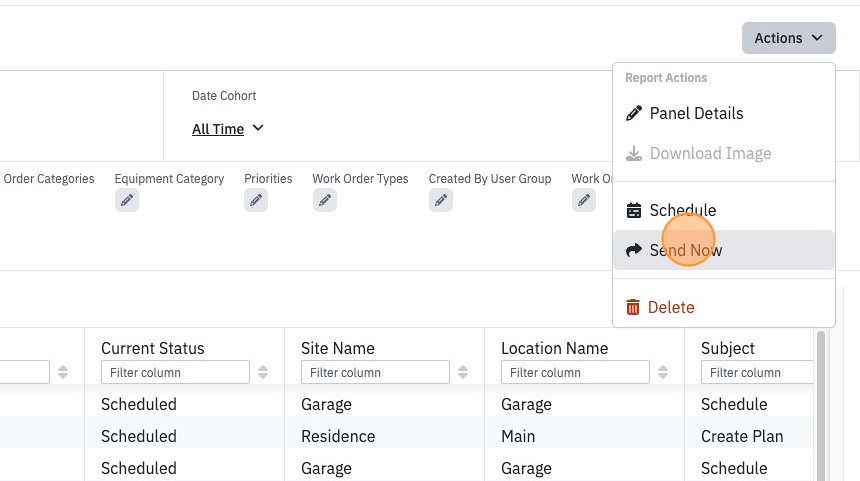
4. Click "Actions"

Panel Details
Panel Details
5. Click "Panel Details"
6. You can change the name of the panel.
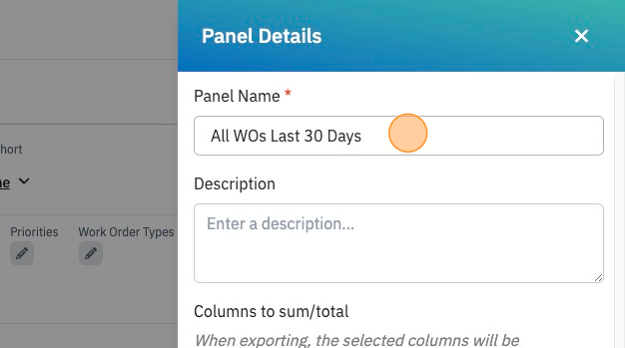
7. Add or chance the panel description.
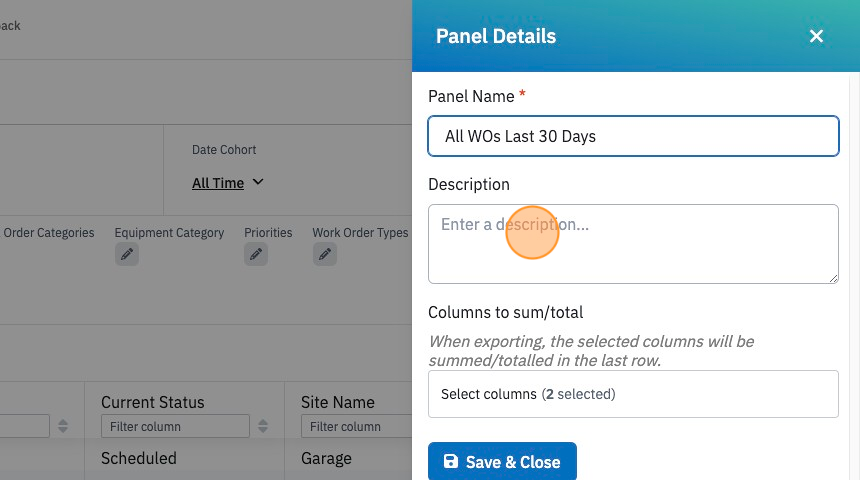
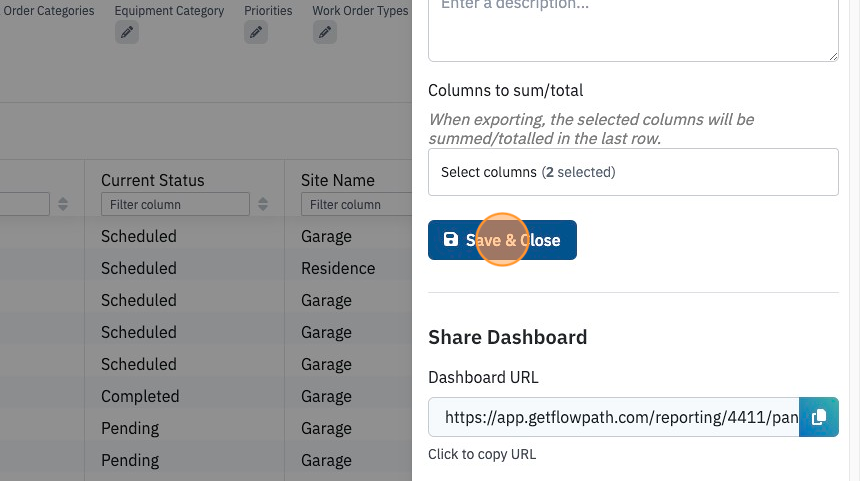
8. Select what columns will be summed/totalled in the last row with exporting the report.
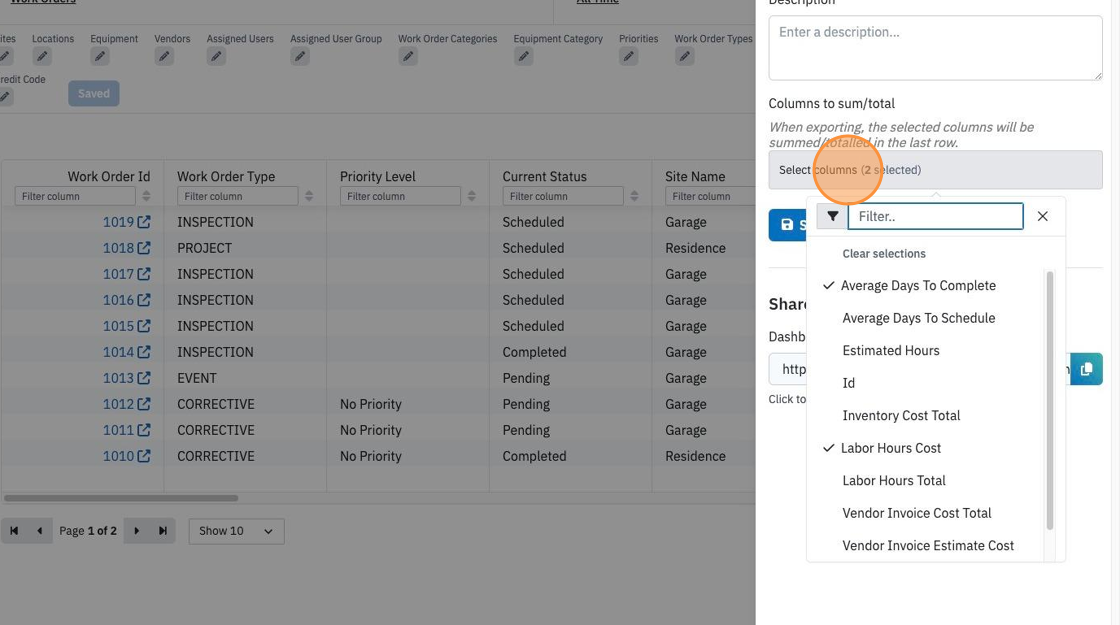
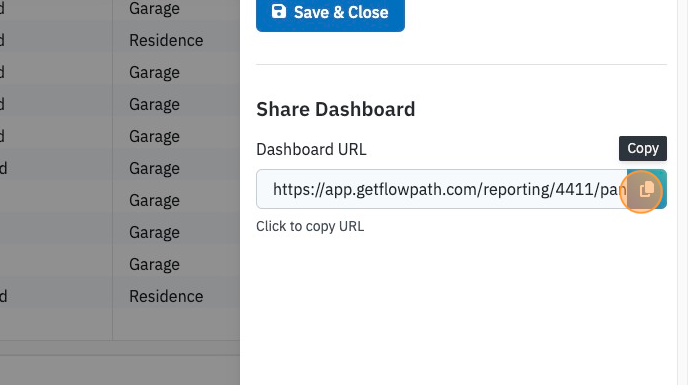
9. Clip to copy the reports URL to send.
10. If no changes were made you can click "Close"

11. Click 'Save & Close' if you made changes that need to be saved, otherwise it wont be saved.
Schedule
Schedule
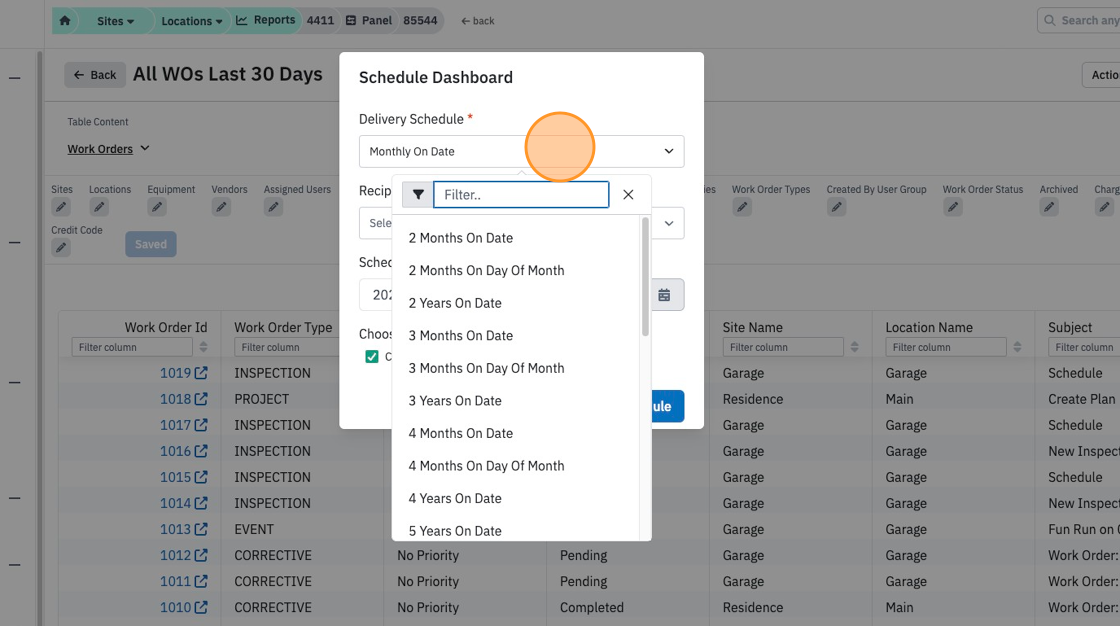
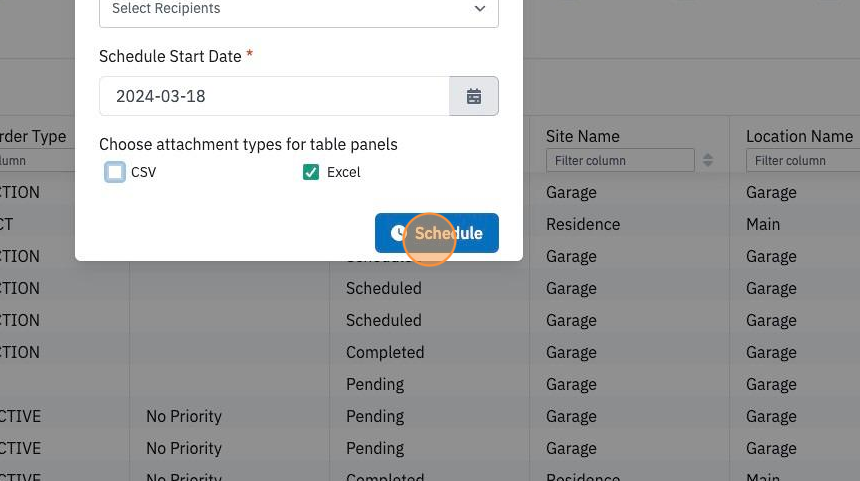
12. Click "Schedule" under actions to schedule a date cadence for a report to be sent to a user.
13. Select the delivery schedule cadence.
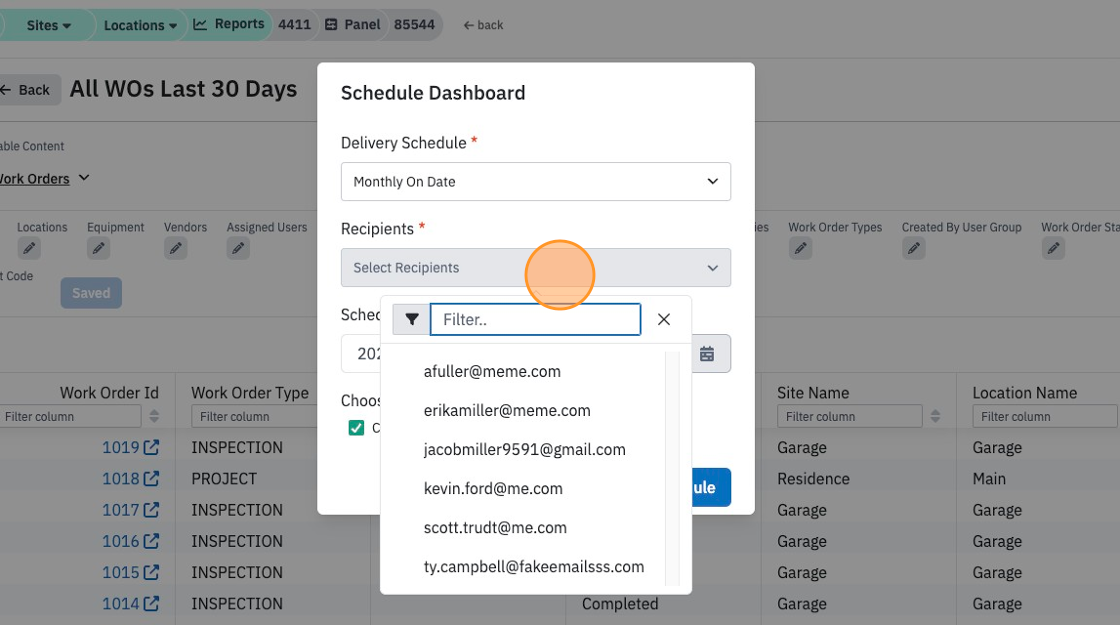
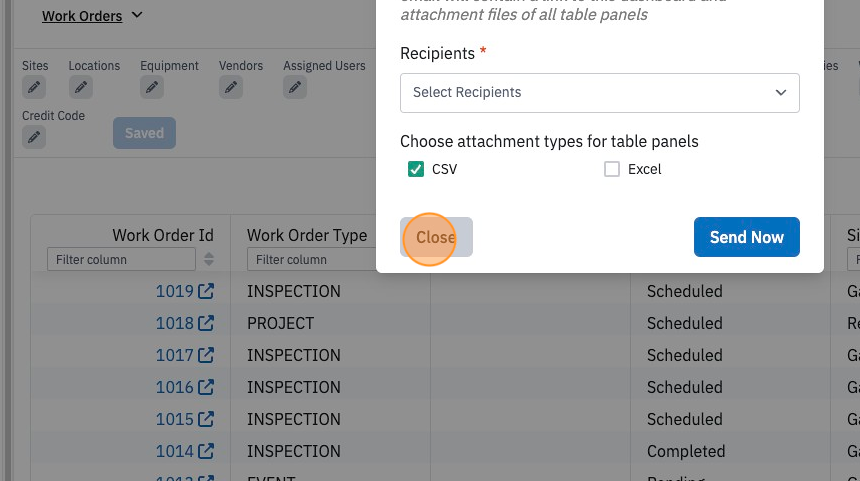
14. Select the recipients for the report.
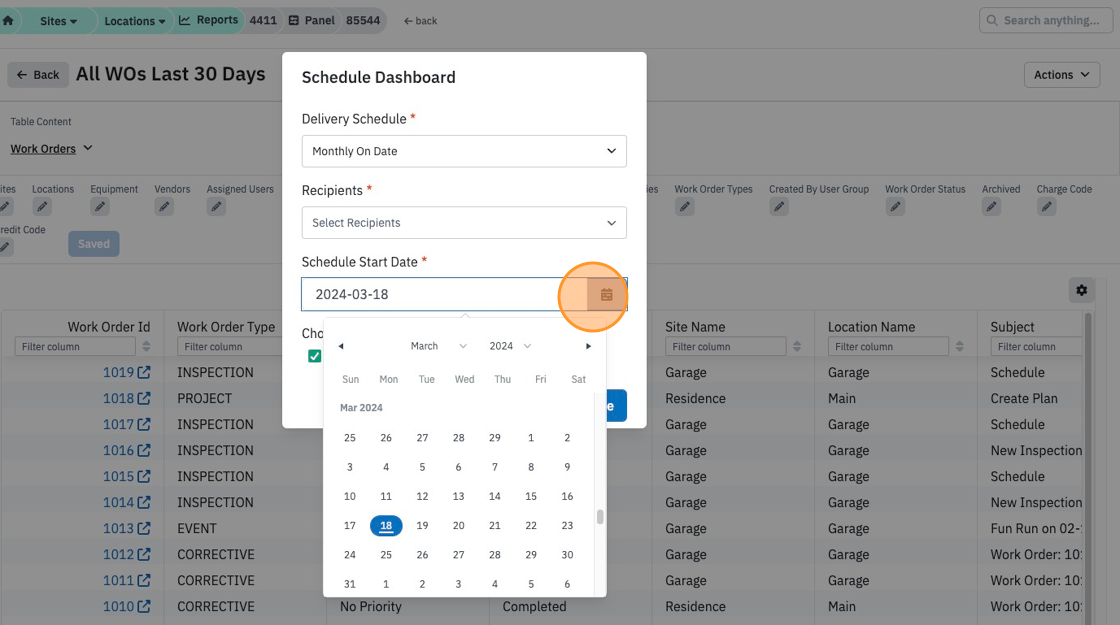
15. Select the schedule start date for the report.
16. Click "CSV" or "Excel" for your attachment type.
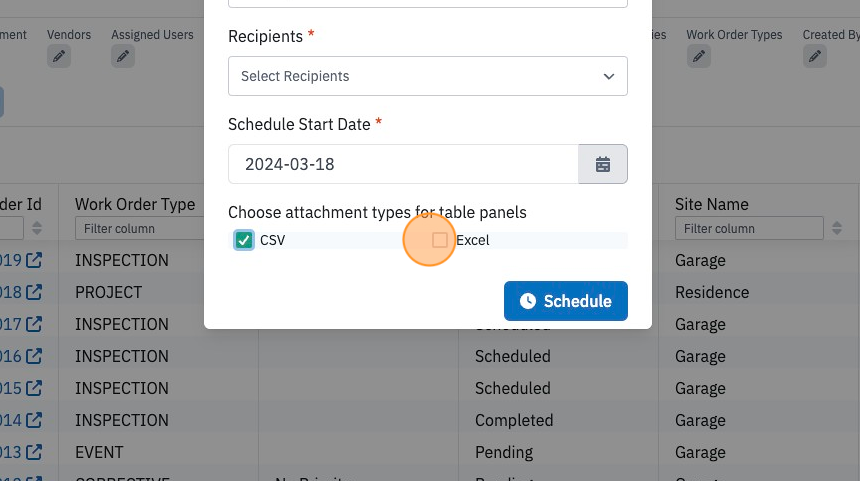
17. Click "Schedule".
Send Now
Send Now
18. Click "Send Now" to export the report and send to a user without a cadence.
19. Select the recipients you want to send the report to.
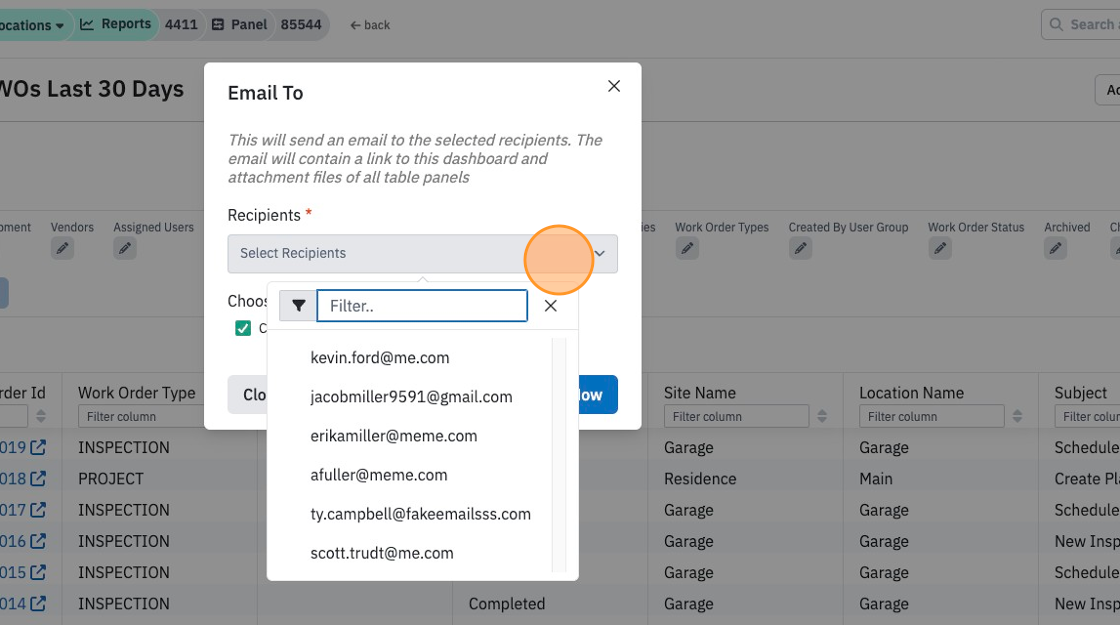
20. Click "CSV" or "Excel" for your attachment type.
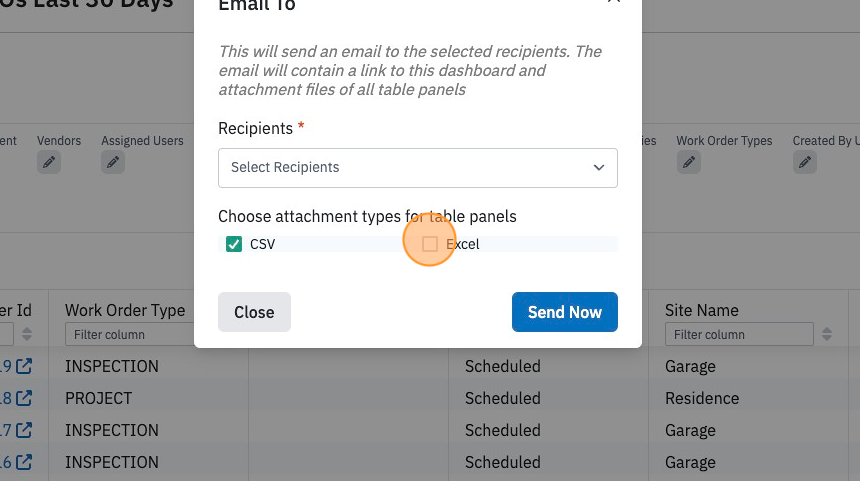
21. Click "Send Now" to send.
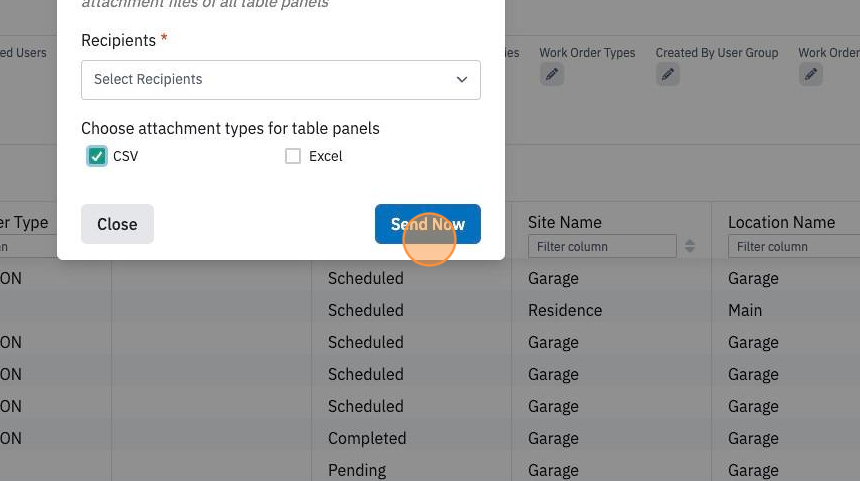
22. Click "Close" to cancel.
Delete
Delete
23. Click "Delete" in actions to delete a report panel.

24. A pop up warning will show and click "Delete Panel" or "Cancel"

Downloading
Downloading
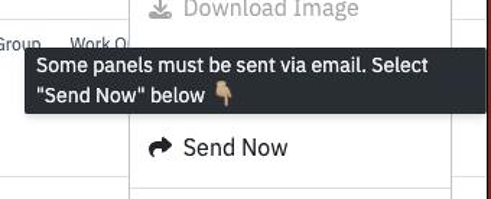
25. Depending on the panel type, you can download the image. To do so, under actions click "Download Image"

26. You will have the options to download the report as a PDF or PNG, or you can print or export the data to either a CSV or XLSX.
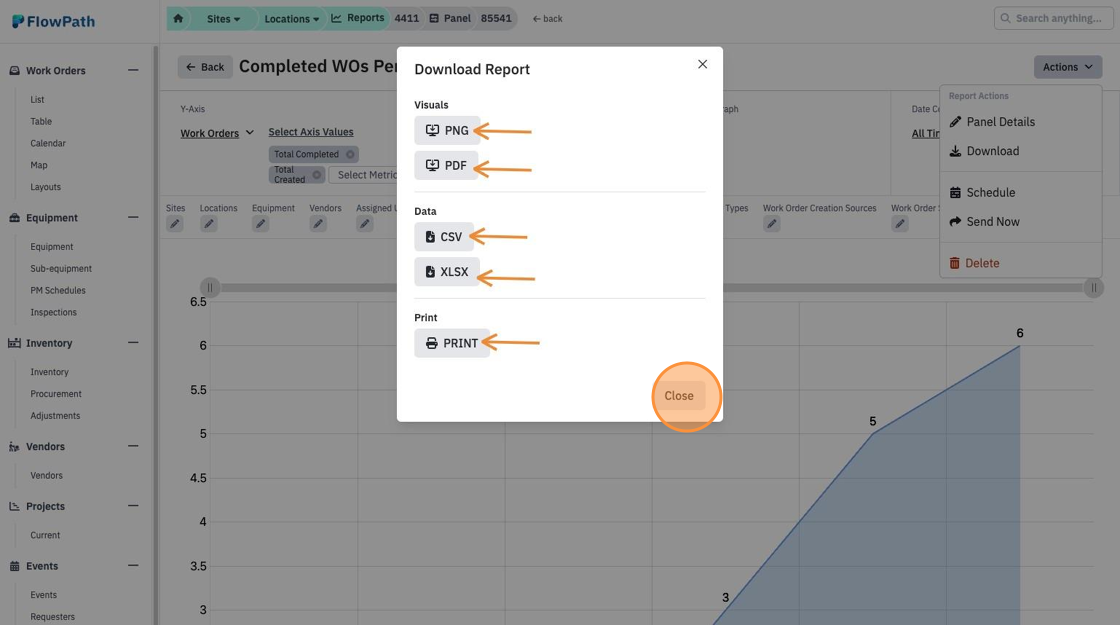
27. If you can not download it is because some panel types have to be sent via email. This will pop up if you can not download the specific panel type.