
Member Portals are an excellent solution for connecting with your members and providing them access to helpful information such as current demo club inventory, special order statuses, grip inventory, open online orders, and more.
Before setting up your Member Portals, it is important to review the Dashboard. This Dashboard is where you will manage, create, and view existing portals. On the Dashboard, you can access customizable templates, so you don't have to build your page from scratch. You can also create Member Portals for different seasons so your page is focused on what matters most.
In this article, we will discuss the Member Portal Dashboard, managing pages, how to add and apply templates for use, and creating new pages.
For more details on managing Member Portals, Click Here.
Member Portals Dashboard:
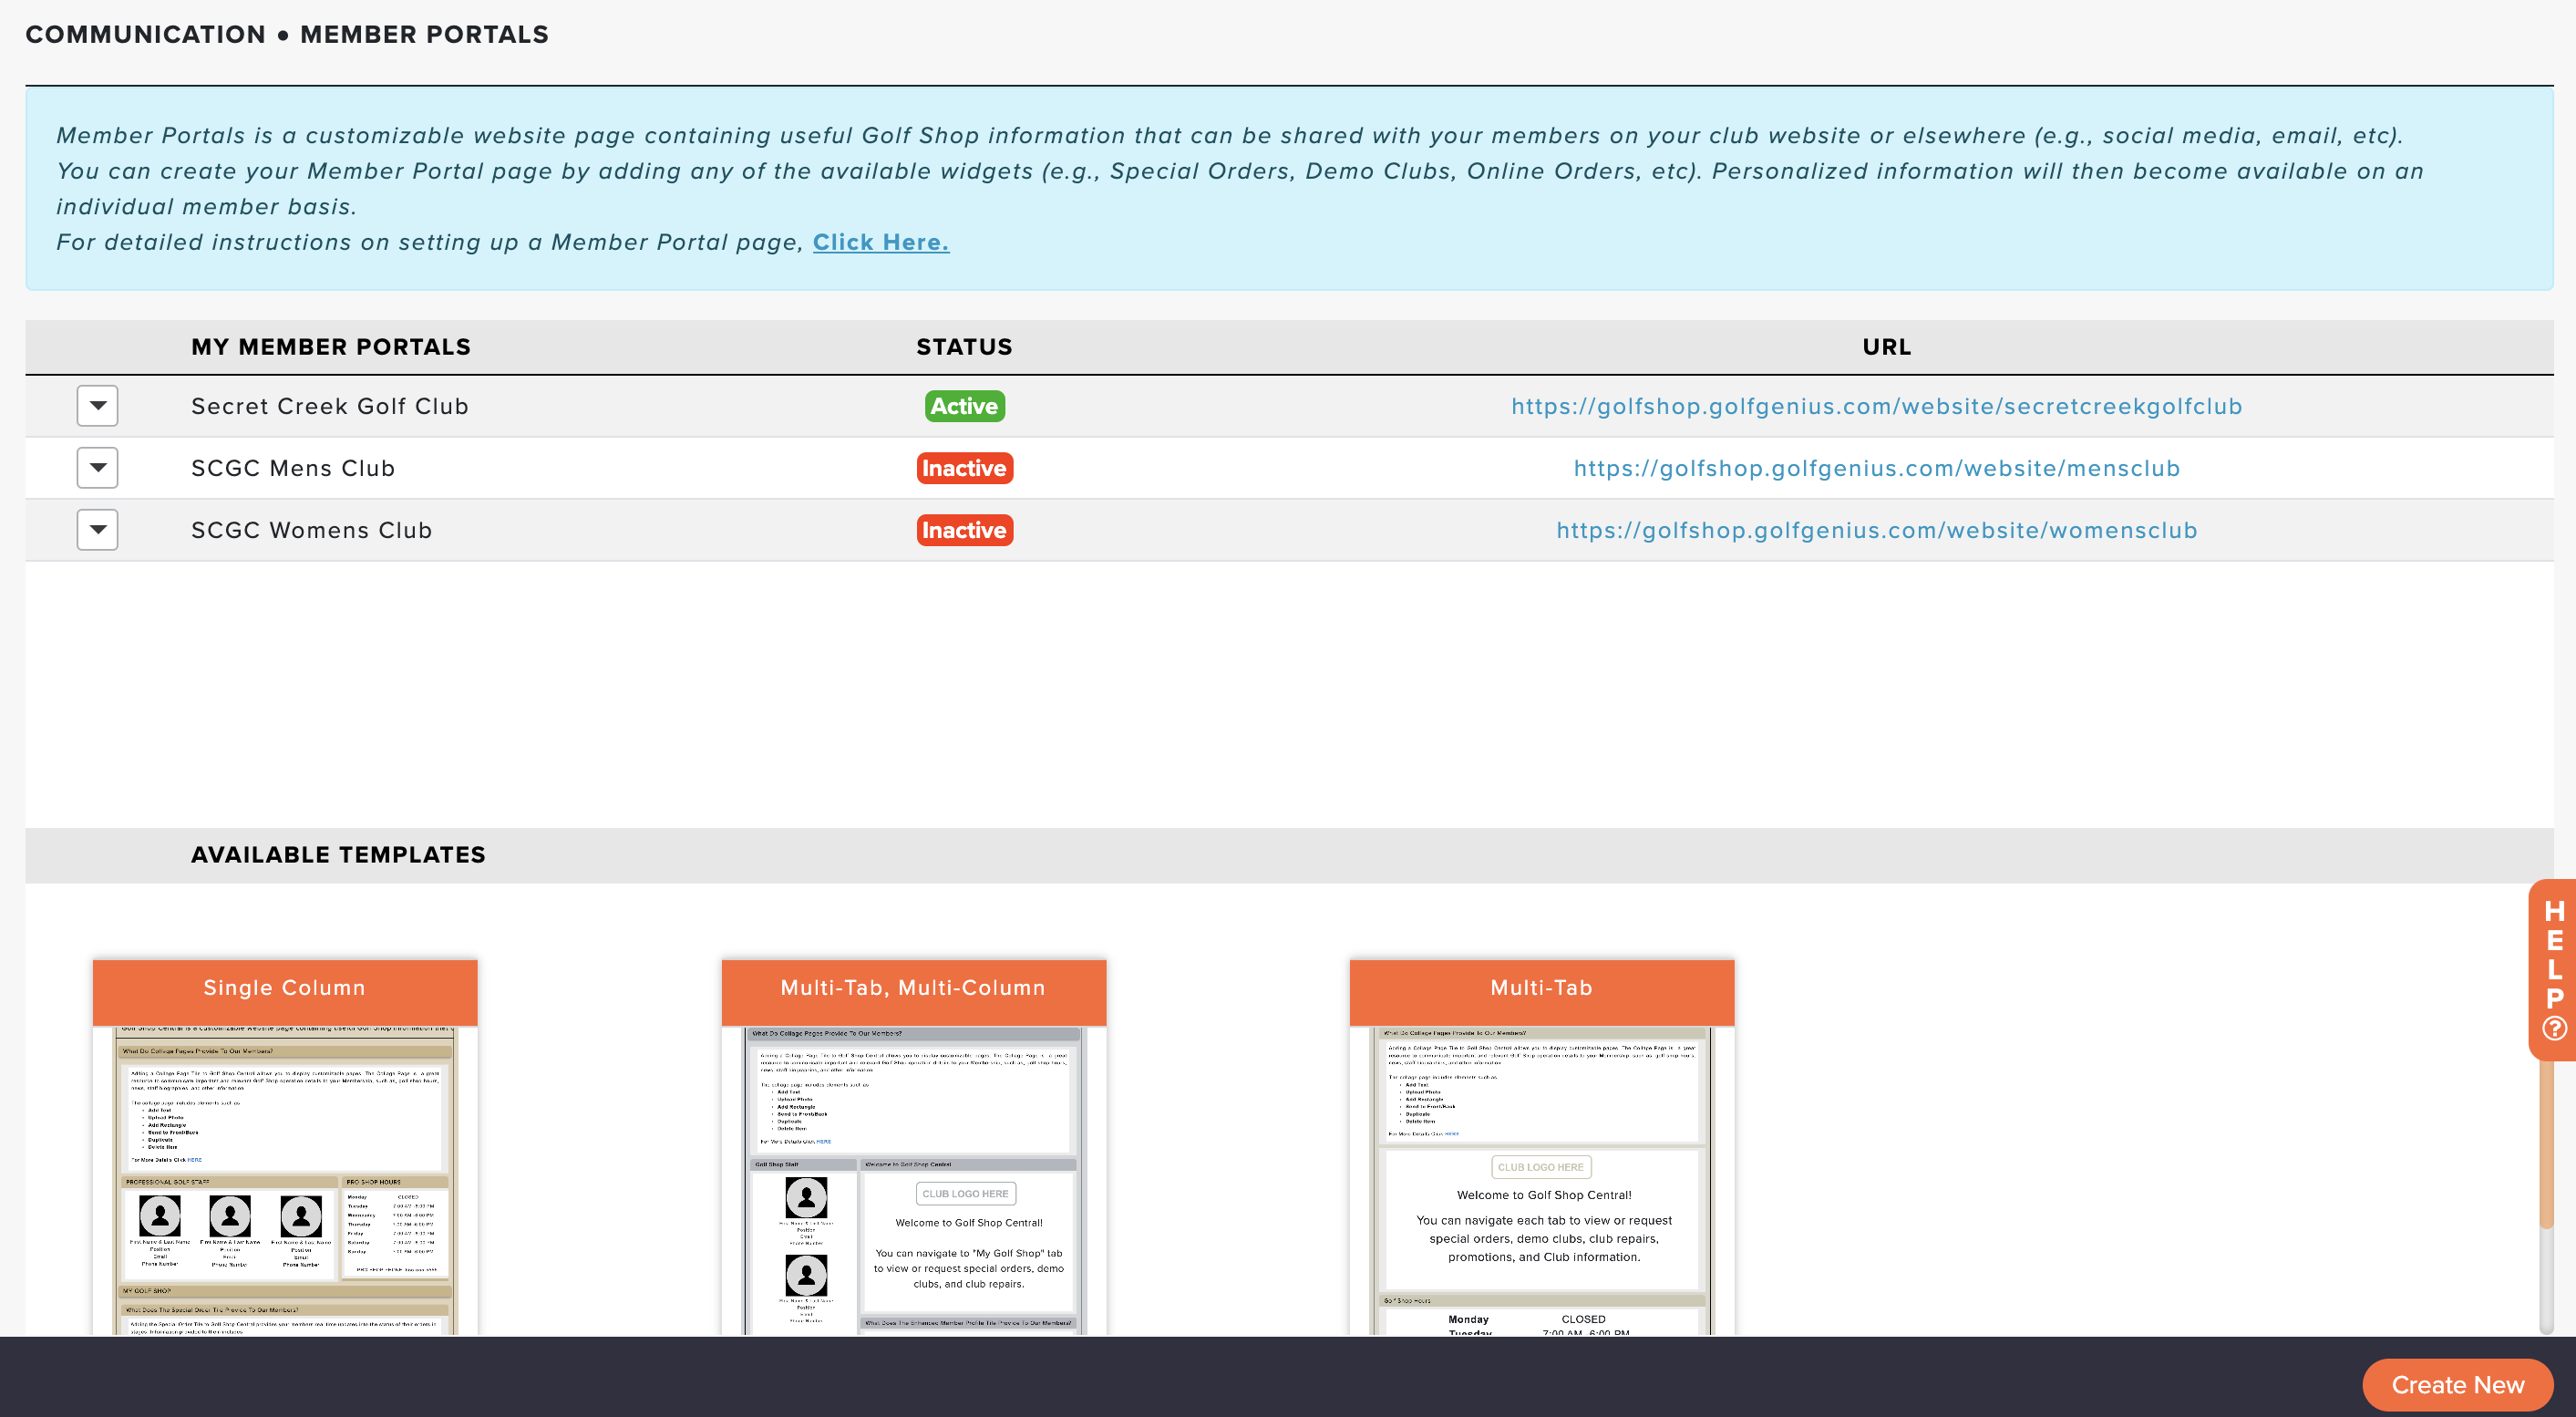
To access the Member Portals Dashboard, go to Communication > Member Portals (as shown below).
On the Template Dashboard, you will see two sections:
My Member Portals: Your Member Portals that you have built, that are ready for use.
Available Templates: Shared templates to use as inspiration, so you don't have to build a new page from scratch.
These sections will be discussed in greater detail later in this article.
Additionally, on the Dashboard, you will be able to take the following actions:
Create New: Create a new Member Portal from scratch. For more details on creating new portals, Click Here.
My Member Portals:
The My Member Portals list your created and available pages (as shown below). You can have several pages created and active (if you wish).

For each page, you will see the following:
Action Dropdown: This dropdown allows you to take the following action on that page:
Preview: View the page as a golfer would.
Edit: Edit the appearance of the page. For more details, Click Here.
Settings: Set the page settings and member access. For more information, Click Here.
Set As Active/Inactive: You can set the page as active or inactive. Note: Golfers cannot access the page when it is inactive.
Copy: Create a copy of the current page.
Delete: Delete the page. This option is only available for a page that is set as inactive. Note: Use caution when deleting templates, as they cannot be recovered.
Page Name: Name of the page as set in the Settings.
Status: Quick view to see if the page is active (green) or inactive (red).
URL: The URL of the page. This can be shared via email, the club website, and other locations so that members can access the page.
Available Templates:
To make setting up a Member Portal easier, select from different templates (so you don't have to build your page from scratch) and further customize from there (as shown below).
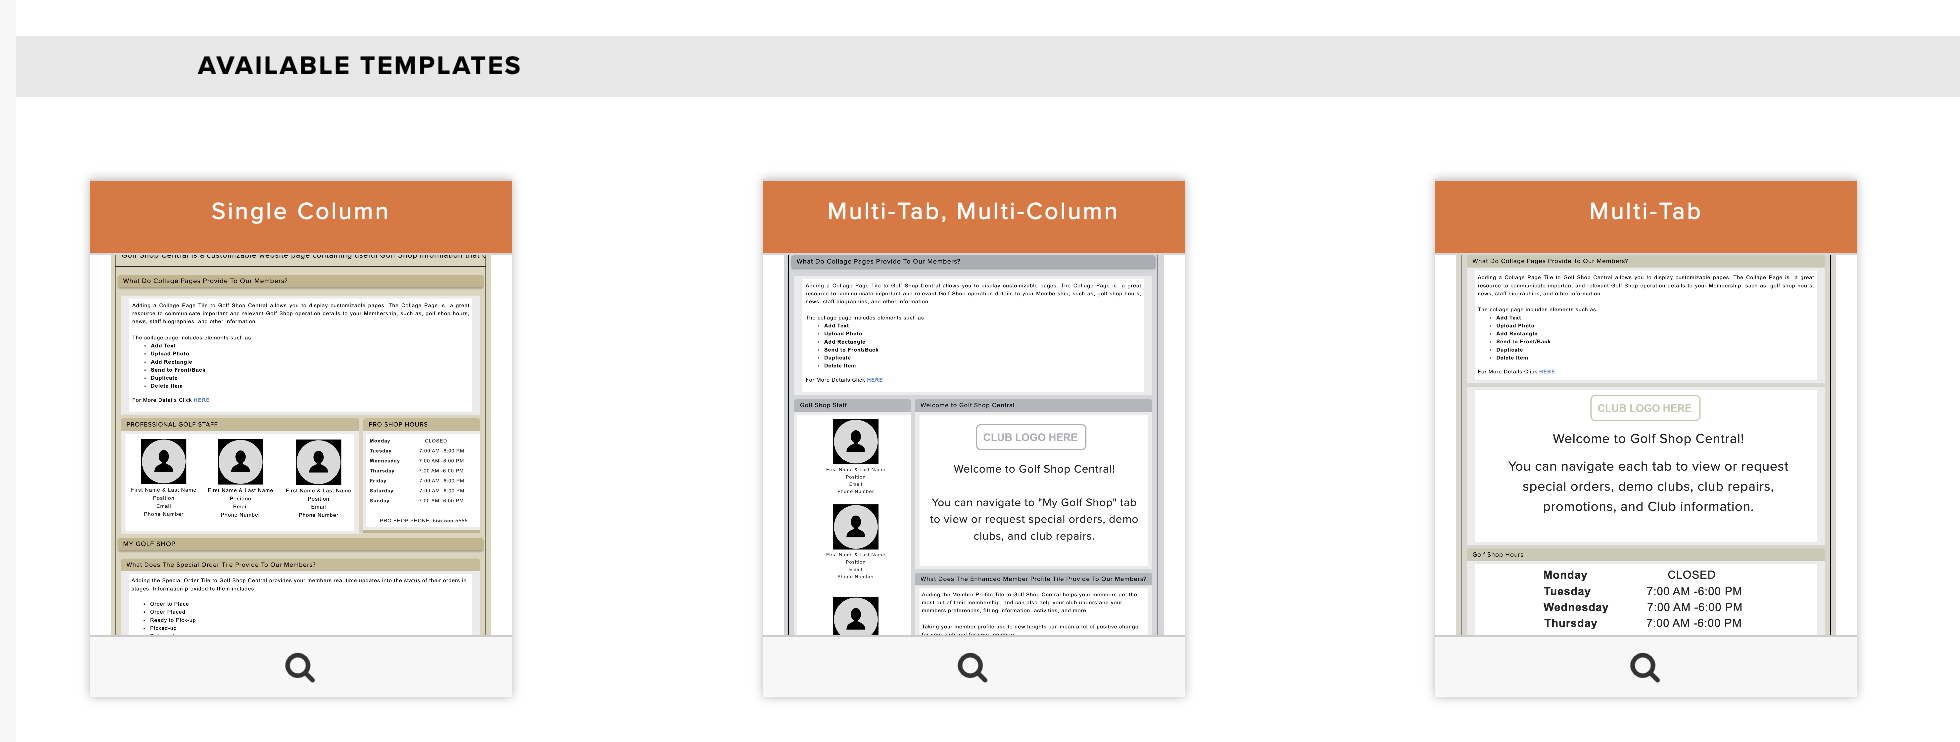
Additionally, on the Dashboard, you will be able to take the following actions by hovering your mouse over the available templates:
Add to my pages: Select this option to set this template as an available "My Member Portals" so you can edit and use the page.
Preview: View the template without setting the template to in use.
Activating and Editing Templates:
To activate and edit a Member Portal Template, follow these directions:
Go to Communication > Member Portals.
Hover your mouse over the template you want to set as active and click "Add to my pages."
Now that the page has been added to "My Member Portals," click the action dropdown for the new page and click "Edit."