The Order Document Composer is a reporting tool that allows you to design custom special order reports on 8.5"x 11 or A4 size paper. When using this tool, you can add text, data fields, images, and other objects anywhere on the page. The Order Document Composer, similar to the Page Composer, offers extensive customization in building reports for special orders and club repairs.
What's the difference between the Order Document Composer and Page Composer? Click Here for the answer.
When using this feature, keep the following in mind:
Reports can currently only be generated with special order or club repair details.
The reports can only be one page.
The information included in a generated report is specific to a single order. In other words, reports can be created to include information for a single order but not across multiple orders.
While you have the ability to create a new report from scratch, templates will also be available that can be copied and customized to fit your operation's needs.
In this article, we will discuss how to use the Order Document Composer when creating from scratch or using our templates.
Order Document Composer Templates
To access the Order Document Composer templates, go to the Report Center and select either the Special Order or Club Repair Category. Default templates will be shown with a blue banner, and user created documents will be shown with an orange banner (as shown below).

The following templates will be available to you:
Special Order Templates:
Special Order Details: This internal report template includes important information regarding the special order item and vendor.
Customer Order Confirmation: This report (intended for your members) includes order confirmation details. For easy communication, it can be automatically attached to the "Order Placed" automated email and linked in the automated text message to the member.
Club Repair Templates:
Club Repair Details Report - Offsite (PDF): A professional detail club repair report for club repairs performed offsite. This report includes relevant information such as customer details, repair items, services performed, pricing, and repair status. This report can be customized by copying it. For details on
Club Repair Details Report - Onsite (PDF): A professional detail club repair report for club repairs performed onsite. This report includes relevant information such as customer details, repair items, services performed, pricing, and repair status. This report can be customized by copying it.
By hovering over one of the templates, you can print or copy any of the available templates. If you wish to edit a template, copy it, customize it, and this will create a user-created page that you can edit later. Any user-created page can be copied, edited, or printed.
Creating a New Document
If you would prefer to create a report from scratch, from the Report Center, click "New Report" and select either the Special Order or Club Repair Document Composer (as shown below).

When creating or editing a report, you will be directed to the design page (as shown below).
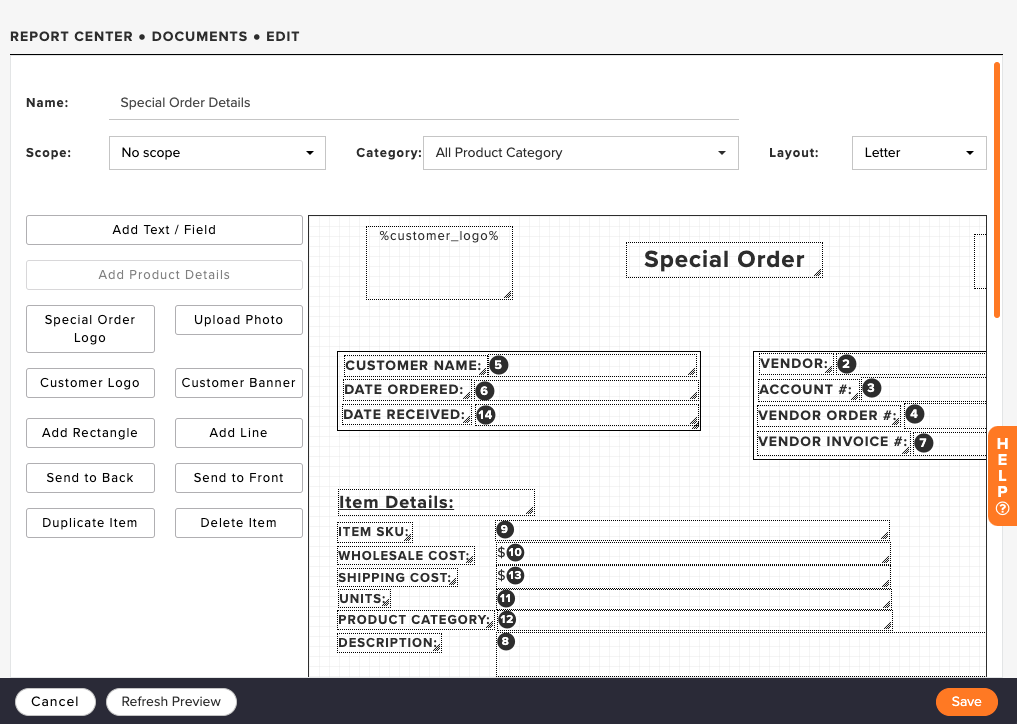
General Design Page Options
Name: The name of the report will be visible on the Report Center.
Unique to Special Orders:
Include in Order Placement Email to Members: When selected, the report will be available to be included in the "Order Placed" email or text message to the member. Click Here for more details.
Category: If the report is applied to the "Member Emails" scope, you can select which product categories will apply to the report. For instance, you can create a Soft Goods and Hard Goods order confirmation report.
Unique to Club Repairs:
Use in Repair Location: Select if this should be available for Onsite or Offsite repairs.
Layout: Select the paper size. You can select Letter (8.5"x11") or A4.
Using the Canvas
The canvas (shown below) will be available on the right.
Gridlines will be visible to make it easier to align objects. On the canvas, you can:
Click and drag the objects to move them in place anywhere on the canvas.
Resize the objects by clicking and dragging the object corners.
Adding Text and Data Fields
To add any text or data fields (e.g., member name, Item SKU/Style #, Vendor Account #, etc) to the report, select "Add Text / Field". Enter the text in the rich text editor or select the desired data field on the left. Format the text/field as desired.
In the example below, a combination of text and data fields is being added.
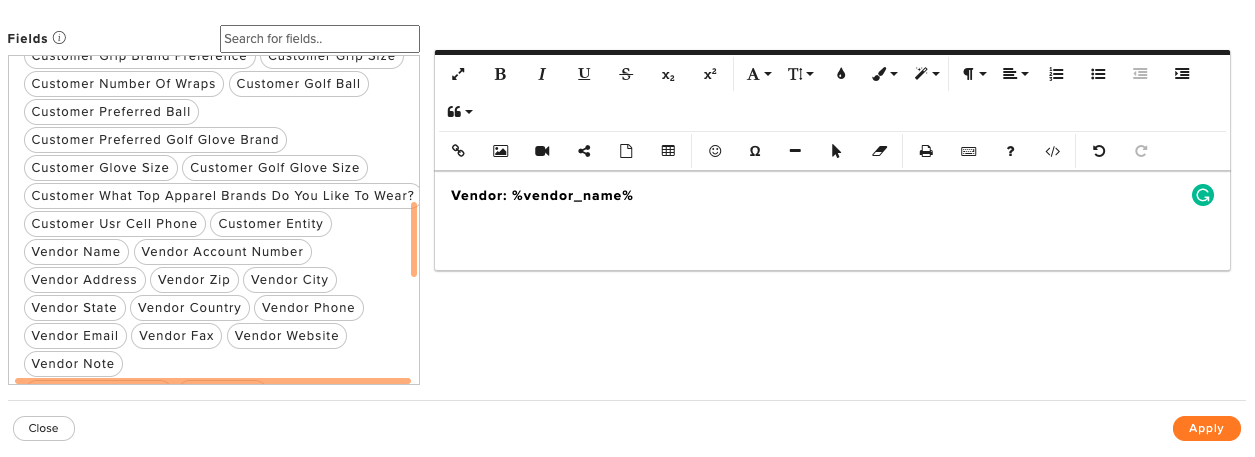
Once the text/field is entered and formatted, click Apply. It will then be added to the canvas where it can be moved and resized appropriately.
Adding Item Details
If product detail custom fields are used to contain item information, then you can display the custom fields on the form by adding this object. Follow these instructions:
Click "Add Item Details" to add the object to the canvas.
Adjust the size of the new object on the canvas appropriately. If there are many product detail custom fields, the object size will need to be large enough to accommodate all.
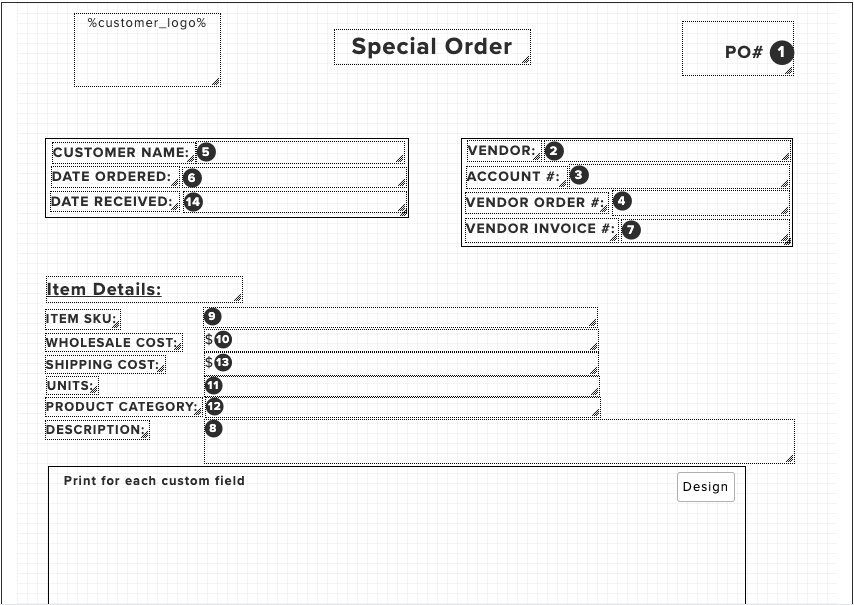
Select the layout type (1 column or 2 columns of fields) then click on "Design" (as shown below).

Adjust the vertical size of the canvas by clicking and dragging (on the right). Generally, you will want a narrow canvas size that will just capture the text.
Click "Add Text/Field".
Add the "Custom Field Name" data field to the canvas. This will display the name of the custom field (e.g.,Loft, Size, Color, etc). Format the text appropriately.
Add the Custom Field Value" data field to the canvas. This will display the answer to the custom field (e.g., 9.5 Degrees, Medium, Red, etc). Format the text appropriately.
Click "Apply"...

The item details will then be added. Below is an example of formatting the item details.
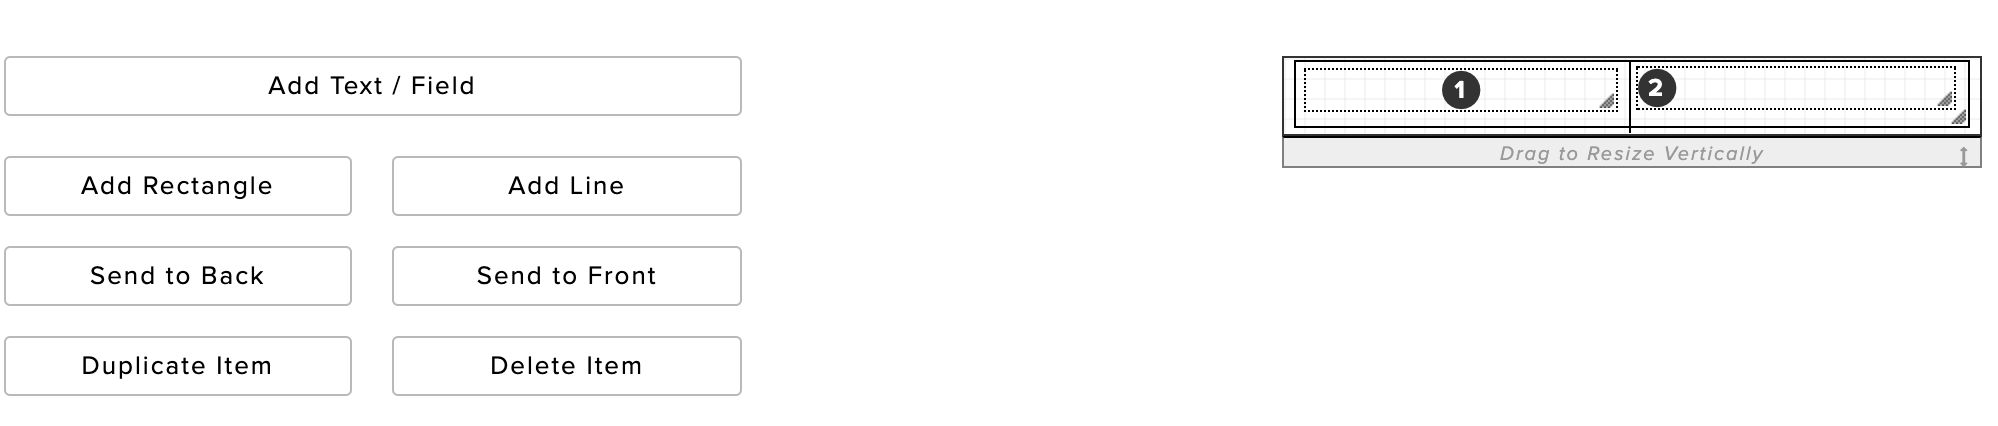
The "1" field represents the custom field name and the "2" represents the custom field value. There is also a border around both fields. Below is what the fields will look like on the report using the example format above with a two column layout.

Adding Logos, Banners, and Other Images
To add color to the report, you can add the following:
Special Order Logo: If there is a logo attached to the special order (typically club logo), then this can be attached to the report.
Photo: You can upload any photo from your computer to be included in the report.
Customer Default Logo: You can add your club/account logo to the report by selecting this option.
Customer Default Banner: You can add your club/account banner to the report by selecting this option.
Adding Lines and Rectangles
You can also add the following objects to the report:
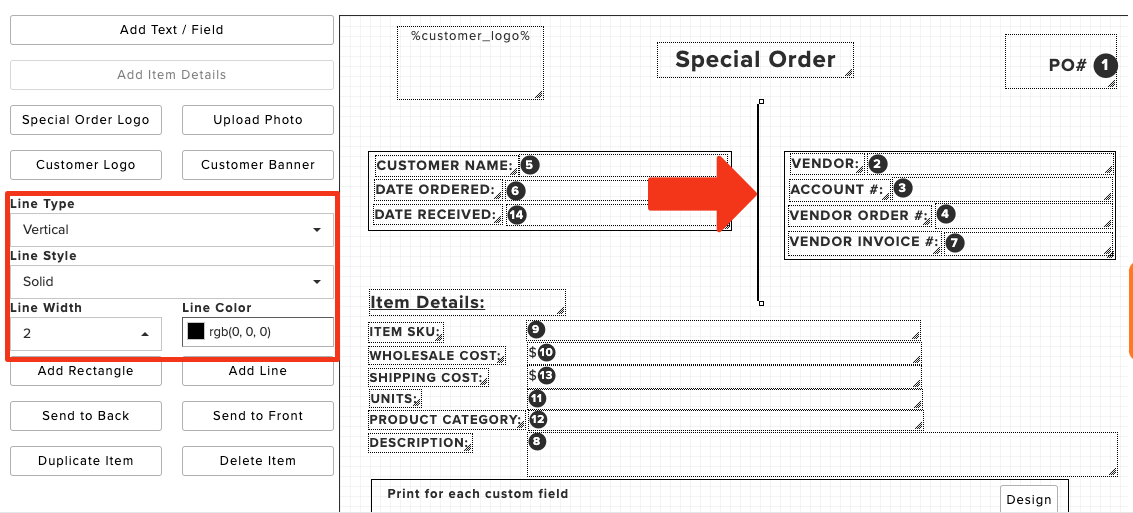
Lines: You can add vertical or horizontal lines anywhere on the report. You can also format the line to adjust the thickness and color. To shorten or lengthen the line, click and drag the ends of the line. In the example below, a vertical black line is being added to the report.

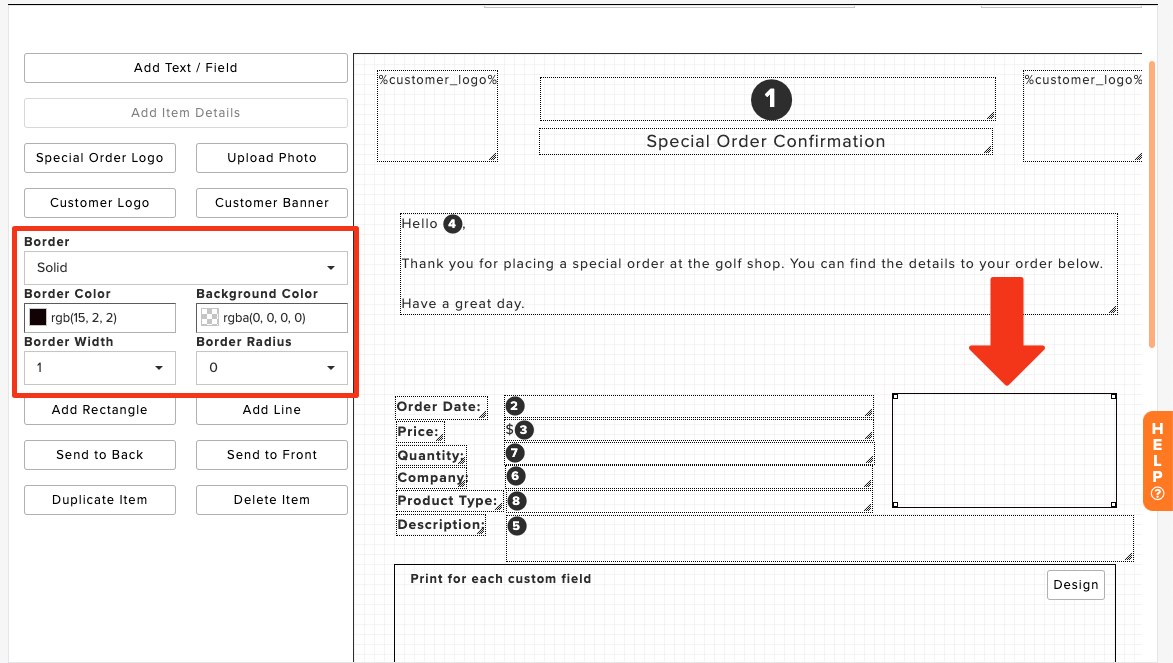
Rectangles: Adding rectangles allow you to create borders and cells within the report. You can also format the rectangle to adjust the thickness and color. To resize, click and drag the rectangle corners. In the example below, a black rectangle is being added to the report.

Other Actions
Send to Back: With two or more objects overlap on the canvas, one will block the other(s). By sending an object to the back, it will get moved behind the other objects.
Send to Front: This action is similar to the "Send to Back" function but will send the object to the front.
Duplicate Item: If you'd like to duplicate an object already on the canvas, select the object then click "Duplicate Item". The duplicated item will then be placed on the canvas.
Delete Item: To remove an object from the canvas, select the object and click "Delete Item".
Previewing and Generating Reports
While designing reports, you can generate a preview at any time by clicking "Refresh Preview" (as shown below). The report preview will then be generated below the canvas.

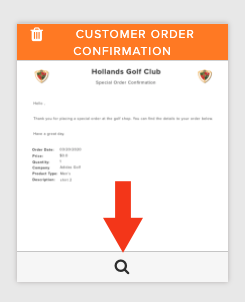
When viewing the Report Center, you can also click on the magnifying glass (as shown below) to get a quick preview of any report.
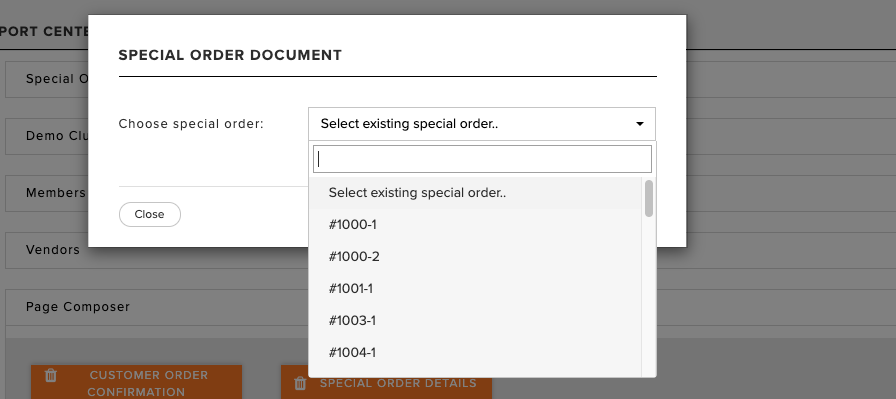
To generate a report, hover over the report, click "Print", then configure the report (as shown below for a special order).