
This feature is only available with the following products:

The Multi-Widget page allows managers to create a single page with a flexible layout that can include multiple tabs, blocks, columns and tiles. Each tile includes content from a portal page. By organizing content into one Multi-Widget page, players may find it easier to navigate and quicker to load.
A Multi-Widget page can have a single tab or multiple tabs. Within each tab can be one or more blocks. Blocks can have a single column or two columns. Within each column can be one or more tiles (which holds the content).
Below is an example that illustrates the structure:
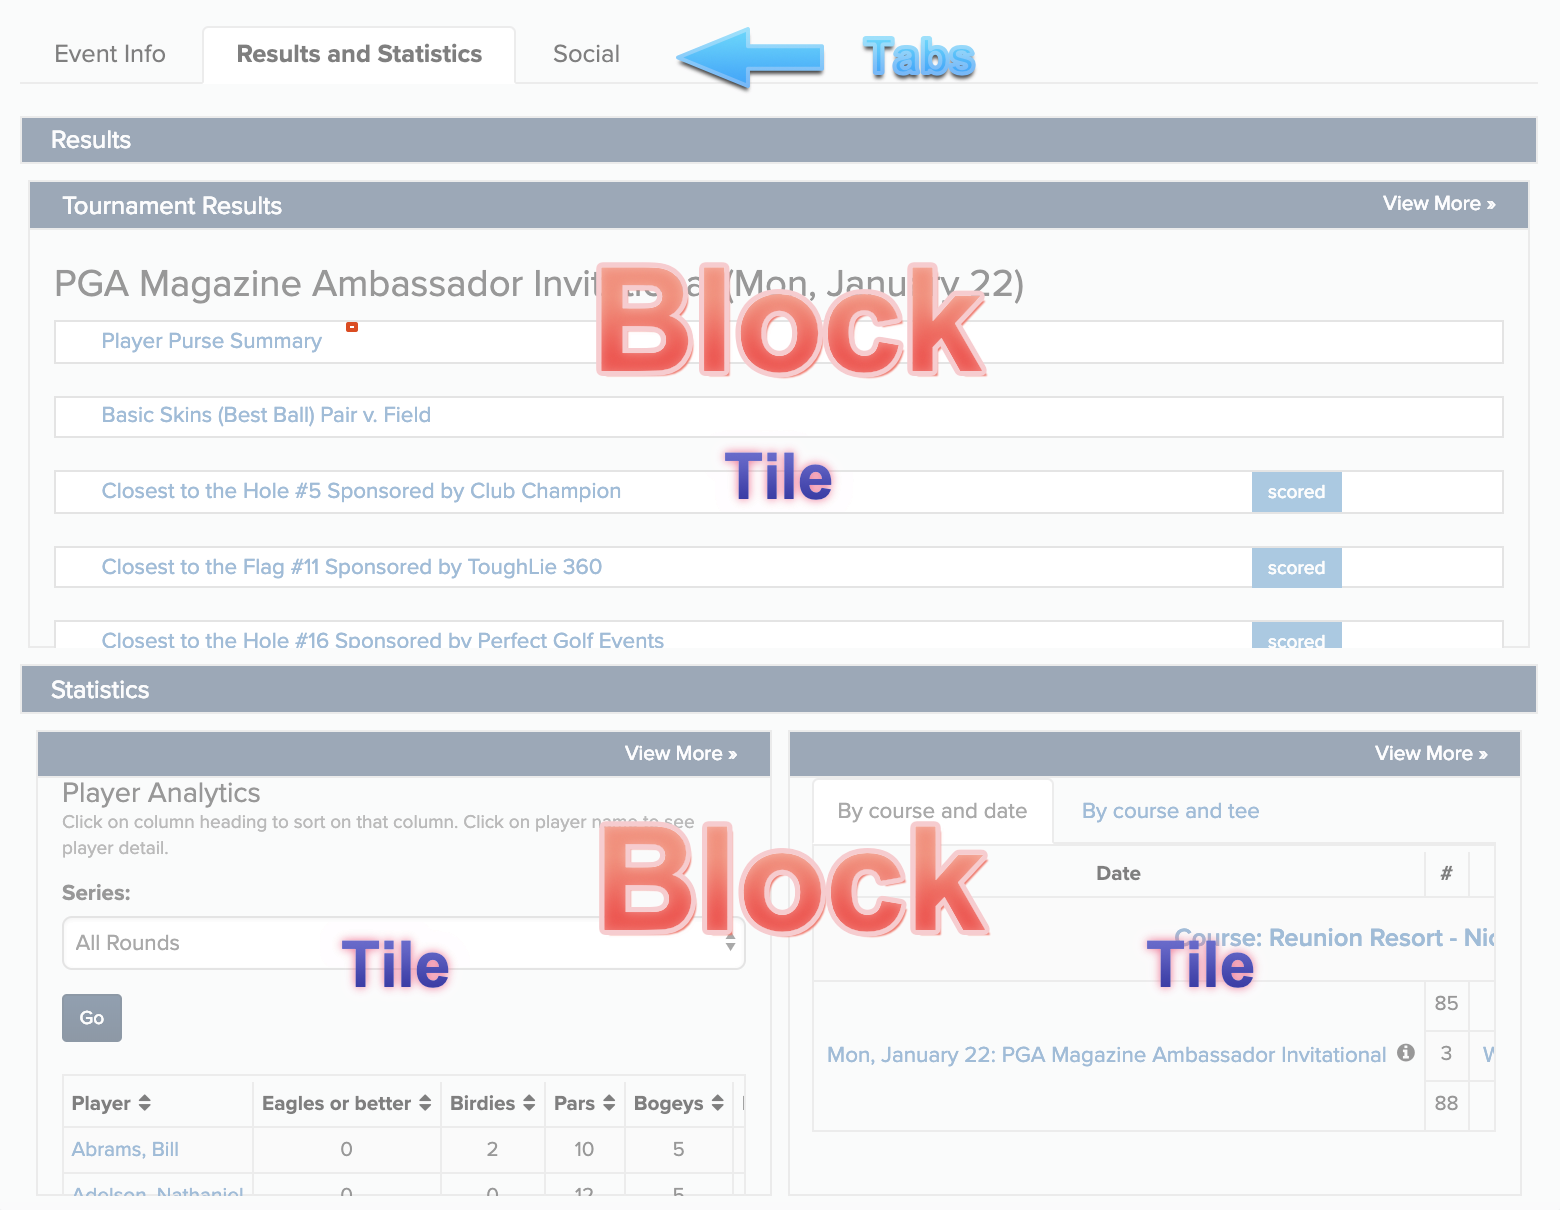
In the example above, there are three tabs (Event Info, Results & Statistics, and Social). Within the Results & Statistics tab, there are two blocks. The first block contains only a single tile. The second block contains two tiles organized into two columns.
When designing a portal with a Multi-Widget page, you can continue to organize pages by section (as shown below).
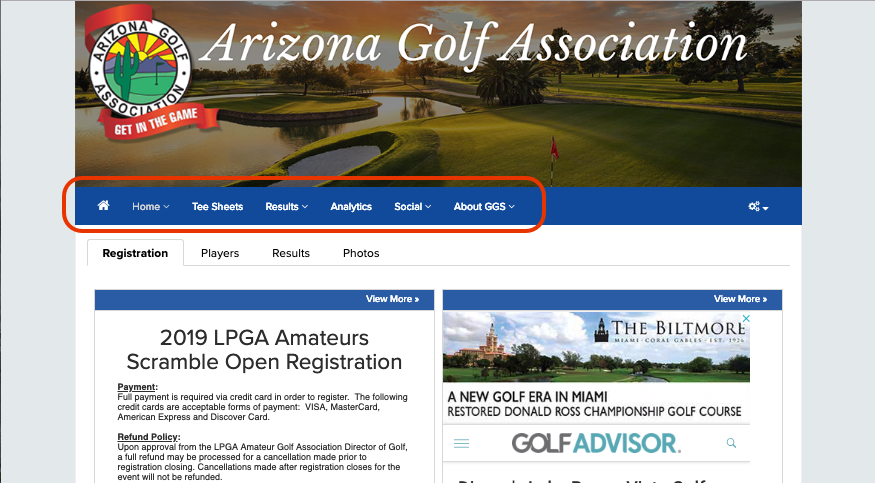
As an organizational alternative, you can organize all of the portal content into a single Multi-Widget page (without sections). This organization can make navigation quicker and easier giving it a "one-stop shop" feel (as shown below).

To create and design a Multi-Widget page, the following steps must be taken:
Add Multi-Widget Page
Add one or more tabs
Add one or more blocks within each tab (with one or two columns)
Add one or more tiles within each block.
You can find detailed instructions for each step below.
Add the Multi-Widget Page:
To add a Multi-Widget Page, follow these instructions:
Go to the section you'd like to add the page. If creating a portal that will have no sections, you can select any section for now.
Click "New Page".
Select the "Multi-Widget Page".
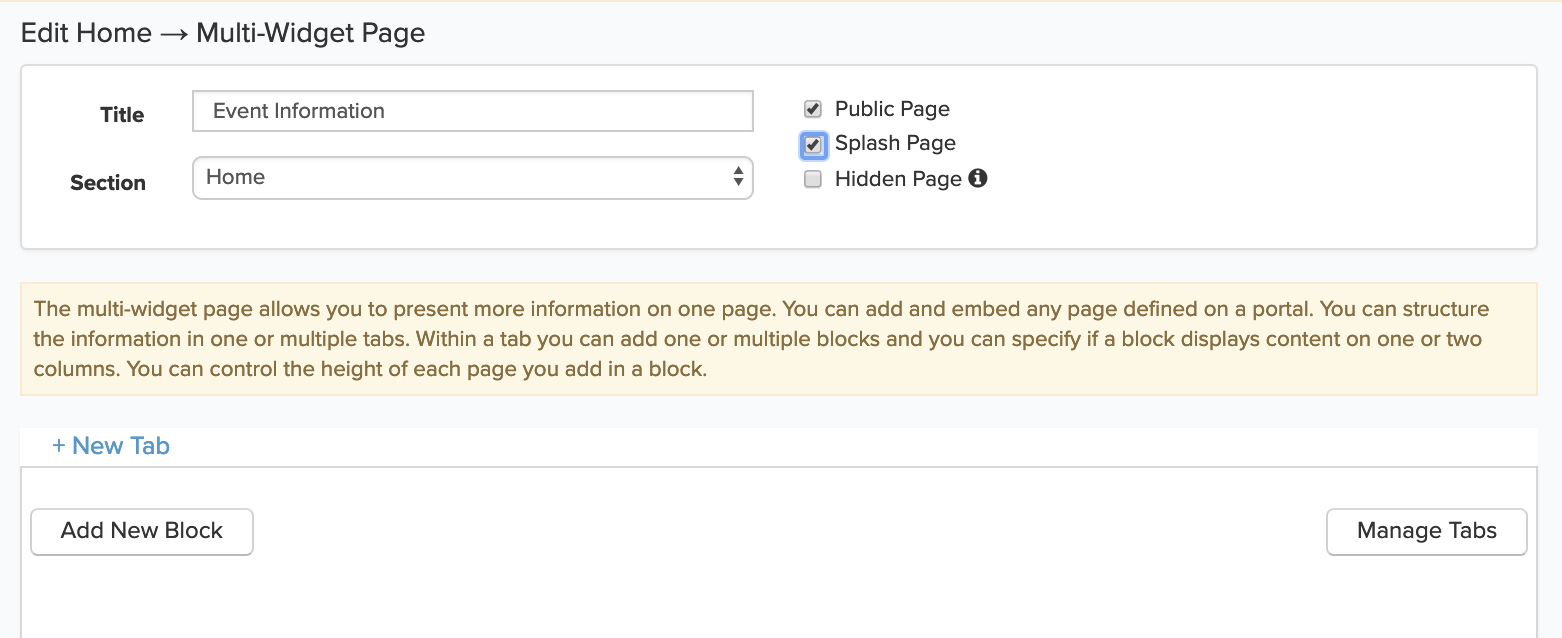
Name the Multi-Widget page. If you are creating a portal with no sections, make the page your Splash Page and mark it as a Public Page.
In the example below, a Multi-Widget page with the name "Event Information" is being set as the Splash Page and made a Public Page.
Add Tabs:
After adding the Multi-Widget page, you can start adding tabs. Tabs allow you to organize widgets so they are not all listed on one page. If you do not want multiple tabs (and would like to include all widgets on one page), you can skip this step.
To add tabs, follow these instructions:
Click "New Tab".
Name the tab.
Click "Save"
Repeat the previous steps for any remaining tabs.
The sequence below shows the process of adding multiple tabs:

You can also edit the tab names and re-order them by clicking "Manage Tabs" (as shown below).

Add Blocks:
After adding your tabs (if necessary), the next step is to add one or more blocks within each tab. These blocks contain one or more tiles (which includes the widget content). There is no limit on how many tiles are included in a block. Every block can also have an optional title and be organized into one or two columns.
To add a new block, follow these instructions:
Go to the tab where you'd like to add the block.
Click "Add New Block".
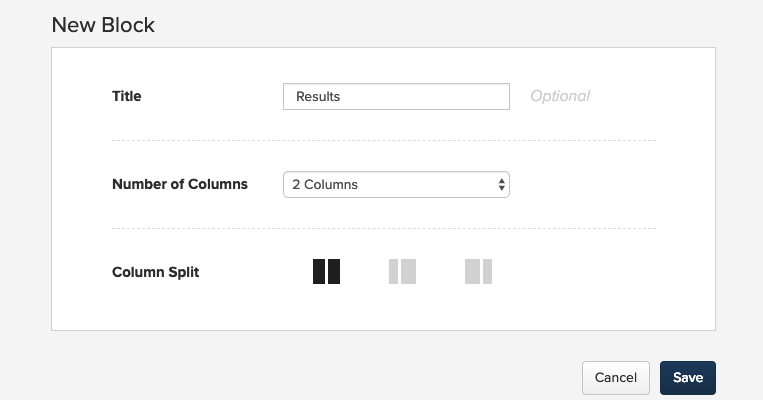
Name the block (optional). A title bar is created for every block which helps identify the content in each block as well as create some separation in between blocks. If adding a block name, the name will be included in the title bar. Otherwise, it will be empty.
Select the number of columns for the block. If selecting two columns, you can also select one of the split options which includes an even split and offset splits (as shown below).

Click "Save".
The sequence below shows the process of adding an untitled block with one column in the "Leaderboard" tab.

The sequence below shows the process of adding two (two-column) blocks in the "Sponsors" tab.

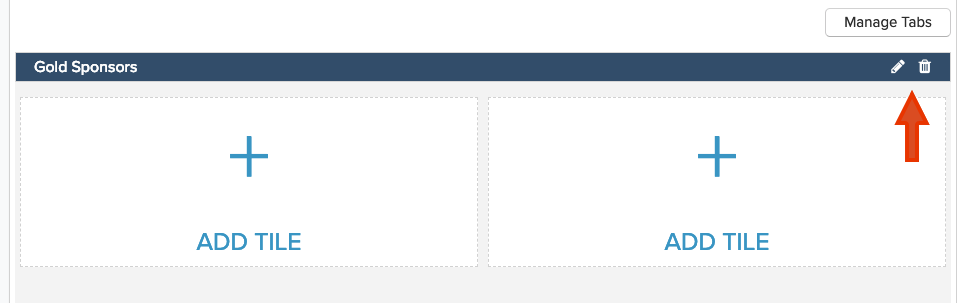
Also note that you can edit any block title or delete the block and its content entirely (as shown below).
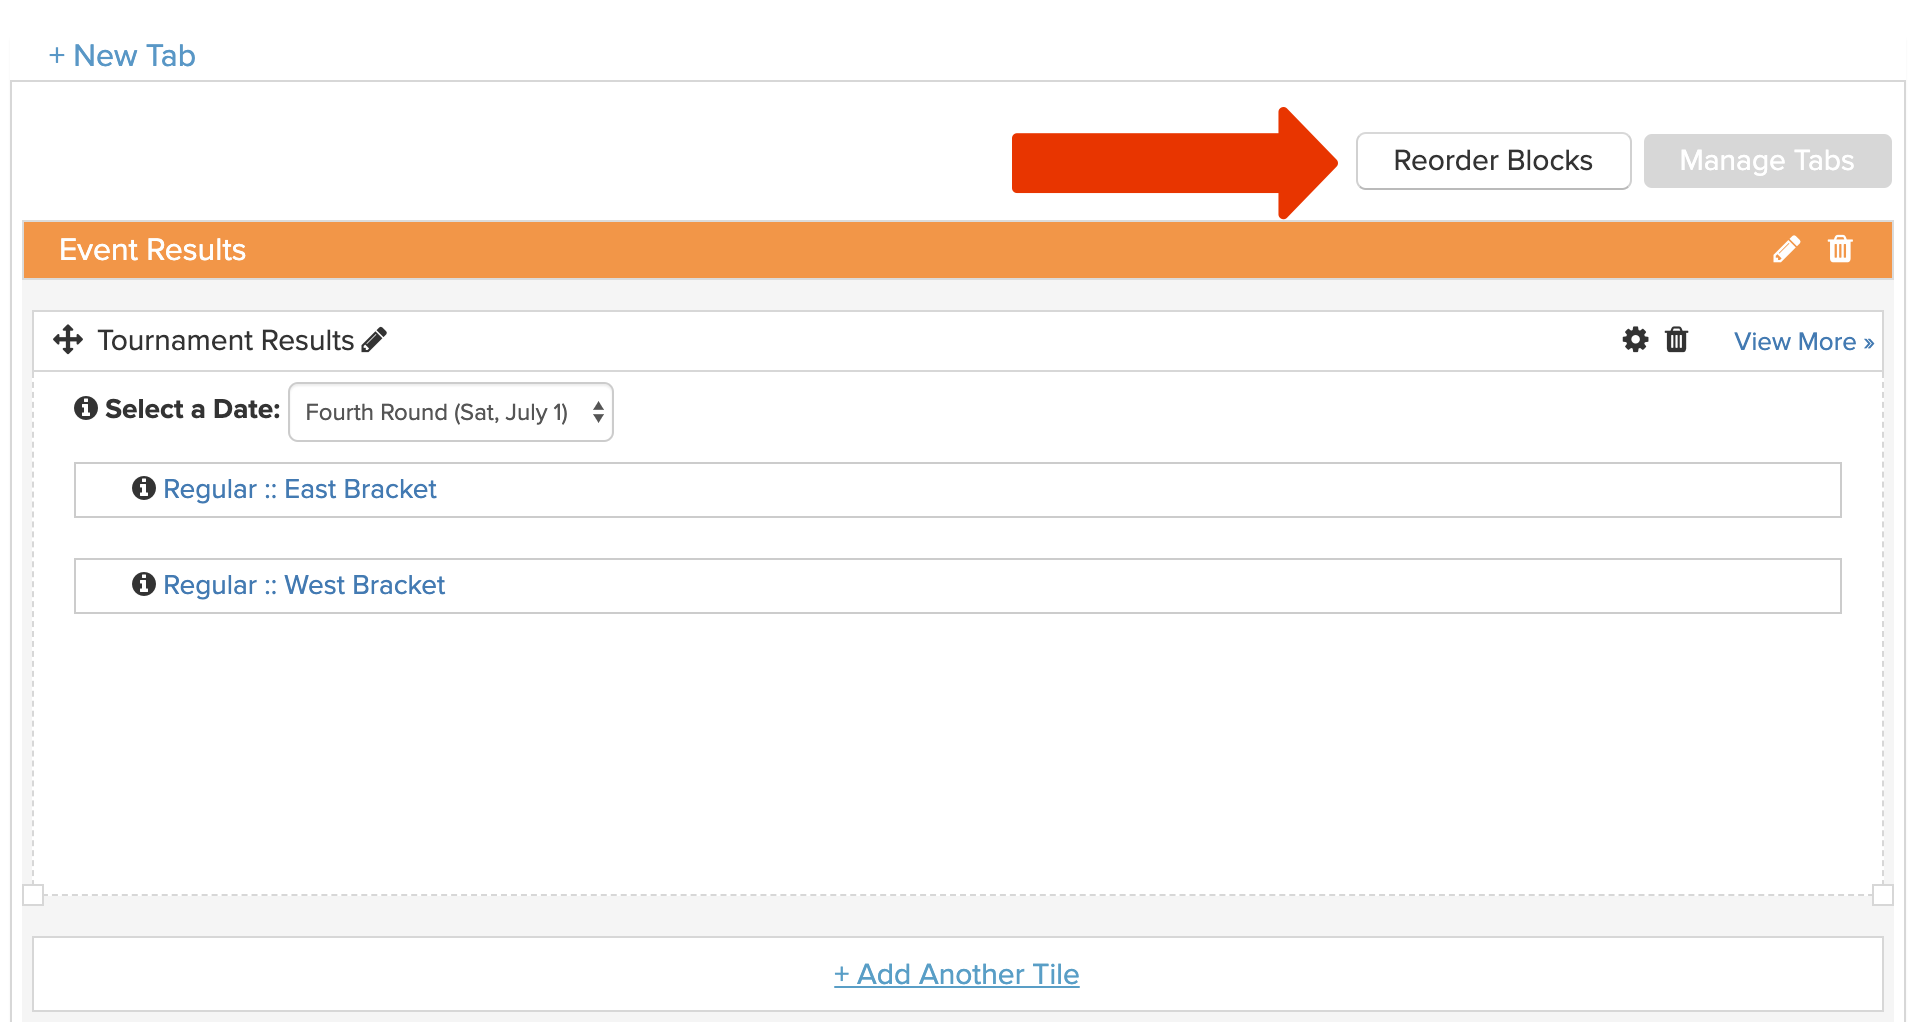
If you have multiple blocks in a tab, you can also reorder the blocks if necessary (as shown below).
Add Tiles:
After adding blocks to your Multi-Widget page, you can insert tiles into the blocks. Every tile holds content from a widget (portal page). These tiles are stacked vertically as they are added within a block.
When adding a tile, you can insert content from an existing page on the portal or you can create a new page.
To add a tile that includes content from an existing page, follow these instructions:
Click "Add Tile" in the desired area of the block.
Select an existing page.
Change the title (if needed). By default, it receives the name of the original portal page.
Select/Unselect to show the "View More" link. This link is placed on the top of the tile (as shown below) and forwards the viewer to the actual portal page (within the portal).

Click "Save".
The sequence below shows the process of adding an existing page to a tile:

To add a tile that includes content from an new page, follow these instructions:
Click "Add Tile" in the desired area of the block.
Select "Or add a new page".
Click "Add new page".
Select the new page from the list of portal page options.
If the page requires configuration or customization (e.g., collage pages, text pages, tee sheets, etc), build and customize the page as needed then save the page.
The sequence below shows the process of adding a new page to a tile.

Tiles can also be moved throughout a block by clicking and dragging the "move icon" on the top left of the tile (as shown below).

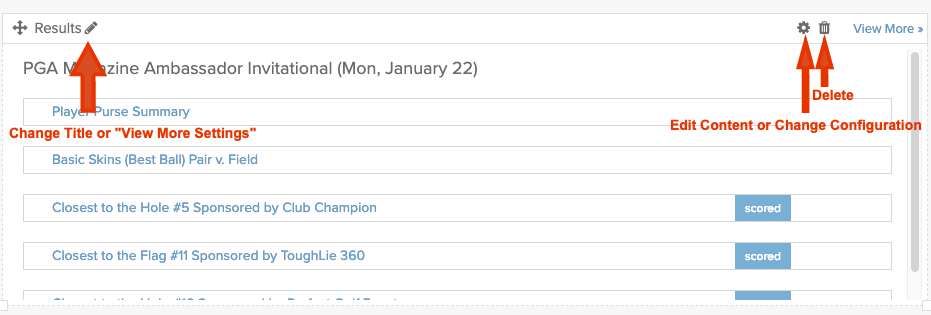
You can also make the following changes to a tile:
Change the title.
Change the "View More Link" setting.
Edit the tile content (for collage pages, text pages, etc) or configuration settings (for tee sheets, etc).
Delete the tile.
And finally, you can increase or decrease the tile height to expand the content area within a tile (as shown below).
