
This feature is only available with the following products:

Our customers generally use portals of similar design for all of their events. Each portal typically includes an event information page describing the details of the event.

Event information differs for every event. Rather than creating event information pages for every event portal from scratch, you can create and use a Default Event Description. When using this feature, the description can be placed in all of your portals, replacing the need to enter the specific event information for every portal.
In this article, we will discuss how to create and use the Default Event Description for your portals.
Creating your Default Event Description:
To create your Default Event Description, go to Customer Center > Customer Settings > Default Event Description. Using our Collage Editor (as shown below), you can create your Default Event Description. On the left, all of the editing tools will be available. On the right, you can add the content.

One of the key steps in creating a Default Event Description is adding dynamic fields (fields that change for each event). To do this, click "Add Text" (in the screen above).

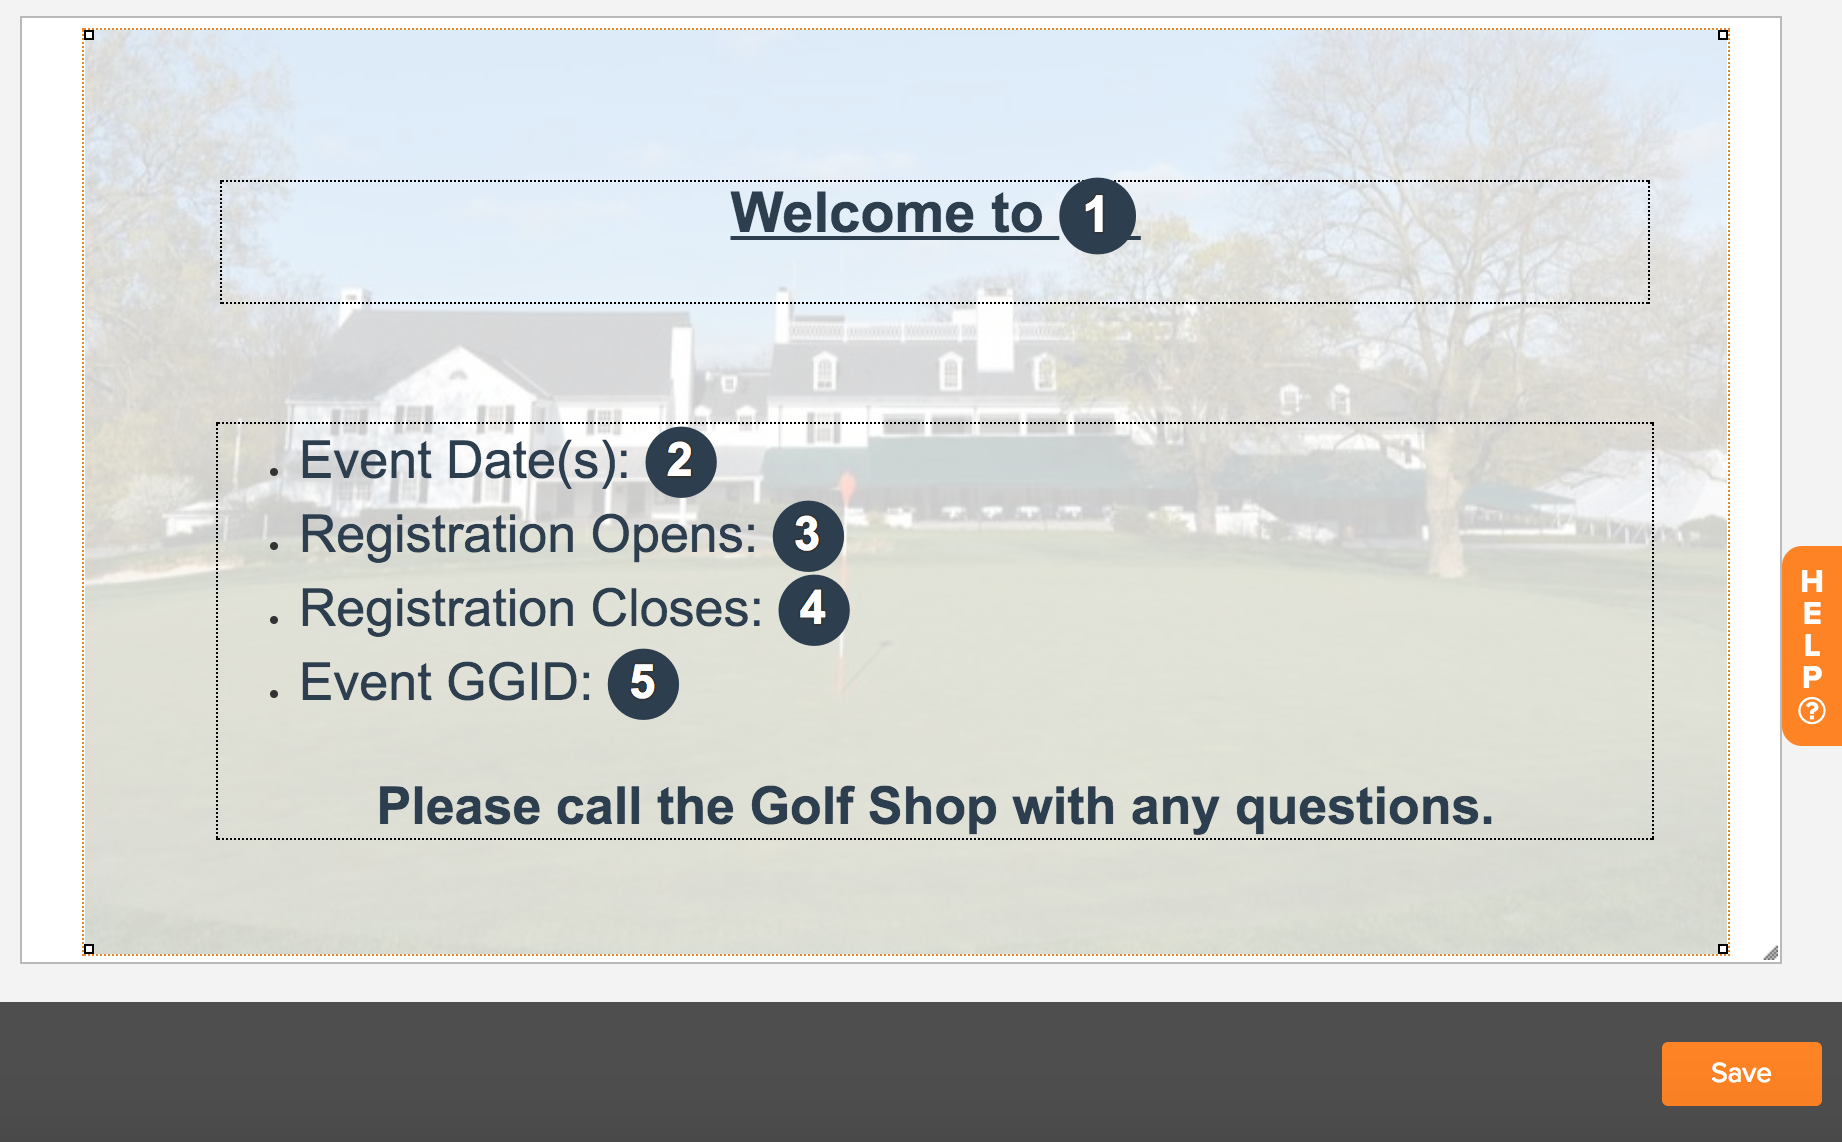
The dynamic fields will be listed above the text editor. Enter the text to your Default Event Description and insert any dynamic fields where necessary. See the sequence below as we create a Default Event Description using dynamic fields.
When finished entering the text and dynamic fields, click "Apply Text Changes". Click and drag the text to the necessary area on the Collage Page. (Note: The dynamic fields will be replaced with number placeholders while in preview mode.) Add any other content in the collage page like images, lines, and rectangles.
When finished, save the description. For more details on using the Collage Editor, Click Here.
Adding the Default Event Description to your Portals:
After creating the Default Event Description, you can then add it to your portals. We suggest adding the Default Event Description to your Default Portal. By doing this, all future events that are created, will have the Default Event Description automatically included. However, you can also add the Default Event Description to individual event portals.
Follow the instructions below to add your Default Event Description to your Portal(s):
Go to the Default Portal or the specific event portal.
Go to the section where you'd like the Default Event Description and add a Collage Page.
Rename the Collage Page (e.g., Event Information, Event Details).
Click "Add Text".
Insert the "Default Description" dynamic field into the text. Click "Apply Text Change".
Save the Collage Page.
The Event Description will now be listed on that Collage Page. The sequence below shows the steps to add the Default Event Description to a portal.

For more details on customizing your portals, Click Here.
Making Changes to the Default Event Description:
The Default Event Description can be edited at any time by going to Customer Center > Customer Settings > Default Event Description. Any changes made to the Default Event Description will propagate to all of the of the portals that include the Default Event Description.
Also remember that any changes to the dynamic fields (e.g., event date, event name, registration open time, registration close time) for an event will also propagate to that event description. For instance, If the registration open time is changed in the event (Event > Registration Form), that change will also update on the dynamic field in that event portal.