
After uploading your demo equipment inventory, you can issue clubs and components (e.g., heads, shafts, range finders, etc.) to members and guests. Issuing demo equipment is simple using one of the following options:
Manually on a Web Browser.
Handheld Scanner attached to a Computer.
The Mobile app. For details on issuing demo equipment from the mobile app, Click Here.
In this article, we will discuss how to manually issue demo equipment on the web browser or with a handheld scanner.
Issuing Demo Equipment Manually on a Web Browser:
To issue a piece of demo equipment manually, follow these instructions:
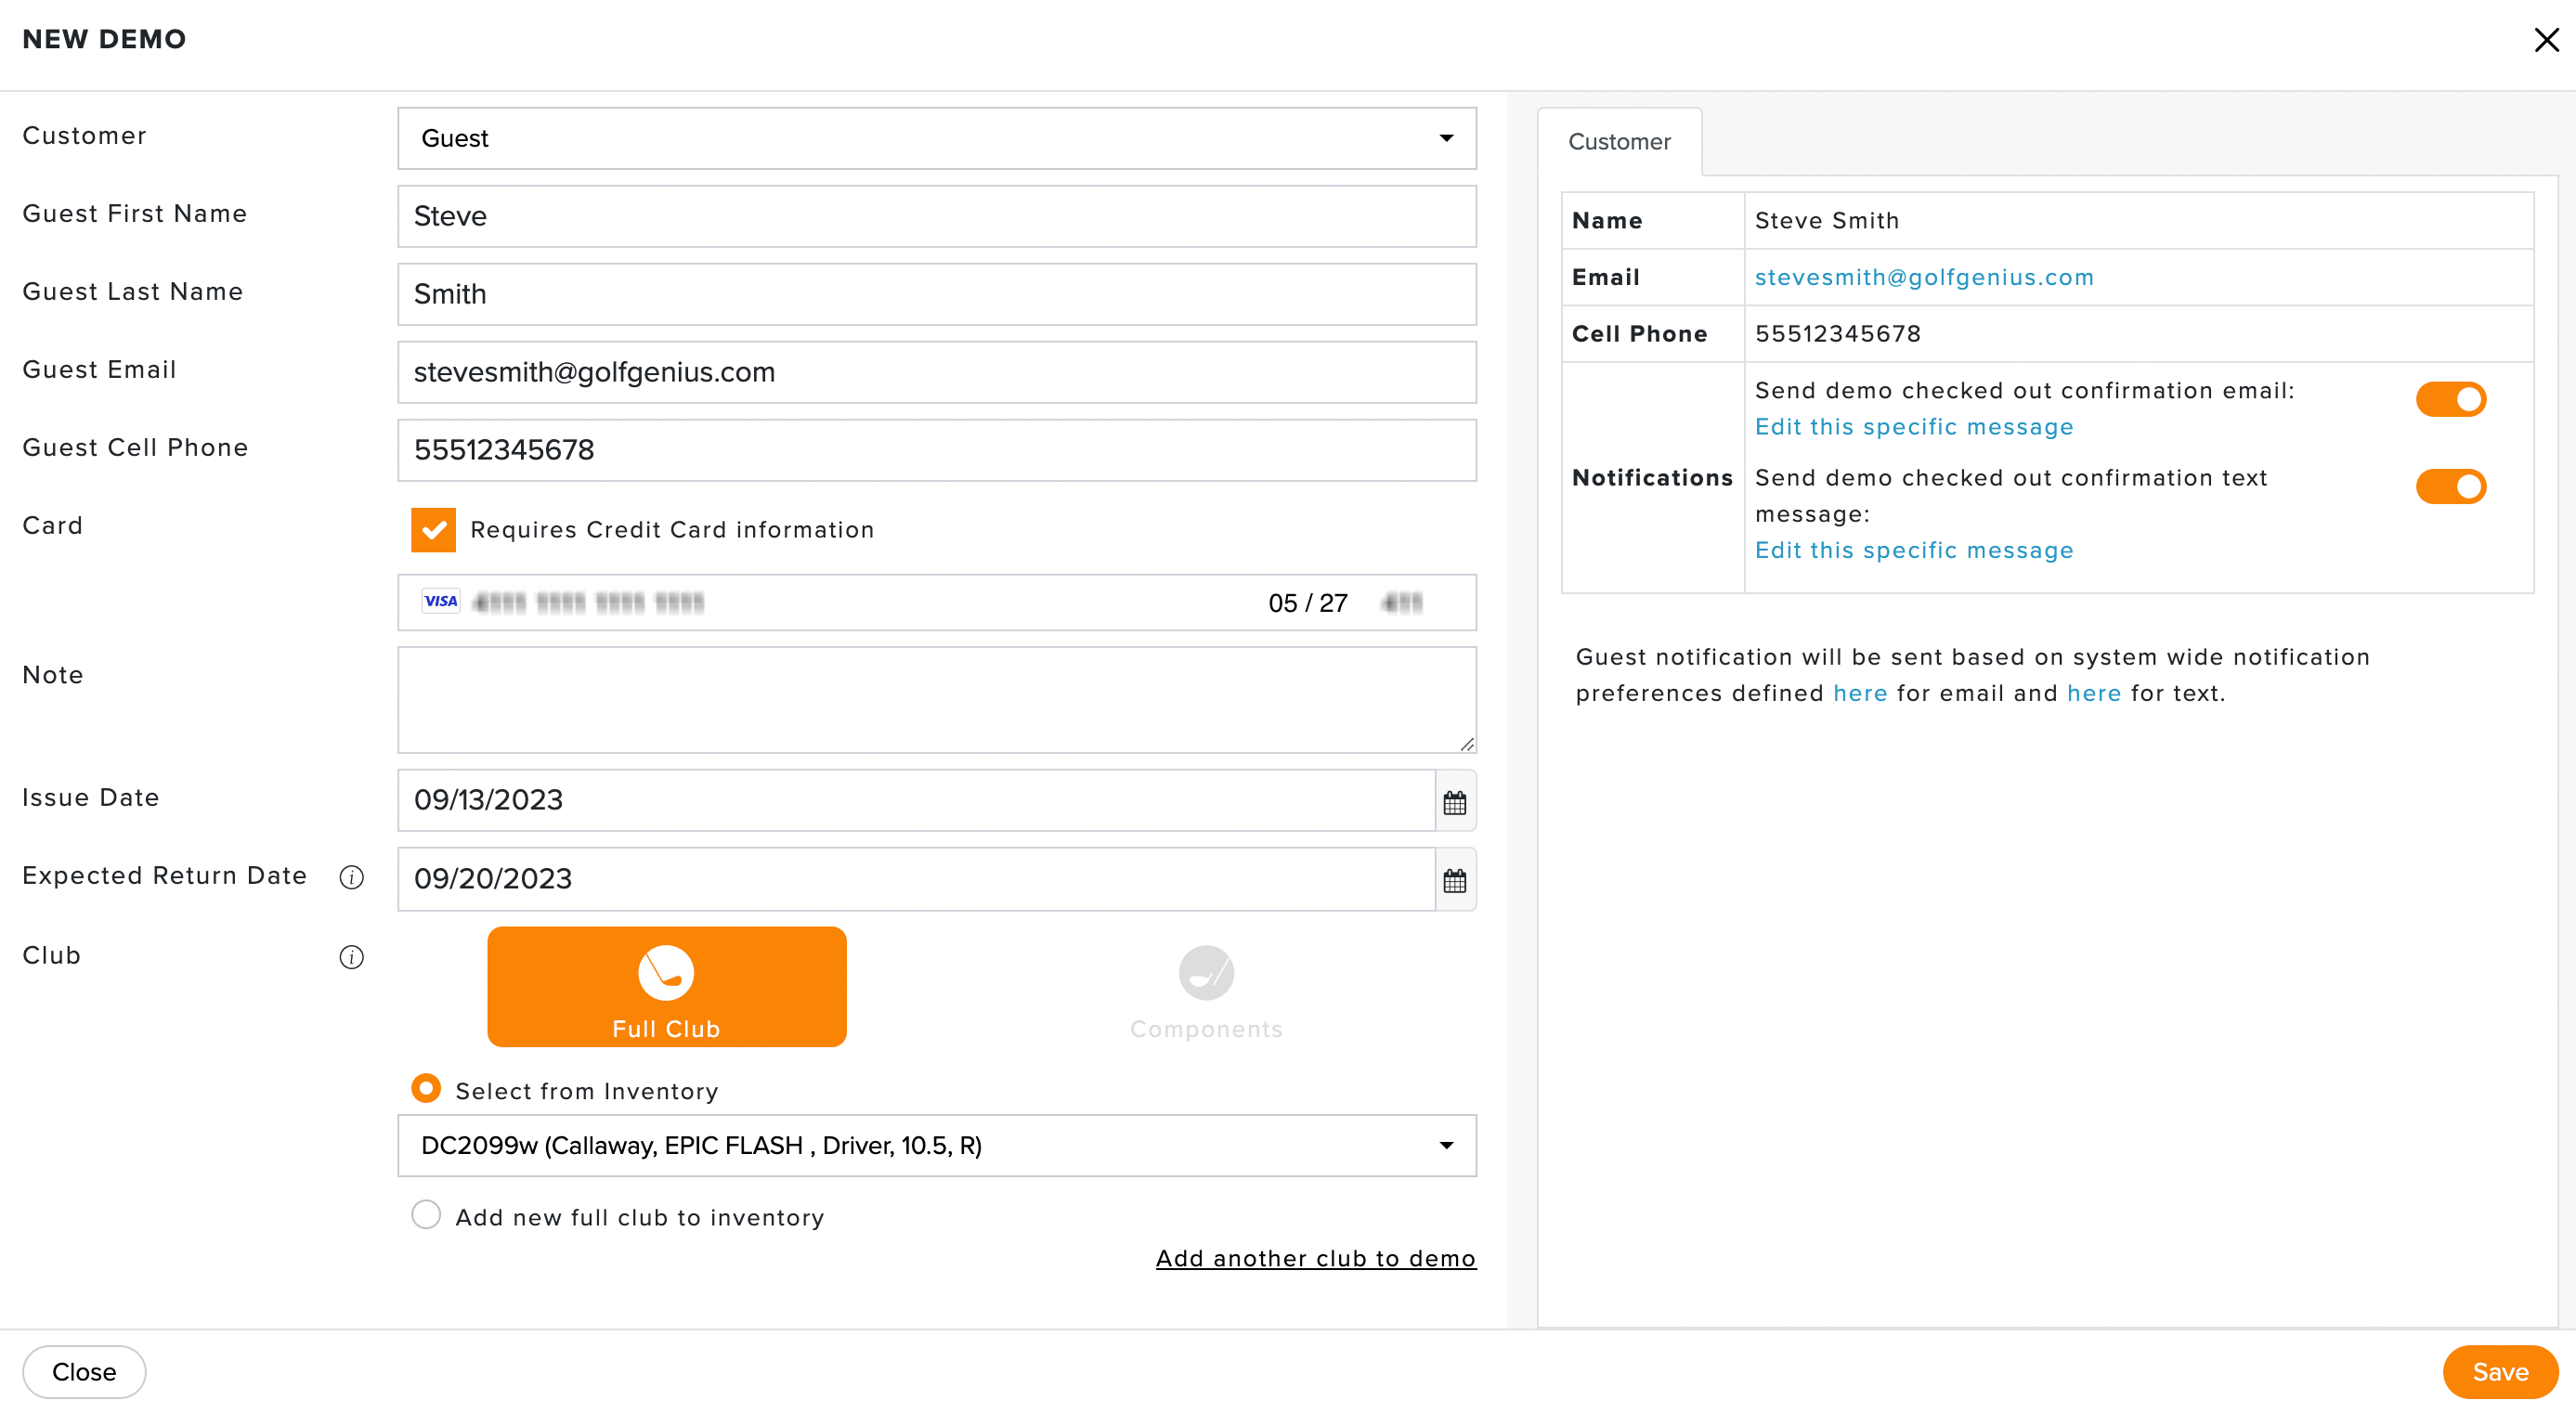
Go to Services > Demo Clubs > Dashboard > New Demo (as shown below).

Select or enter the following:
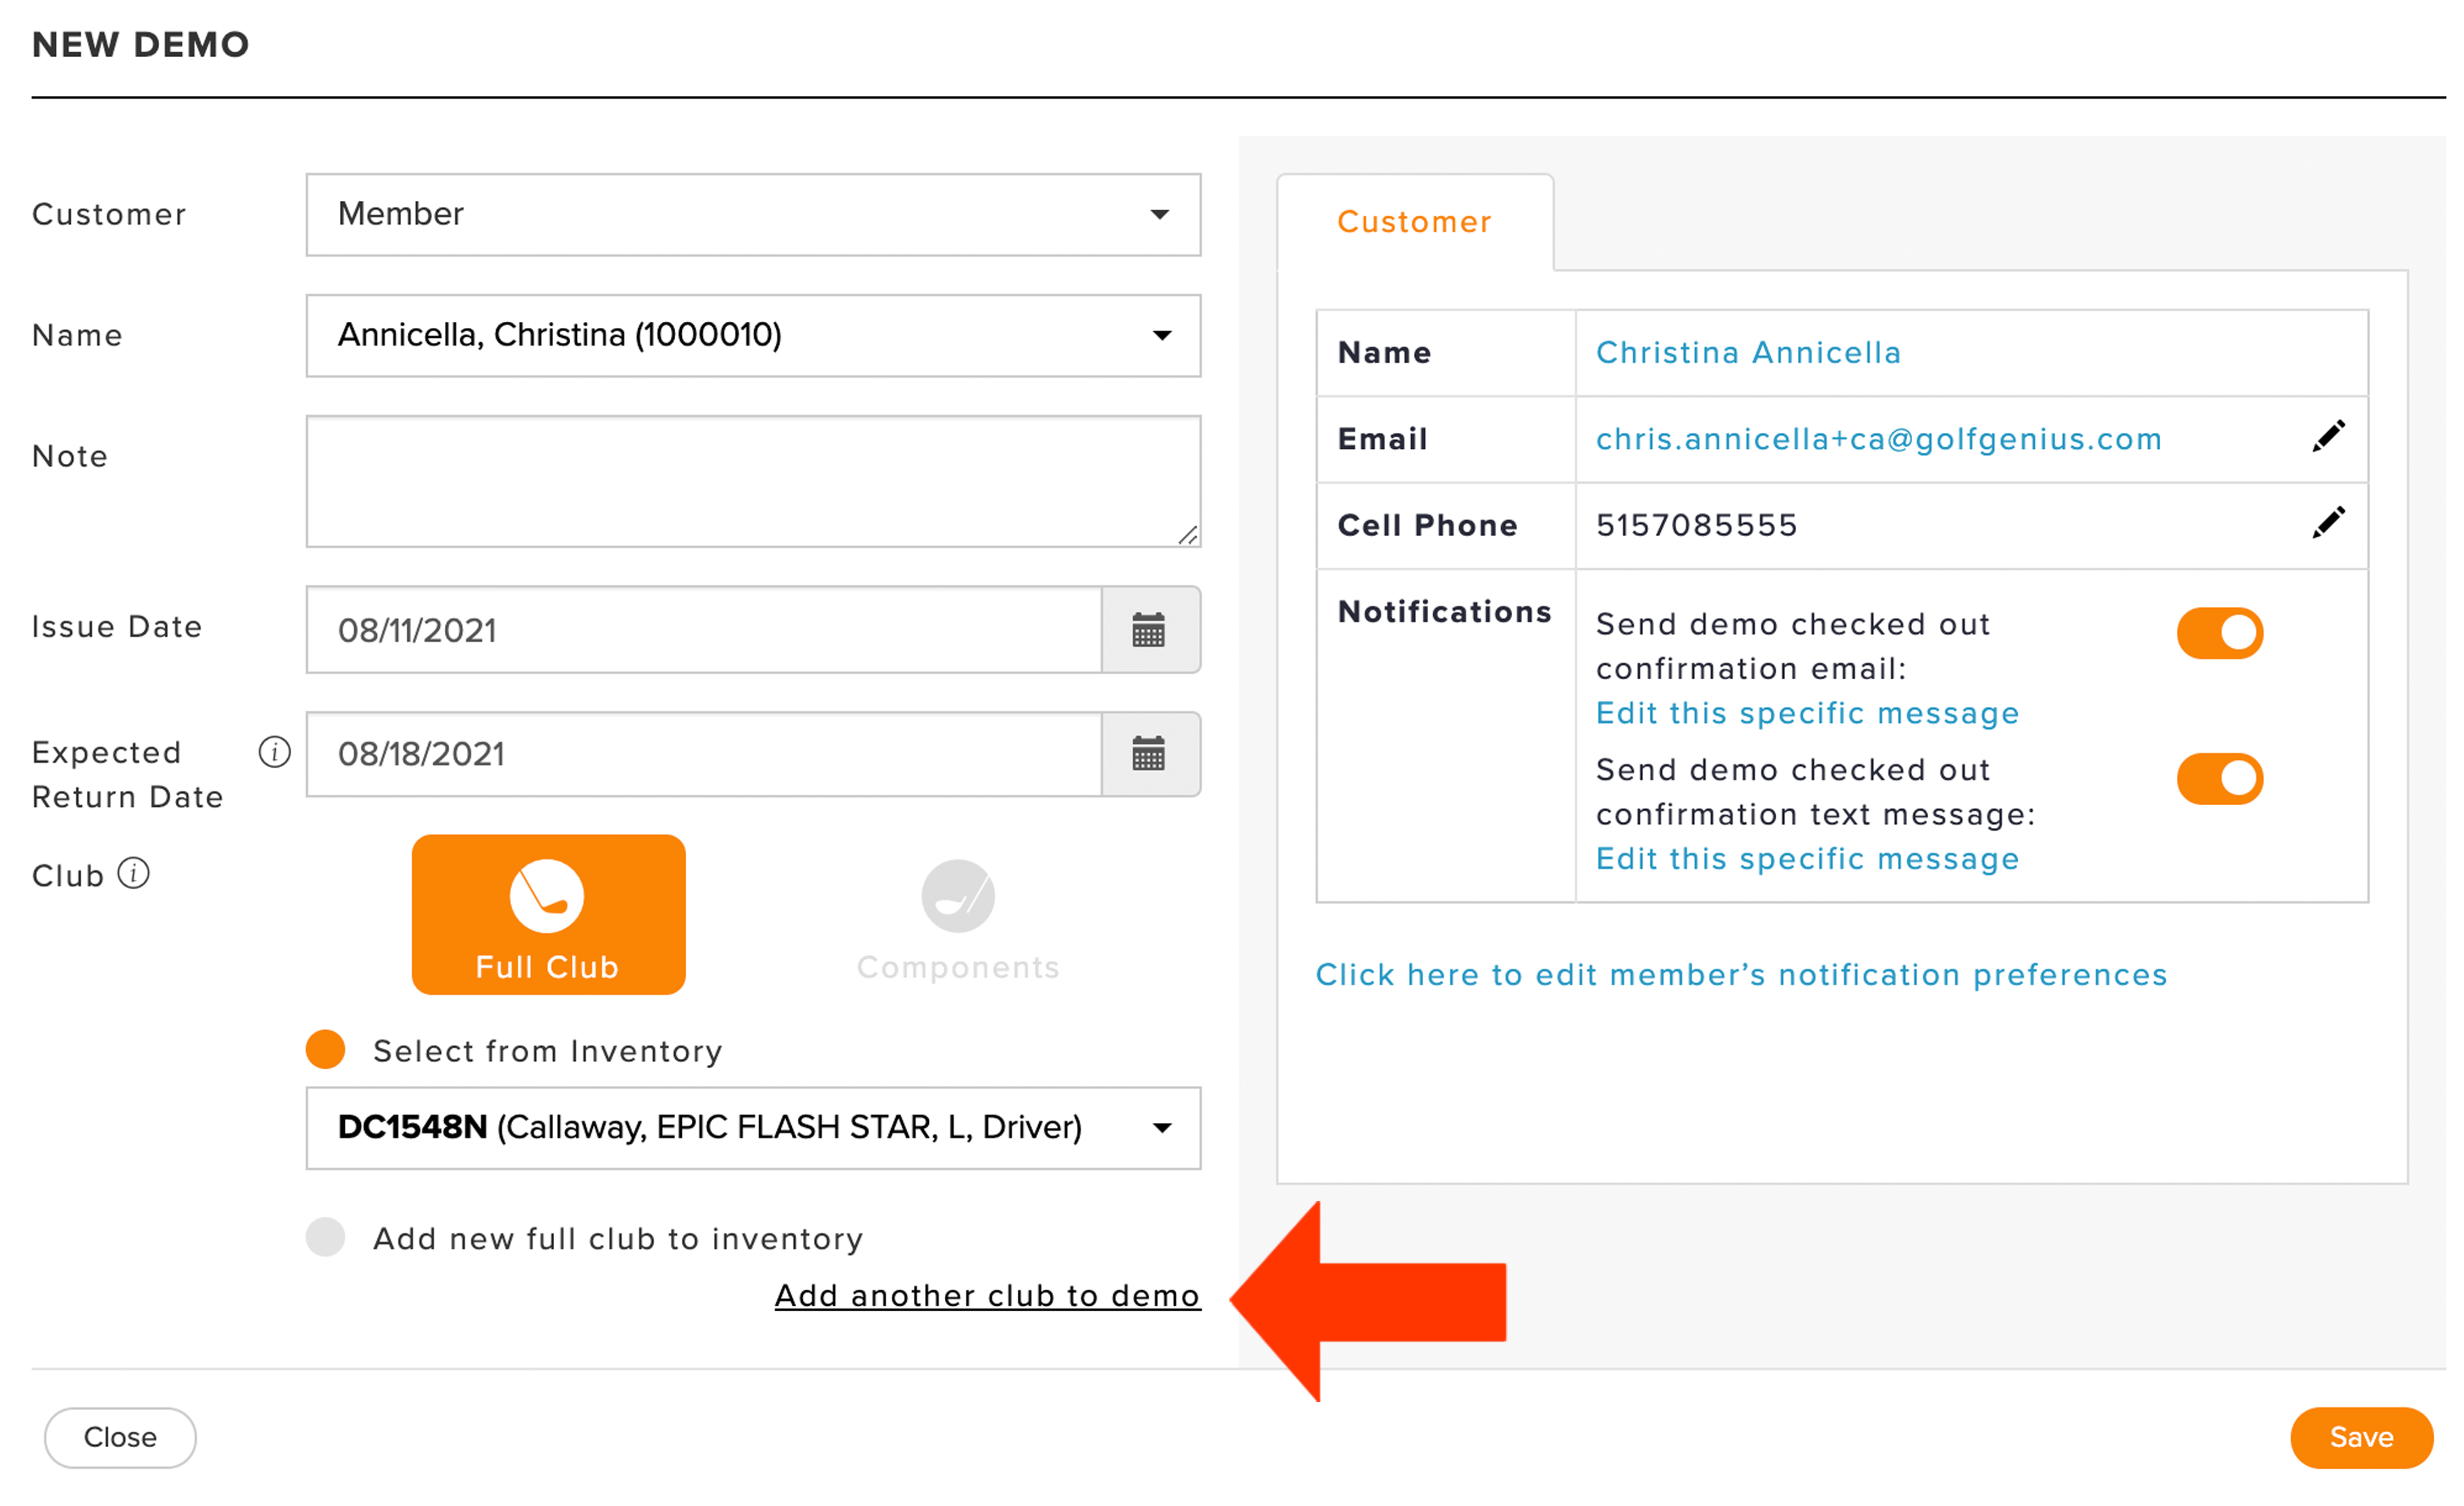
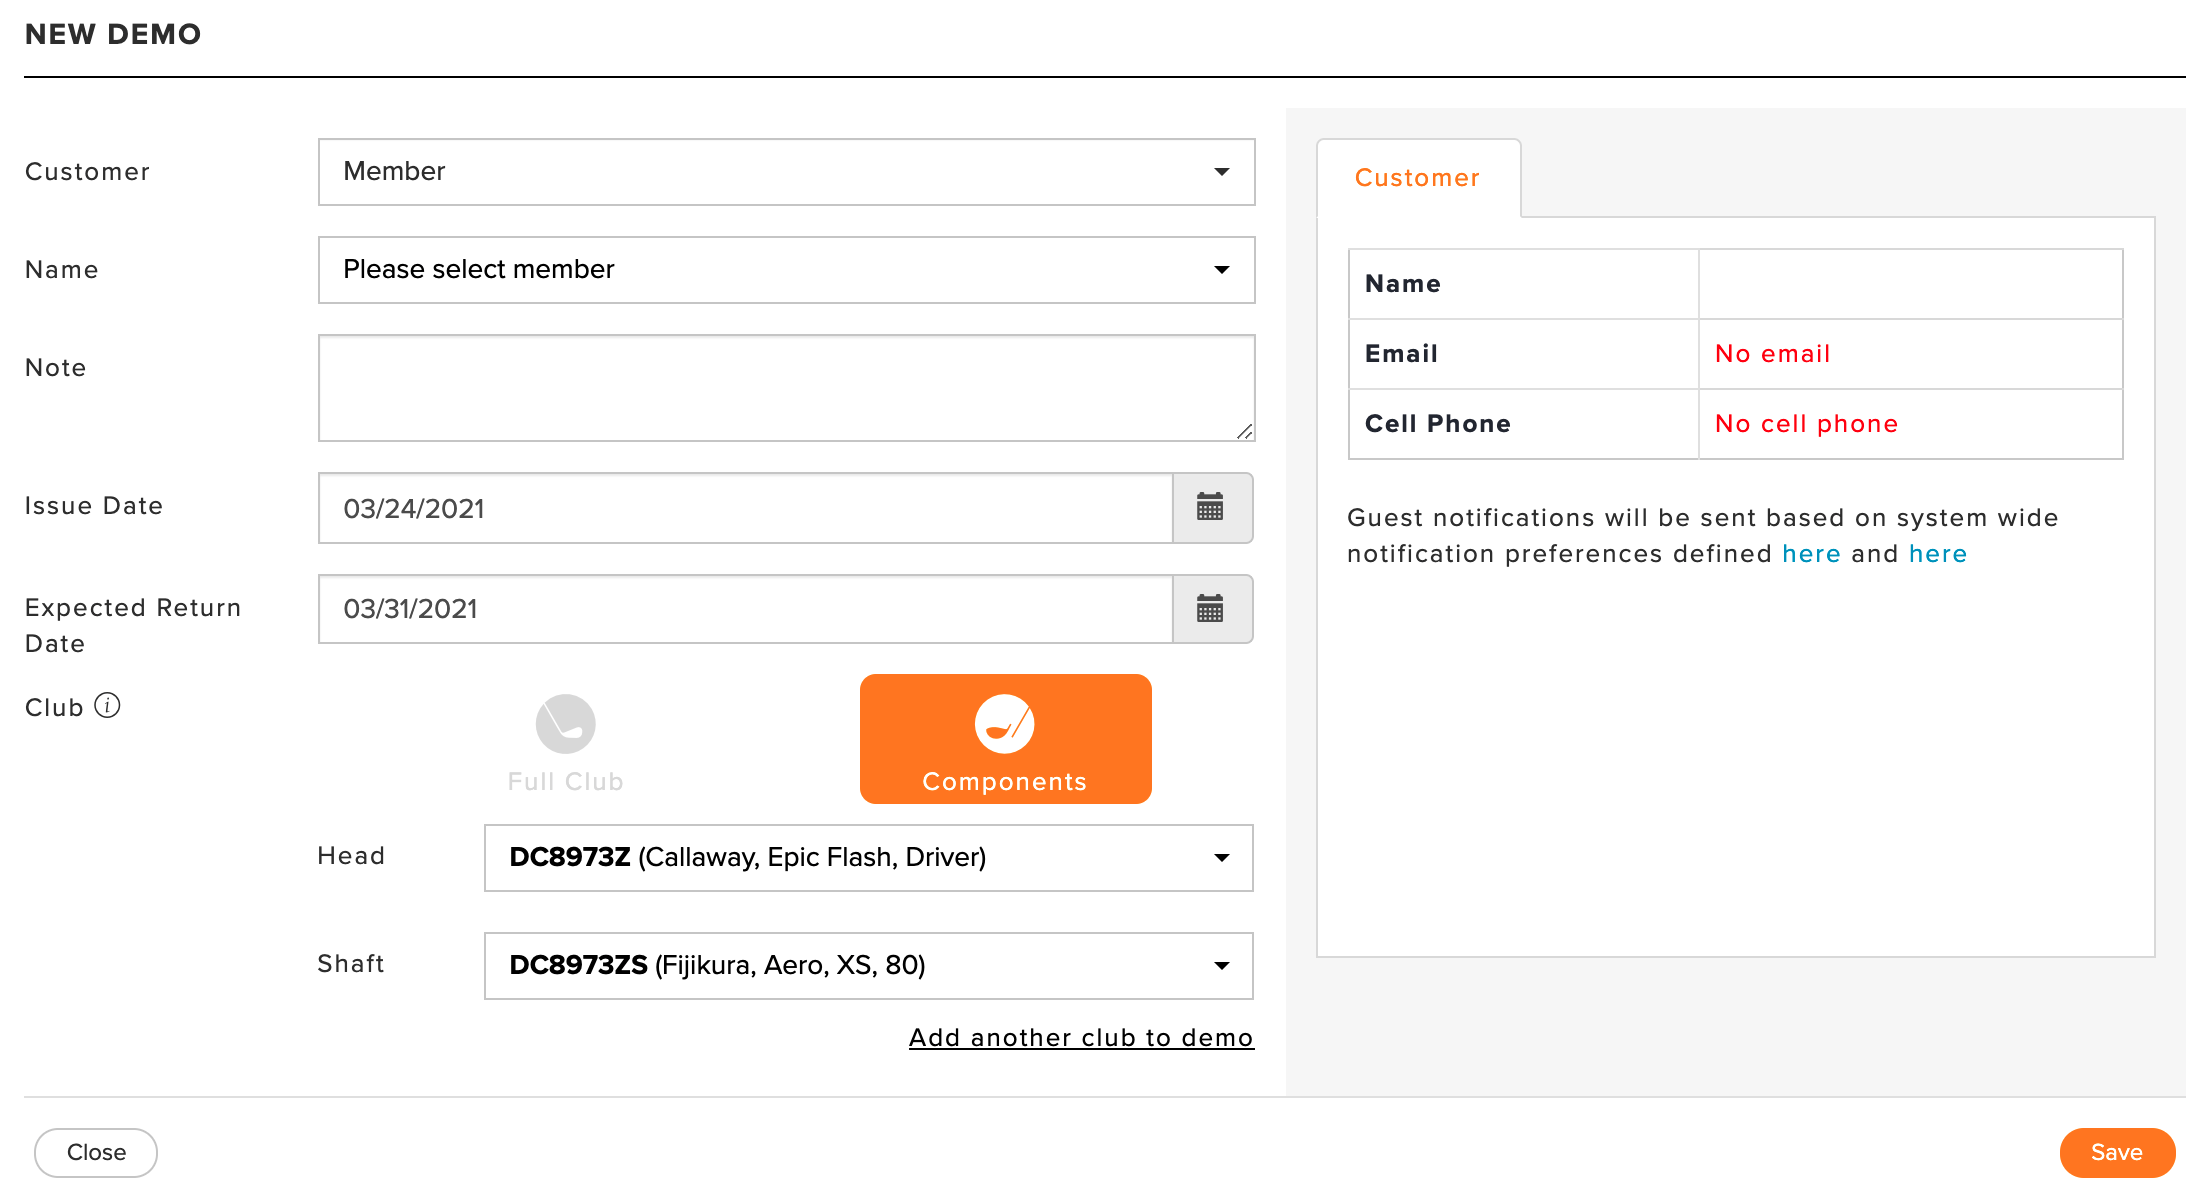
Customer Type: Select the appropriate customer type (i.e., Member or Guest).
Members: Enter the following member information:
Member Name: Select the member name from your member roster.
Guest: Enter the follow guest detials (Note: If you maintain a Guest Roster, you can start typing a guest's first name, last name, or email in the respective field and then select that guest saved to the guest roster.):
Guest First Name: Enter the Guest First Name.
Guest Last Name: Enter the Guest Last Name.
Guest Email: If a guest is placing the order, enter their email address for email notifications and contact info.
Guest Cell Phone: If a guest is placing the order, enter their cell phone # for text message notifications and contact info.
Add to Guest Roster: If this is a new guest, you can save them to your Guest Roster.
Card: If you require a credit card for the demo order, check the box and enter credit card details. To enable card capture, enable the Stripe Integration.
Note: Add any additional information as a note. For instance, you can enter more contact information (phone #, mailing address, etc.) or specific return instructions.
Issue Date: Enter the date that the customer received the demo.
Expected Return Date: Enter the demo due date. If there is no due date, leave it unselected. If automatic email notifications or text message notifications have been enabled, the due date will determine when the borrower will receive reminder emails/texts to return the club to the shop. For details on setting the default expected return date, Click Here.
Club: Select the type of demo item that is being issued to the customer. You will have two choices:
Full Club: If you have one barcode per club, you will use the full club option.
Components: If you have a barcode for each part of a club (e.g., heads and shafts, range finders, etc.), you will use the components options.
Select the club or component from the inventory or add a new full club or component not yet in the inventory. You can also select individual components from your current inventory. Note: Only the Tracking ID will be listed in the selector dropdown by default. If you'd like to display more demo details in the dropdown, Click Here for instructions.
If you'd like to issue multiple clubs or components to the customer, click "Add another club to demo" and repeat this step (as shown below). This is most commonly used if you are issuing components of a club. For example, you might mix and match a clubhead and two shafts to the same member/guest.

If necessary, enable or disable the customer's text message or email notification when the demo is checked out.
Click "Save."
The sequence below shows the process of issuing one full club and one multi-component club to a member.

Issuing Demo Equipment using a Handheld Scanner:
Barcodes must be attached to the demo or in a booklet to issue demo equipment using a handheld scanner hooked to a computer. For details about printing demo inventory barcode labels, Click Here.
Follow these instructions for using a Handheld Scanner:
Sign into Golf Genius - Golf Shop.
Scan the barcode of the item you wish to issue. You will be taken to the new demo page, where you can fill out the remainder of the demo details (as shown below).

If you'd like to issue multiple demo items (e.g., heads, shafts, range finders, etc.) to the same member/guest, scan the additional barcodes or enter them manually. Repeat this step if necessary.
Click "Save."
In the video below, we use a handheld scanner to check out two components and a full club for a member.

Automated Notification:
After entering the demo details (e.g., issue date, return date, club details) and submitting the demo, the customer will then receive an email notification (if enabled) and text message notification (if enabled) confirming their demo order. The default notification includes the demo tracking number for customer reference. You can further customize these automated notifications to include a personalized message to the individual by clicking "Edit this specific message." For more details on customizing notifications on the fly, Click Here.
For automated emails, you can view the Email Delivery Report to ensure emails were delivered successfully and identify those that were not. Click Here for more details.