
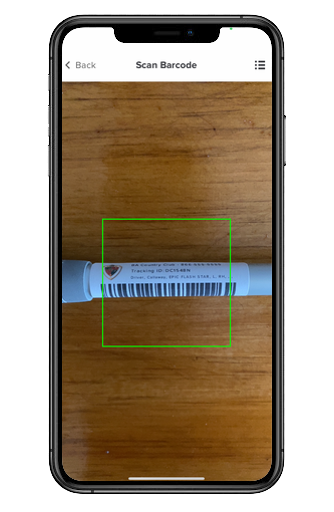
Managing Rentals is a tricky and time-consuming task that is only made more difficult when having to keep track of when rentals are issued and returned. With Golf Genius - Golf Shop, you can easily maintain and track rentals using Rental Labels. To further simplify the process, use barcodes (as shown below) on your labels to make checking in/out rentals a breeze.
In this article, we will discuss:
Label templates
How to create labels
Printing labels
Note: For details about printing labels for other features (i.e., demos, rentals, club repairs), Click Here.
**Important Note**
When using labels and you delete a rental or the entire inventory, the barcode(s) for the deleted rental(s) will no longer be valid.
Rental Label Templates:
You will find rental label templates already created in the Report Center. Go to Report Center > Page Composer. Two templates have been created for you:
Rentals - Greenbriar 10 Labels
Rentals - Greenbriar 14 Labels
Rentals - Greenbriar Laser
Rentals - Scan Labels 5160
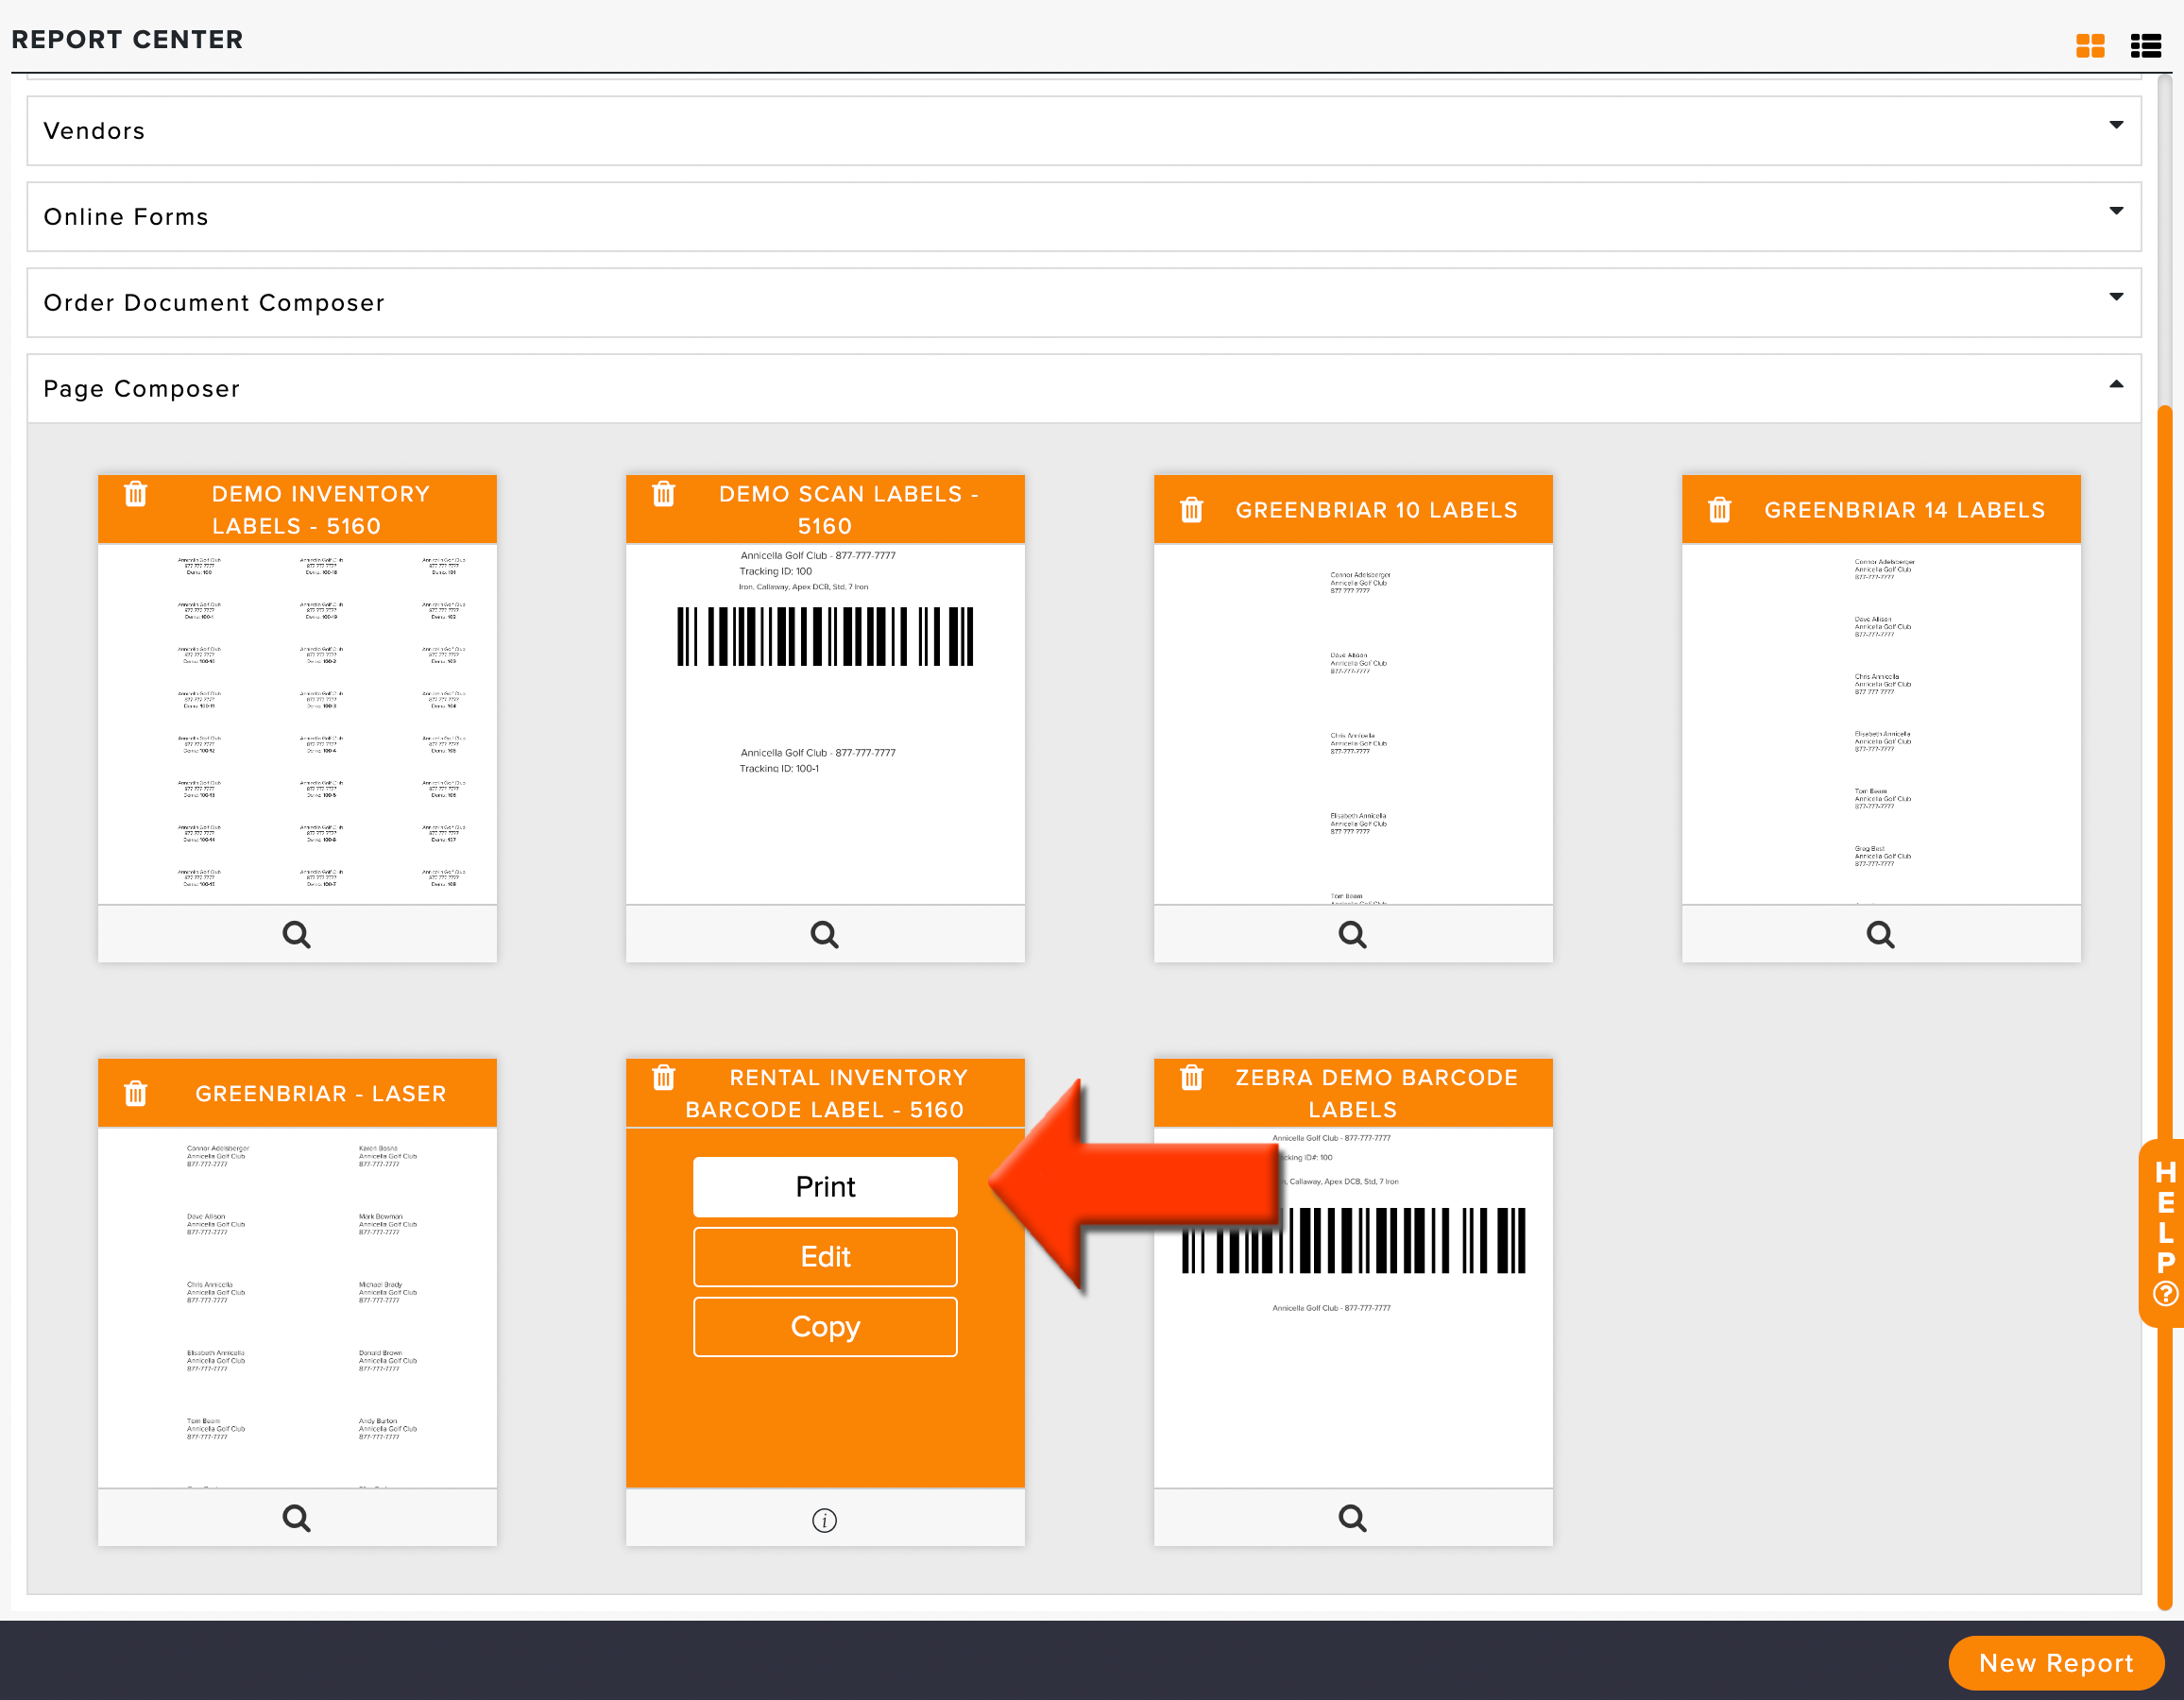
If one of these labels meets your needs, you can print rental labels using the provided templates. If the label meets your needs, but minor adjustments must be made to the dynamic fields or layout, you can click "Copy" for that particular shaft label (as shown below) and customize it. For more details about editing labels using Page Composer, Click Here.

Alternatively, you can create new label reports using the Page Composer for other paper types (e.g., Greenbriar).
Creating New Labels
To print rental labels, a label report must be created for each label type. To ensure you are capturing the appropriate details on your labels, separate reports should be made for:
Creating Rental Labels
For your rental inventory, you may need to create multiple label types to accommodate different types of rentals. This could include rental sets, shoes, range finders, etc.
To create a new label, follow the instructions below. For instructions on creating labels for thermal printers (e.g., Zebra, Dymo, Brother, etc.), Click Here.
Go to Report Center > Rentals > New Report > Page Composer.
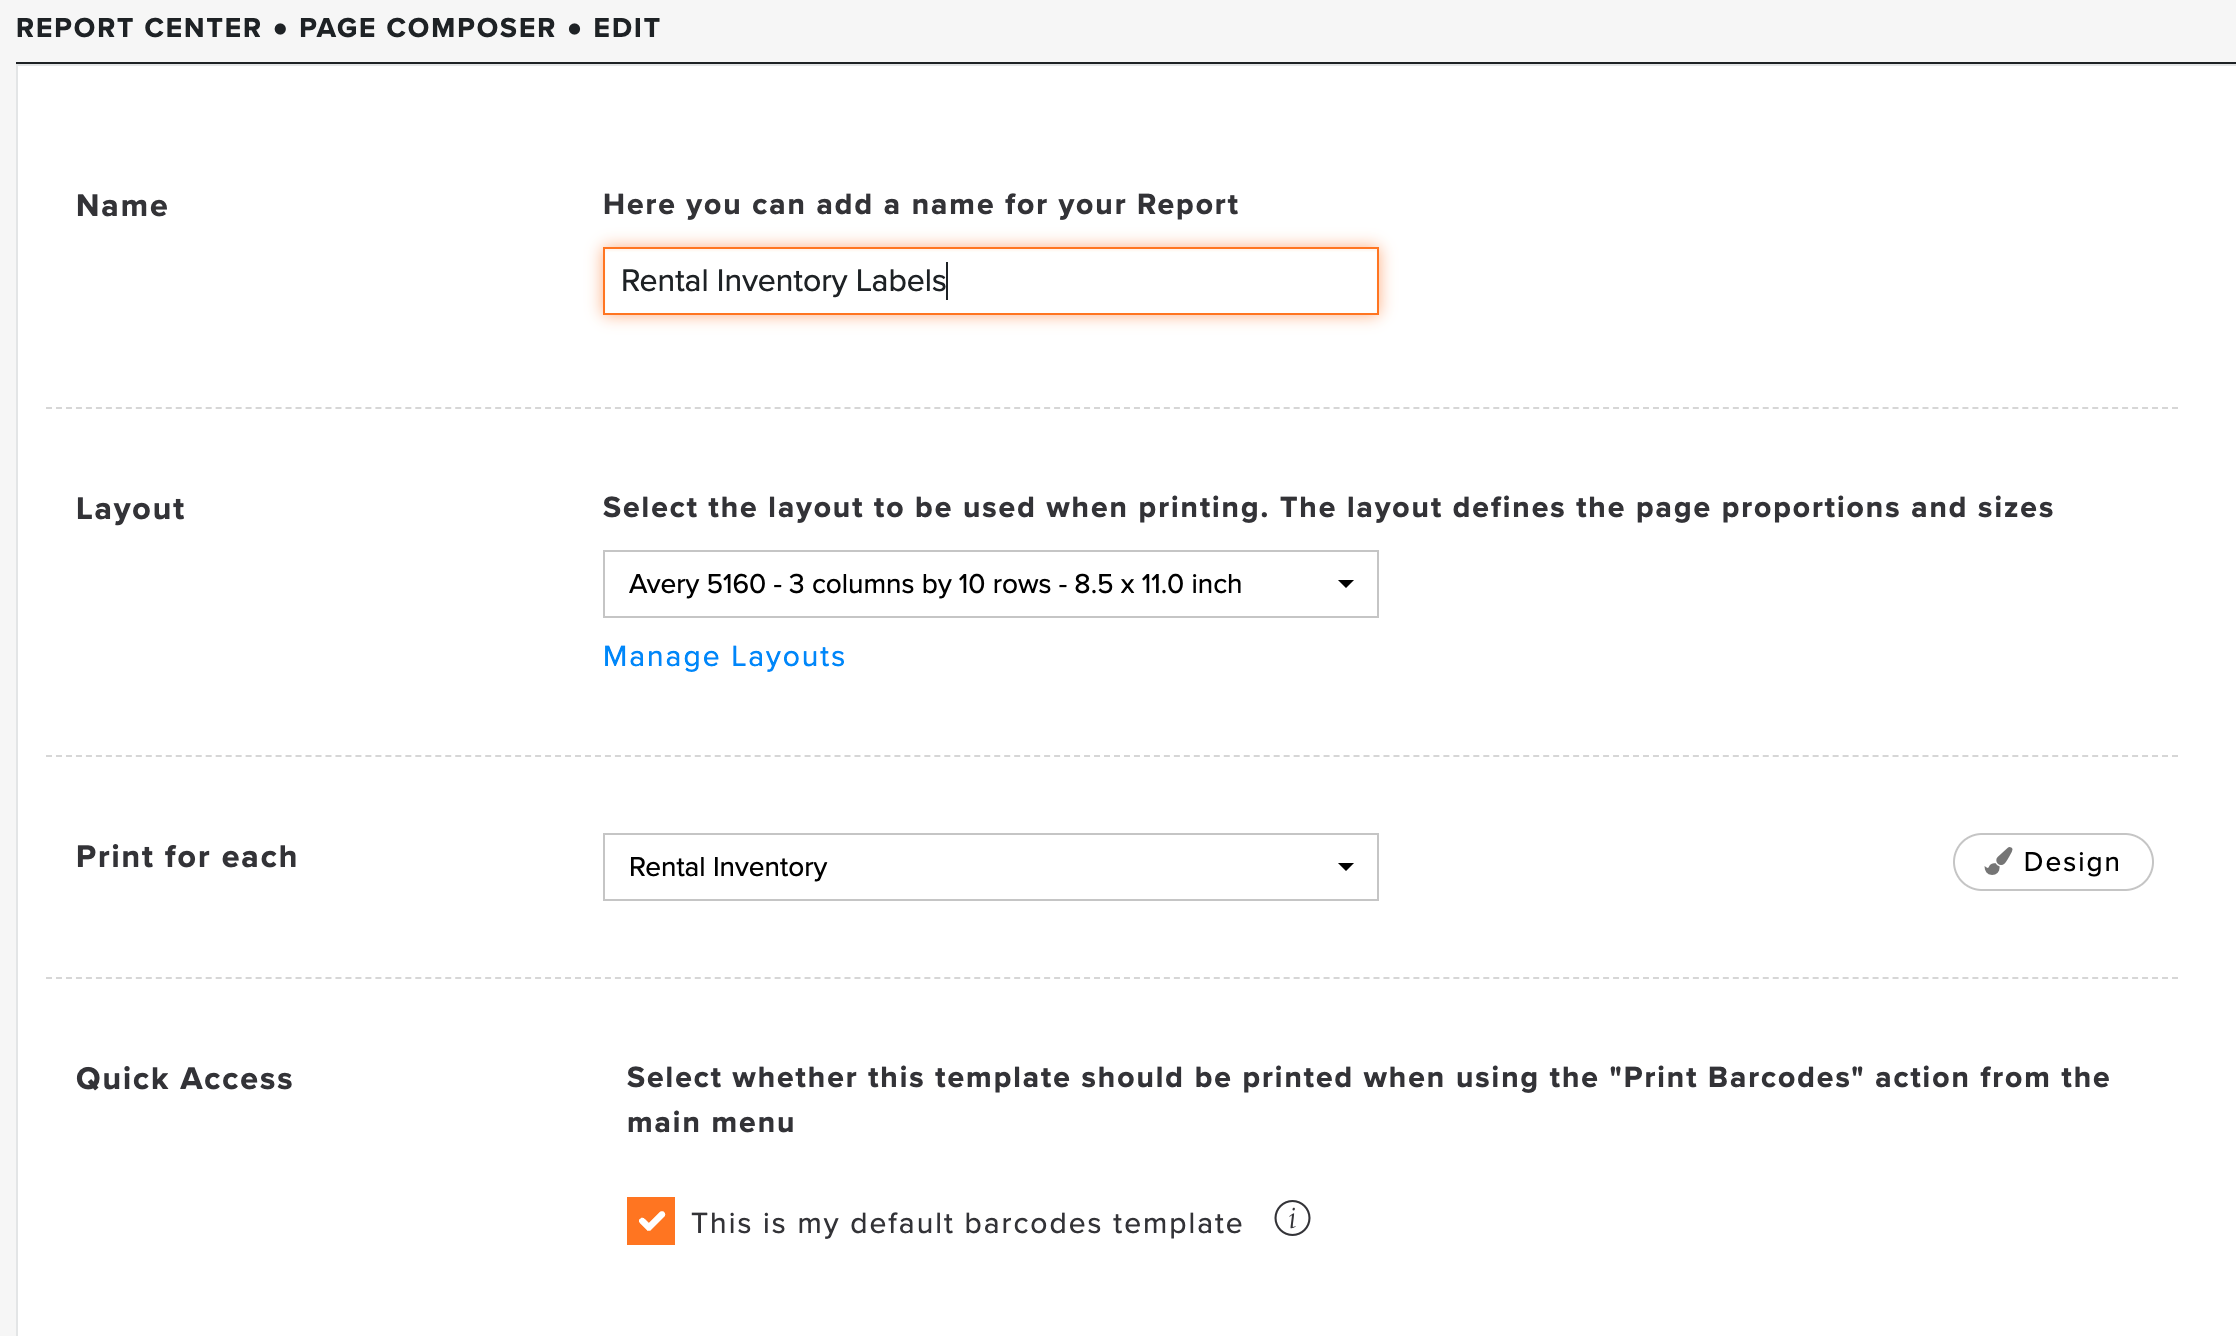
Name the Report.
Select the Layout. If the proper layout is not available, you can create one. For more details on building/managing layout, Click Here.
Print for each "Rental Inventory."
Design the content for the labels. Some tips:
To add the barcode, click "Add Barcode" and expand its size on the canvas. The wider and taller the barcode, the better.
Its always good to include the "Inventory Rental Tracking Number" to help match it to your inventory if needed.
Add more rental inventory detail field for more information on your labels.
Check the box for "Quick Access" if this rental label report will be your default template to print labels in the future. For more details, Click Here.
Click "Save."
Printing Rental Labels:
Now that you've created rental labels, you can print the labels and attach them to your rentals. To print your labels, follow these instructions:
Go to Report Center > Page Composer > Print the report you need labels from (as shown below).

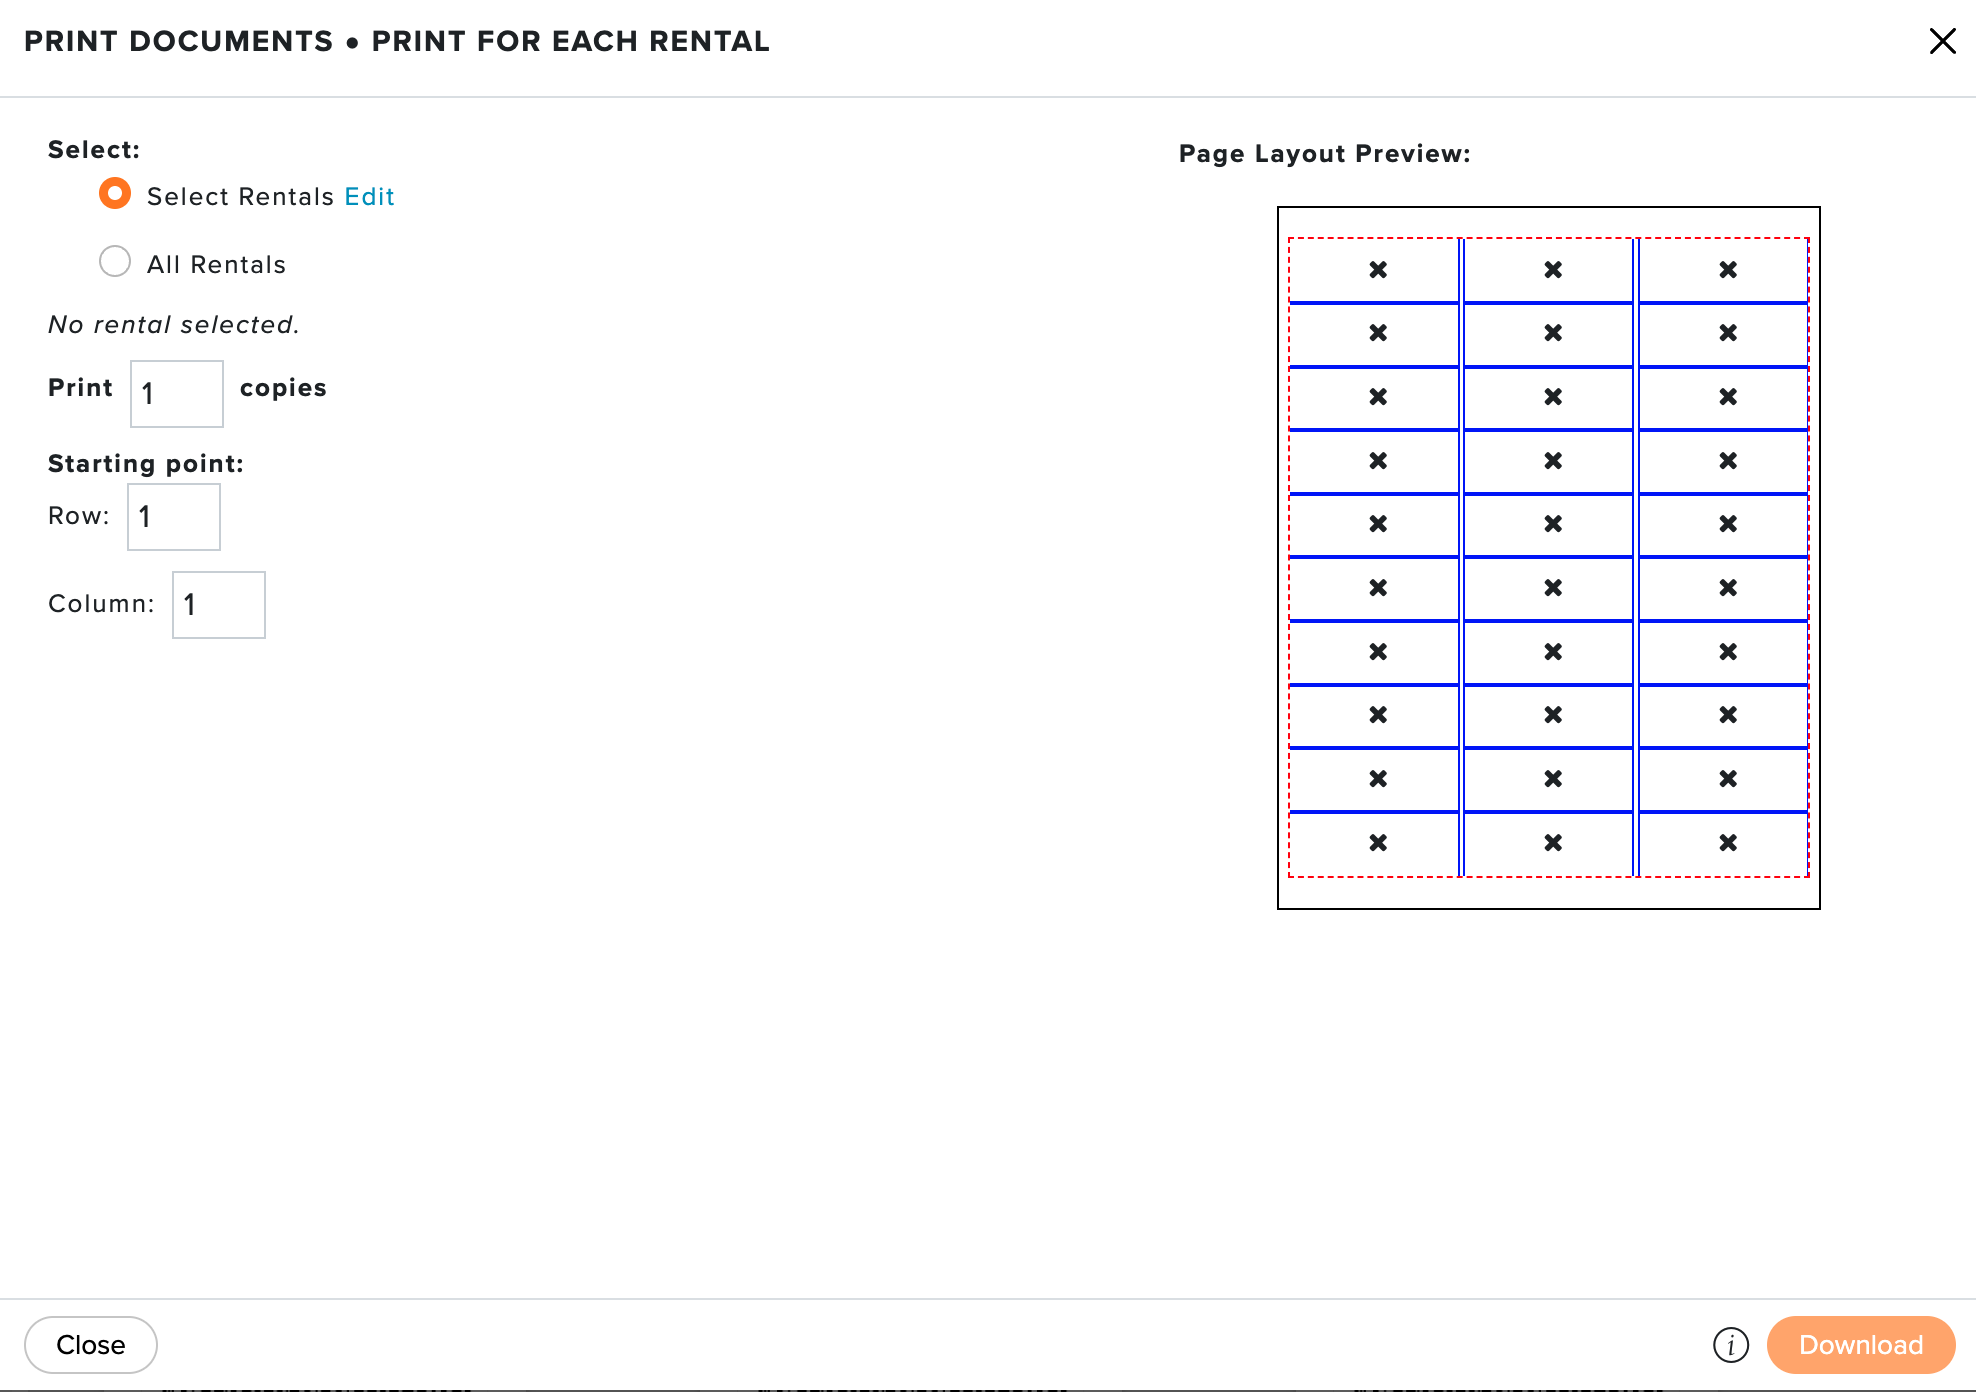
Select the rentals to print labels for. You can select multiple items to be printed at the same time.
Set the number of copies for each item. This is the number of copies that will print for each rental selected in the previous step.
If you have partially used label sheets, select your starting row and column.
Click "Download."
Click "Download PDF."
Quick Print Rental Labels:
To Quick Print rental labels, you must first define an existing rental label report as the default rental label template (This should be a different label than the default demo club label). You can change this by going to Report Center > Page Composer > Edit Label, and in the section "Quick Access," check the box for "This is my default barcode template." For more details on setting the default rental template, Click Here.
Once a default rental label template is selected, you will be able to quickly print labels by going to Services > Rentals > Print Barcodes (as shown below).
You can select to print for:
Selected Rentals: Click "Edit" to specify which rentals to print labels.
All Rentals: A label will be printed for all items in your rental inventory.
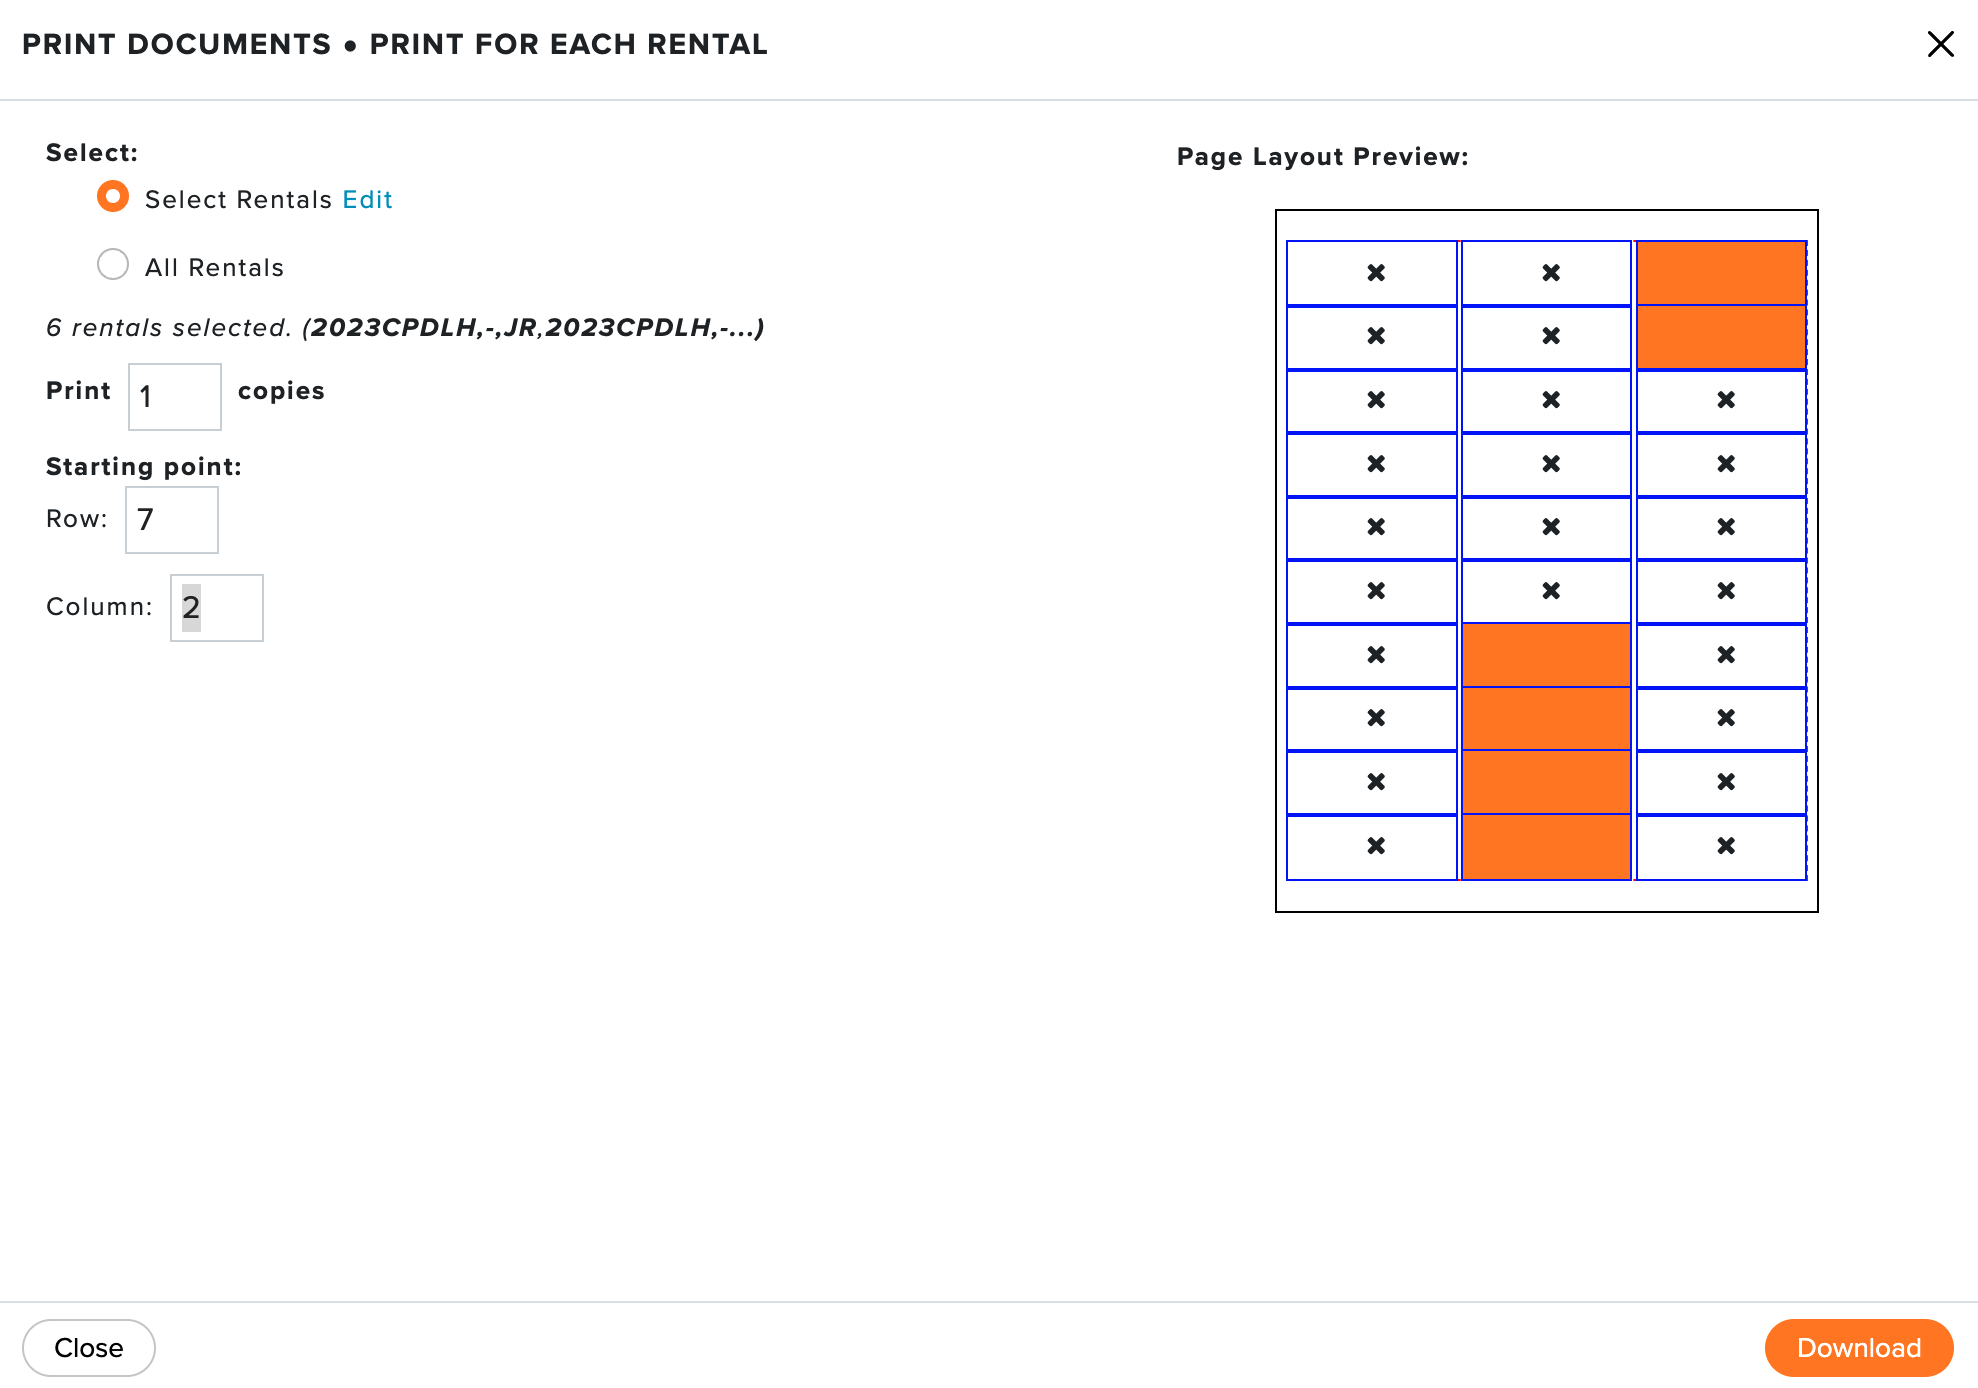
Then specify how many labels you would like to have printed for each item. Set the starting point if printing on a partially used label sheet. You can set the row and column, and the starting position will be adjusted and shown in the page layout preview (as shown below). We are printing for 6 rentals in this example below, starting on row 7, column 2.
Rental Label Best Practices:
When deleting a rental from your inventory, the deleted rental label will become invalid and no longer scannable.
When printing labels for the first time or creating a new label template, always test a label or two before printing your entire inventory. This way you can:
Test to ensure the barcodes scan appropriately on the mobile app and shop computer scanner.
Verify the font is legible.
Verify placement on the page is accurate.
It is recommended, at a minimum, to put your club logo on the barcodes. This way, if the rental is left at another course, they know who to contact.
When using laser or inkjet printers to print labels, put a seal on the labels to ensure that the ink is not washed away.