This feature is available for the following products:

Flyers are a powerful tool for creating captivating marketing materials for your events, leagues, and clinics. With many functions and tools in the designer, it can be very valuable to understand how best to use them.
In this article, we will discuss tools, tips, and shortcuts to become more efficient and productive with the Flyers designer.
Note: This article is intended only to familiarize you with the designer tools. We will direct you to some of the most valuable tools available, but will not go into great detail, as it would be too much to cover.
QR Code:
*Important Note*
Before printing, test your QR codes (Golf Hub or otherwise) to ensure they link to the correct event. If the link is incorrect, edit the flyer to insert a new, functional QR code.
Each flyer includes an option to add a QR Code linked to the event/league Golf Hub Page. If you are using Golf Hub Pages and would like to include the QR Code, you will need to take the following steps to enable the option to use the Golf Hub QR Code generator:
Create and Publish a Golf Hub Page: Once you have created your event/league or within an existing event/league, go to Apps > Create Golf Hub Page. Fill in the details for your Golf Hub Page with a description, schedule of events, sponsor logos, and specific banners. Then save and publish the Page. For complete details on setting up your Golf Hub Page, Click Here.
Enable Golf Hub Registration (Optional): Offer Golf Hub Registration with your event/league. Note: If you are a Golf Genius TM Club Premium user and want to use Premium registration with your Golf Hub Page, Click Here for details.
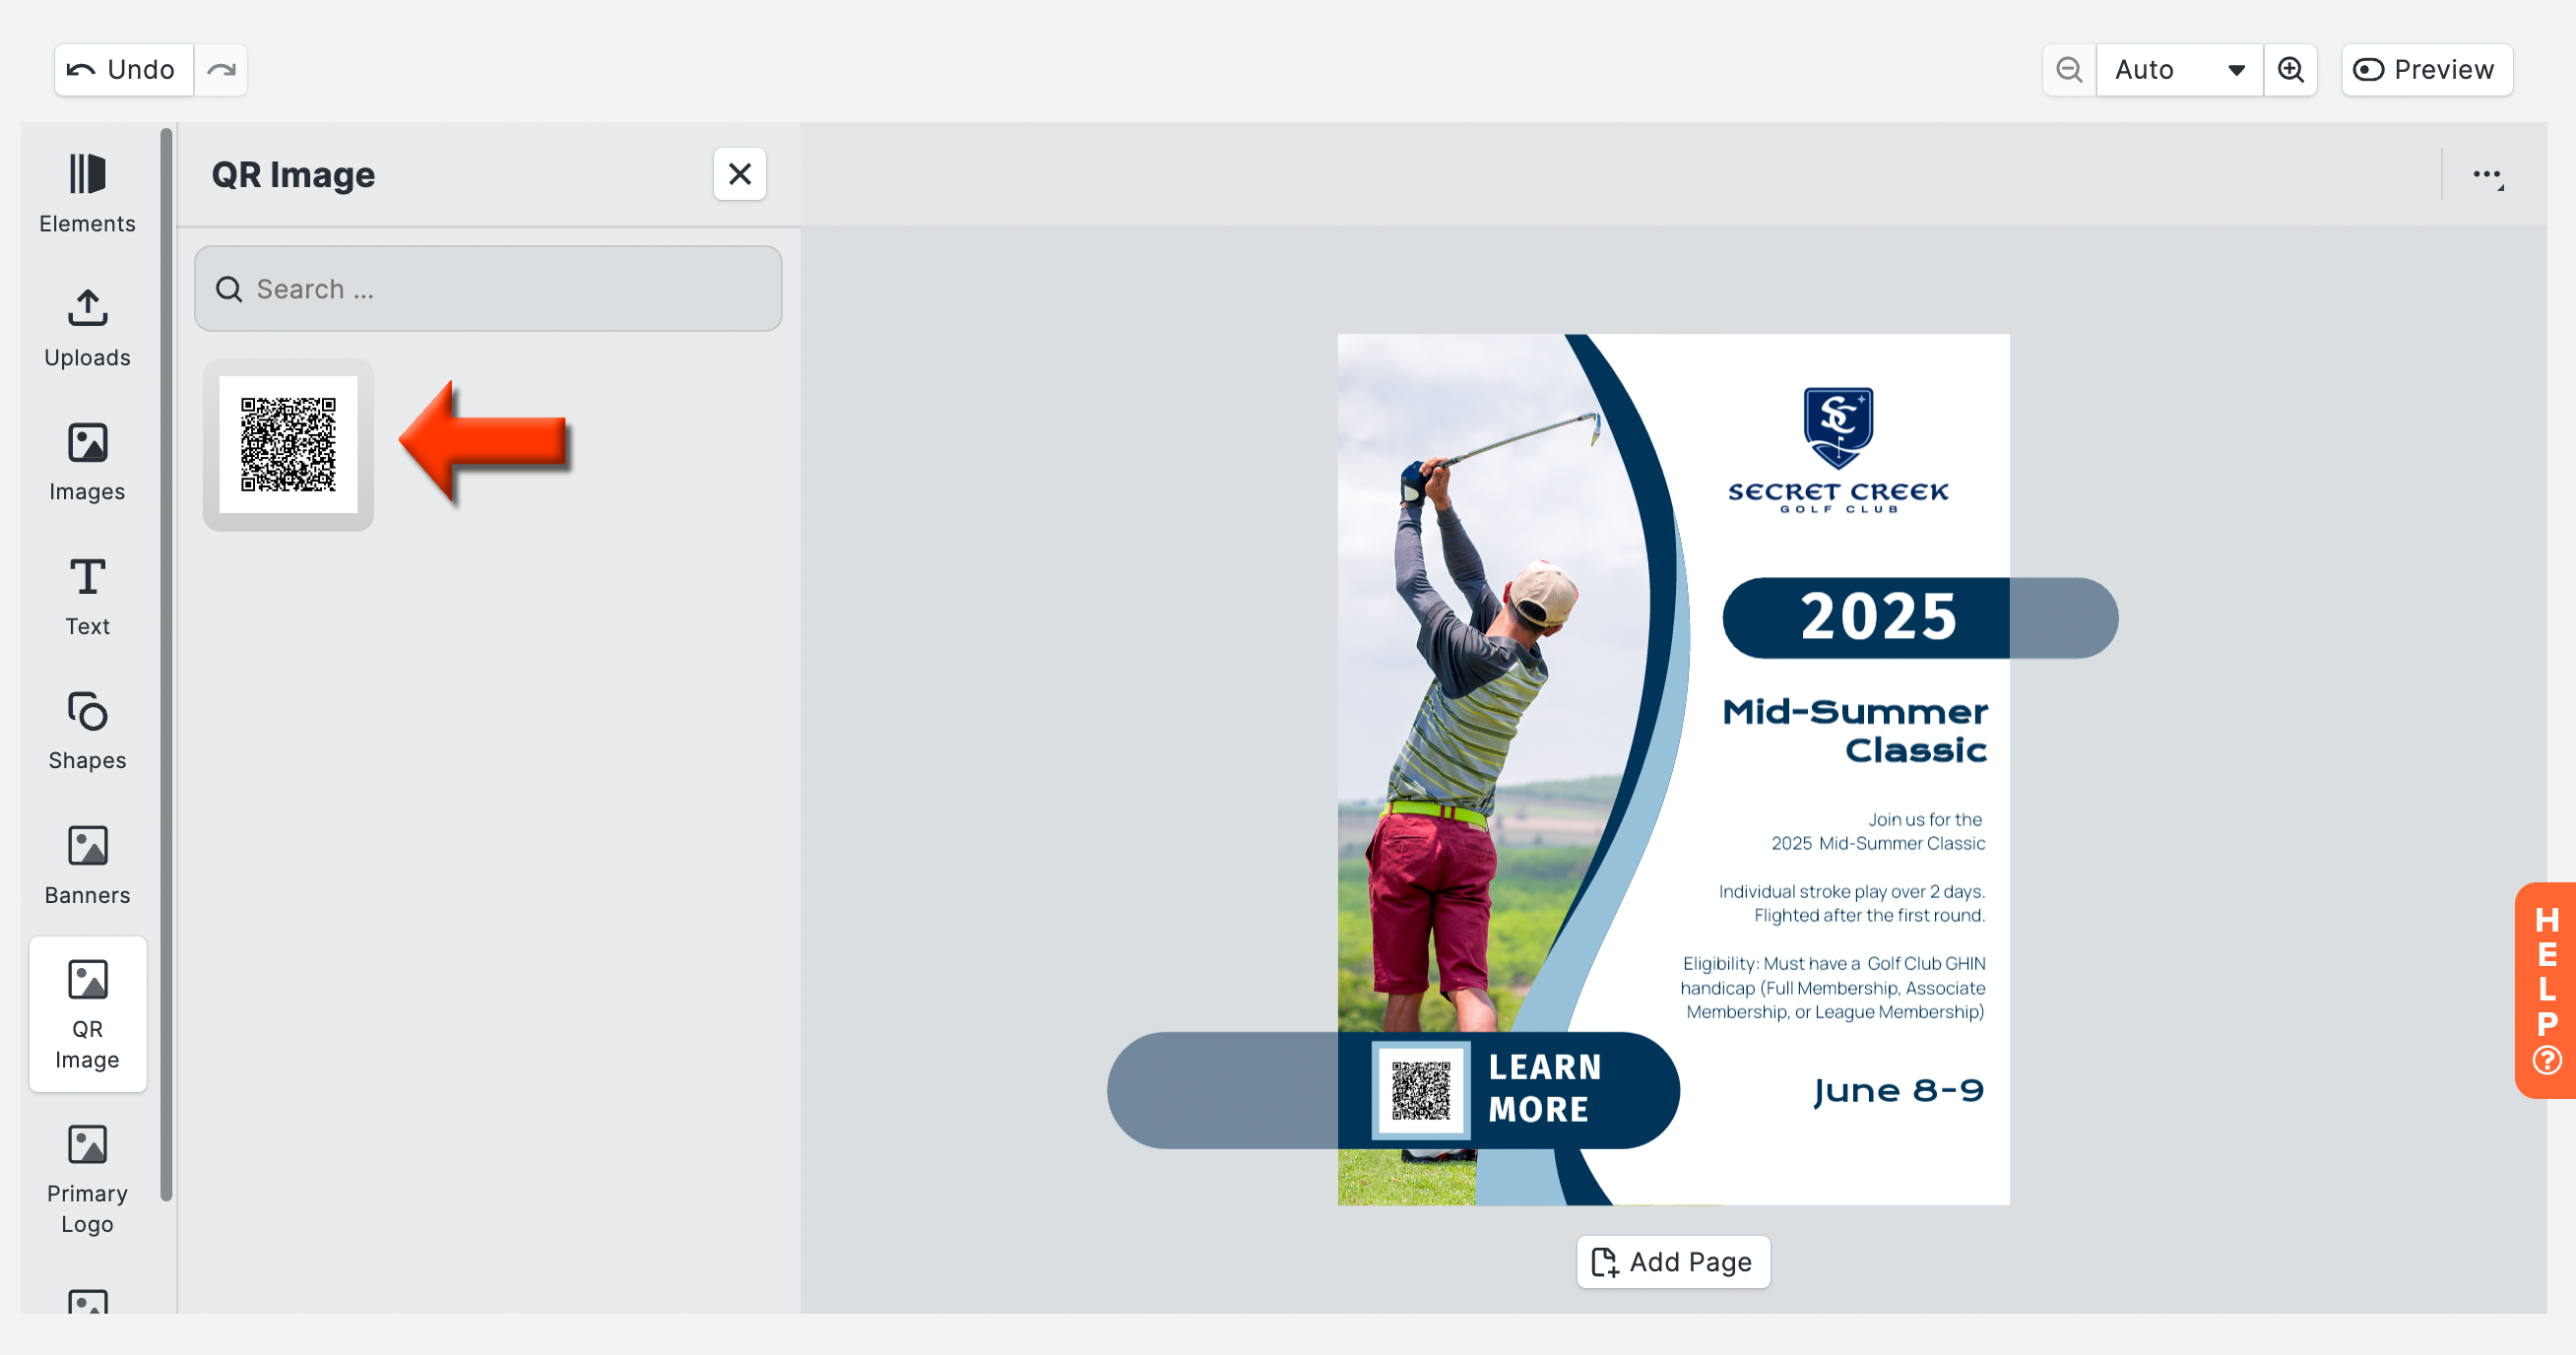
If you wish to add/update a QR Code to the flyer, follow these directions:
Delete the existing QR Code.
Click "QR Code," in the menu on the left.
Click the image of the QR Code to add it to the flyer.
Move and adjust the size of the QR Code image.
Designer Tools:
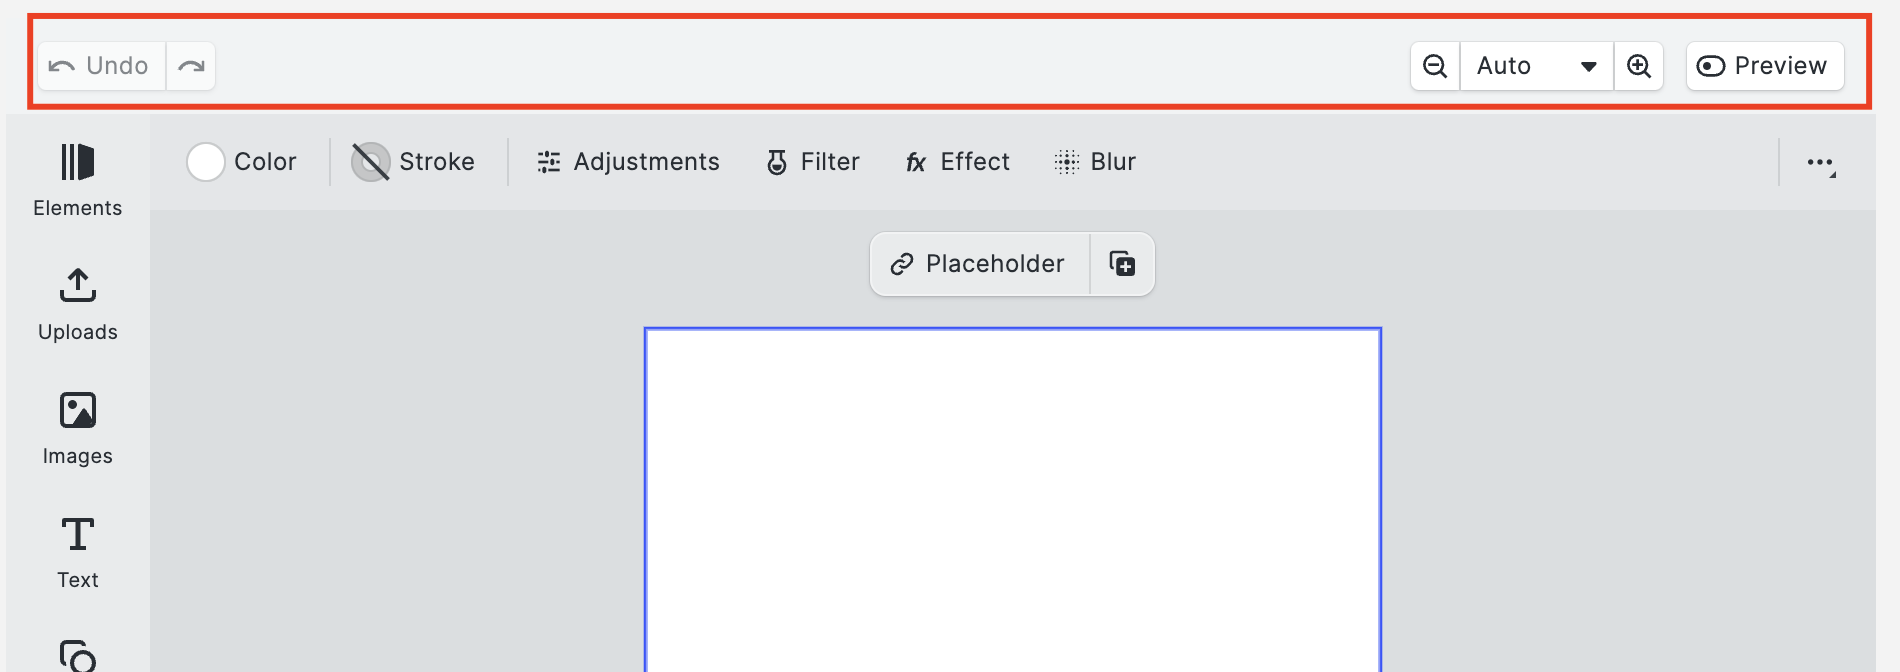
Near the top of the designer are a few useful tools that can help you if you make a mistake or see things more clearly. Here are those tools (as shown below):
Undo: Undo the most recent actions taken.
Redo: Redoes the most recent undo action.
Zoom: Click the magnifying glass +/- to zoom in and out of the canvas.
Preview: Allows you to view the page in a preview state without unselecting content.
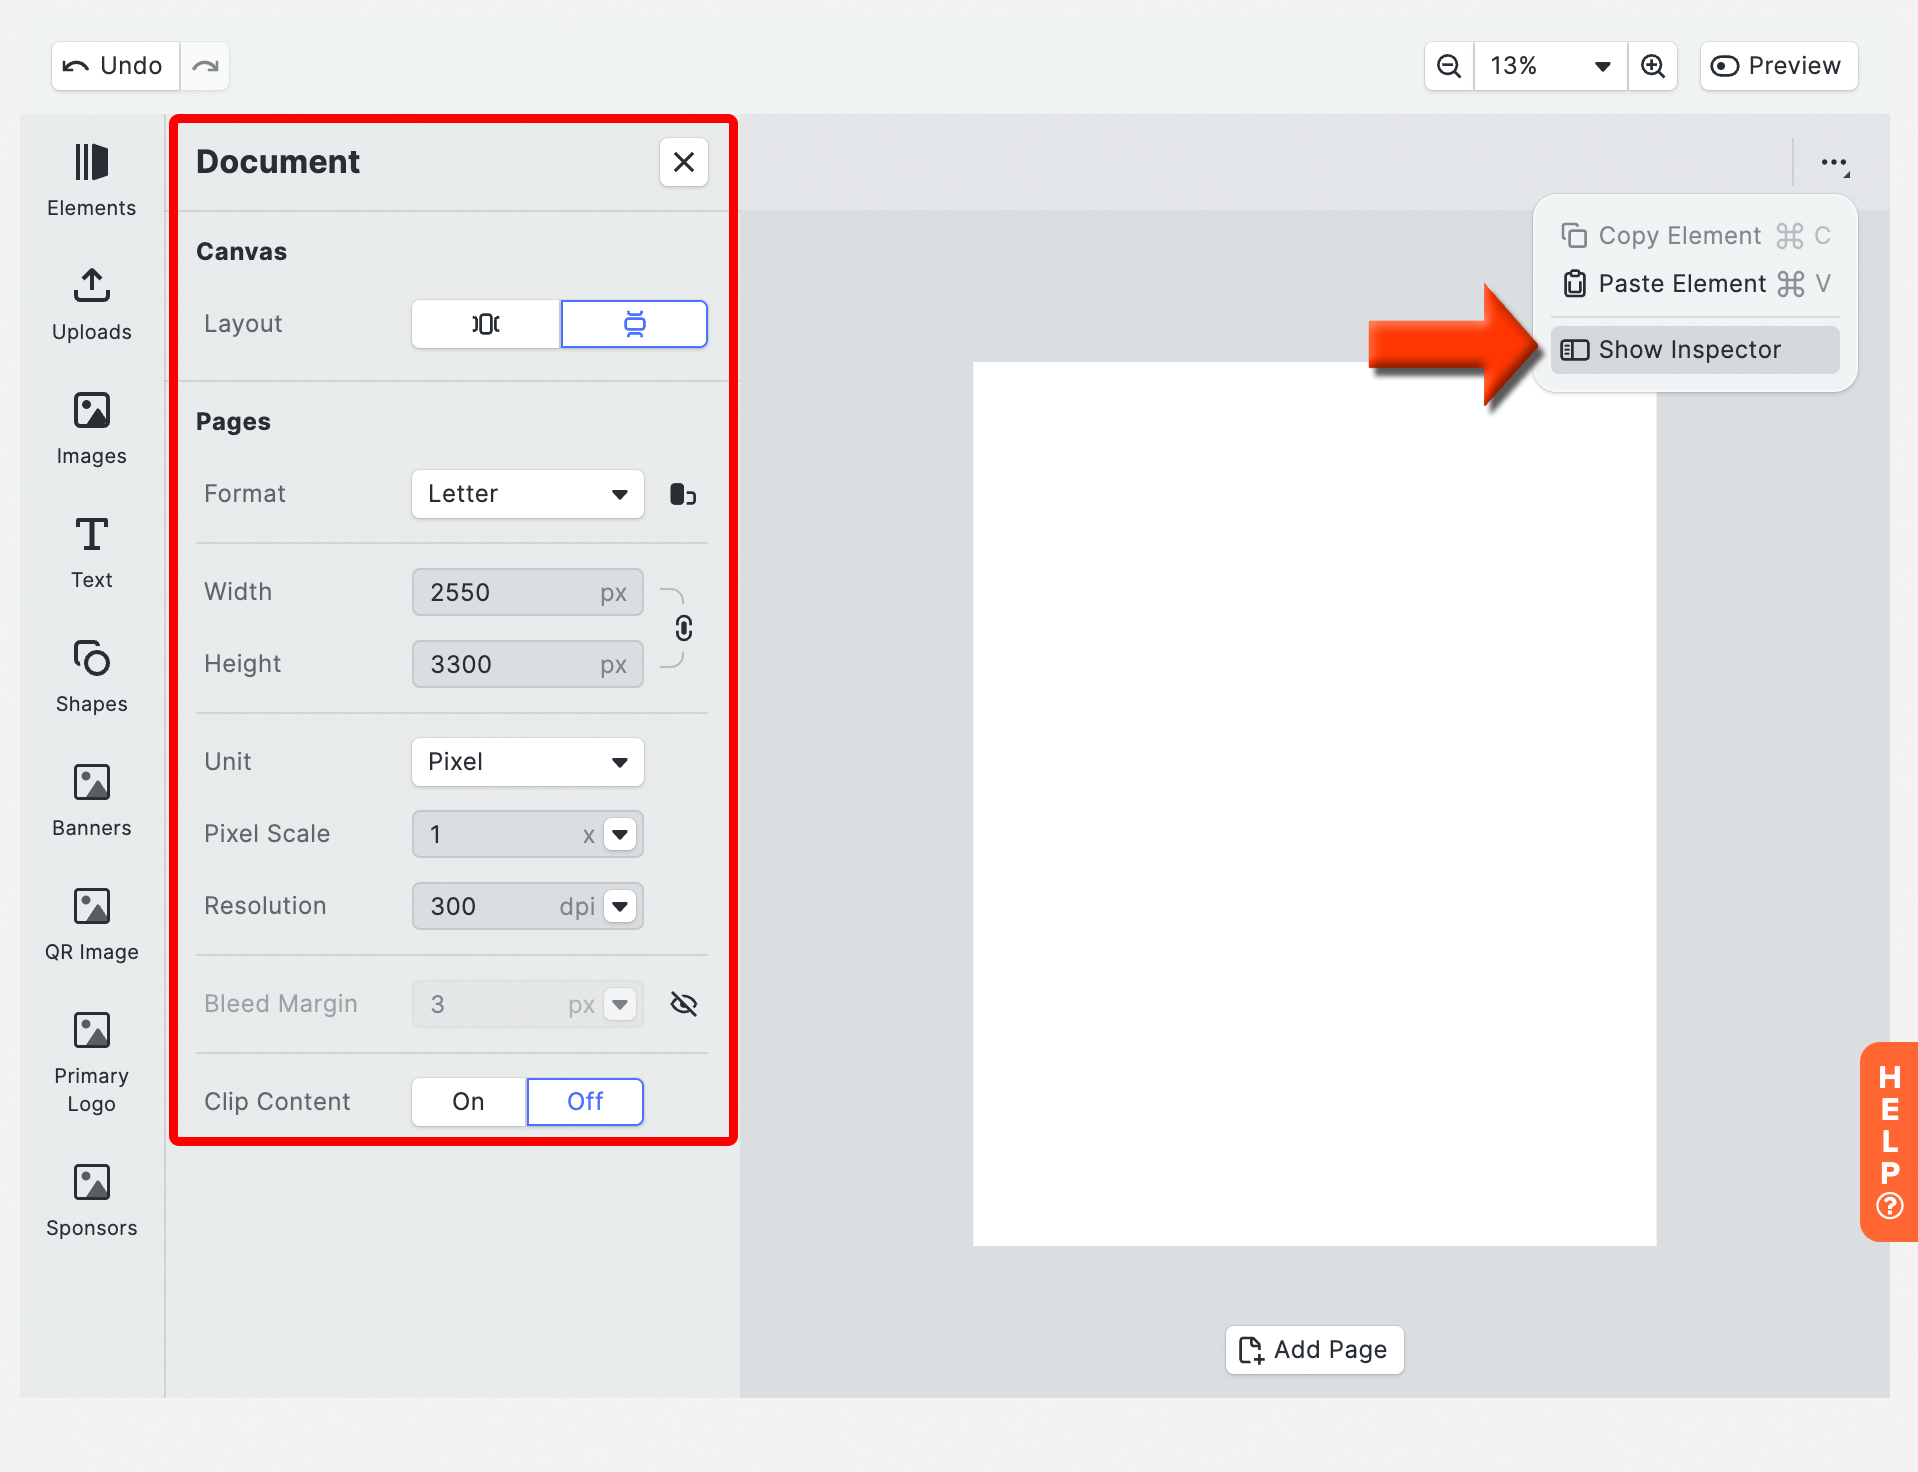
Document Setup:
The document setup allows you to set some of the basic parameters of the flyers, including layout, page format, units, and clipping. To access the document setup, ensure all the side windows are closed, and no elements are selected (including the page). Click the ellipsis icon, and click "Show Inspector." You will see the document window on the left (as shown below).
Page Setup:
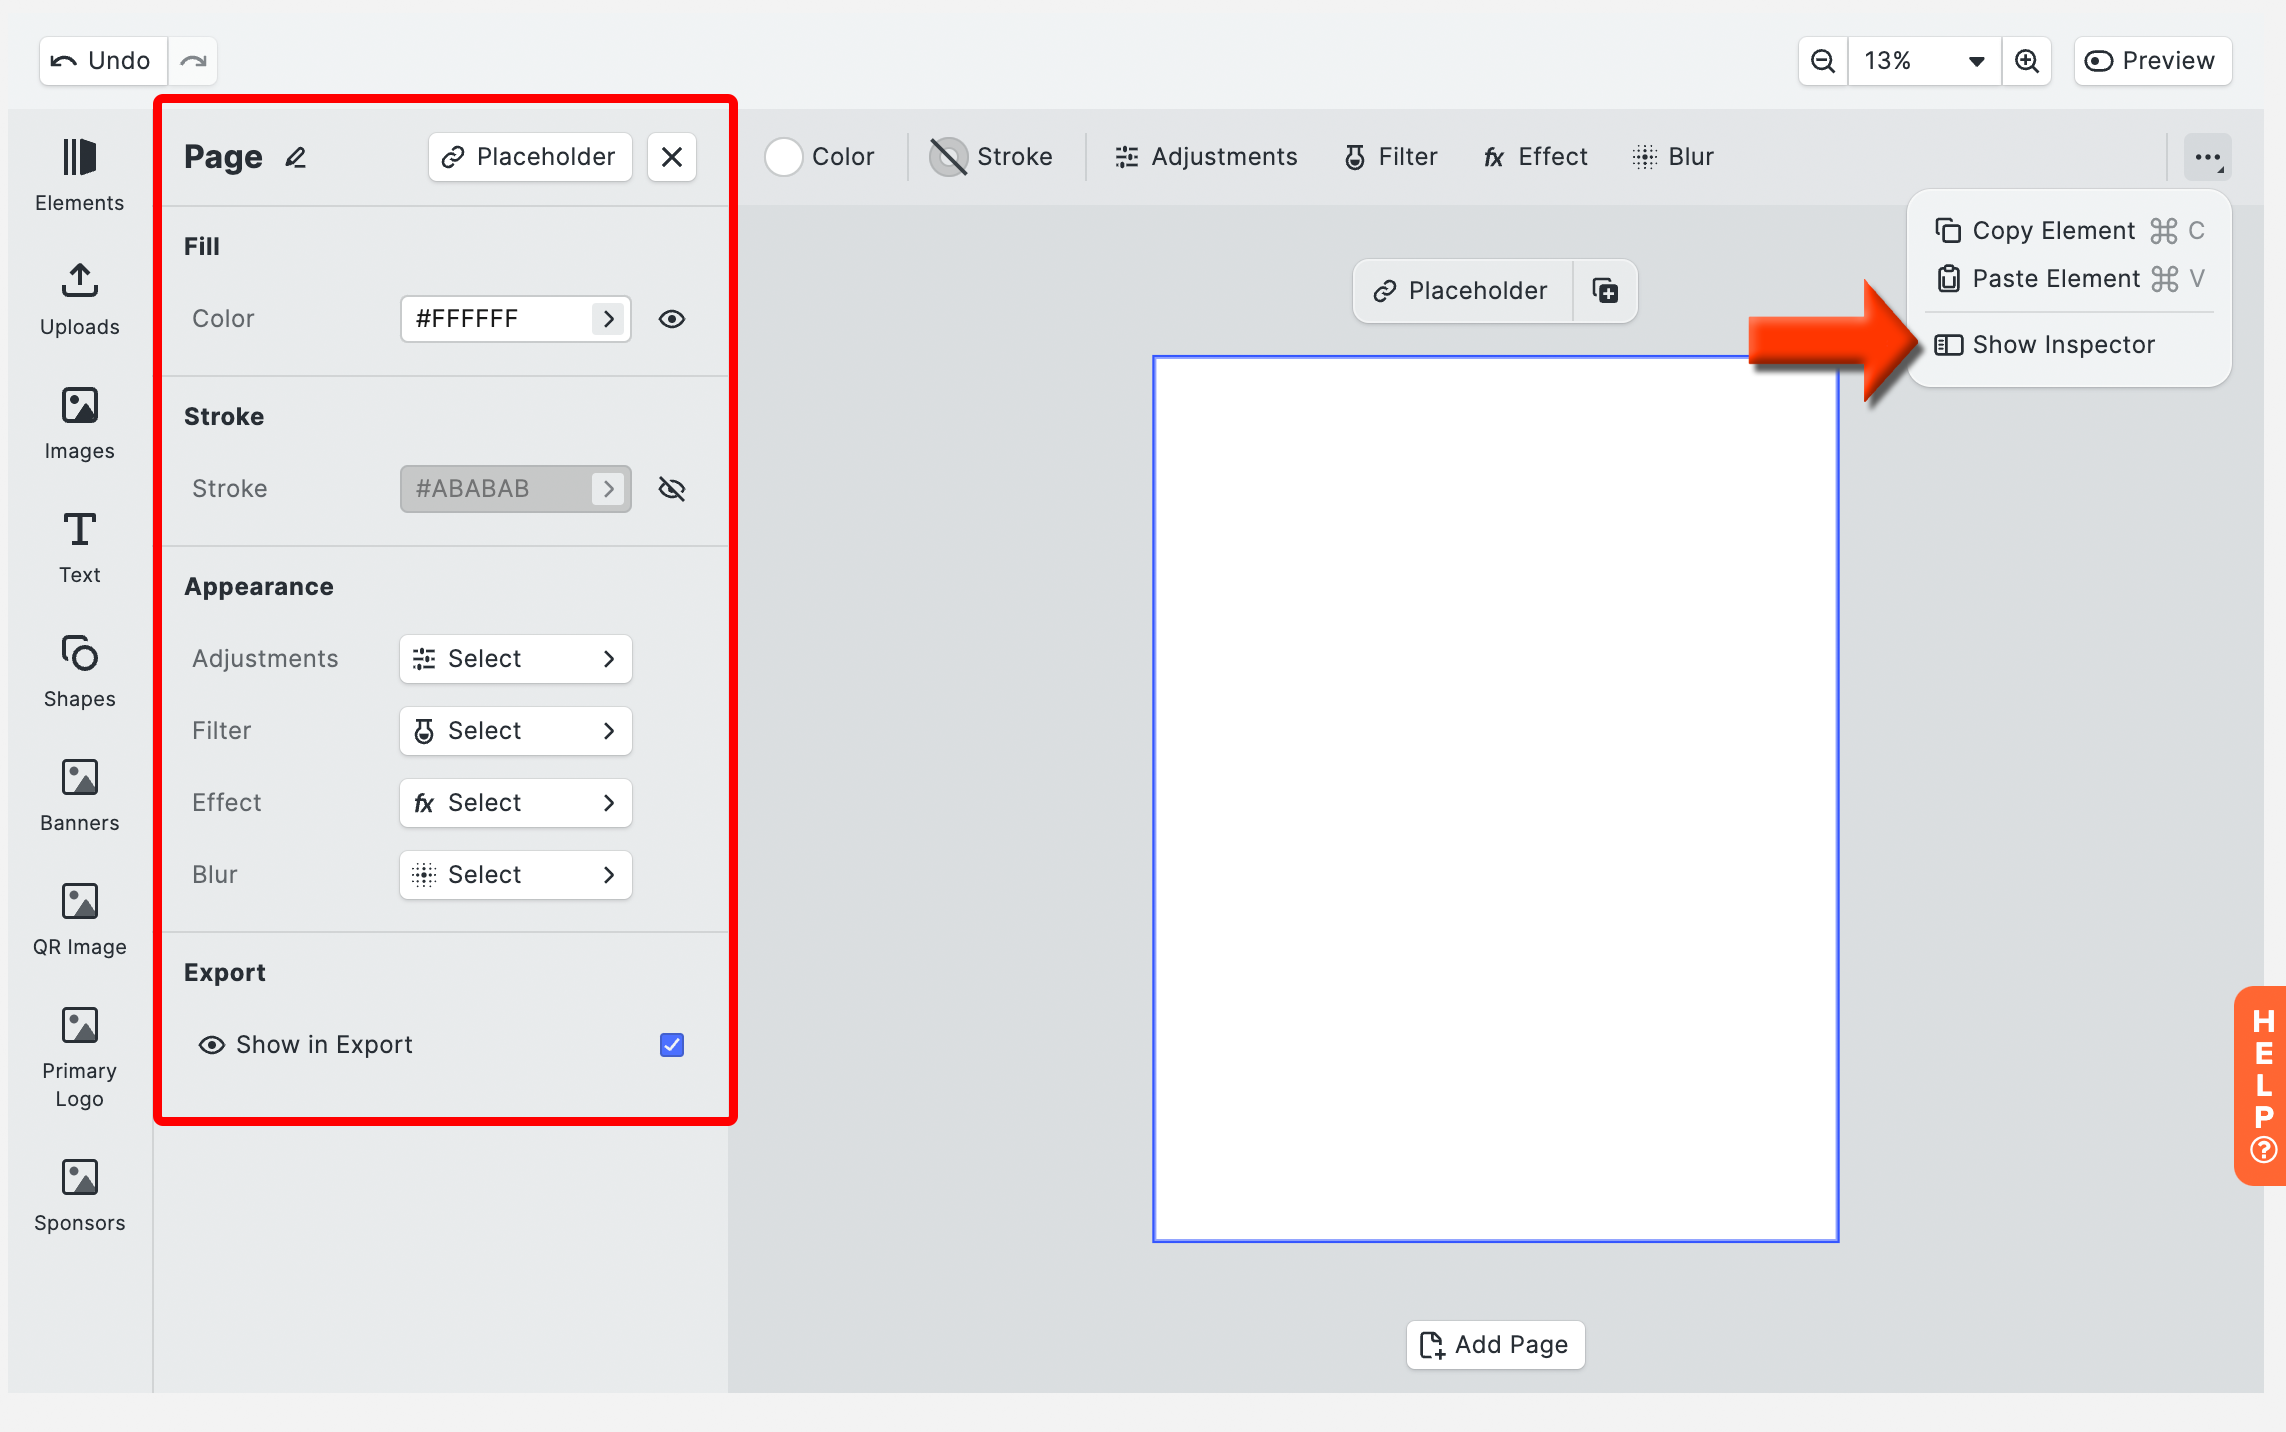
The page setup allows you to set some basic parameters, including its background appearance. To access the page setup, ensure no elements are selected, click the background, click the ellipsis icon, and click "Show Inspector." You will see the page window on the left (as shown below).
Design Elements:
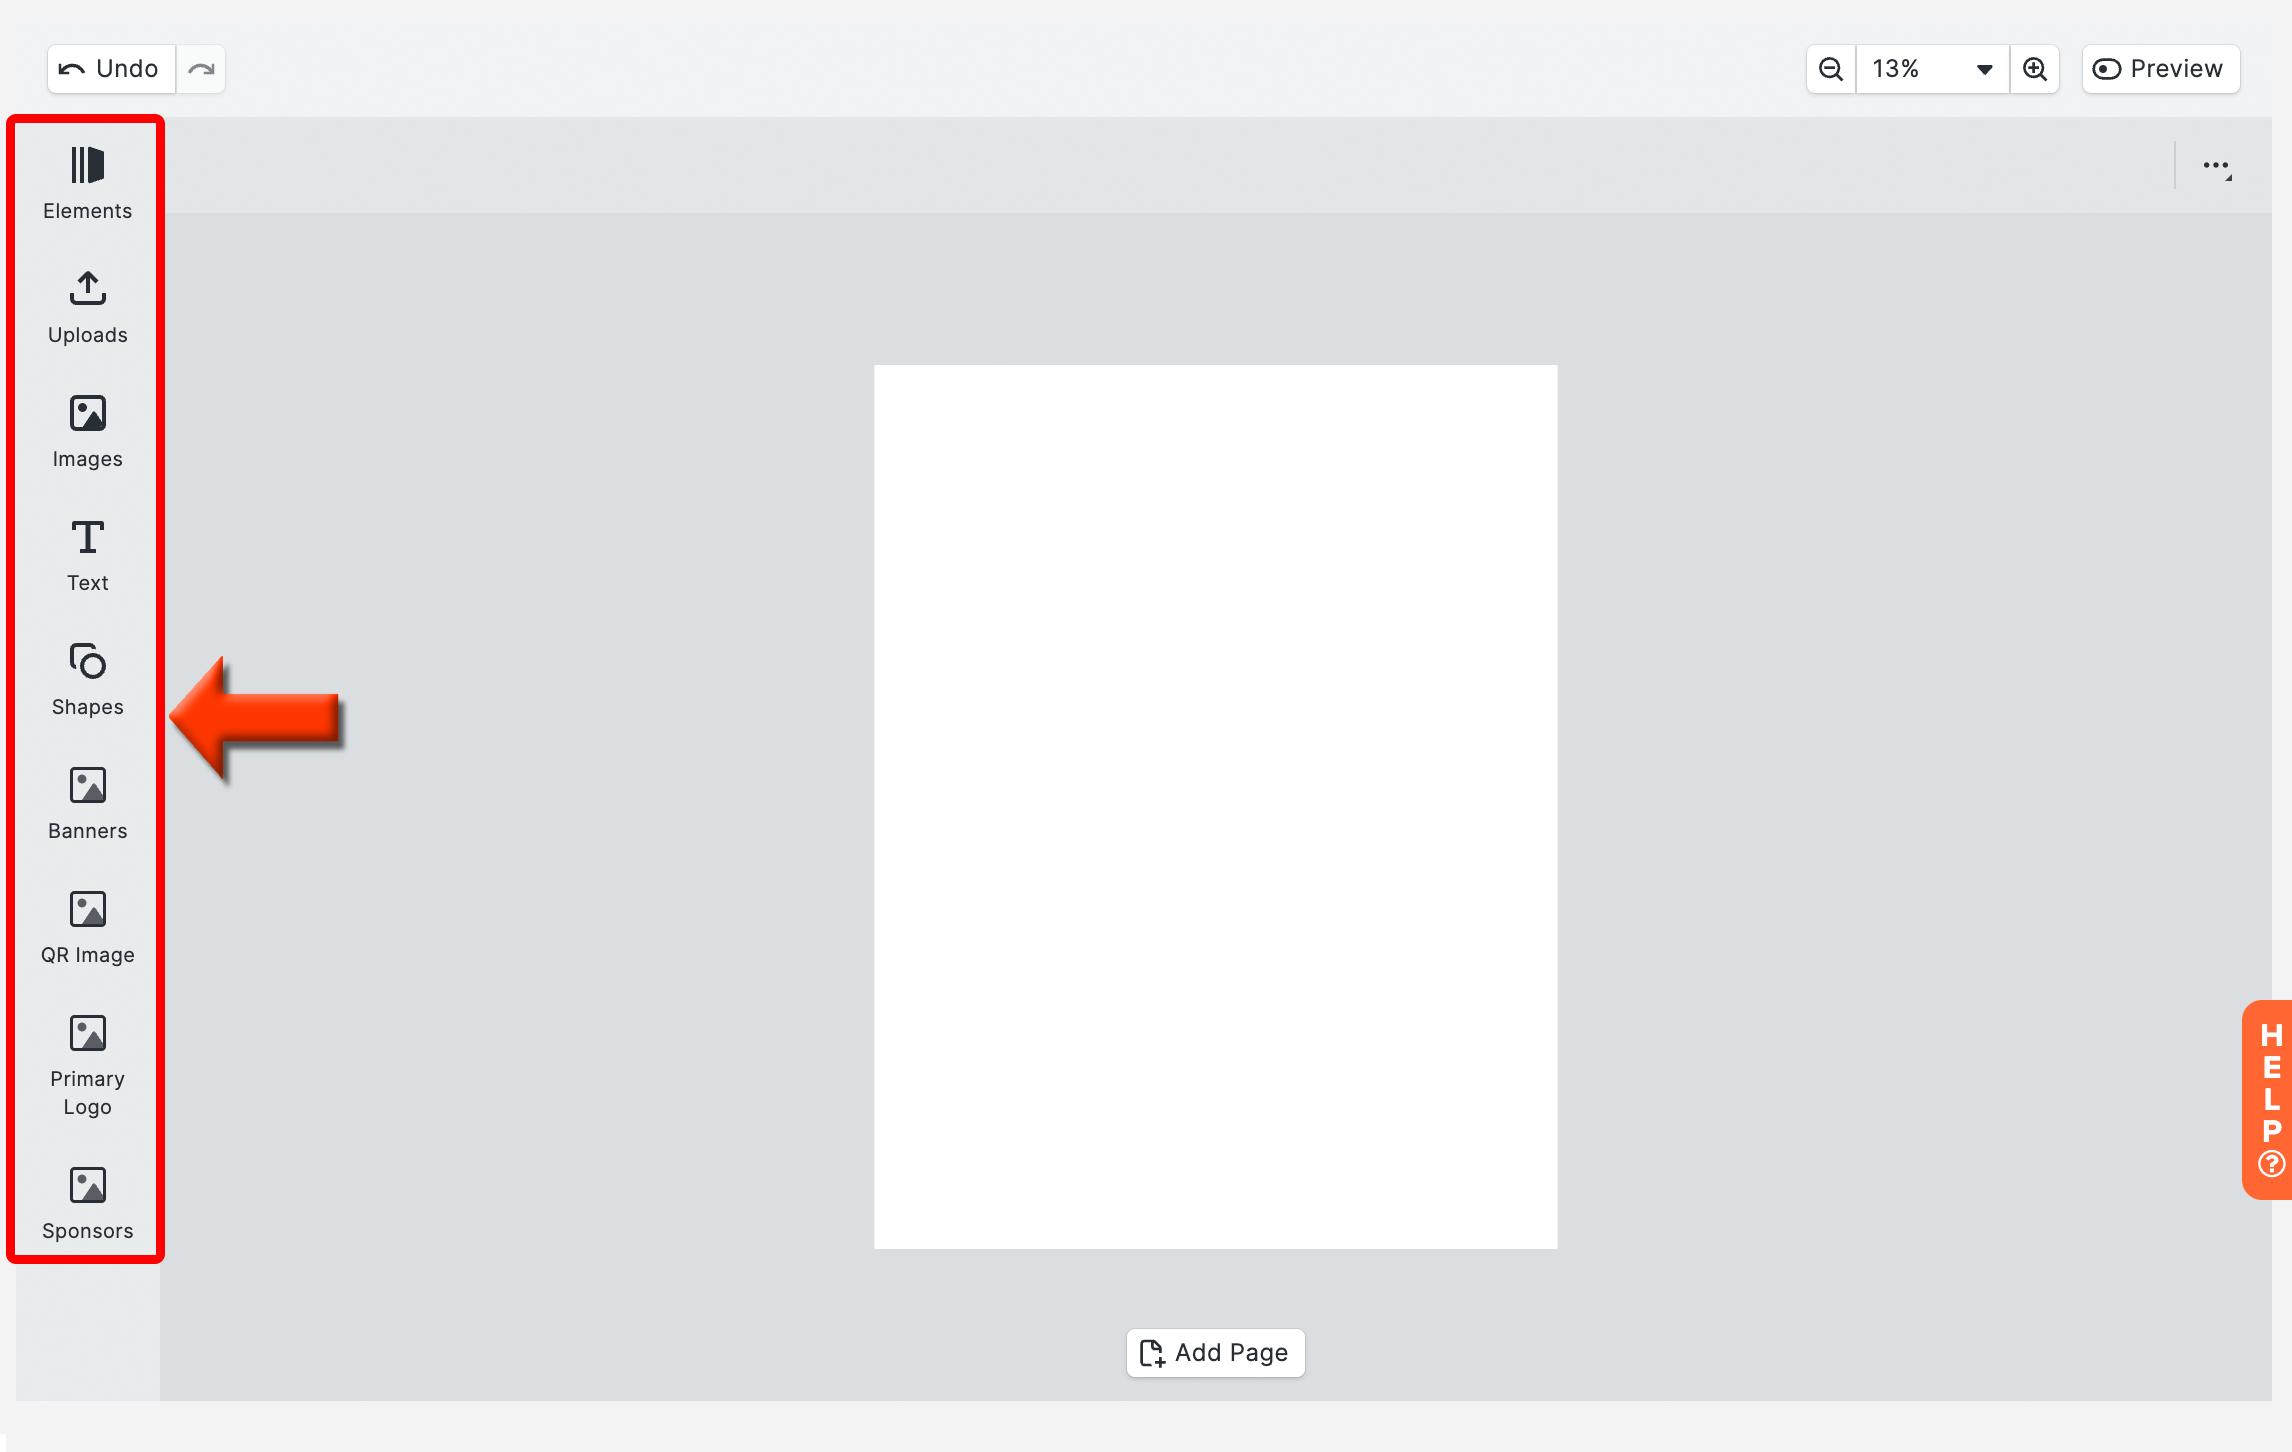
Design elements are what allow you to add content to the canvas. Here is a list of the available design elements and where their content comes from (if applicable):
Uploads: Upload images from your computer to use on the template.
Images: A curated collection of golf event related graphics.
Text: Insert general event related information with the text options.
Variable Text (Dynamic Fields): Variable text adds event related content using dynamic fields so that you can use the flyer for multiple events.
Shapes: A curated collection of shapes to add to the flyer.
Banners: Insert banners from Golf Hub.
QR Image: Add a QR Code to your flyers so potential participants can scan the code with your mobile device and access the event/league portal.
Primary Logos: Insert the primary logos or banners from the event.
Sponsors: Insert sponsor logos from the Golf Hub Page.
Advanced Text Editor:
After adding text to the canvas, you can manipulate the look of the text in many ways. To edit the look of the text, click on the text and you will get the basic editor in the top bar. If you wish to have an additional text editing option, click the ellipsis icon, and click "Show Inspector." You will see the advanced text window on the left (as shown below).

Variable Text (Dynamic Fields):
Insert tournament related information using variable text (dynamic fields). The same Flyer can be used for multiple events/leagues without any additional setup when using variable text. To insert variable text, follow these directions:
Click "Text" on the left column to add new text or Select any existing text.
Click "Edit."
Click "Insert Variable" to add to existing text or replace text with the variable text (as shown below).
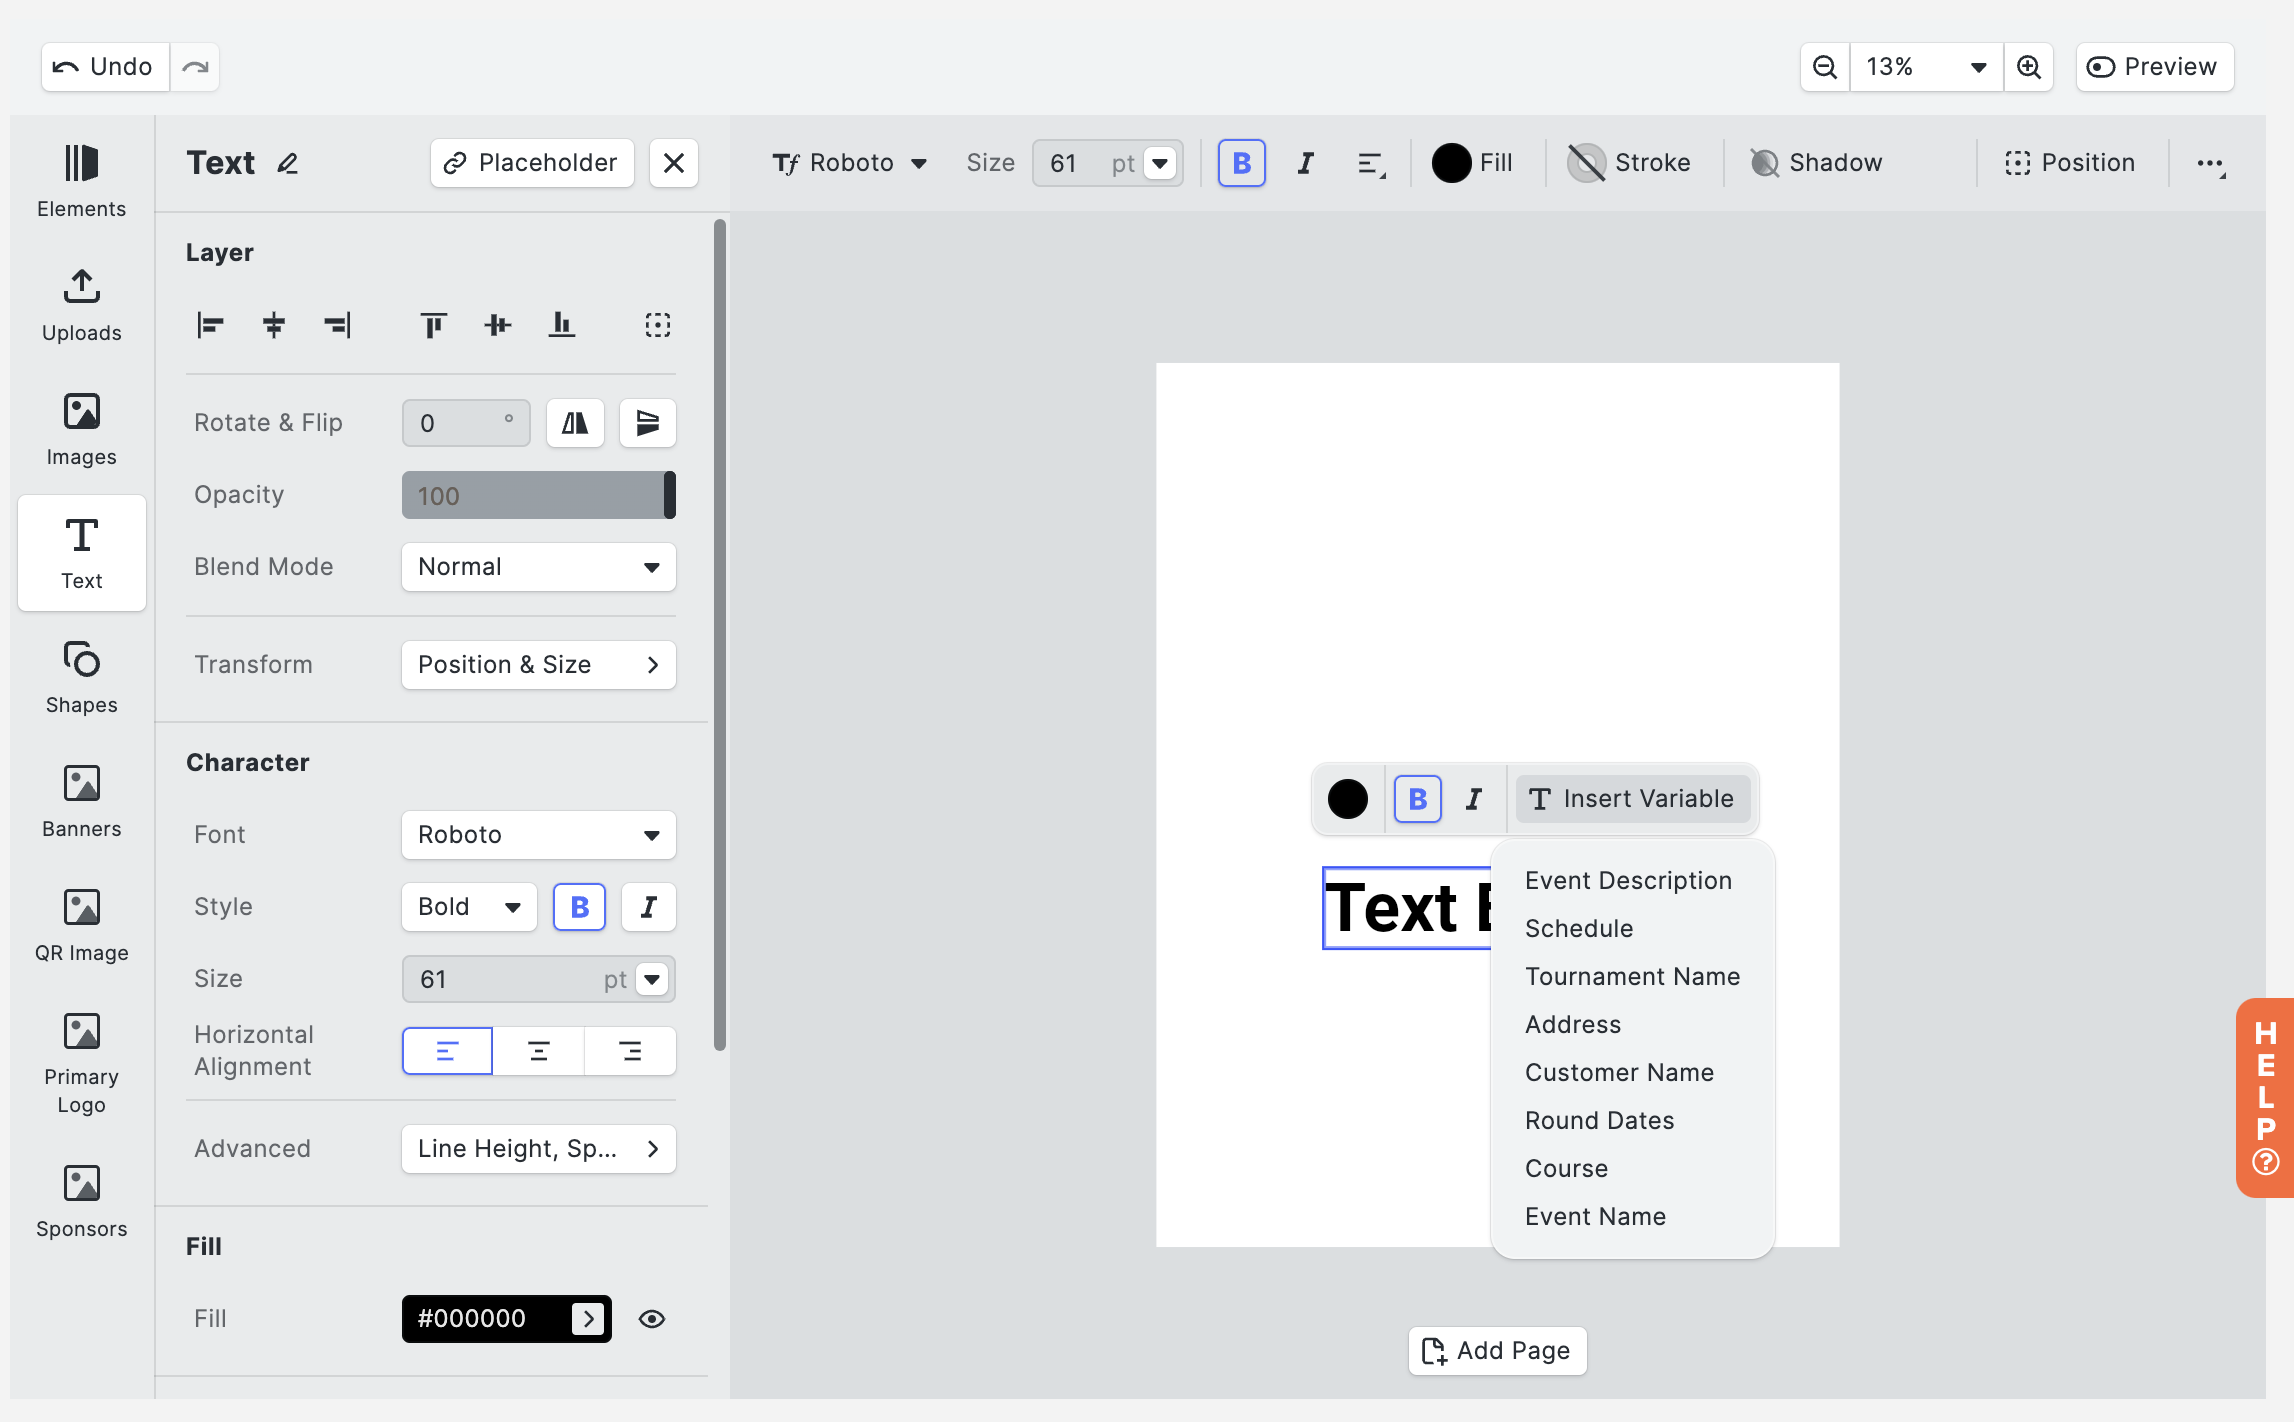
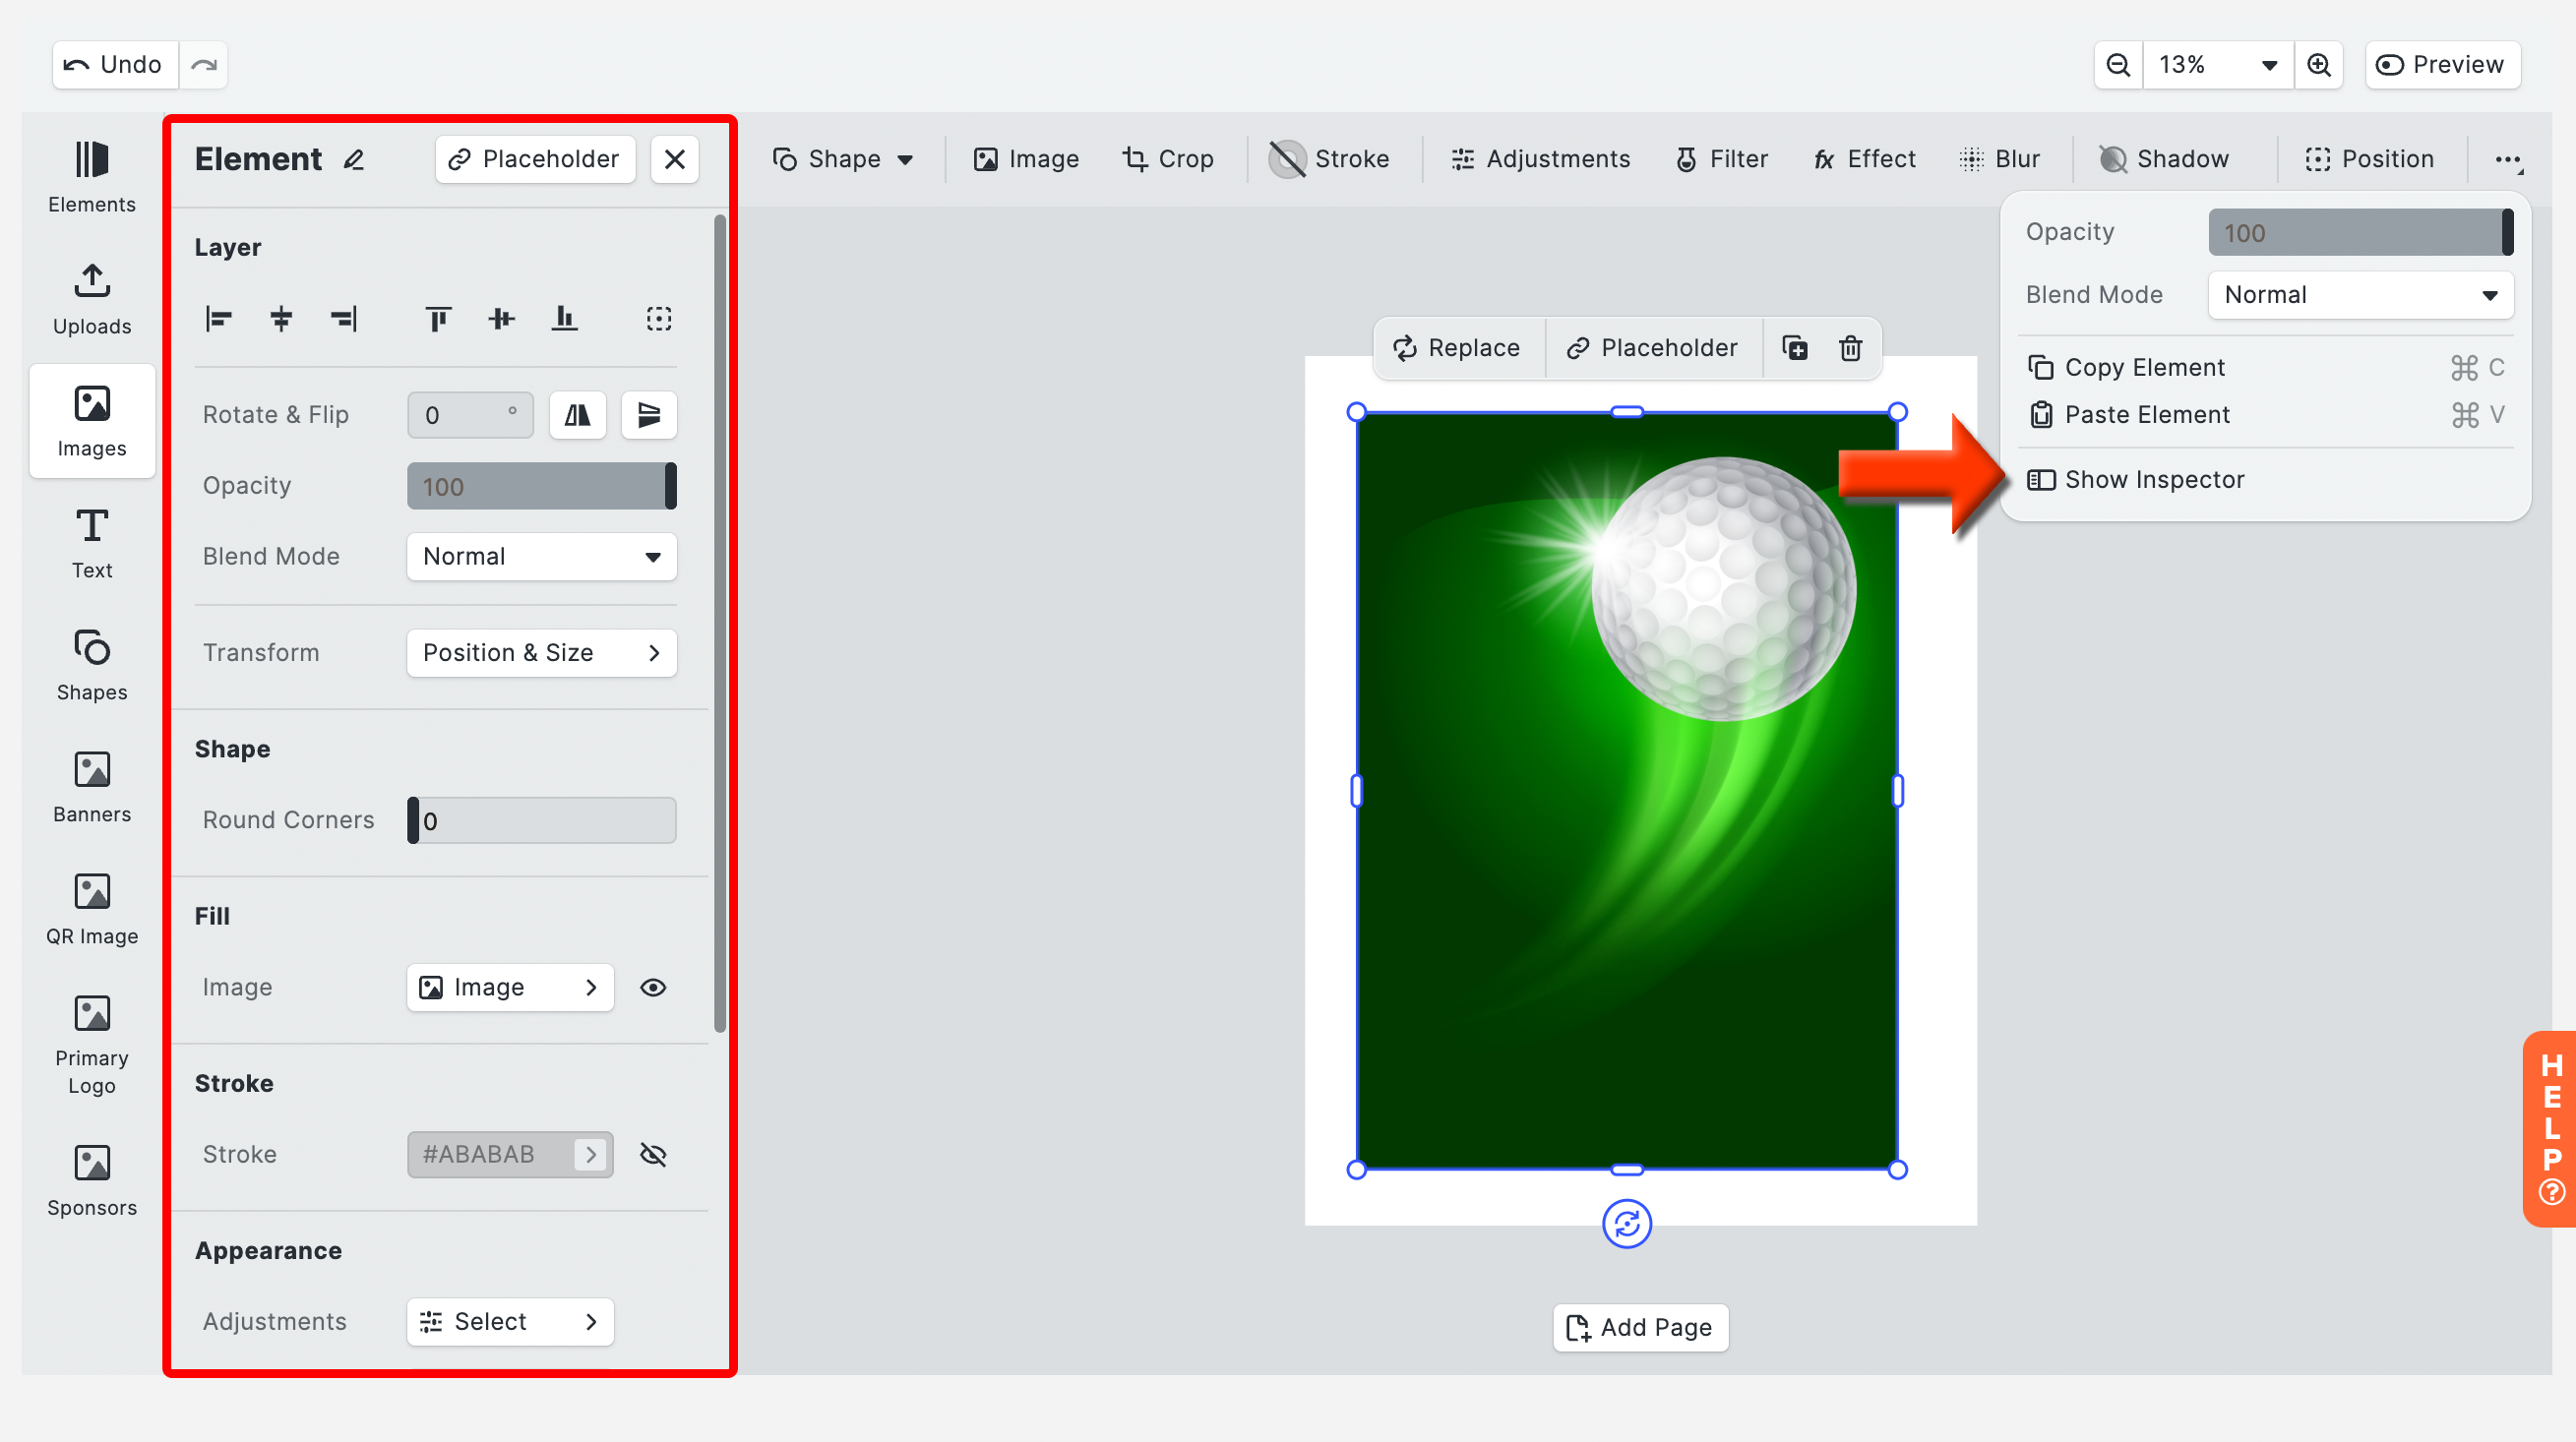
Image Editor:
There are many image related tools that you can utilize to adjust your image. To edit an image, click on the image and you will get the basic editor in the top bar. If you wish to have an addition editing option, click the ellipsis icon, and click "Show Inspector." You will see the advanced text window on the left (as shown below).