
This feature is only available with the following products:

If you use payment processing with Stripe, you can view the history of your customer transactions across all of your events. You can also view the transaction history for a specific event.
The Transaction History will include activity from:
Event and League Registration Payments
General Invoices
Round Payments
Refunds
In this article, we will discuss how the Transaction History can be used while managing your events.
Accessing and Filtering the Transaction History
To access the Transaction History, follow these directions:
All Events and Leagues: Go to Customer Center > Payment Center > Transaction History.
Specific Event or League: Within the specific event or league, go to Event/League > Transaction History.
When initially accessing the Transaction History, all of your transactions will be listed (as shown below).

You can apply one or more filters to narrow down your search.

You can filter by:
Season: If accessing the Transaction History in the Customer Center, you can filter the transaction by Season. When filtering by season, only event/league assigned to that season show.
Event: If accessing the Transaction History in the Customer Center, you can filter the transactions by event.
When accessing the Transaction History within a specific event, the transactions will already be filtered by that event.
You can also filter the Transaction History by Membership Program by selecting the program in this dropdown.
Player: You can filter the transactions by player. When selecting a player, all of their transactions will be listed. When viewing the Transaction History within an event, you can only filter the players listed within that event roster.
Status: You can also filter by payment status:
Paid/Cleared: Credit card was approved and payment was processed.
Paid/Pending (Stripe Only): Credit card is being processed, but not yet approved by Stripe. This process can take up to 7 days.
Paid by other means: Payment has been marked as "paid offline" (e.g., with check or cash).
Refunded: Payment has been refunded. (Note: In addition to the original payment transaction, another transaction will be listed for the refund.)
Merchant Account: You can filter by merchant account if you use multiple Stripe merchant accounts. For instance, you may have separate merchant accounts for junior events and professional events.
Start Date/End Date: Filter transactions by date. Select the start date and end date. All transactions within that time range will be filtered.
After selecting the filters to apply, click "Go," and your filtered transactions will be listed below. At any time, you can adjust the filters above to get an updated filtered search.
Viewing the Transaction History
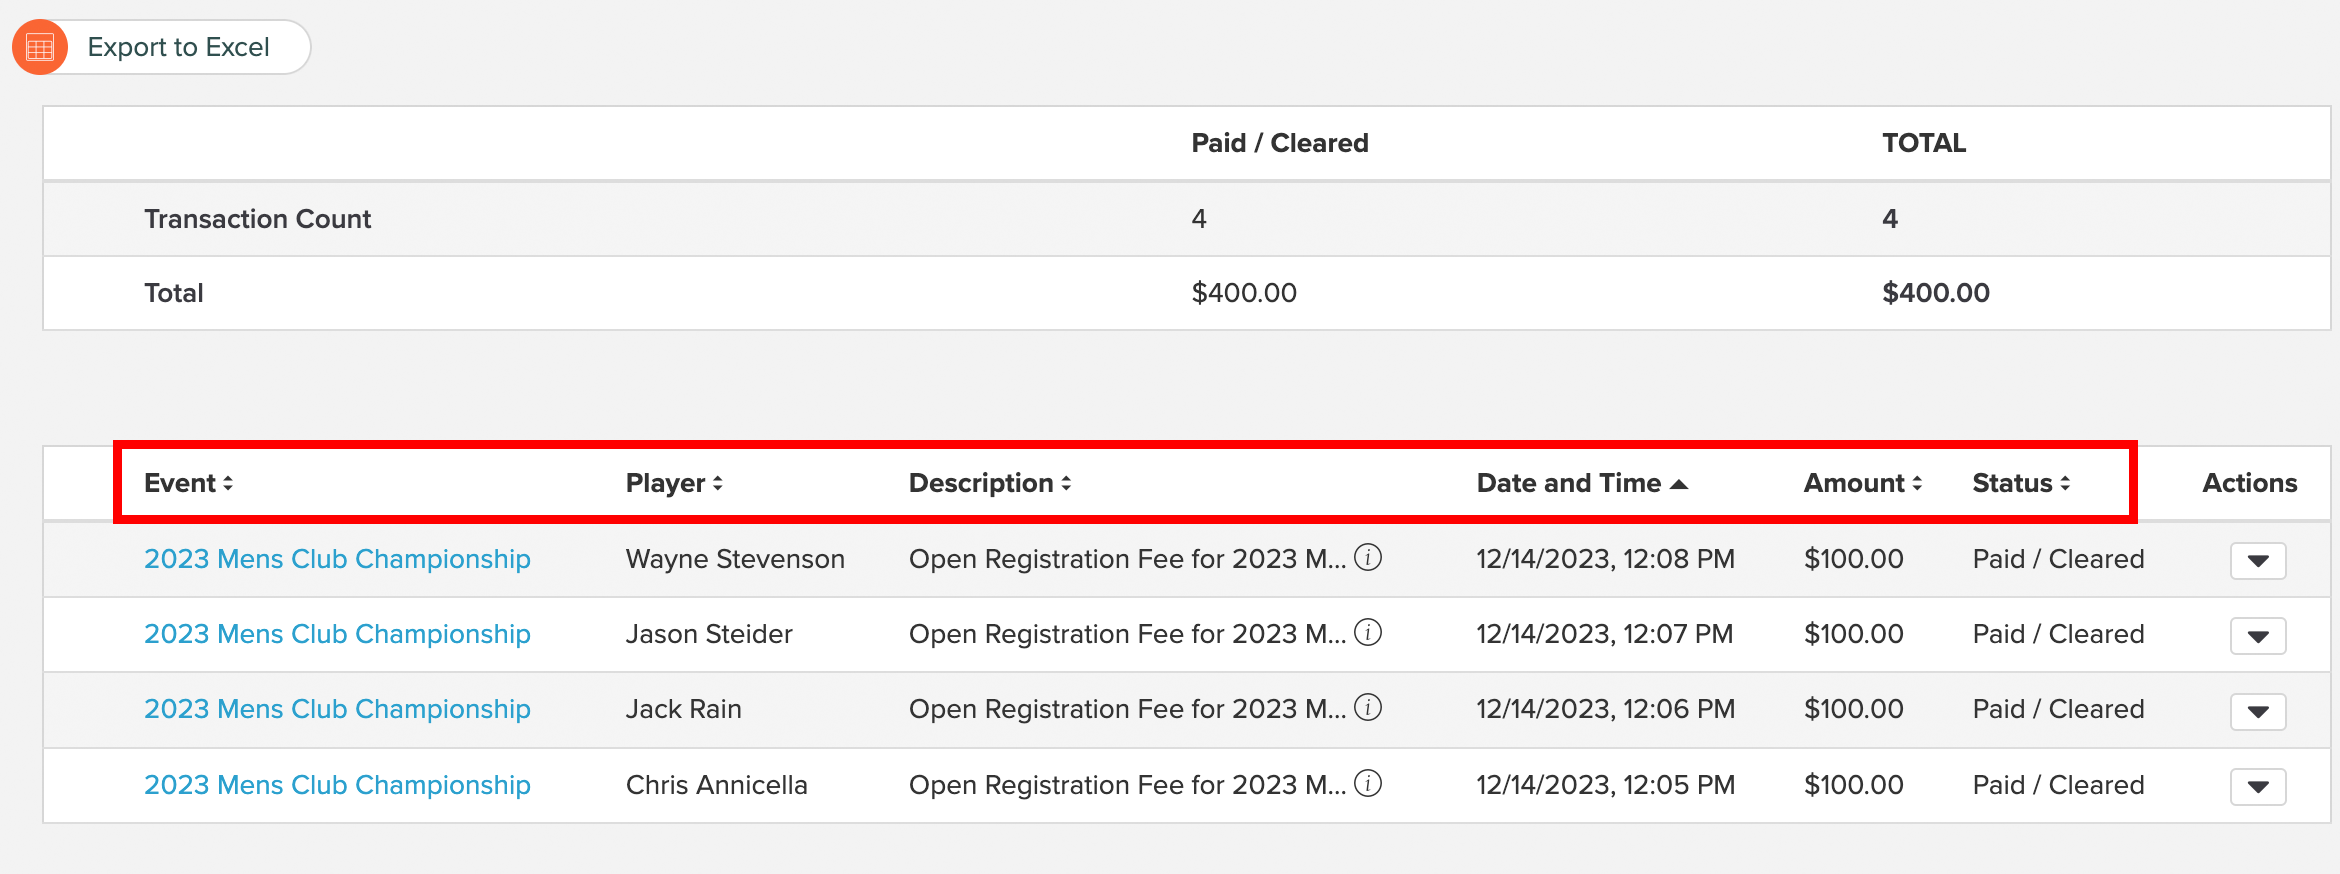
When viewing the Transaction History, you can sort the transactions by event, player, description, date & time, amount, and status. Click on the Transaction History header to apply the sorting method (as shown below).
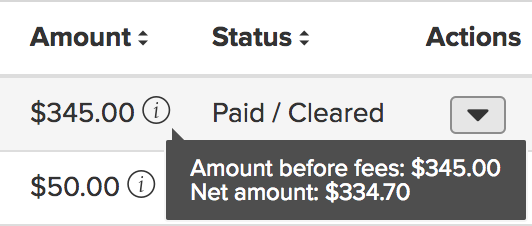
For Stripe customers, the gross amount of the transaction will be listed. However, if you hover over the "i" icon, you can view the net amount (the amount after the transaction fee) (as shown below).
You can also export the filtered Transaction History onto a spreadsheet by clicking "Export to Excel". The spreadsheet data will be separated in columns by event, description, date & time, amount, and status (as shown below). There will also be a second sheet (tab) in the spreadsheet with totals by transaction status.

Viewing Transaction History from Roster Profile
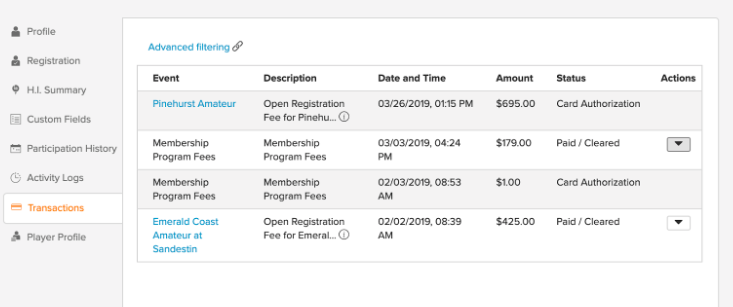
You can also view the transaction history for specific players in their master roster and event/league roster Player Profile (as shown below).
To access a player's roster profile, follow these directions:
Master Roster Profile (transactions across all events): From the customer center, go to Master Roster > View Master Roster, select the player, and view the "Transactions" tab.
Event/League Roster Profile (transactions for a specific event/league): Within a specific event or league, go to Golfers > Event/League Roster, select the player, and view the "Transactions" tab.
Issuing Refunds
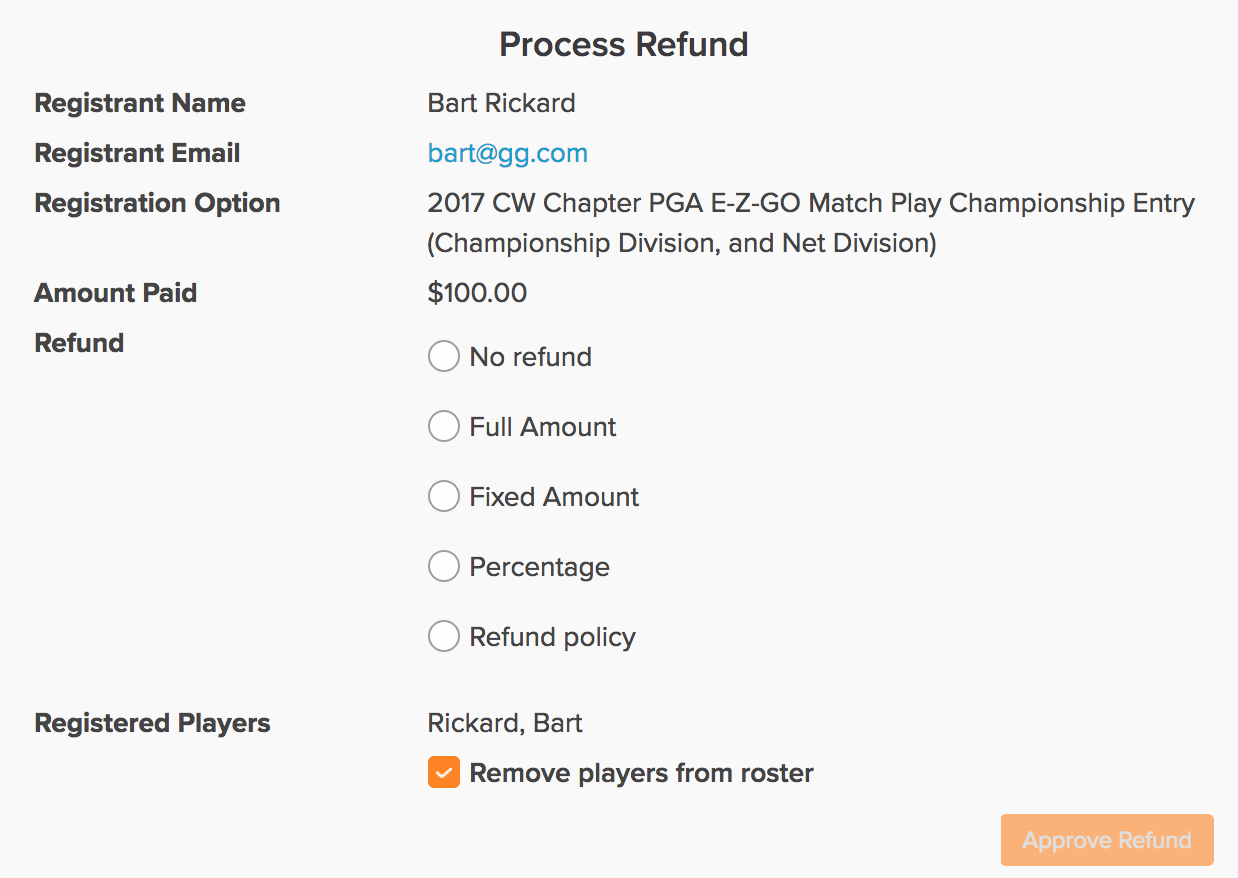
To issue refunds manually, select the actions dropdown on the player's row and click "Refund".

You can refund the full amount, partial amount, or a percentage of the amount. If the payment is from Event and League Registration, you can also apply a refund policy. If selecting a refund policy, the refund amount will be determined by the rules of the policy.
Note: Refunds for Add Credit to Balance transactions are not supported.
If the payment was for Event and League Registration, you also have the option to remove the player(s) from the roster.
After issuing the refund, the player will receive an email confirmation.
As discussed earlier in this article, the original transactions and refund transactions are listed in the Transaction History. The original transaction will also contain a "Refund Issued" disclaimer.

Transferring Registration
To transfer event registration to another event, select the actions dropdown on the player's row and click "Transfer Registration" (as shown below).

For more details, Click Here.
Printing Receipts
Many managers must provide receipts to players after they have registered and paid. While a transaction receipt is available to players, there are cases where the Player Dashboard has not been added to a portal by the manager or registration is closed, meaning the player cannot access the receipt any longer.
To print a receipt for registration, select the actions dropdown on the player's row and click "Print Receipt" (as shown below).
