
Custom fields are used to contain certain player information. The Tee Custom Field is a default field available for every event or league. The tee custom field's purpose is to allow you to quickly set the course and tee for a field of players in a round or for a Round-Robin Schedule.
Ideally, setting the course and tee would be done using Default Tees. However, this is not always possible. In events and leagues with guests, using Default Tees for every player is not possible because a player must be on the Master Roster to use Default Tees. An alternative solution would be to use the "Tee" custom field.
Using this field is also a great option where the tee used is specific to a particular event/league and not the same as the Default Tee from the master roster.
In this article, we will discuss how to assigning the "Tee" custom field in the Player Profile and using that custom field to assign the tee when setting the course and tee in the pairings or during the round-robin scheduler.
Assigning the "Tee" Field:
When setting the course and tee in the pairing based on the "Tee" field, it must be defined in the Player Profile (as shown below).
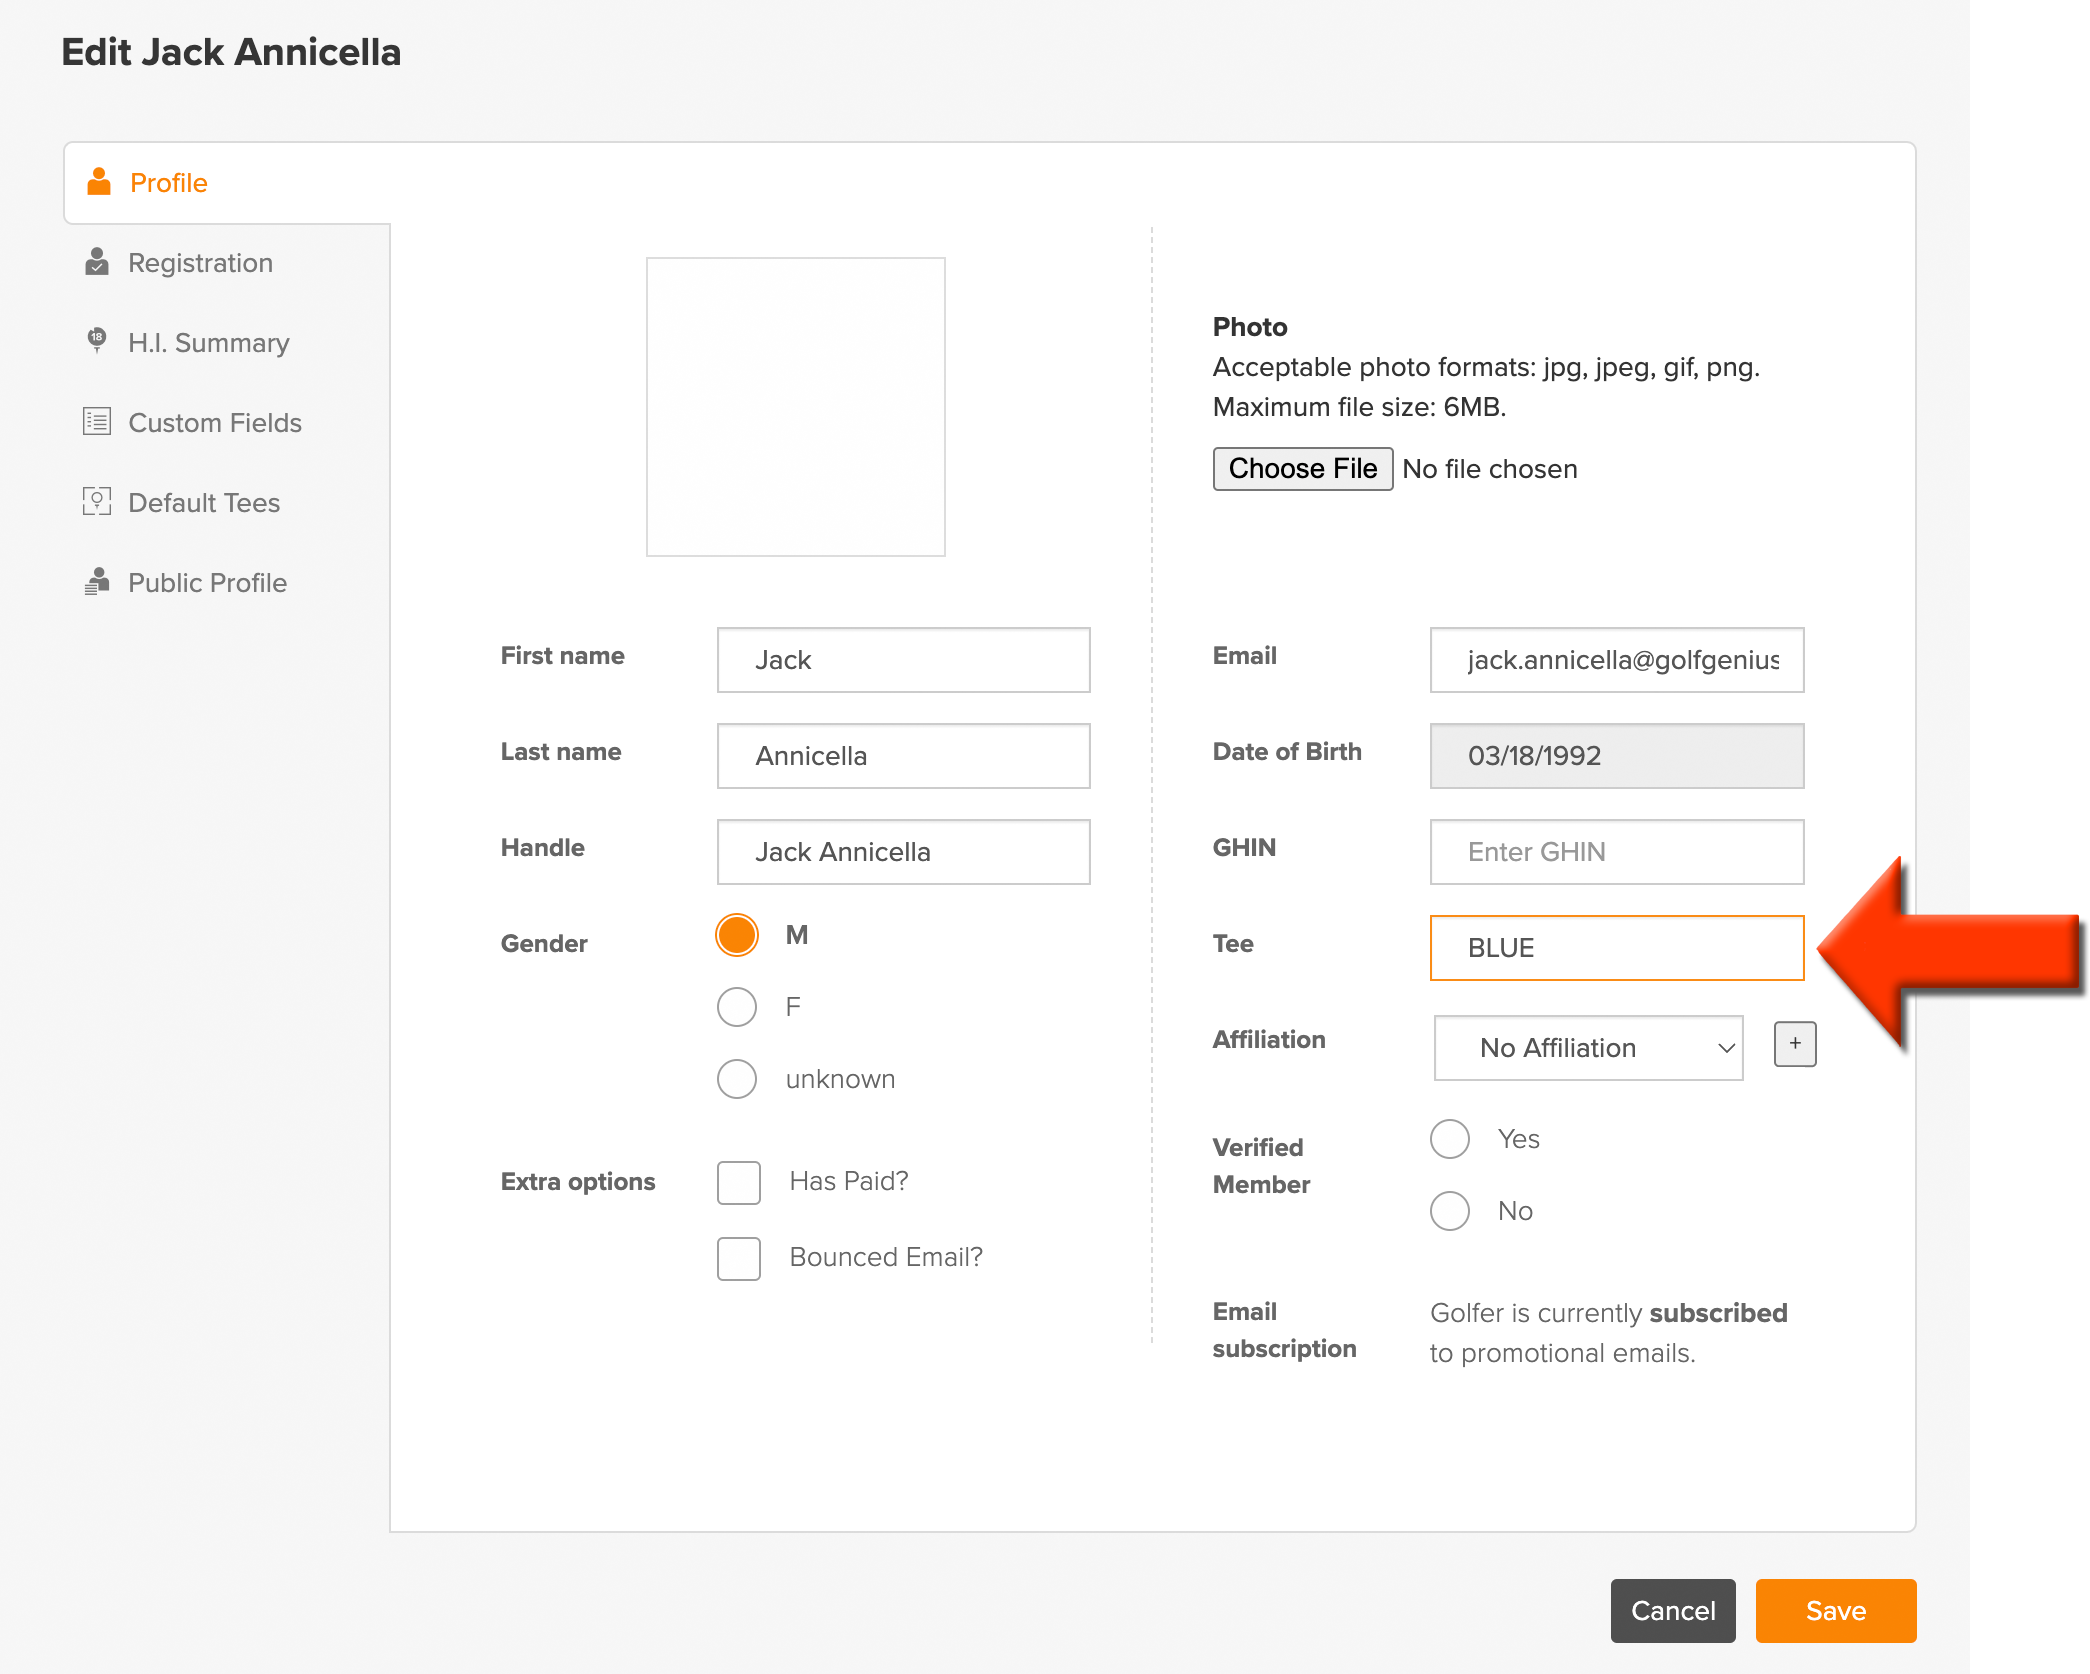
There are several ways to populate the "Tee" Field in a players profile:
Manually through the Player Roster Profile. Click Here for more Details.
Managing Event or League Roster via Spreadsheet. Click Here for more details.
During Event and League Registration. Click Here for more details.
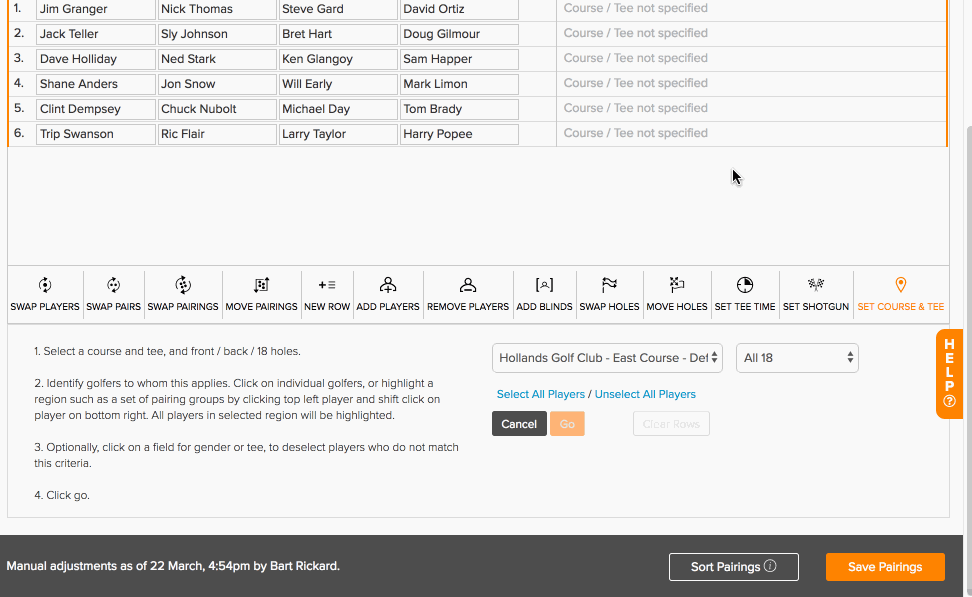
Setting player course/tee in the pairing using the "Tee" Field:
Follow these instructions to accomplish this:
If no pairings are created, Create New Pairings by going to Round > Create New Pairings.
If you have created pairing already, go to Rounds > Edit Existing Pairings.
Click "Set Course & Tee."
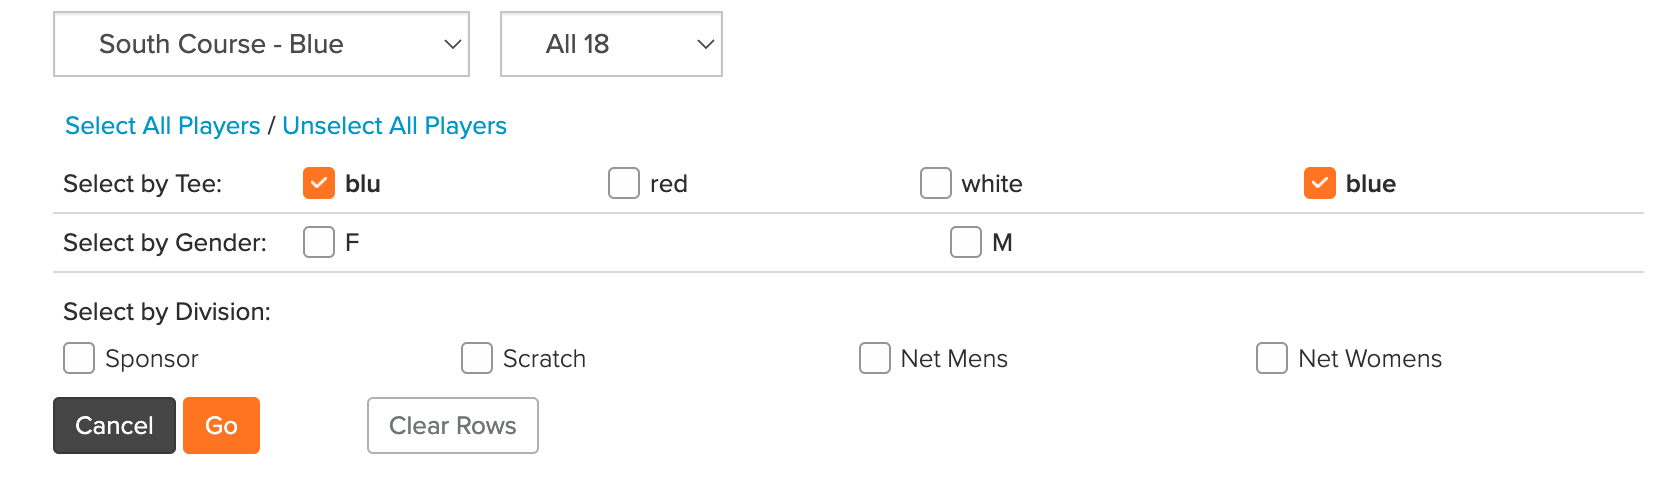
Select one of the tees being played.
Select Front 9, Back 9, or All 18.
Click "Select All Players"
Select the "Tee" Custom field answer(s) to be used for that tee (those players will highlight.)
Click "Go."
Repeat steps 3 thru 7 for all remaining tees.
Click "Save Pairings."
See the sequence below as we set some players on the blue tee and white tee using this method.
Note: Multiple custom field values can be selected and assigned to the same team (as shown below).
Setting player course/tee during Round-Robin Scheduler using the "Tee" Field:
During the Round Robin Scheduling process, you will be able to set the course and tee. When selecting the course and tee, you can match the custom "tee" field to the course tee (as shown below).

When setting the course and tee for the round robin scheduler, follow these instructions:
Set the course being used.
Select if it is All 18, Front 9, or Back 9.
Set the Default Tee. The default tee will be used if no tee is defined in a Player Profile.
Any tees that are defined in the Player Profile (as shown above). Match the "Tee" field to the appropriate course tee.
Define the additional options as part of the "Set Course & Tee" outlined in the round robin scheduler (e.g., Tee Time vs. Shotgun, Start times, Apply the same setting to other rounds).
Click Save.
For more information on using the Robin Robin Scheduler, Click Here.