
This feature is available for the following products:

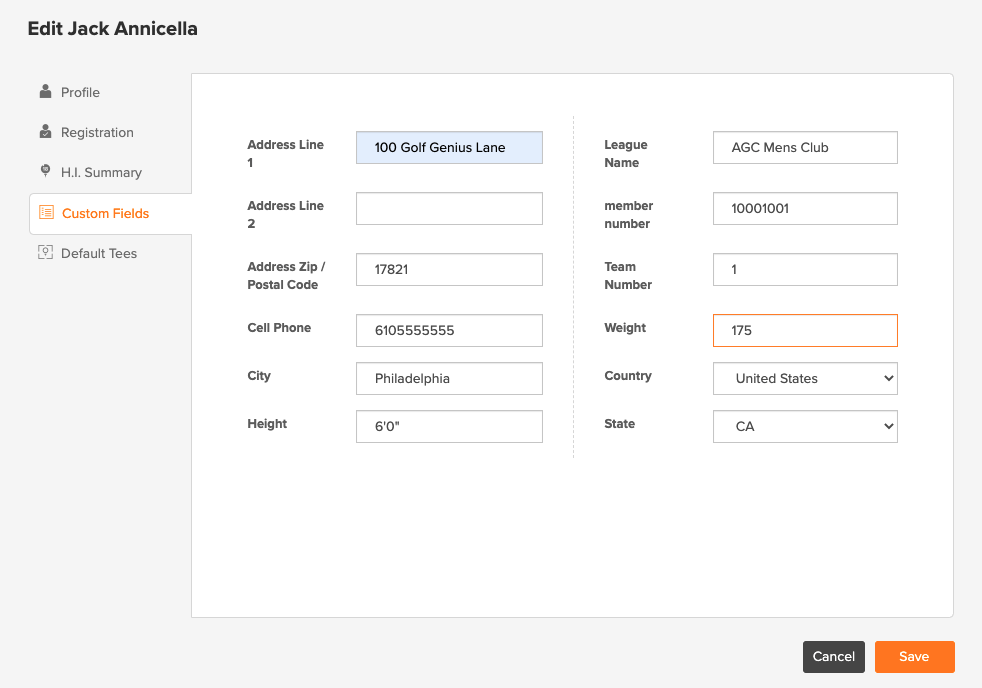
When looking at a Player Profile, you have system fields and custom fields. System fields are default fields that cannot be renamed or deleted. Some examples of system fields include email, date of birth, gender, affiliation, default tee, and more. Custom Fields are user-defined fields that allow you to track additional player information that is not already captured by the system fields. For example, you can capture member details, such as mailing address, member numbers, merchandise preferences, and more (as shown below).
System Fields and Custom Fields can be used through Golf Genius to:
Populate Reports,
Filter and Sort,
Create pairings,
Create teams,
Create flights,
and more.
In this article, we will discuss:
Creating Custom Fields
Populating Custom Fields
View/Manage Custom Fields
Creating Custom Fields:
There are two ways to create custom fields:
Creating Custom Fields Manually
Creating Custom Fields via Spreadsheet Upload
Creating Custom Fields Manually:
For custom fields that are used across all events/leagues (e.g., phone number, bag storage, membership type), add them as customer-level custom fields. These fields can be accessed by going to Customer Center > Customer Settings > Custom Fields > New Custom Field.
For custom fields that are specific to an event or league (e.g., dinner selection, flight, tee gift), add them as event-level custom fields. These fields can be accessed by going to Event > Custom Fields > New Custom Field (as shown below).

Enter the following:
Question/Field: Name used to identify the custom field.
Hint: Provide a hint in case the custom field needs more explanation than the title.
Answer Type: select the type of answers that will be stored in the roster. The following answer types are available:
Yes/No
One Line Answer
Number
Date
Multiple Line Answer
Multiple Choice - Single Answer
Multiple Choice - Single Answer (Large data set): For more details about this option, Click Here.
Multiple Choice - Multiple Answers
Country
State
Member Portal: Allow/disallow players to enter/edit the answer if you have the Golfer Profile page available in the portal.
Event/League Registration: Include (and optionally require the guest to answer) the custom field in the guest form. For instance, if it is important that you know if the guest has a food allergy, you can require that the registrant answer the custom field question in order to complete registration. For more details on Event Registration, Click Here.
Click "Save" and the custom field will be created.
Creating Custom Fields via Spreadsheet:
When uploading an event/league roster or master roster via spreadsheet, you can create custom fields during the process. To do this, give the custom fields their own column in the spreadsheet and name the column (as shown below).

In the above spreadsheet, notice we added a new column, which creates the custom field, called Member Type.
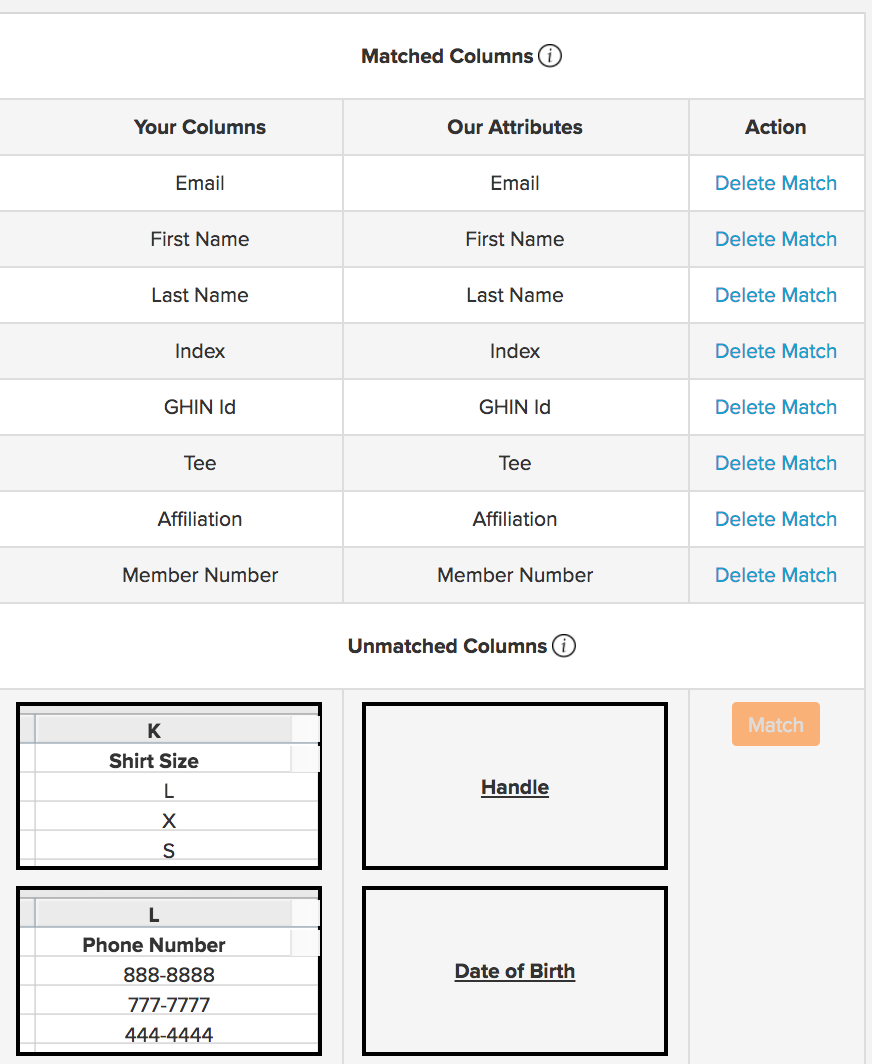
When uploading the spreadsheet, any column that is not matched will be created as a custom field. If you look at the screenshot below, the Shirt Size and Phone Number fields will be added as a custom field.
How to Populate Custom Fields:
Populating custom fields for your players is a great way to store important information (e.g., phone number, bag storage number, membership type, etc).
Custom fields can be populated using the following methods:
Manually through the Player Roster Profile. Click Here for more Details.
Updating Master Roster via Spread Sheet. Click Here for more details.
Managing Event or League Roster via Spreadsheet. Click Here for more details.
During Event and League Registration. Click Here for more details.
How to View/Manage Custom Fields:
For custom fields in your master roster, that are used across all events/leagues view them at the customer-level. Customer-level custom fields can be accessed by going to Customer Center > Customer Settings > Custom Fields.
For custom fields that are specific to an event or league view them at the event-level. Event/League level custom fields can be accessed by going to Event > Custom Fields (as shown below).
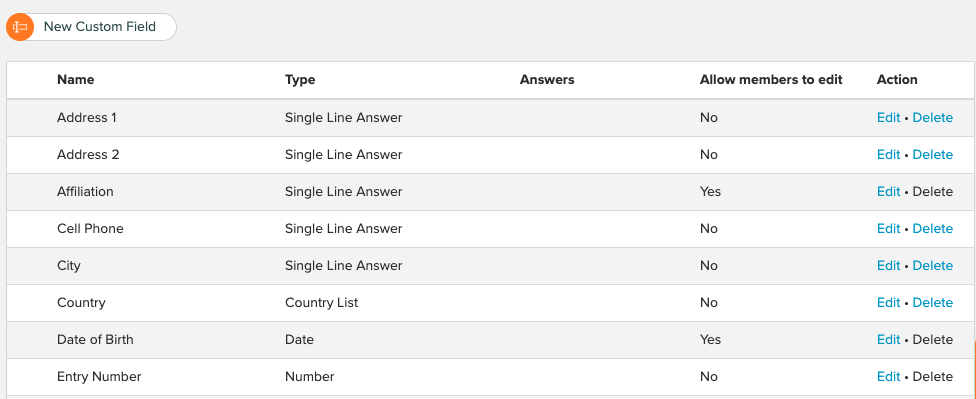
You can add new, edit, and even delete custom fields (if necessary). Keep in mind that system fields (e.g., affiliation, date of birth, entry number) cannot be deleted.