
(Note: For a more detailed hole location sheet, use our Stracka Hole Location (Pin) Sheet. For more details, Click Here.)
Hole location sheets are often used in competitive rounds. These printed sheets are used to indicate the location of the holes on every green. These sheets indicate:
Green Depth
Distance the hole is from the front of the green
Distance the hole is from the left or right edge of the green.

Above is an example hole location for hole #7 on a golf course. The green depth is 32 paces. The hole is located 7 paces off the front of the green. It is also 12 paces off the right side of the green. Most yardage markers on golf courses are measured from the center of the green. If a player's ball is on the 150 yard marker on the fairway, the player will know to deduct 9 paces from the 150 yard marker.
Printing Hole Location Sheets:
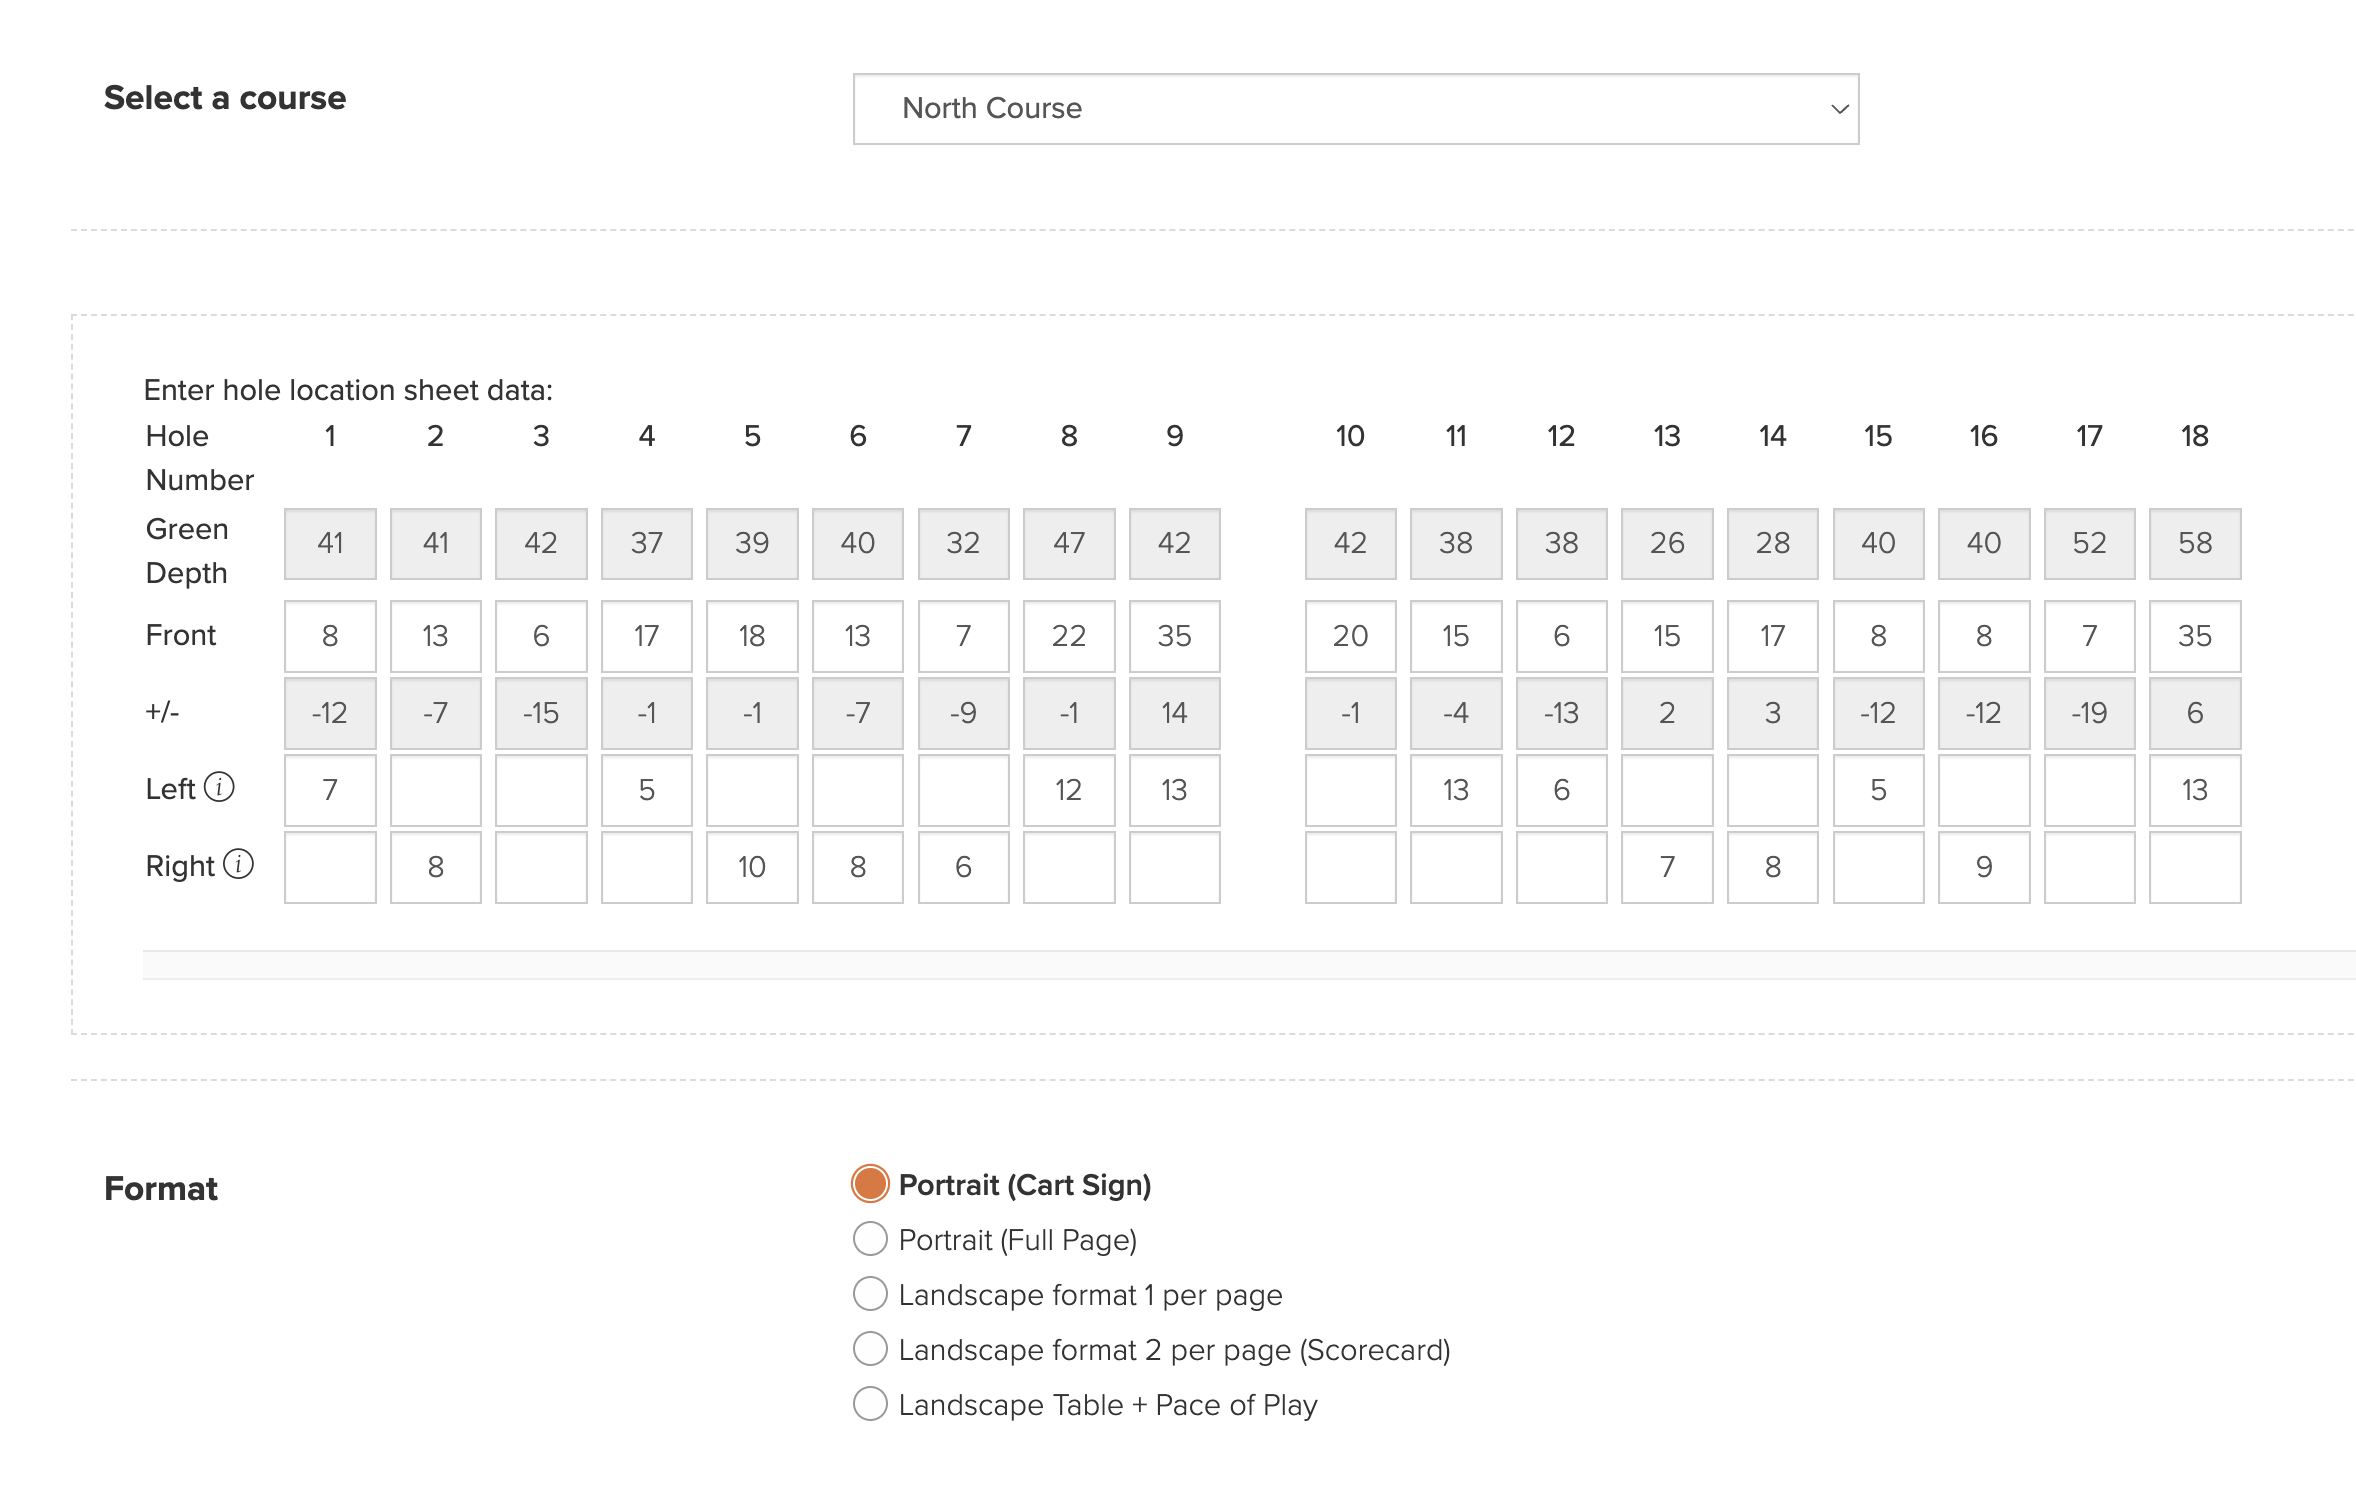
To enter hole location data for a round and print the sheets, follow these instructions:
Make sure the green depths are entered in course details for the course being played. Go to League/Event > Course Details. Select "Edit" for your course. Enter the green depths (as shown below).

These depths will be stored for all of your future events and leagues.
Go to Rounds > Report Center > Basic Reports > Hole Location Sheets.
Hover your mouse over the report and click "Configure & Print" (as shown below).

Select the course that is being played in the round. Note: Only Courses with green depth data will be displayed.
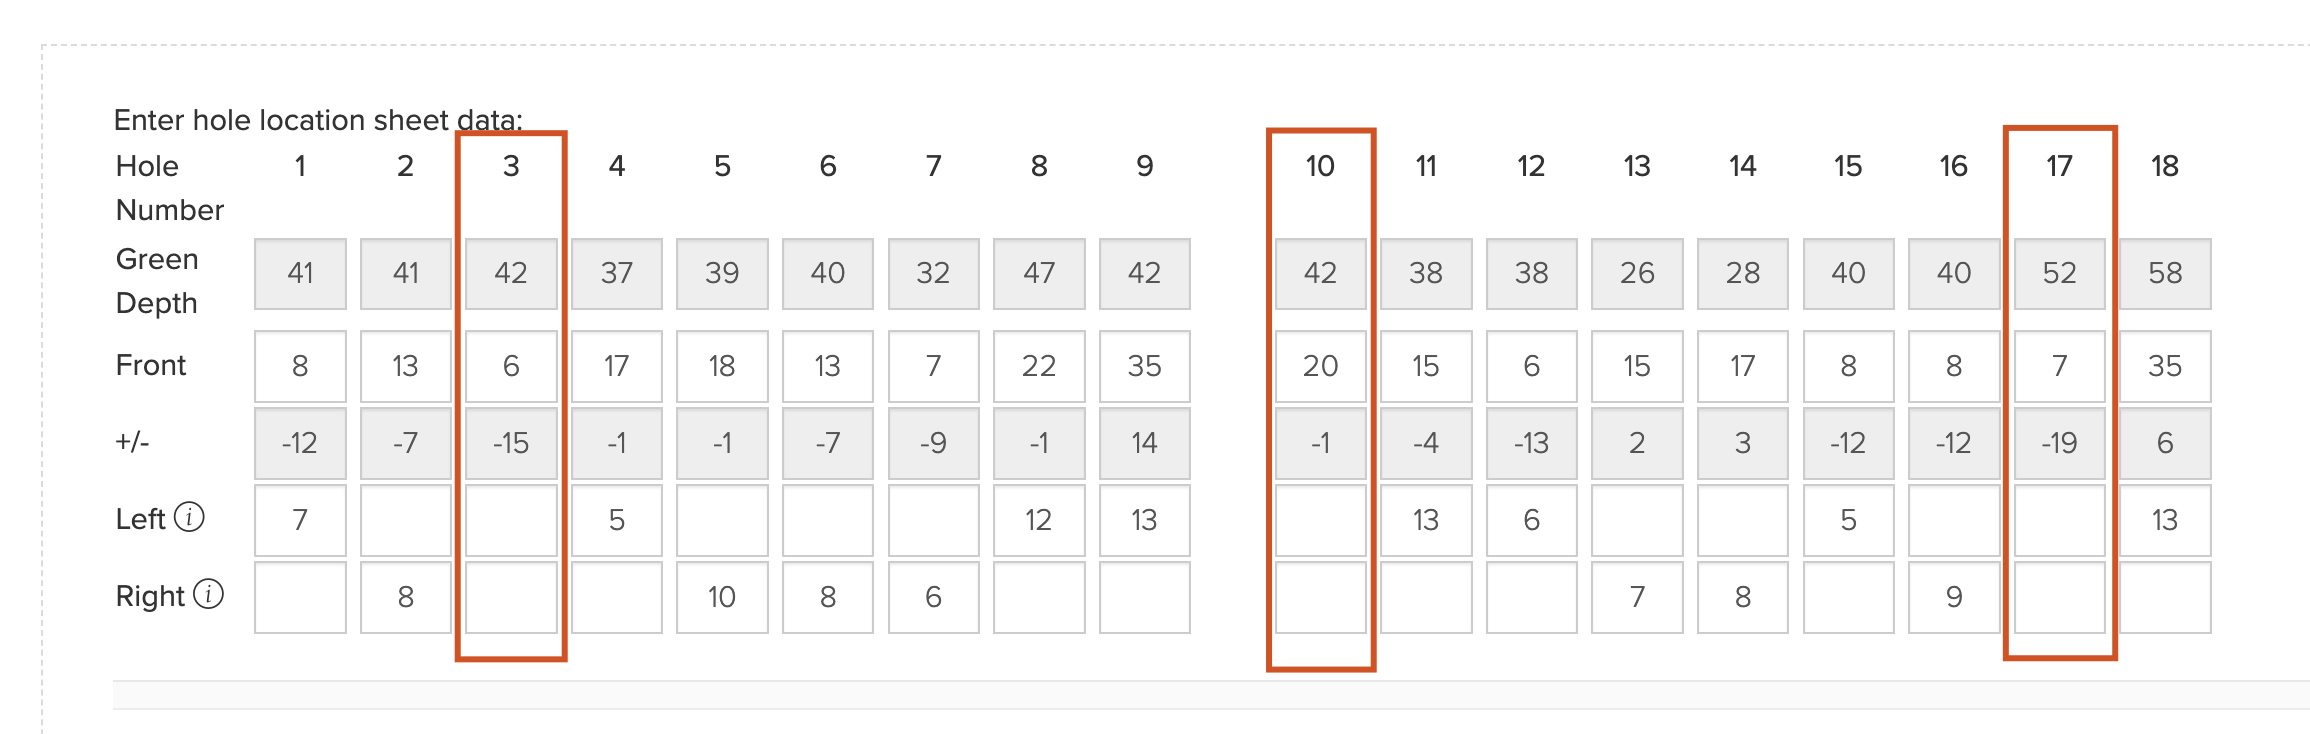
Enter the remaining data for the holes. Because you entered the green depth data in the previous step, it should already be populated. For holes with center hole locations, leave both the Left and Right cell blank. For instance, in the screenshot below, hole #10 has a center hole location.

Select one of the following printing format options:
Portrait (Cart Sign): This option prints the hole locations left to right, allowing the players to fold the sheets in half to view front 9 on one side and the back 9 on another.
Portrait (Full Page): This option prints the hole location sheets top to down on a full page.
Landscape Format 1 per page: This option prints one sheet from top to down on a full landscape page.
Landscape Format 2 per page (Scorecard): This option prints two sheets from top to down on a full landscape page.
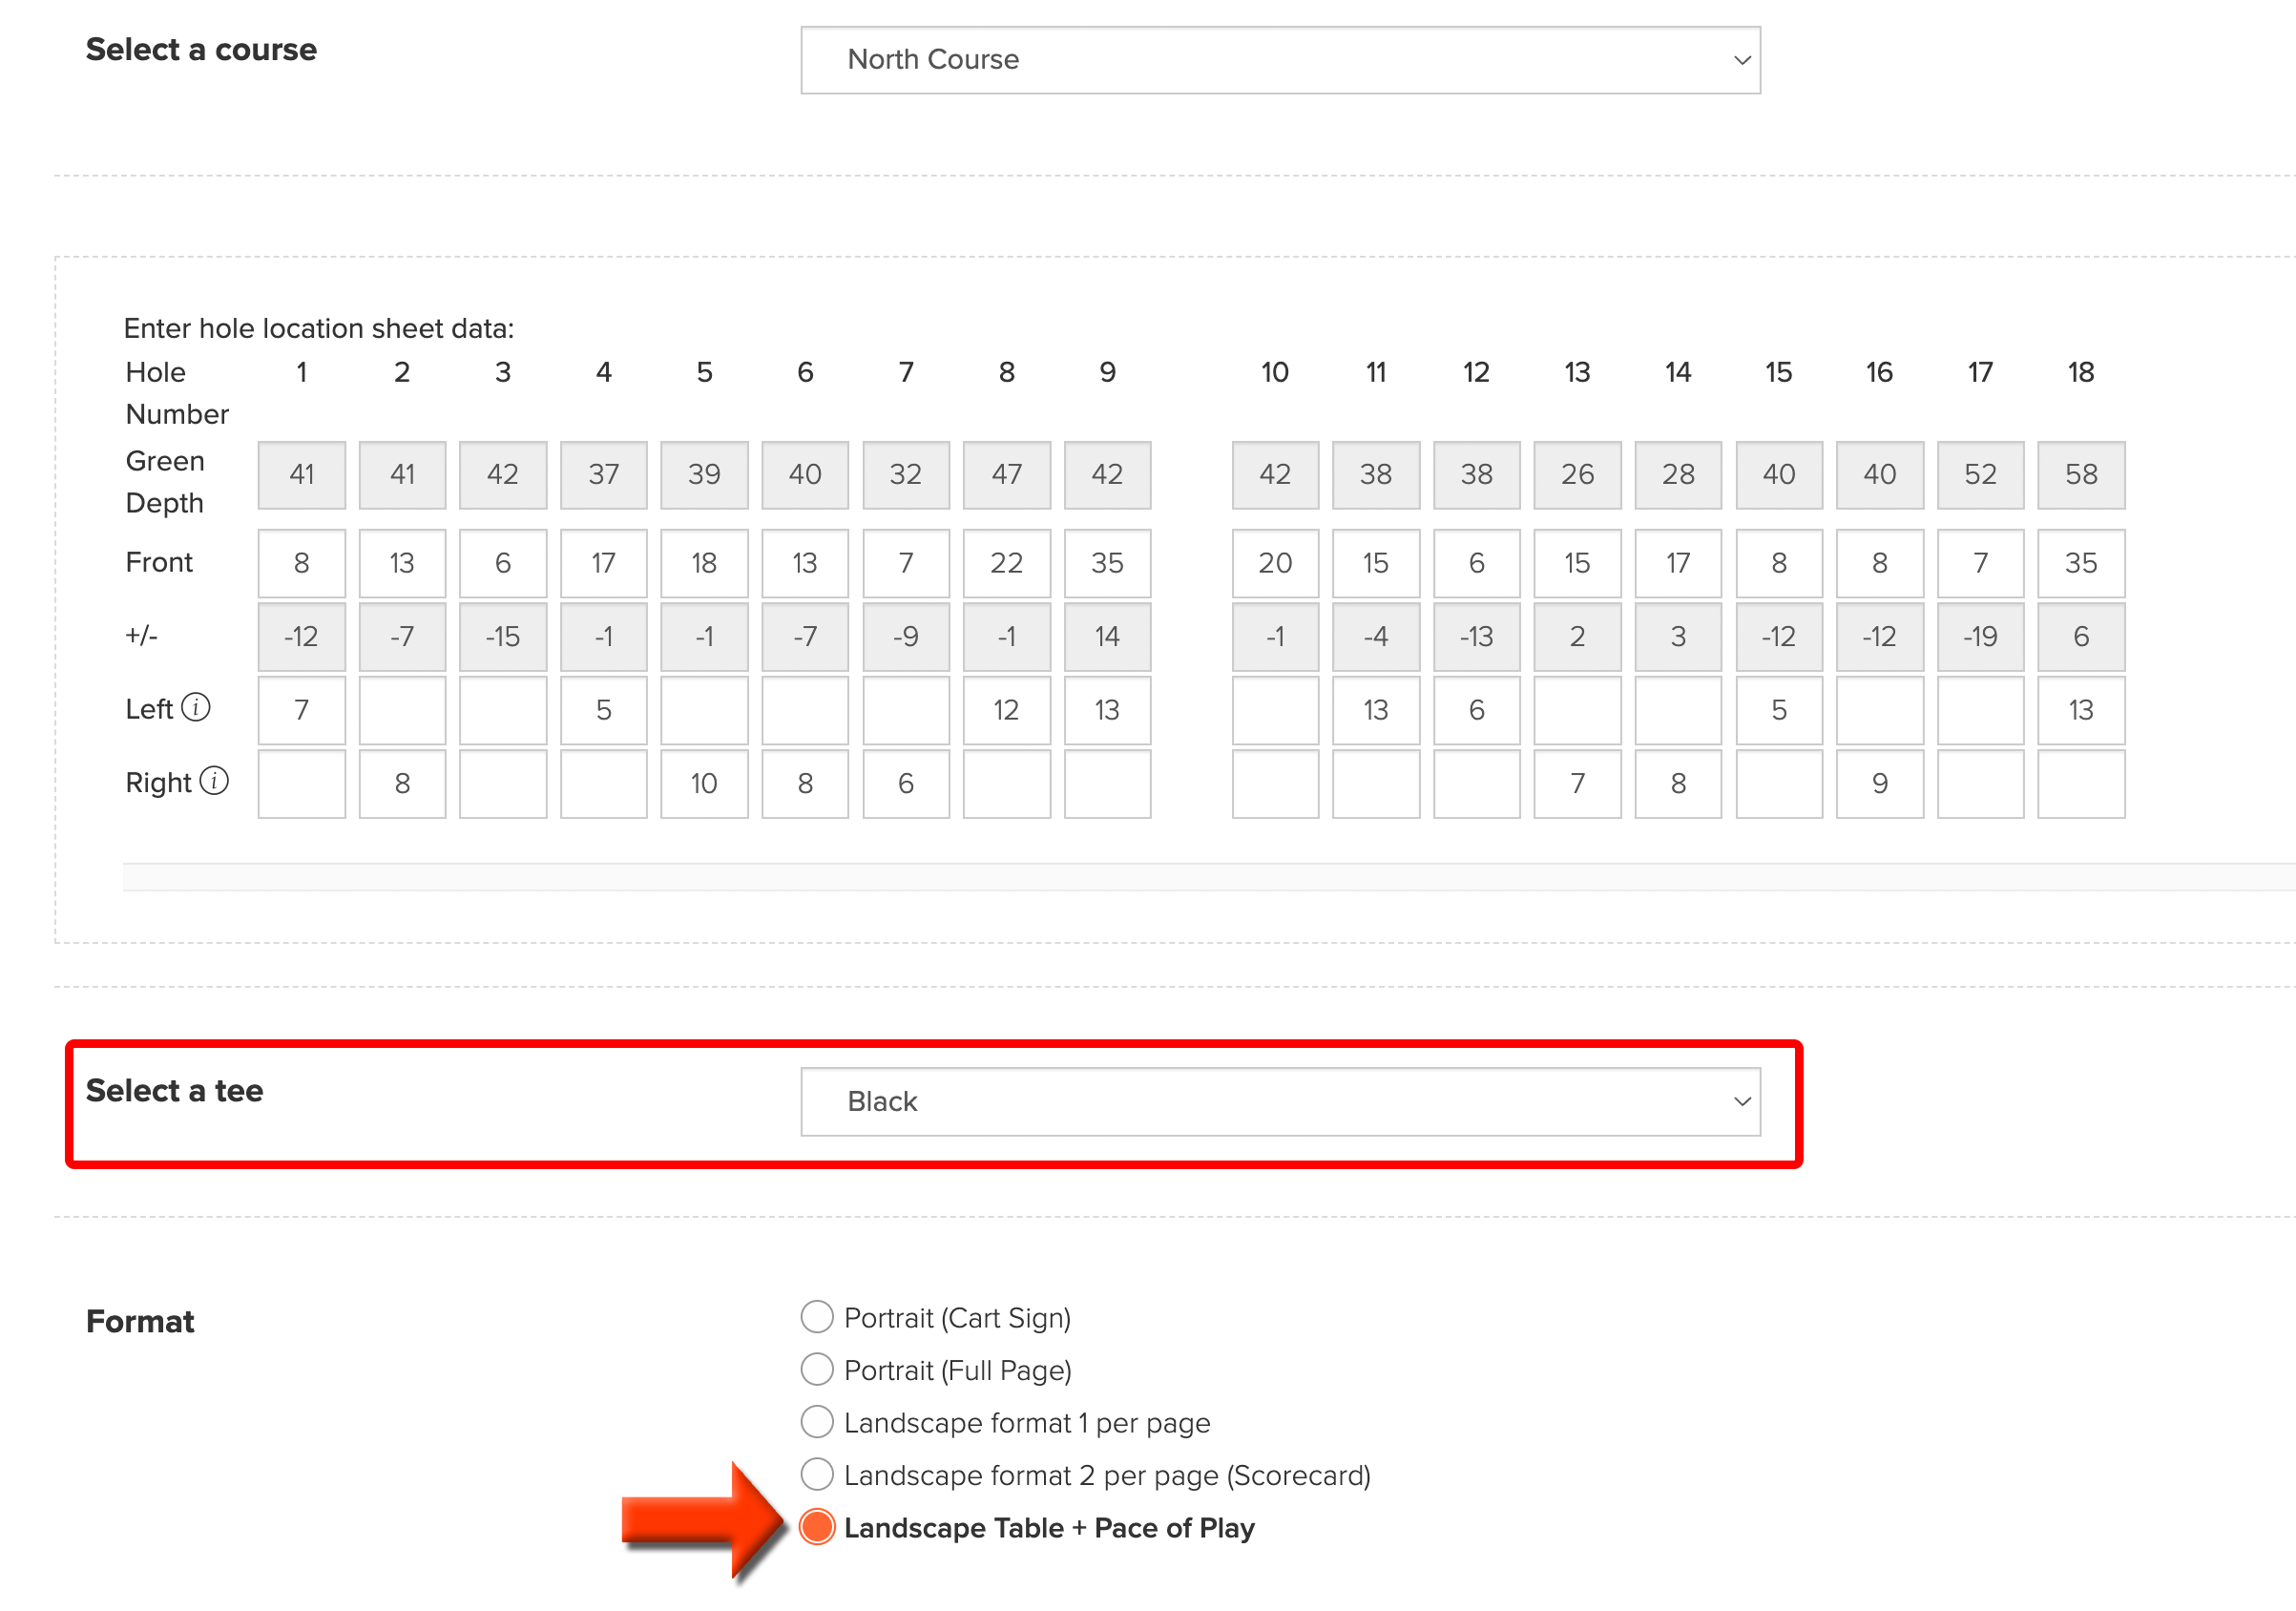
Landscape Table + Pace of Play: This option prints the report in Landscape view, with the hole location details on the top of the page and page of play details for the selected course on the bottom of the page. After selecting this option, you will be show a drop down where you can select the tee that the report should pull pace of play information for, from the course details (as shown below). If you need to add pace of play information for a tee, that can be added to the course details (League/Event > Course Details). For more details on adding pace of play time by tee, Click Here.

Note: If the tee pace of play information is not available for the select course, the report will use the pace of play information from the course level. If that information is also unavailable, the report will not display any pace of play related information.
Click "Save & Print". The hole location sheet with then be produced.

If you need to edit the data and re-print, go to Rounds > Report Center > Basic Reports > Hole Location Sheets > Configure.