Every course includes details like yardage, par, handicap, slope, rating, etc. In this article, we will discuss various subjects pertaining to course details.
Note: League/Event Managers cannot edit, archive, or otherwise modify course details unless editing privileges have been provided in the General Settings tab of the League/Event Profile by a Customer Manager for your Account.
Accessing Your Course Details
To access the course details for your account, go to Customer Center > Customer Settings > Course Details. Your current courses will be listed (as shown below). Selected courses will be made available to all future events and leagues that are created.

If you have an extensive list of courses (common for tours and associations), we suggest leaving only the active courses selected. Otherwise, you may experience slowness in the system.
You can also access your course details within an event or league by going to Event/League > Course Details. From there:
Selected courses will be made available when setting the course/tee in that event or league.
Changes made to the course details here will propagate to the course details in the Customer Center.
Course Priority can be set if there are multiple courses. Course Priority is used to determine the leaderboard order of tied players in a competition that retains ties. This setting is controlled in the Tournaments & Scoring tab of the Event/League Profile.
To watch an instructional video on adding a new course, Click Here. Otherwise, read the instructions below.
Importing Courses
Customers can import courses from the following sources.
USGA Course Rating Directory (CRD): If you are a GHIN Customer, it’s important that the courses used for your events and leagues have been imported from the USGA Course Rating Directory (CRD). This will ensure that hole-by-hole scores can be posted to GHIN, and the scores can be used for Playing Condition Calculations and Playing Statistics. For instructions on importing courses from the USGA CRD, Click Here.
Importing Courses from WHS: WHS users can import golf courses from the WHS course database (rather than enter them manually). This will ensure that hole-by-hole scores can be posted to WHS, and the scores can be used for Playing Condition Calculations and Playing Statistics. For more details, Click Here.
Score Centre Database: If you are a Golf Canada or Canadian Customer, it’s important that the courses used for your events and leagues have been imported from Score Centre. This will ensure that hole-by-hole scores can be posted to GolfNet, and the scores can be used for Playing Condition Calculations and Playing Statistics. For instructions on importing courses from Score Centre, Click Here.
To begin, importing a course, follow these directions:
Navigate to Customer Center > Customer Settings > Course Details
Click the Add a Course dropdown.
Select the option "Import from..."
Manually Adding Courses
If you do not have the ability to import courses from the USGA CRD, WHS Course Database, Score Centre Course Database, or the course you would like to add is not available from these databases, you can add courses manually. Follow the instructions below:
Navigate to Customer Center > Customer Settings > Course Details
Click the Add a Course dropdown.
Select the option "Add a new course"
Note: Additional details for adding 9-hole or 27-hole courses can be found later in this article.
Course Compliance Labels:
Each course in your Course Details list displays a compliance label indicating its current status.
Hovering over a compliance label will display a tooltip with the following information:
• The date the course was imported.
• The date the course was last updated.
• The date the course was last synced.
• Any issues that would render the course non-compliant.

Course Details
The course details contain the general information about your course (i.e., Name, green depth, pace of play, default tee, location, etc.) (as shown below).
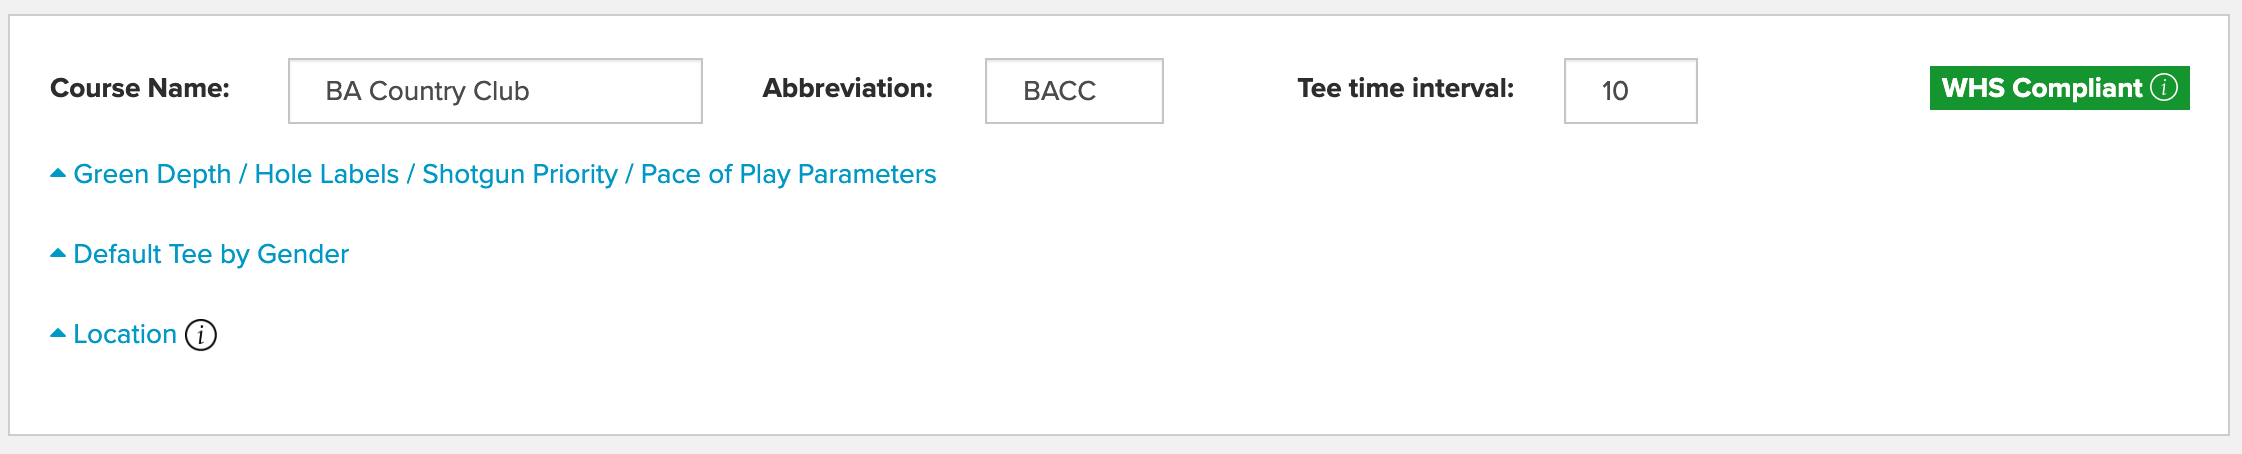
You can enter the following course information:
Course Name: Name of the Course.
Course Abbreviation: For details on where the course abbreviation is used, Click Here.
Tee Time Interval: This is the default tee time interval used when setting tee times.
You can also enter additional course information like:
Green Depths: Enter the green depths for your golf courses to include this information on your hole location sheets.
Hole Labels: Optionally, rename the hole numbers that will be printed on your scorecard. These are commonly used for 27-hole facilities.
Order of holes to Double Up: This is your shotgun priority. Set the priority in which pairing groups are assigned to starting holes and "doubled-up" first. Click Here for details.
Pace of Play Parameters: This data is needed if you plan to use a pace of play line on your printed scorecards, pace of play stations, or using a pace of play worksheet from the Report Composer.
While pace of play parameters are typically managed at the course level, if you would like to manage pace of play at the tee level, Click Here for more details.
Enter the following pace of play data:Pace of Play Per Hole: Time expected to complete each hole.
Transition in between Holes: Time expected to get from the green to the next tee.
Shotgun Offset Interval: If a shotgun start is used, this is the extra time expected for the second pairing group on a hole to tee off.
Default Tee by Gender: Using default tees is a quick way to assign the course/tee for players depending on their gender or other criteria. If using default tees by gender for the course, you must select the default tee for both genders. For more details, Click Here.
Location: This allows you to enter the location of the course. Course location will be used for displaying the address on your Golf Hub and Golf Hub map. Location details include:
Street Address
City
State
Country
Zip Code
Latitude and Longitude: These are only necessary if you are using geo-location with the club app. For more details, Click Here.
Tee Details within a Course
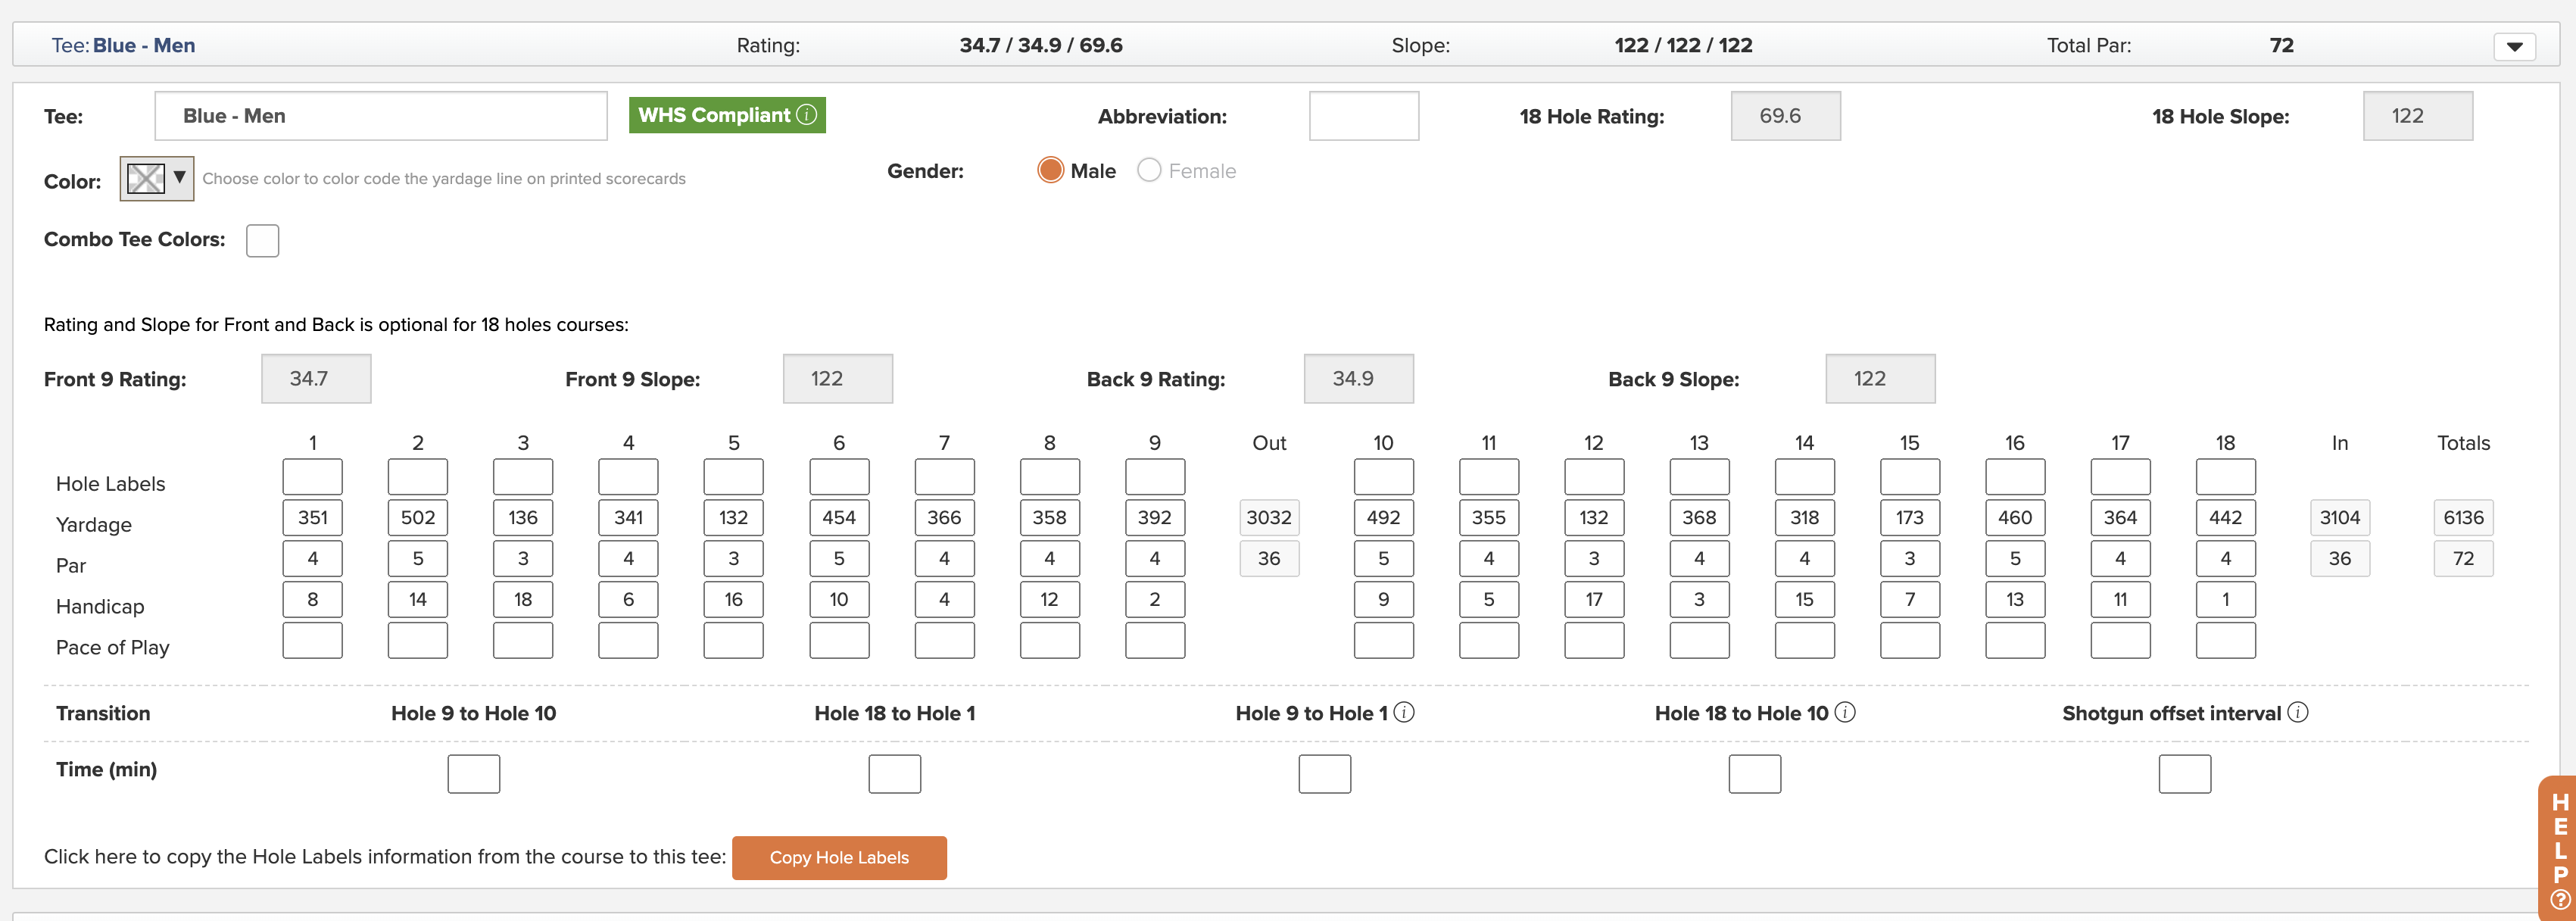
For each course, you may have one or several tees. To simplify your setup, you can add all the tees to one course, instead of creating multiple courses for each tee. When creating your tees, you will be able to enter the following information:
Tee Name: What is the name of this tee (i.e., Black, Blue, White, Red).
Tee Abbreviation: A brief 2 or 3 letter abbreviation for the tee. For example, you might label the men's blue tee MBT. For details on where the tee abbreviation is used, Click Here.
18-hole Course Rating and Slope: Supply the 18 Hole Course Rating and Slope.
Color: Select the background color to be used on the tee row on the printed scorecard.
Combo Tee Colors: This overrides the "Color" option and lets you select the color on the scorecard by hole. For more details on setting combo tees color, Click Here.
Gender: Select the gender that will play this tee.
External ID (JGA Only): The Course ID and Tee ID for the course and tee. For more details, Click Here.
Front 9 and Back 9 Course Rating and Slope Rating (Optional): Supply the Course Rating and Slope Rating for both the front 9 and back 9 if you need to:
Post 9-hole scores to your handicap service provider.
Stroke 9-hole tournaments using the front or back 9 Course Rating and Slope Rating (or you can stroke the entire 18-hole card and let the strokes fall where they may). These handicap options are controlled in the Event/League Profile.
Hole Labels: Hole Labels are typically managed at the course level, but you may wish to manage hole labels for each tee independently in some circumstances. For complete details, Click Here.
Yardage: Yardage for each hole to be displayed on scorecards.
Par: Par for each hole to be displayed on scorecards.
Handicap: Hole Handicap for each hole to be displayed on scorecards.
Pace of Play and Transition: While pace of play and transition parameters are typically managed at the course level, if you would like to manage pace of play at the tee level, Click Here for more details.
Once you've entered the information for the first tee, click "Add Tee" and enter the information for the next tee. Repeat this process until all tees are added.
Once all the course information is added, click "Save."
You can always go back to edit the course by going to Customer Center > Customer Settings > Course Details. In the "Actions" dropdown, select "Edit" then "Edit this Course." Keep in mind that changes to the course will affect (past or future) events and leagues already using that course. If you do not want the changes to affect past events/leagues, see the instructions later in this article for updating your course.
Duplicating Tees Within a Course
You can duplicate an existing tee, and all its data, to create a new tee within the same course. To do this, go to Customer Center > Customer Settings > Course Details > Edit an existing course. Find the tee you wish to duplicate, and select the "Actions" dropdown (as shown below). Pick "Duplicate," and the tee will be copied within the same course.
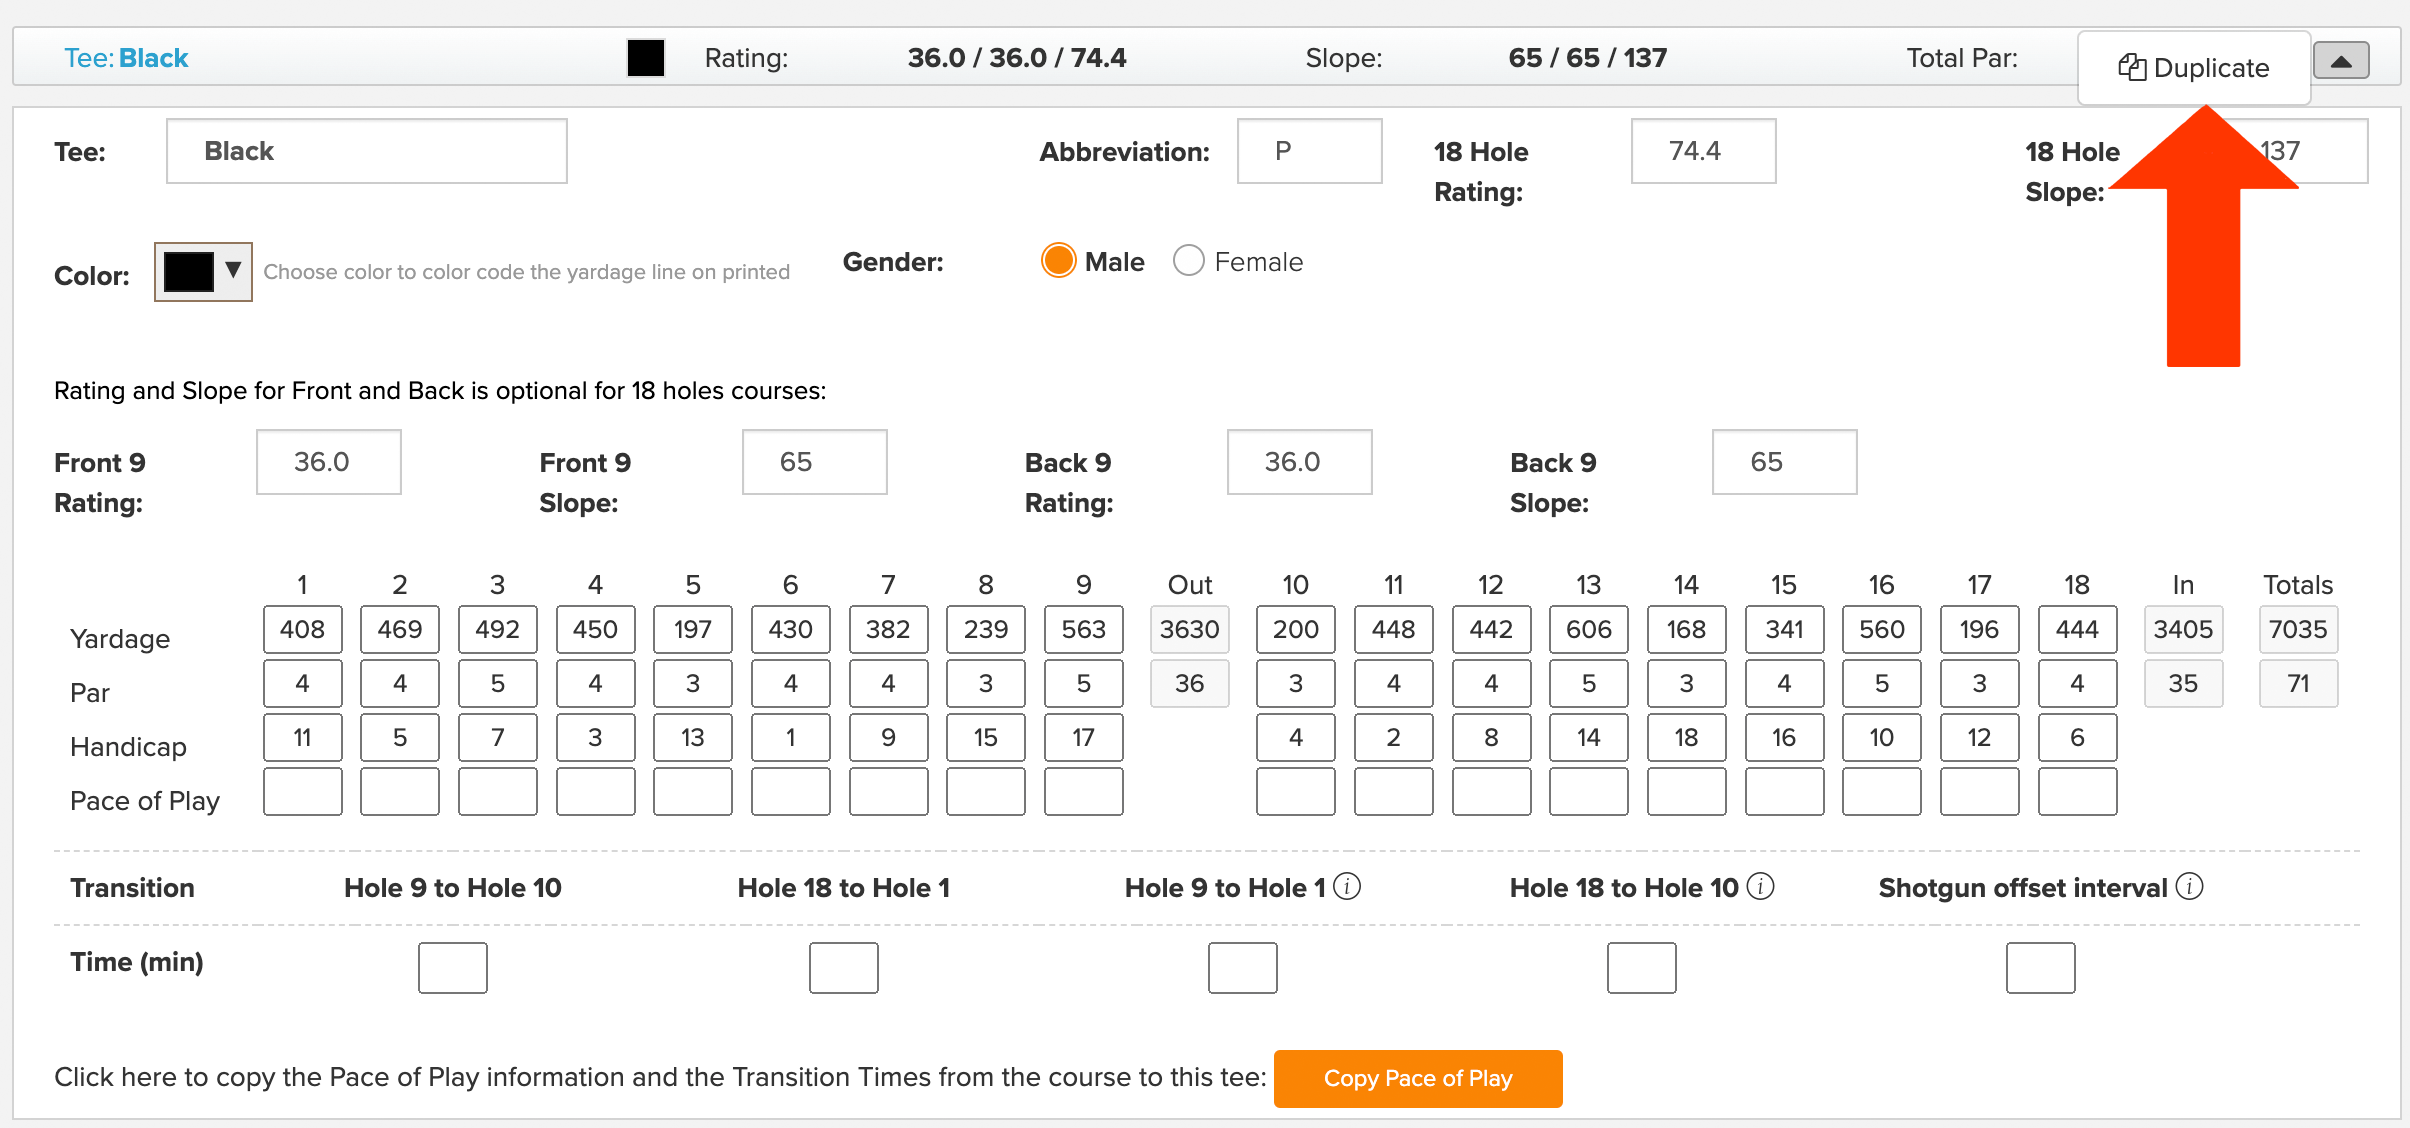
Add a Tee name to the new tee and make any additional adjustments as necessary.
Course Rotations/Cross 9s
Cross nine tee rotations are typically used when there are 9-hole matches, and the event is a shotgun start. All matches will play their match in a nine-hole stretch that may include holes from the front 9 and holes from the back 9. For instance, if a foursome starts on Hole #3, they play the match on holes 3 thru 11.
A rotated course needs to be set up by our support team to use this type of format. For more details, Click Here.
Adding a 9-Hole Course Manually
Enter yardage, par, and handicap for holes 1 through 9 along with the front 9 Course Rating and Slope Rating. Leave the back 9 data empty and save the course. Click Here for more instructions.
Adding a 27-Hole Course Manually
Because there are three different combinations of 9s, three separate 18-hole courses need to be created. Click Here for more instructions.
Host Venue Approval
WHS Customers will have the ability to request approval for using the course of a club in order to post scores from that course to the WHS. For more details, Click Here.
Updating a Current Course
After a course has been used in an event or league, changes to that course will affect that event or league. While this may sometimes be the intended outcome (e.g., a mistake in hole handicap that needs to be corrected and re-scored), in most cases, you'll want to make changes in such a way that they are only applied to future events. For details on updating a course without affecting past results, Click Here.
With that said, there are some changes that you can make to your current course that will not cause this issue and change past results, for instance, changing the yardage on a hole or green depth. To make these changes, edit the current course and save the changes.
Copying Courses
You can also copy a current course to create a duplicate. You can make changes to the copied course without affecting the original. To do this, follow these direction:
Navigate to Customer Center > Customer Settings > Course Details. In the "Actions" dropdown, select "Create and Edit Copy" (as shown below).
Archiving Courses
Note: This can only be accomplished from the customer center.
Whenever a course is no longer used, we recommend archiving it. When archiving, it will no longer be available for future events and leagues (and will reduce the chance of selecting the wrong course). To archive a course, follow these directions:
Navigate to Customer Center > Customer Settings > Course Details.
In the "Actions" dropdown, select "Archive" (as shown below).
You can also unarchive a course if needed. To do this, follow these directions:
Navigate to Customer Center > Customer Settings > Course Details.
Open the Archived Courses section.
Select "Restore" for the desired course (as shown below).