
The time is finally here... to set up your stabilizer! You should have received a box looking like this 🤩:

In this box will be the stabilizer that you will use to record Realync videos and host Live Tours. A few important notes before you dive in:
When you receive your stabilizer, it should be fully charged and ready for action!
Always ensure your stabilizer is turned OFF before trying to place your phone on the magnetic motor.
The clippies on your magnetic phone clamp are adjustable, just gently pull the clips apart and insert your mobile device. You will want to adjust the phone so there is more phone at the bottom to offset the weight of the lens at the top.
A good rule of thumb is positioning the clip just below your volume buttons! Line up the white dot on the magnetic clamp with the white dot on the motor and gently place the phone on the stabilizer! The magnets will take it from there and stick together!
*Please note that YOU DO NOT NEED TO DOWNLOAD THE DJI APP! We are here to make your life easier. This means only ONE app is needed (Realync).
Here are some more instructions about your stabilizer based on which model you have:
OM 4
OM 4
Does your stabilizer look like this?

If so, you have The OM 4 stabilizer!
You should've received a package with these fun items (see the image below)! Want to do an inventory check? Click here to follow along with us as you open your package.

After you have the phone and lens in place, press and hold the power button. Pro Tip: Double-check that your phone screen has the portrait mode lock turned off.
Once the power is on, double-tap the M button to allow the stabilizer to calibrate. This just means the stabilizer is taking the weight of the phone and lens and adjusting its mechanisms to ensure your phone remains stable and in landscape mode during your videos/tours.
Your stabilizer should have started moving by now and turned your phone into landscape mode. If the stabilizer is not adjusting properly, you may need to use trial and error here depending on the different size phone you are using.
Always turn your stabilizer off before adjusting it between the grips and/or removing the lens. Pro Tip: Never adjust the phone with your hand manually. If you want to get footage of the ceiling or flooring in a space, simply use the arrows on the stabilizer to adjust the tilt up or down.
Ta-dah! 👏 You did it. Now, it's time to make some videos and host some tours.
OM 5
OM 5
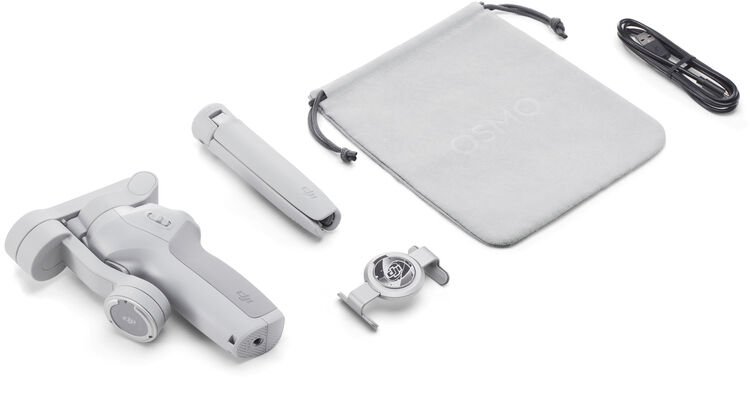
Does your stabilizer look like this?

If so, you have The OM 5 stabilizer!
You should've received a package with these fun items (see the image below)! Want to do an inventory check? Click here to follow along with us as you open your package.

After the phone and lens are in place, press and hold the power (or M) button. This button is located on the left side of the OSMO 5. Pro Tip: Double-check that your phone screen has the portrait mode lock turned off.
Once the power is on, double-tap the refresh button located under the button with the red dot to allow the stabilizer to calibrate. 🔄 This just means the stabilizer is taking the weight of the phone and lens and adjusting its mechanisms to ensure your phone remains stable and in landscape mode during your videos/tours.
Unlike the OMSO 3 and 4, the OSMO 5 has a built-in extension rod (aka a selfie stick), letting you capture footage from new unique angles! 🤳 This extension rod, extends smoothly and uniformly, providing easier adjustments and more creative options when recording your newest units/amenities/community and more. Learn how to set up your selfie stick here!
Also, check out some of the selfie stick do's and don'ts when it comes to utilizing the selfie stick! 🙅
OM Mobile SE
OM Mobile SE
Does your stabilizer look like this?

If so, you have The OM Mobile SE stabilizer!
You should've received a package with these fun items (see the image below)! Want to do an inventory check? Click here to follow along with us as you open your package.
After you have the phone and lens in place, press and hold the power button. Pro Tip: Double-check that your phone screen has the portrait mode lock turned off.
Once the power is on, double-tap the M button to allow the stabilizer to calibrate. This just means the stabilizer is taking the weight of the phone and lens and adjusting its mechanisms to ensure your phone remains stable and in landscape mode during your videos/tours.
Your stabilizer should have started moving by now and turned your phone into landscape mode. If the stabilizer is not adjusting properly, you may need to use trial and error here depending on the different size phone you are using.
Always turn your stabilizer off before adjusting it between the grips and/or removing the lens. Pro Tip: Never adjust the phone with your hand manually. If you want to get footage of the ceiling or flooring in space, simply use the arrows on the stabilizer to adjust the tilt up or down.
Ta-dah! 👏 You did it. Now, it's time to make some videos and host some tours.
Want to learn how to record a pre-recorded video? Check this out!
