
This feature is available for the following product:

Note: If you are a Golf Genius TM Club Premium customer and would like this feature enabled, contact support.
Golf associations typically build their Master Rosters as players register to participate in association events. Our Master Roster Registration feature allows players to register for association affiliation and automatically be placed on the Association Master Roster. This is a required step for players before they can register for Membership Programs.
In this article, we will discuss how to set up and use this feature.
Setting up the Registration Form
The first step is to create a registration form for the players to collect the information you need. To do this, go to Customer Center > Directories & Registration > Master Roster Registration Form Setup.
Note: When using this feature, a separate portal will be created to host the registration form, which will be discussed later in this article.
The following parameters can be set when setting up the registration form.
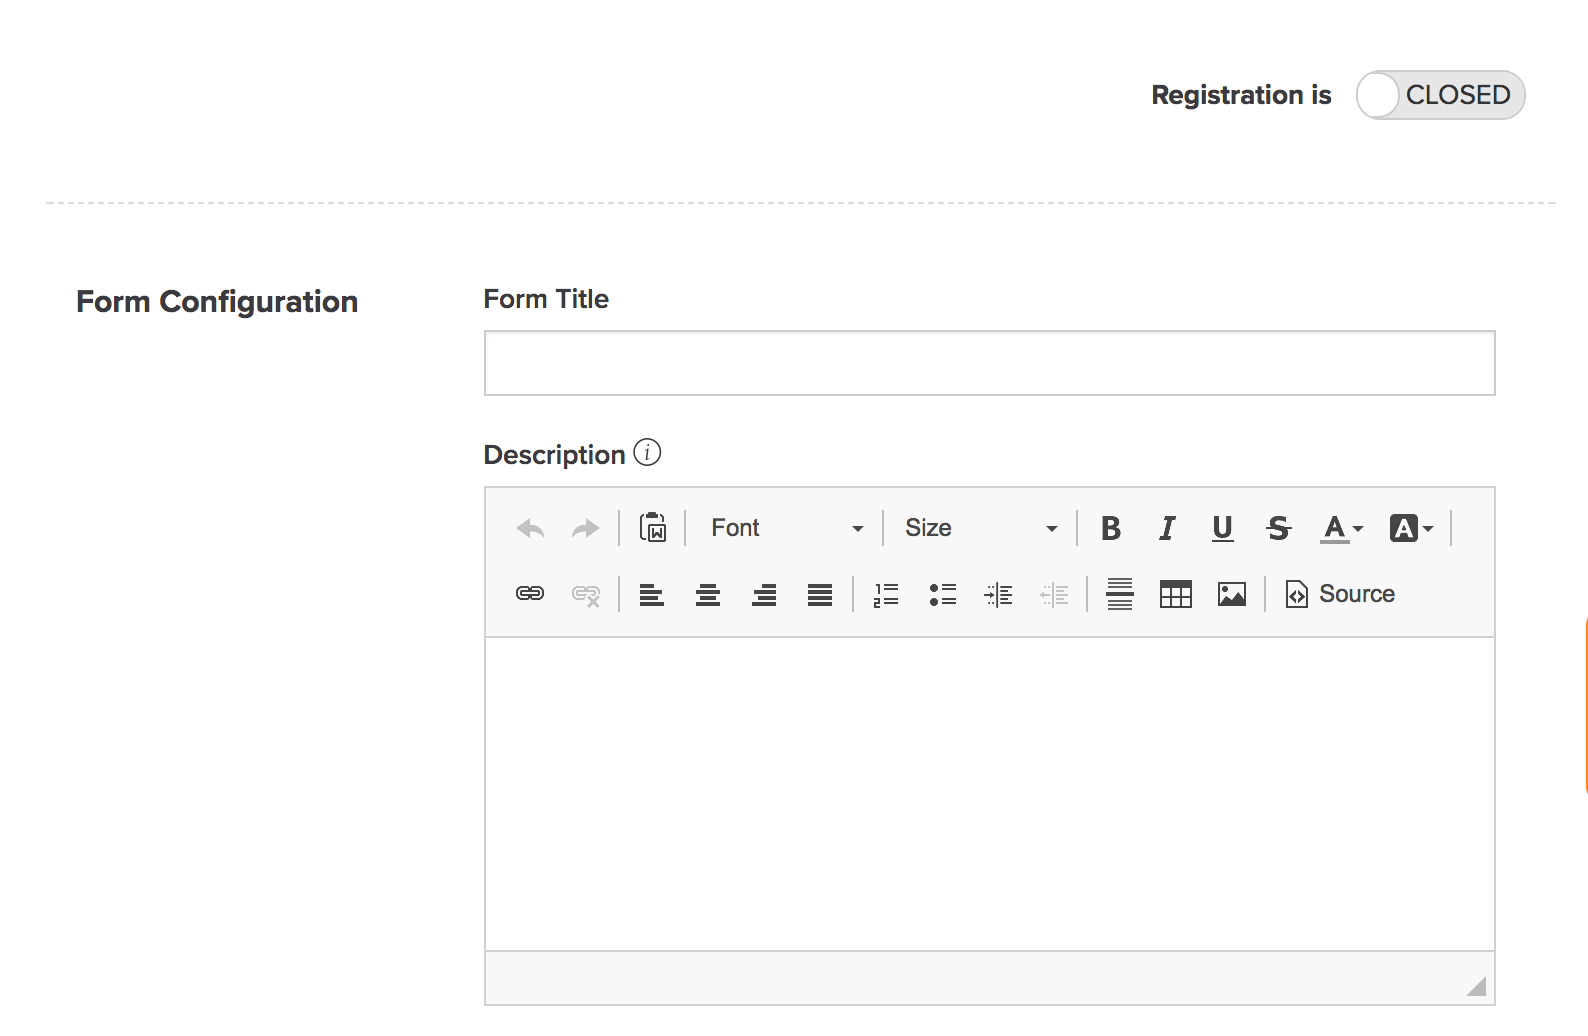
Registration is Open/Closed: The toggle switch on the top right allows you to open and close registration to the master roster.
GHIN Integration/WHS/JGA WHS: GHIN, WHS, or JGA customers have the option to use the GHIN/WHS integration during the registration process when checking the box to "Golfers fill in their last name and GHIN/WHS/GLID number to start the registration process." When registering, players can enter their last name and GHIN/WHS/GLID number, and select player information will be populated for them. When selecting this option, you have two additional options:
Additionally, allow golfers to register even if they don't have a GHIN/WHS/GLID number: If players without a GHIN/WHS/GLID number are permitted to register, you can select that option as well (as shown below).
A manager must manually validate golfers without GHIN/WHS/GLID number before they can register for specific leagues and events: For players who register without a number, you can set up a validation process where a manager must approve their registration before being placed on the master roster. Click Here for instructions on validating members.

Form Configuration: Managers can enter a form title, description, and special form instructions. This information will be shown on the registration form when the players register. You can enter a description of what they are registering for. If you need to add any special form instructions, enter them as well.
Handicap Index Information: If players without a GHIN number are allowed to register, you can optionally ask the player for their Handicap Index during the registration process. You can even require that the Handicap Index be entered.
Additional Information: Select the information that you would like to collect during the registration process. The answers can be required or optionally answered. You can also allow players to upload their photo during the registration process. Click and drag the elevator bars to change the order of the information on the registration page.
Terms and Conditions: If you have terms and conditions that the players need to agree to during the registration process, enter them here. They will have to agree to these terms and conditions in order to complete registration.
Manager Notifications: Select the Customer Managers who should be receiving email notifications whenever a player registers to the master roster.
Registration Setup: When the registration contains an email address that's already registered within the system, do not auto-fill the golfer's information.
You can also customize the messages in the automated emails being sent to your players. To do this, select the option to customize the email notifications (as shown below).

You will be directed to the Email Configuration page where you can customize the automated emails. For instructions on using Email Configuration, Click Here.
Setting up the Registration Portal
As mentioned earlier in the article, when using Master Roster Registration, a portal will be created to host the registration form. Players should be directed to this portal to register for Master Roster.
To set up and manage this portal, go to Customer Center > Customer Settings > Other Portals. The portal should already be listed.
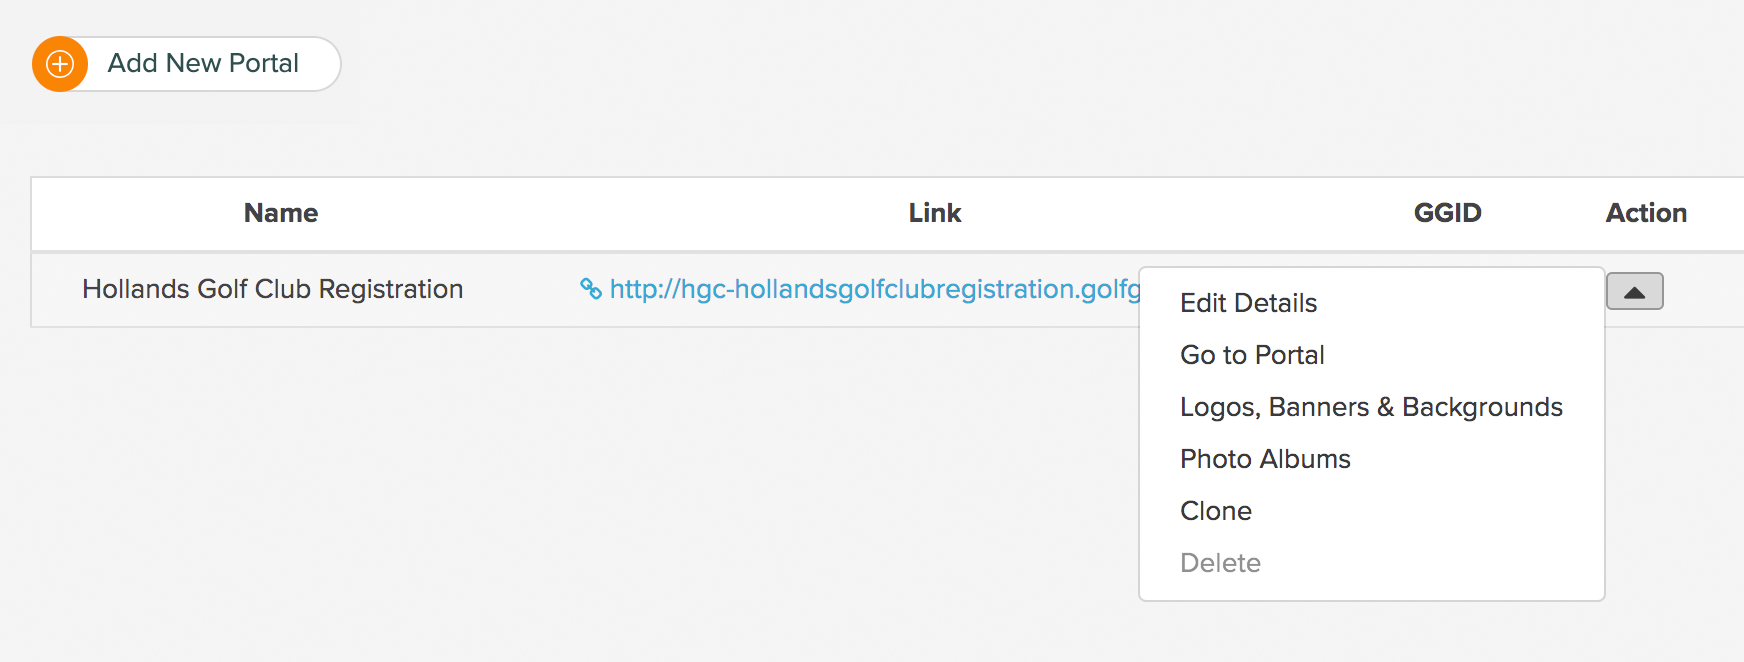
When selecting the "Actions" dropdown, there are some options:
Edit Details: You can change the name of the portal, the prefix (portal URL), and Portal GGID here.
Go to Portal: Directly access the portal. Once you are in the portal, you can then customize it.
Logos, Banners, and Backgrounds: Add the primary logo, banner, and background image for the portal here.
Photo Albums: You can create a photo album here to be viewed on the Photo Stream Portal page.
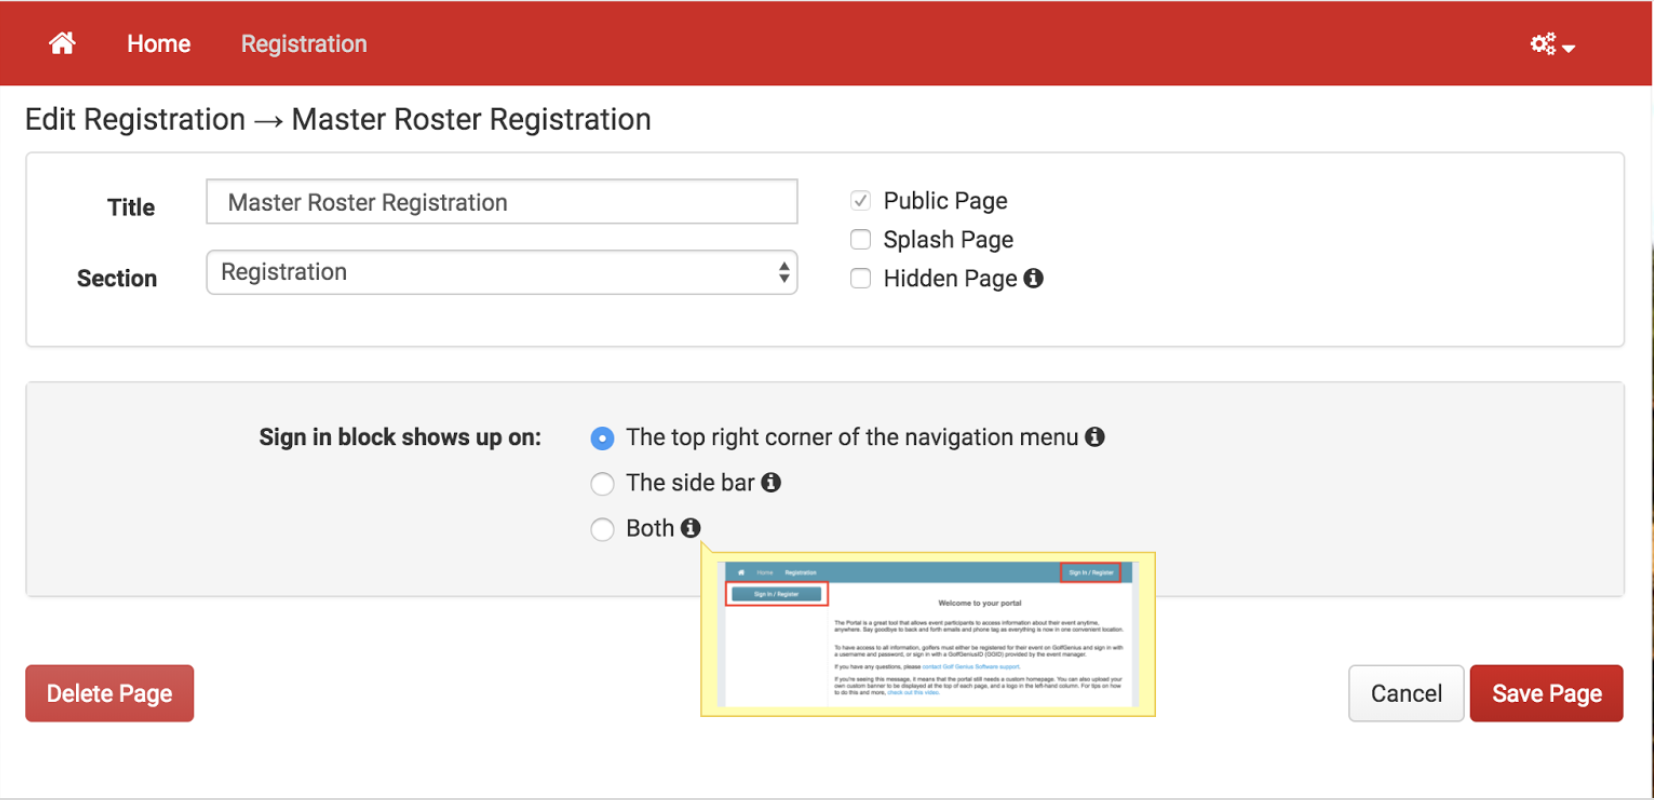
Go to the portal when you are ready to design and customize it. By default, there is a "Registration" section already created in the portal. Within that section, there is a Master Roster Registration Portal Page. This is an always-public page where players will go to register to the master roster. When editing the Master Roster Portal Registration Page, you can select where you'd like the "Sign-In" to be on the portal.
You can also embed the Master Roster Portal page by going to the Registration Section, then clicking "Share" for the Master Roster Registration Page. You can then copy the embedding code and place it in your association website. Or you can link the Master Roster Portal Page URL on your association website.
Continue to design the portal as you would with an event or league portal. Add any other pages or information you'd like. For instance, you may want to list one or more Directories of events on the portal, showing a schedule of events.
Directory of Events and Leagues Page on the Portal
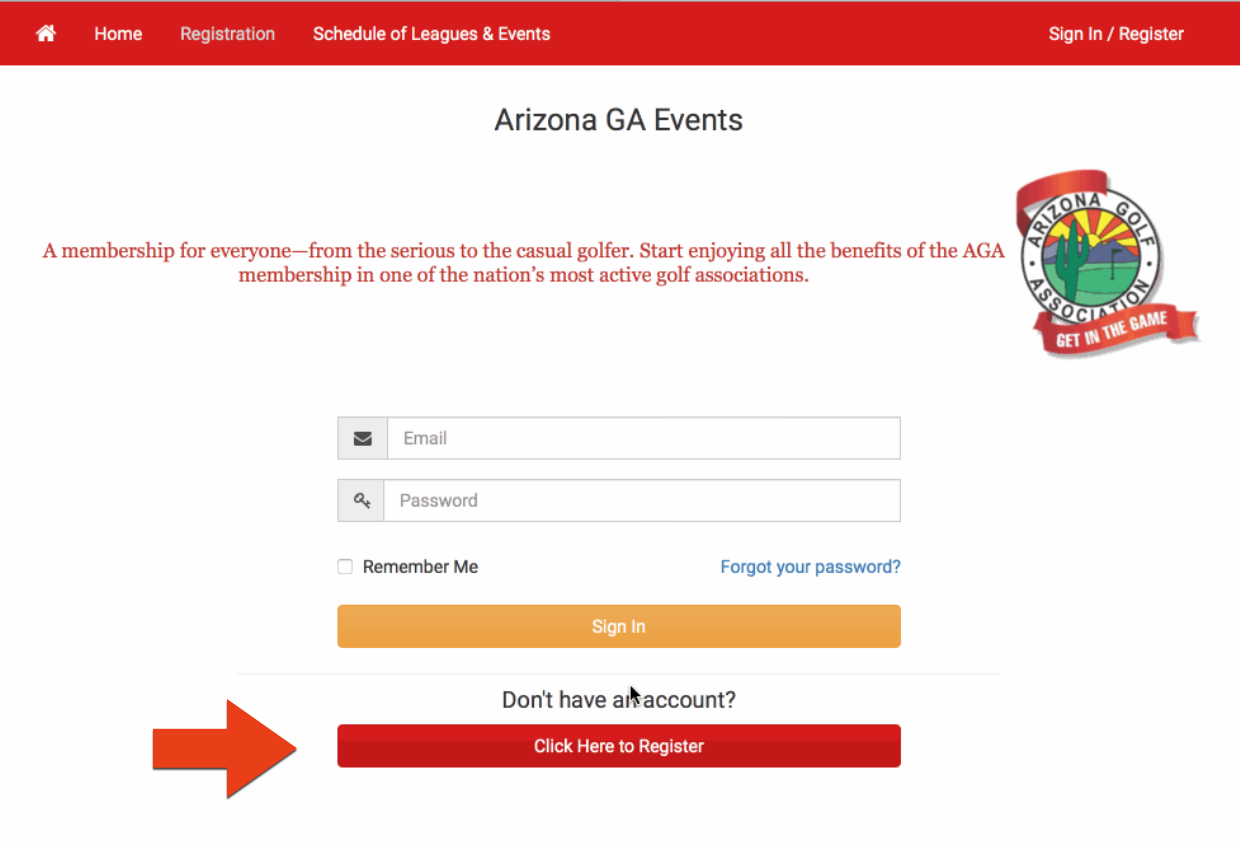
When a player goes to the registration link, they are first prompted to enter an email and password. If they have already registered (to another association, event, or league) in the past, they can use the same email and password. If they have not registered yet, they will need to select the option to register a new account (as shown below).
If using the GHIN Integration, they will enter their GHIN number and last name. If players without GHIN numbers are allowed to register, there will be an additional option to do so below.
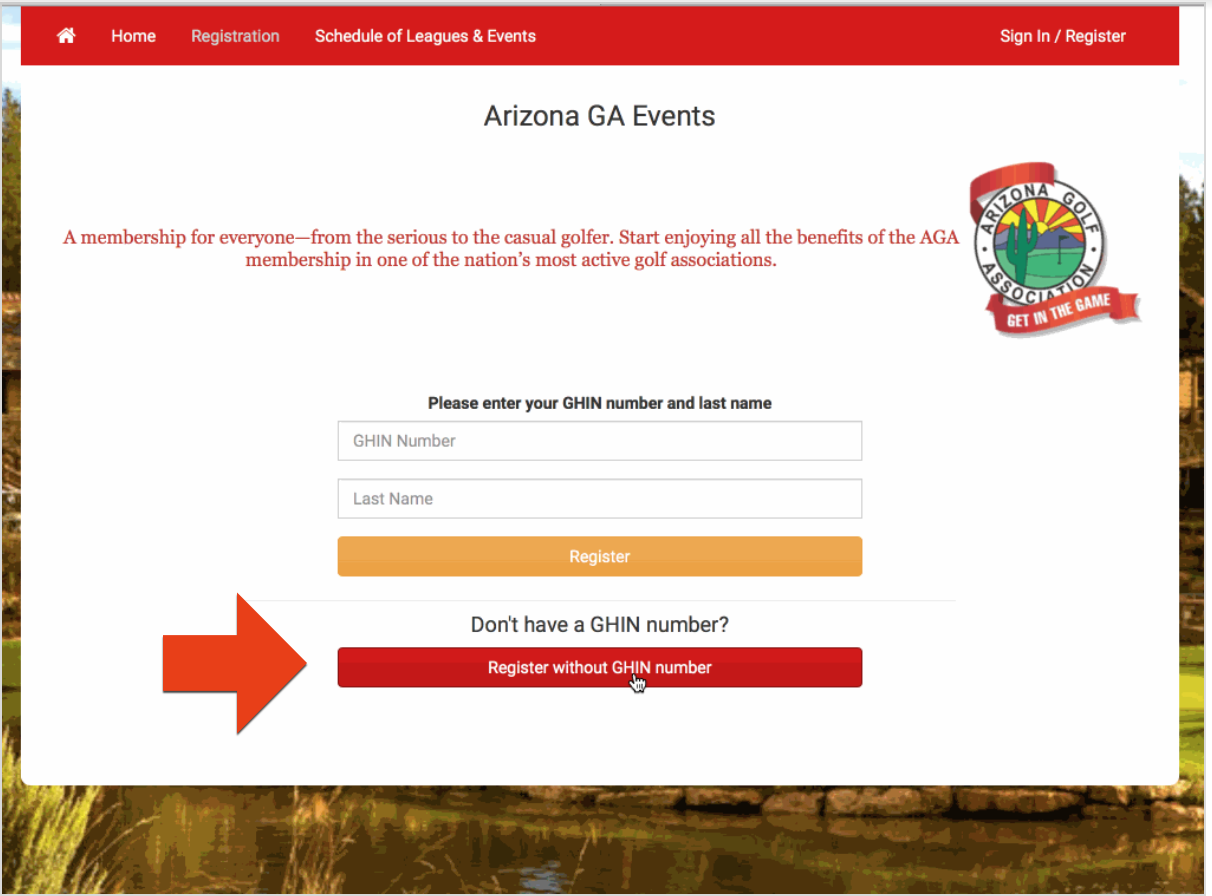
Once the players enter their last name/GHIN or click "Register without GHIN number", they will be directed to the registration form. If the player entered their last name/GHIN, select information will automatically populate into most of the fields as they are pulled from the GHIN database. If they are registering without a GHIN number, all the fields will need to be filled.
The players will also be required to create a password so they can log in for future visits. See the sequence below as a GHIN player registers to the master roster on a portal.
Any fields that are "grayed out" cannot be edited by the player. If you have allowed the option to upload a photo, they can also upload a photo at this point.
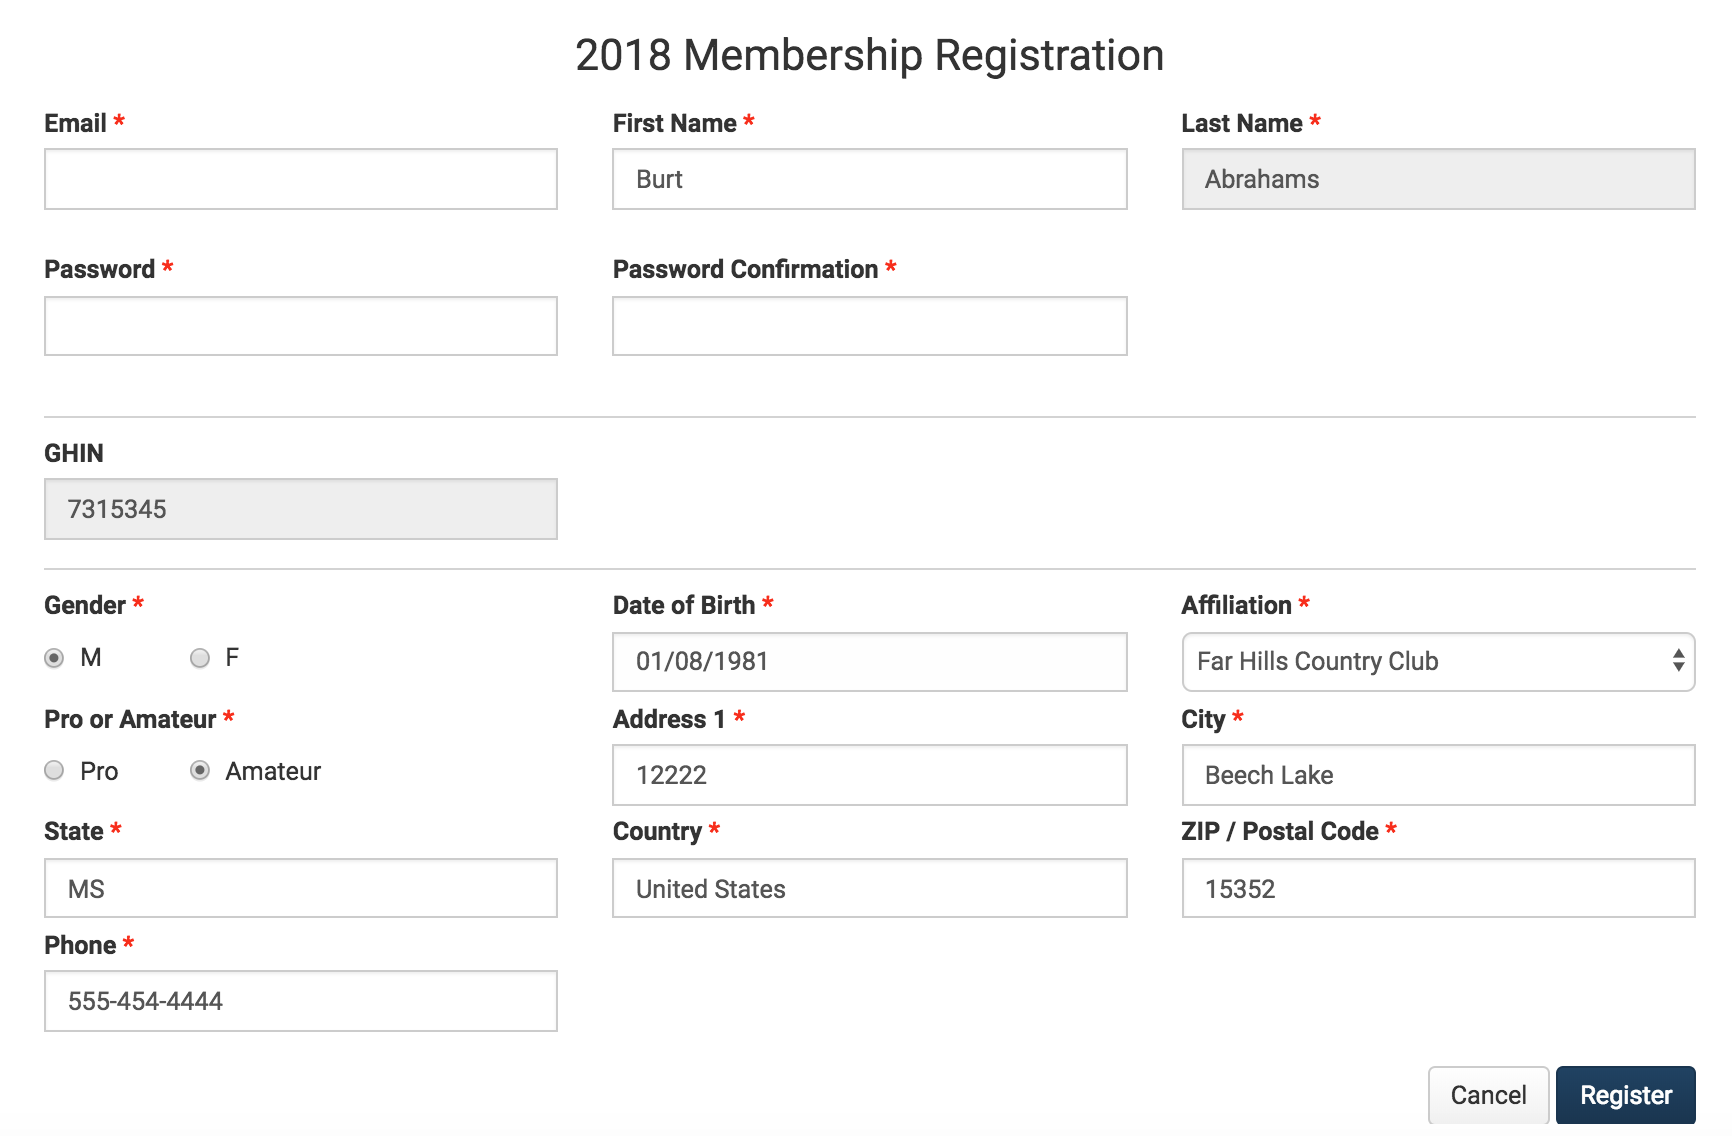
After reviewing and entering the remaining information, the players will click "Register". They will then be directed to the Terms and Conditions page (if set up).
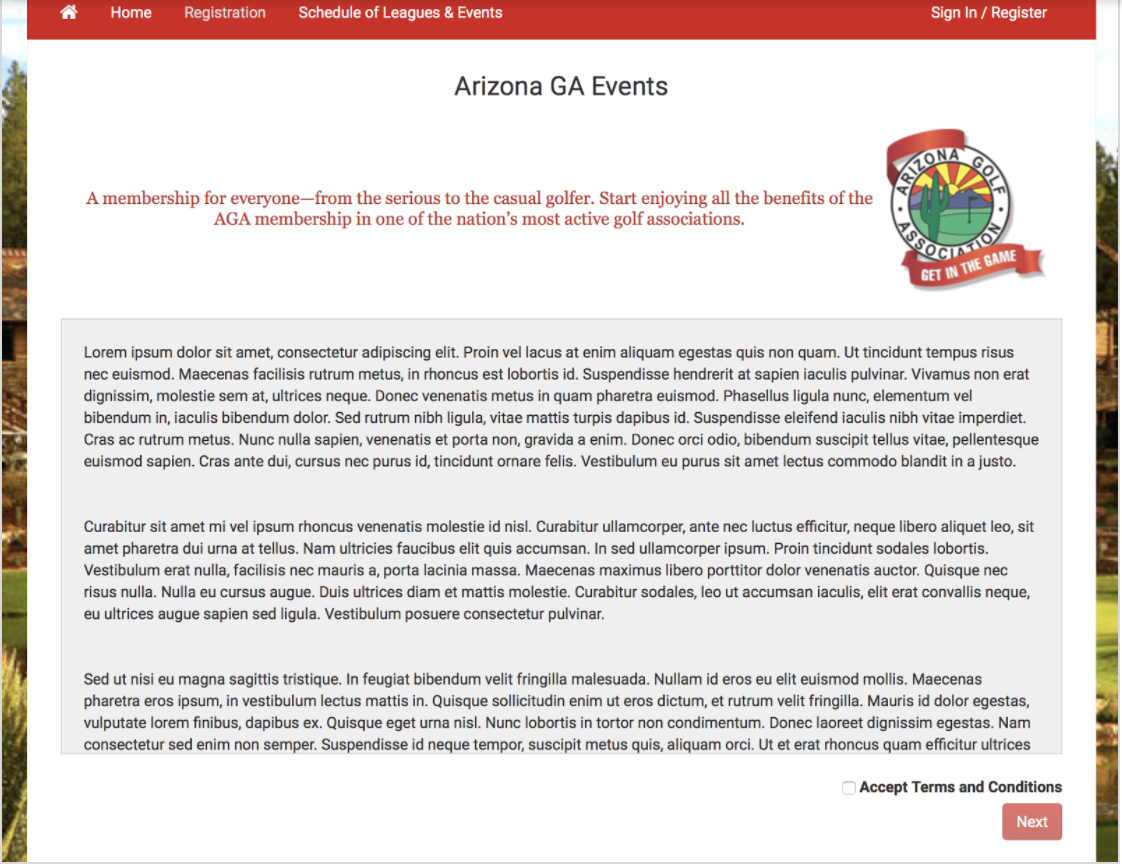
From there, they can select to Accept the Terms and Conditions, then click "Next". At this point, the player is registered and entered into the master roster (unless manager validation is required, which is discussed later in this article) and both the player and the selected managers will receive an automated confirmation email.
After registering, if a player needs to edit any of their information, they can go to the portal, log in, and go to "Edit Profile".
Viewing the Player Information
As players are registering, Customer Managers can view the players and their information by going to Customer Center > Master Roster > View Master Roster.
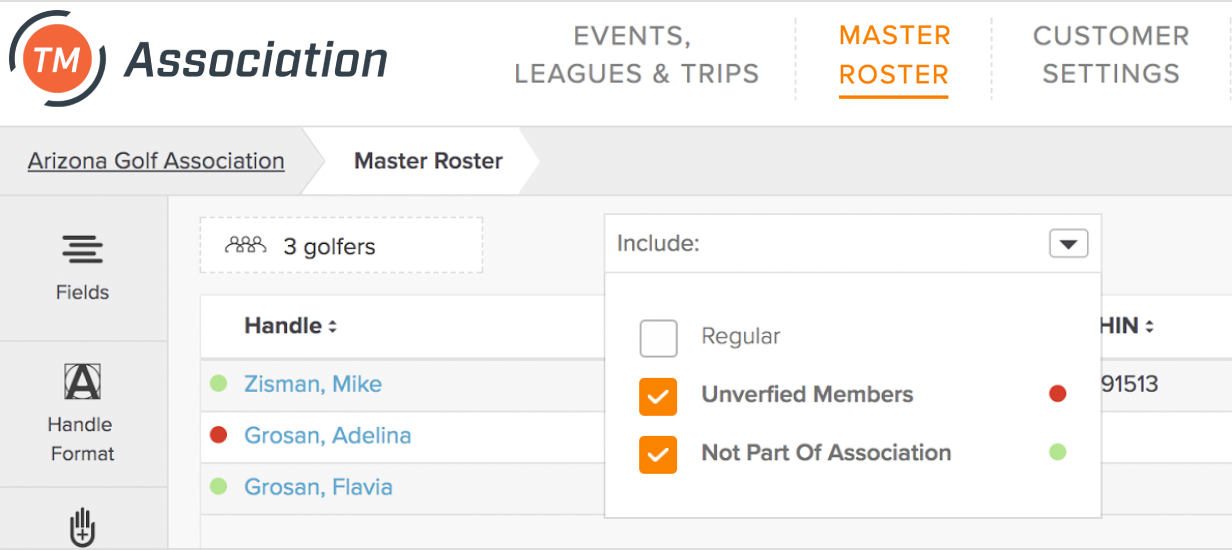
Non-association players are denoted with a green circle next to their name.

Click the "Include" dropdown menu at the top to filter between association players and non-association players. Click on the player names to view the specific player detail.
You can also view the Master Roster Registration activity by going to Customer Center > Directories & Registration > Roster Activity Log.
Manually Validating Players
As discussed earlier in this article, it may be necessary for managers to manually validate players who attempt to register without a GHIN number. When attempting to register, players will see the following message.

To validate unverified players, go to Customer Center > Master Roster > View Master Roster. Filter the roster to only "Unverified Members".
Players who have attempted to register without a GHIN number will be listed. Click on each player individually and select the option to verify them.
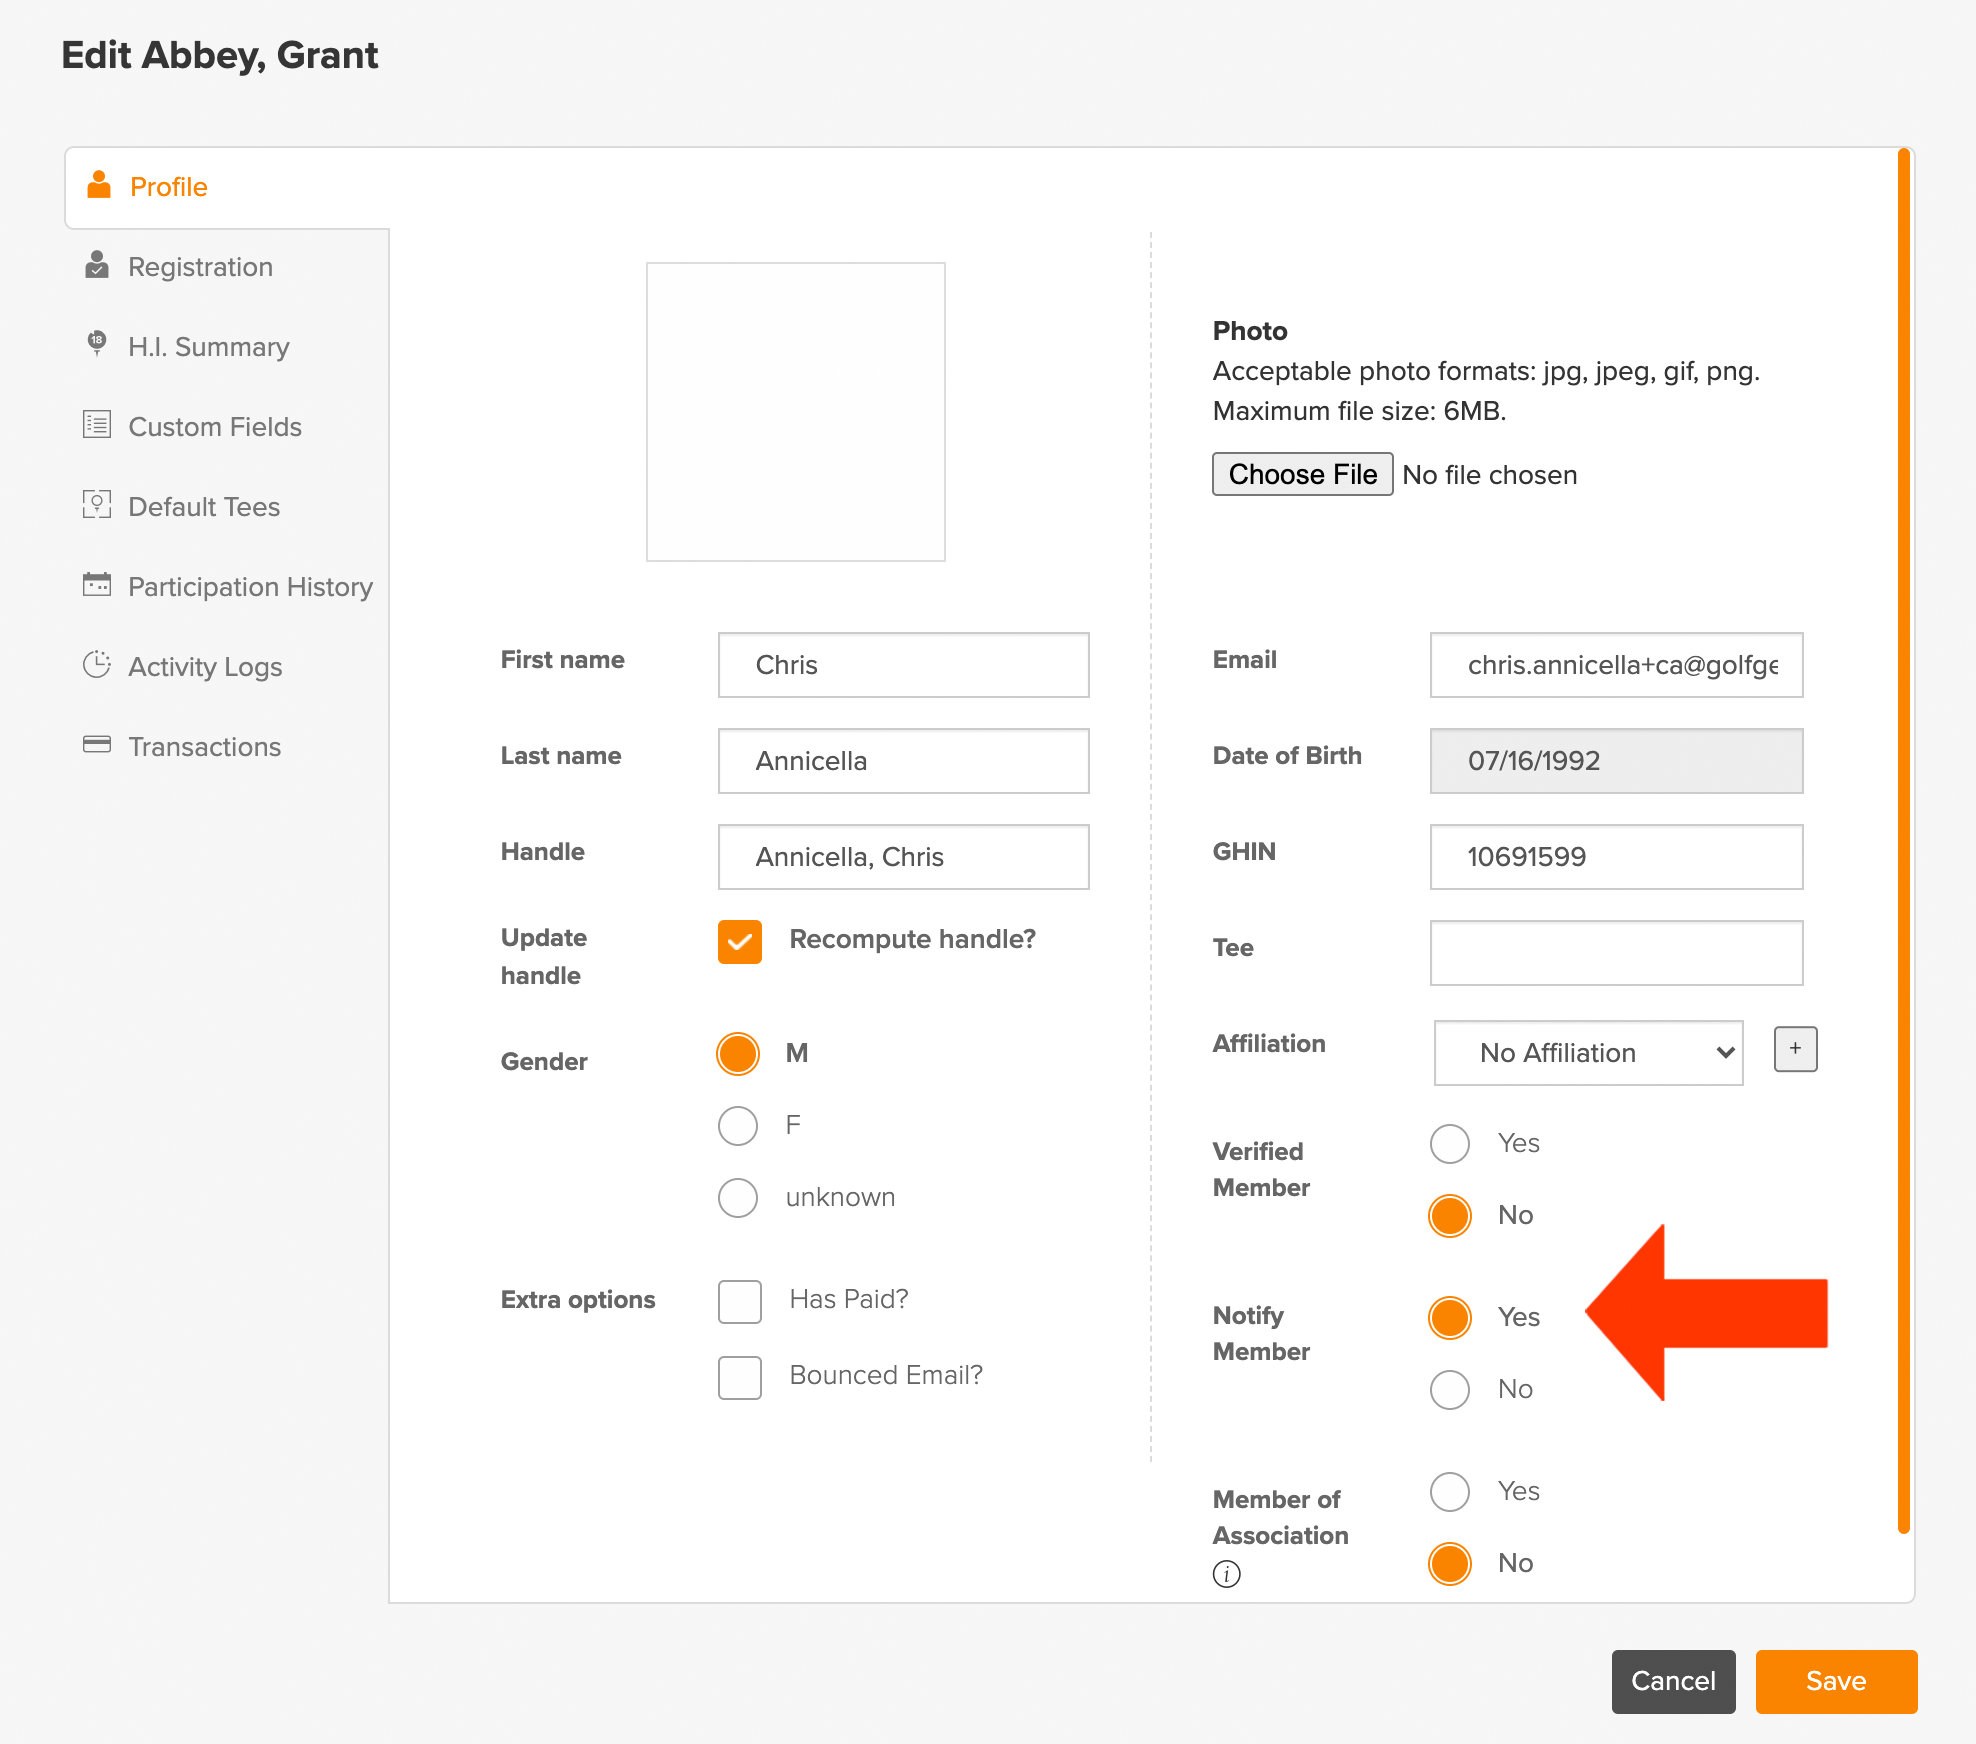
You can also select the option to notify the member. By selecting "Yes", the player will receive a confirmation email that they have been verified and registered to the master roster. Make sure to click "Save" after selecting these options.
Automatic Golfer Registration with Backfilling Golfers from Events/Leagues
If you would like to automatically add golfers to the Master Roster as they join events and leagues, and optionally create their user accounts automatically, you can enable Master Roster Backfill and Automatic Golfer Registration. For complete details on configuring and using these features, Click Here.