
This feature is available for the following products:

Similar to the Report Composer, the Page Composer gives you extensive customization in building printable material. The Page Composer allows you to design and print reports to your specifications. Select the size, text, images, and much more.
What's the difference between the Page Composer and Report Composer? Click Here for the answer.
In this article, we will discuss creating, designing, sharing, and printing a page report.
Creating a New Page
To create content using the Page Composer, follow these directions:
Go to Rounds > Report Center > New Document > New Page.
Enter or select the following:
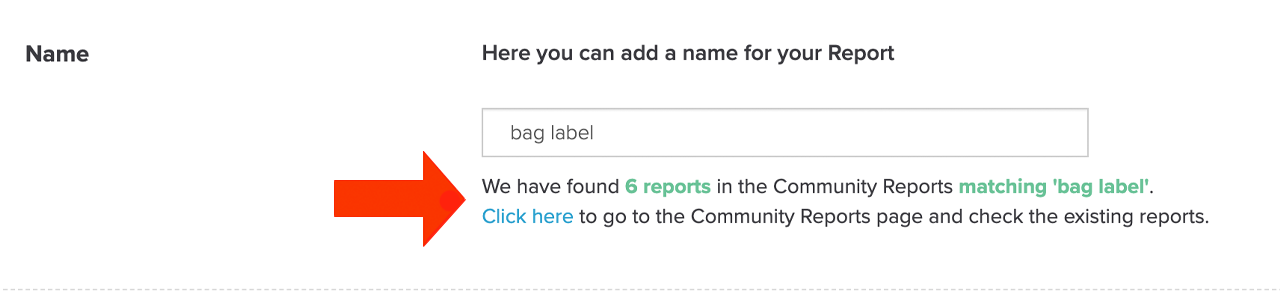
Name: Name the report.
If the name you entered matches documents in the Community Reports, the system will identify reports with matching fields based on name, category, and tags. When a matching document is found, the number of reports and a link to the community reports page will be provided for quick access (as shown below).
Form: Forms define the paper size and page proportions. Select any of the forms that are already available (e.g., Avery 5160, 5161). If the form you need is not available, go to Manage Forms > Add New Form. Creating a new form is discussed later in this article.
Print for every: Select the scope of the report. For instance, you would print for "every player" if creating bag labels. If making cart signs, you would print for every "pair."
Report Center: Select the Report Center categories to include the report.
Click "Save."
Below is an example of the setup for a bag labels report.
Editing an Existing Page
To edit an existing page, follow these instructions:
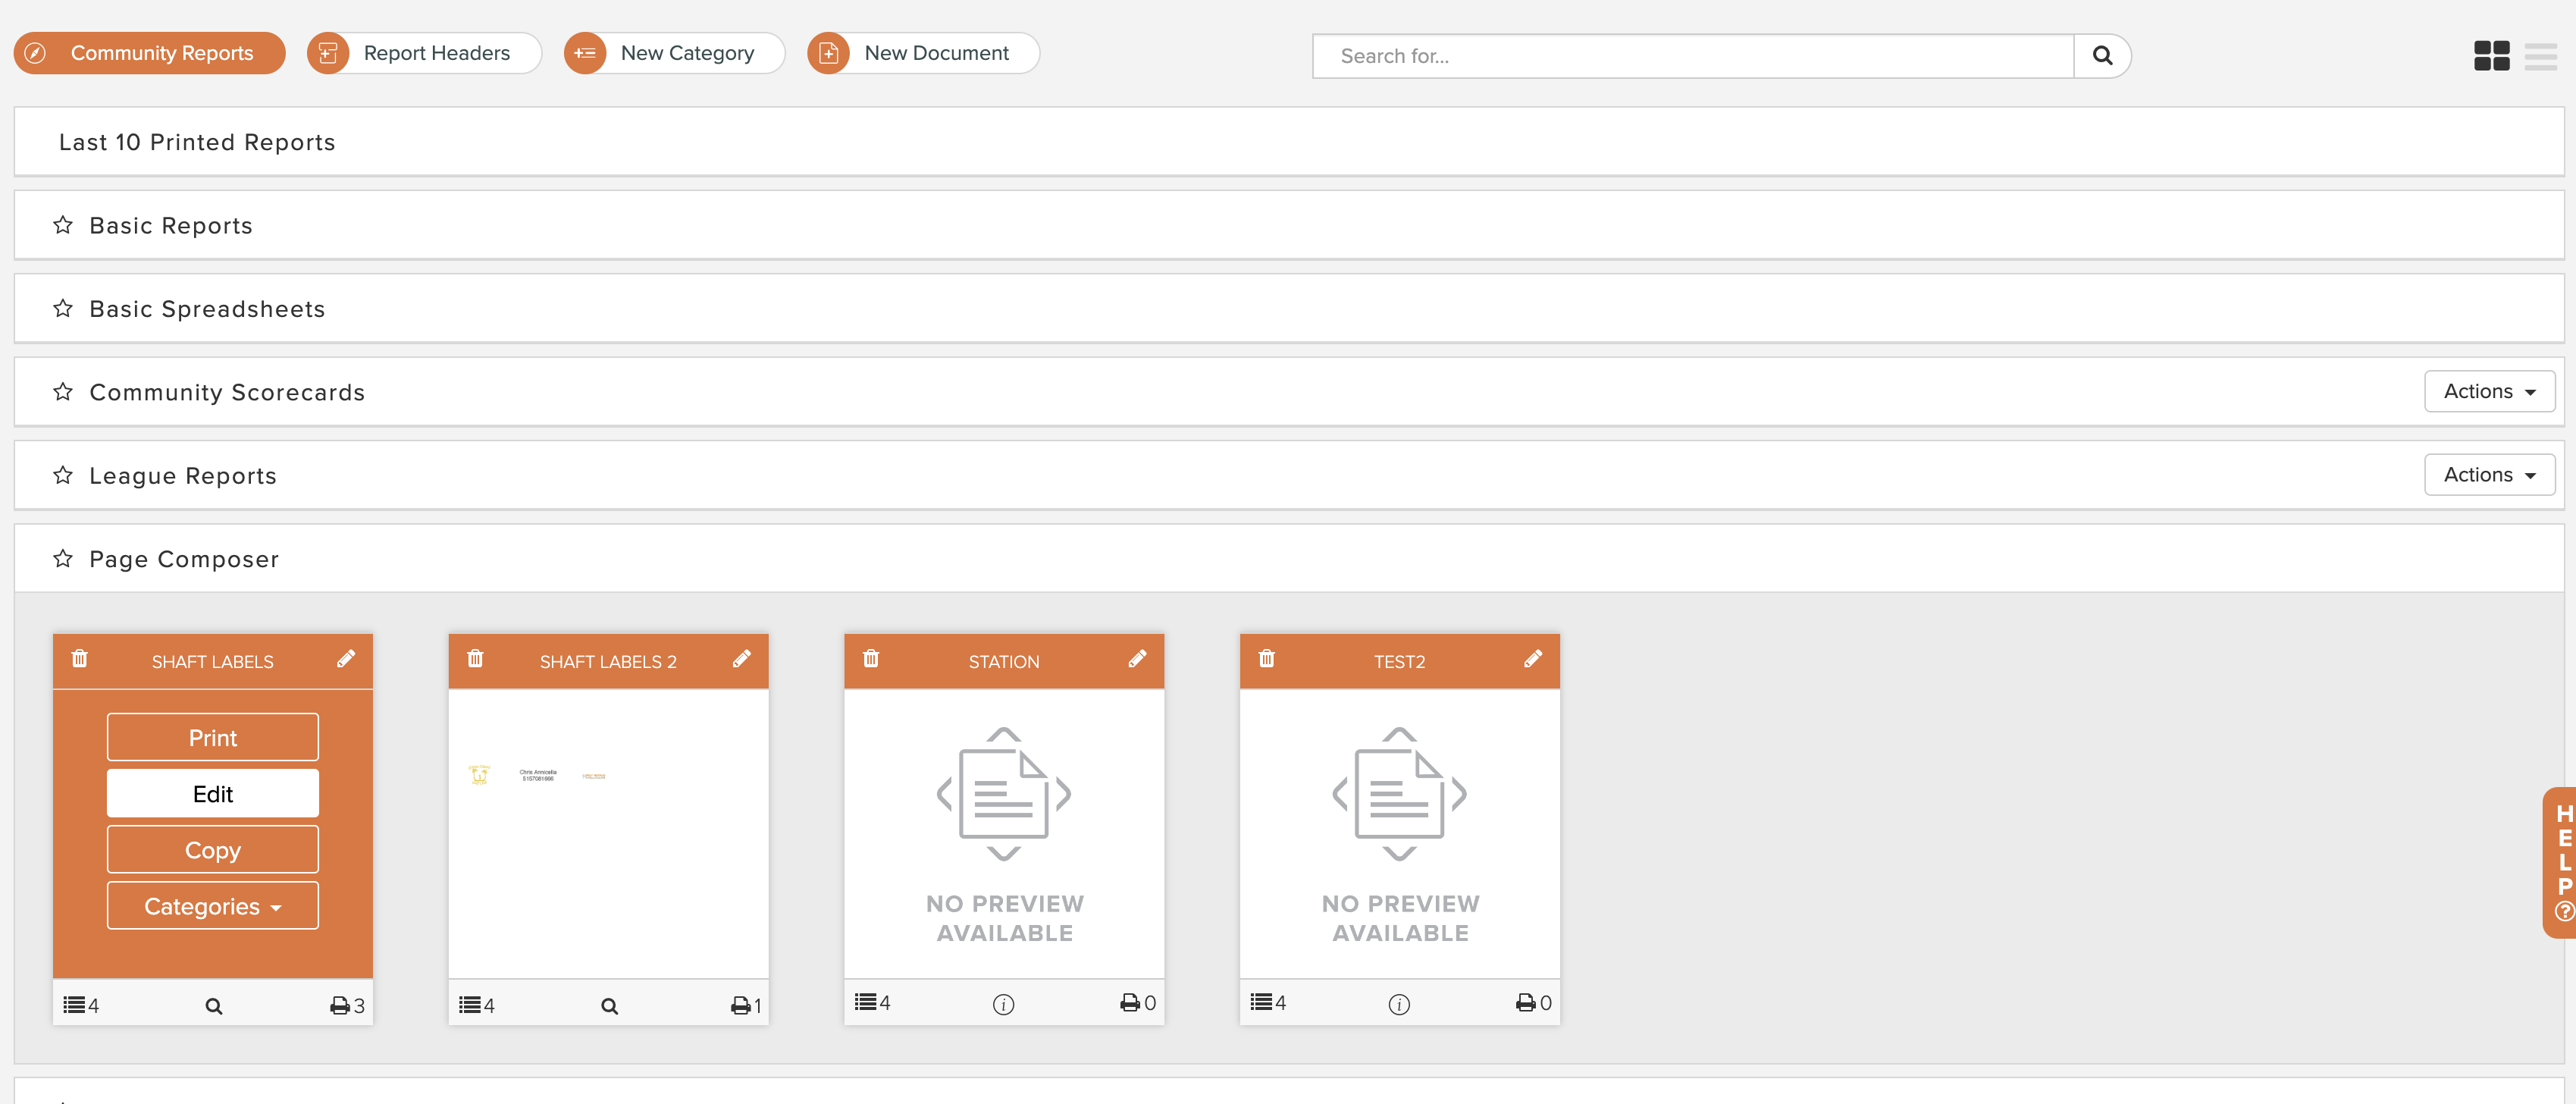
Go to Rounds > Report Center.
Search for the Page you wish to edit.
Hover your mouse over the page and click "Edit" (as shown below).
Page Composer Layout
The Page Composer is divided into multiple areas (as shown below).
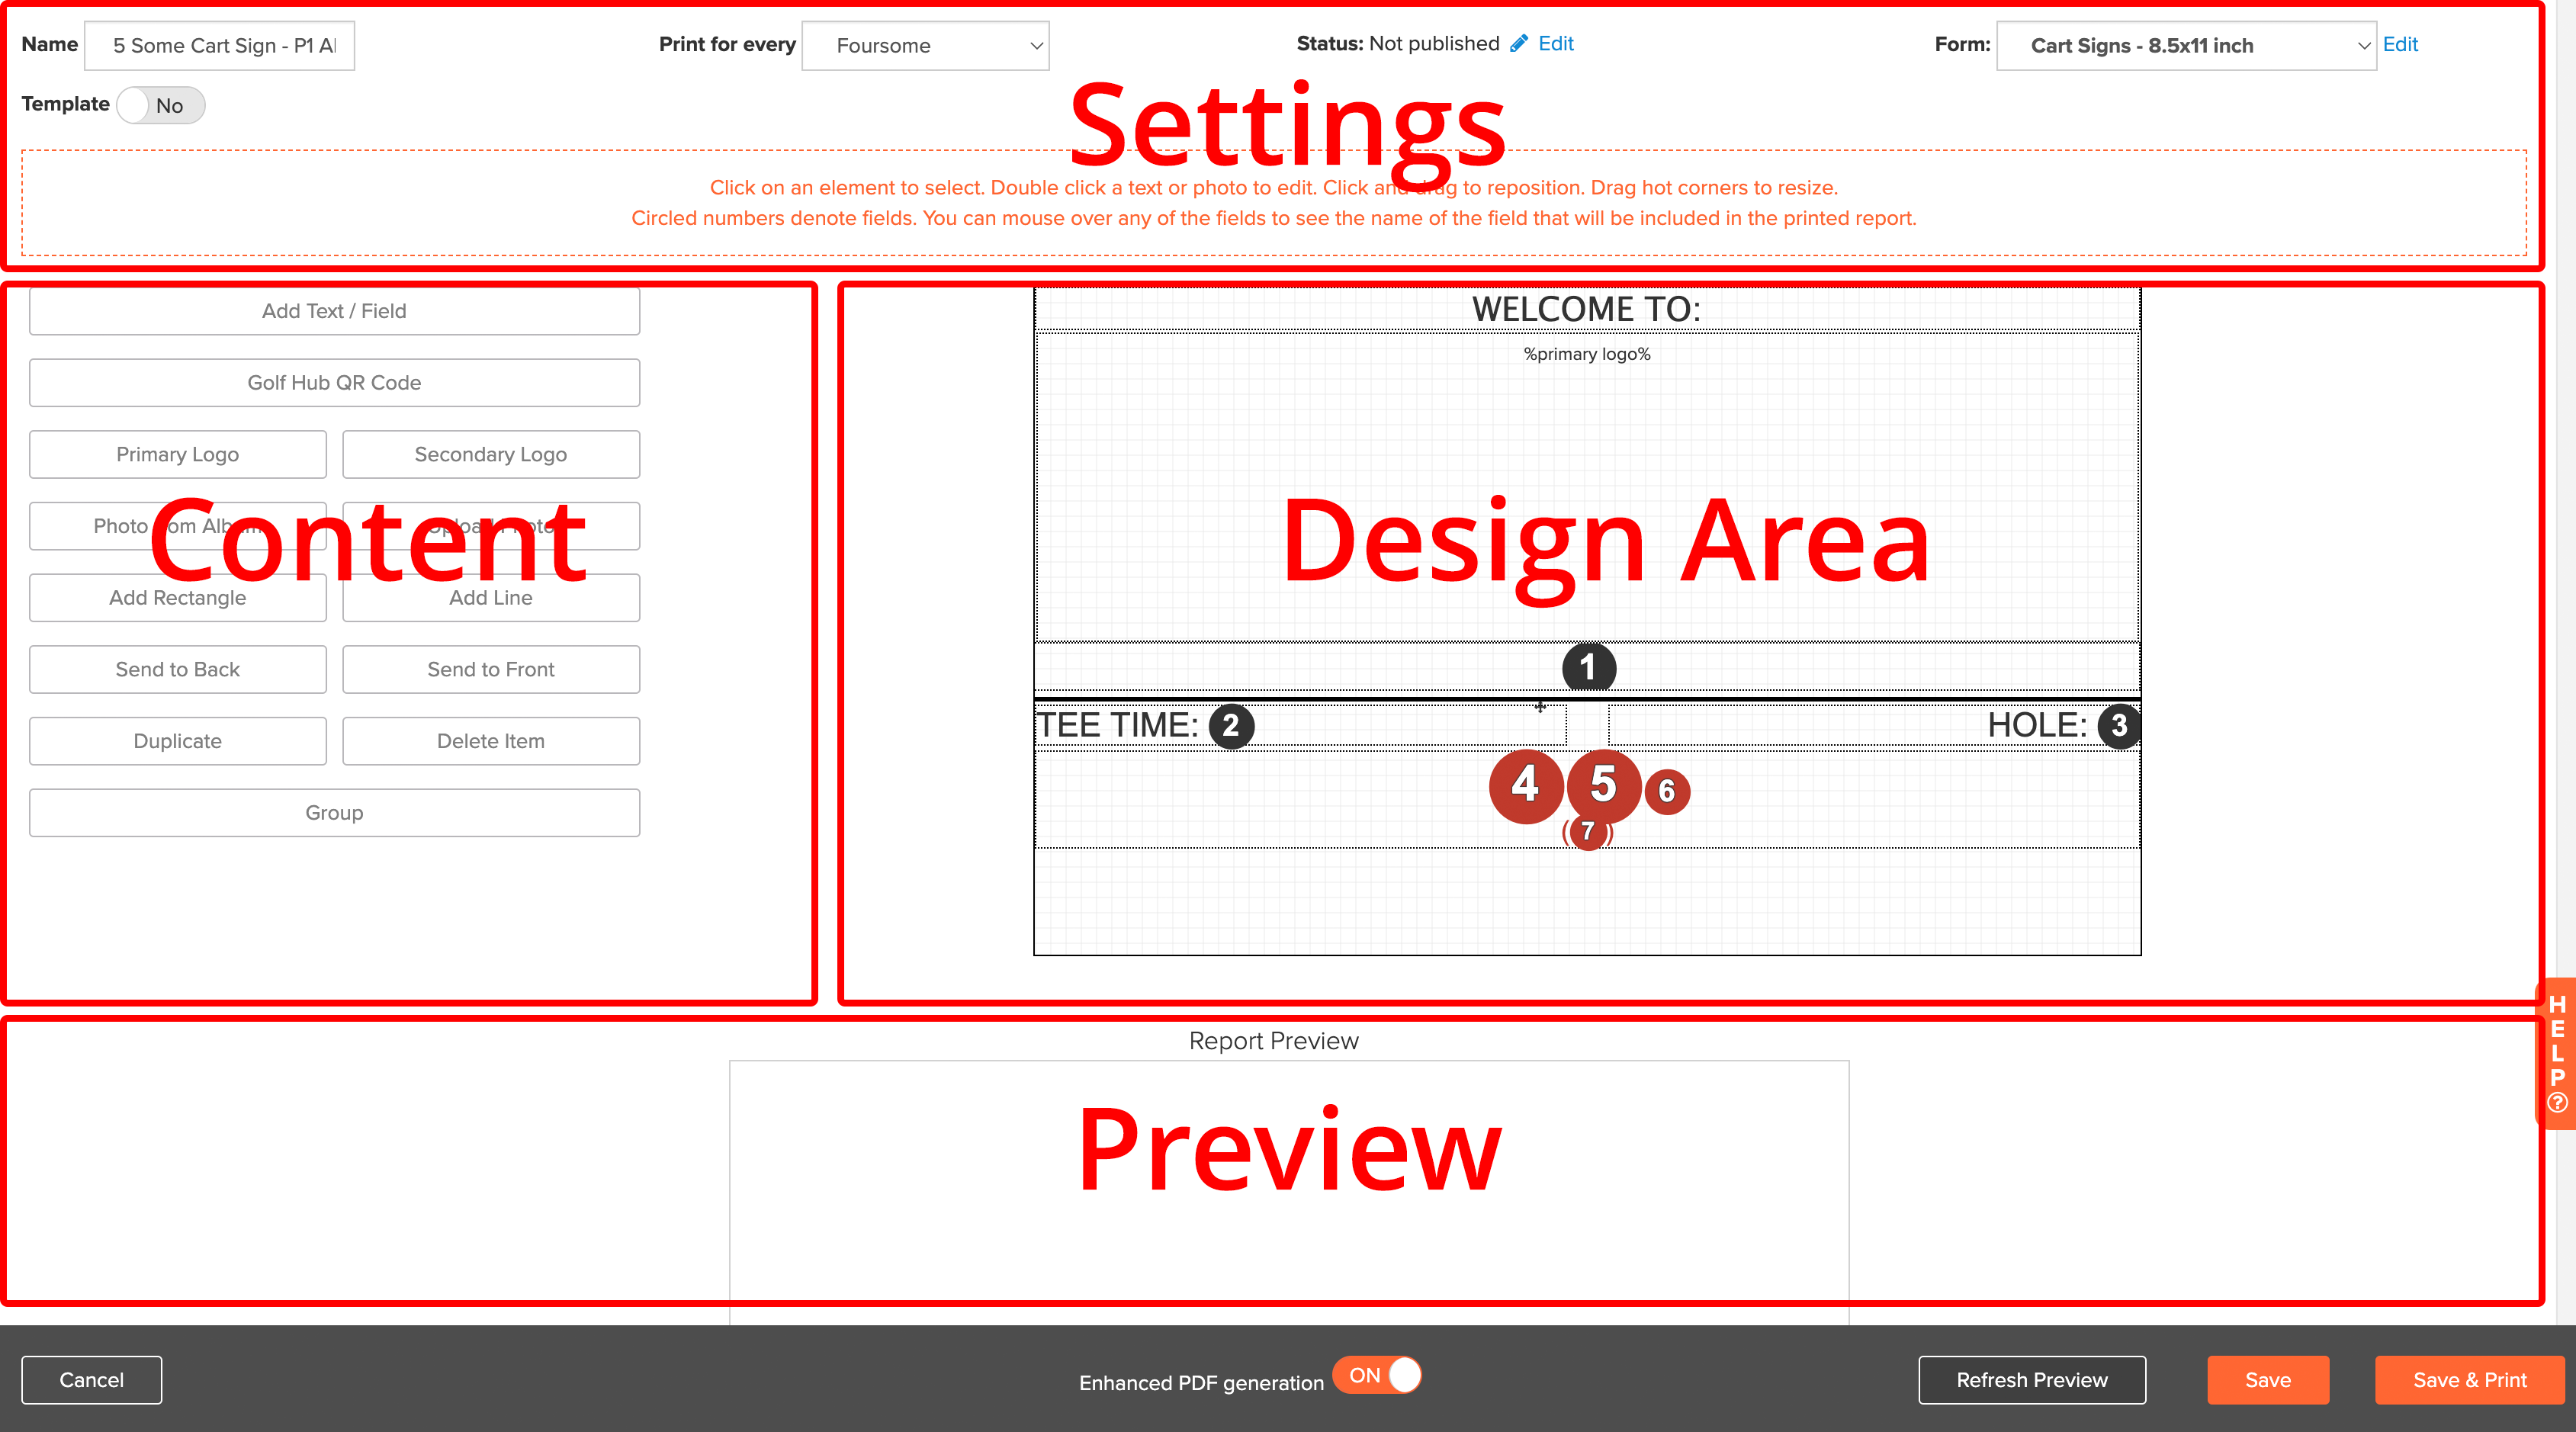
Page Composer Settings
The settings area allows you to adjust some of the pages general details that were set when first creating a page:
Name: Edit the name the report.
Print for every: Select the scope of the report. For instance, you would print for "every player" if creating bag labels. If making cart signs, you would print for every "pair."
Status: You can also share your page with the user community. Click "edit" to publish or un-publish your page to the user community. For more details on the publishing to the user community, Click Here.
Form: Forms define the paper size and page proportions. Select any of the forms that are already available (e.g., Avery 5160, 5161). If the form you need is unavailable, click Edit > Add New Form. Creating a new form is discussed later in this article.
Template: When editing a page, customer managers, with permission, have the option to mark a report as a template. This restricts who can modify a report you created in the Report Center. For more details about templates, Click Here.
Page Composer Content and Design Area
Note: For some Composer shortcuts and tips, Click Here.
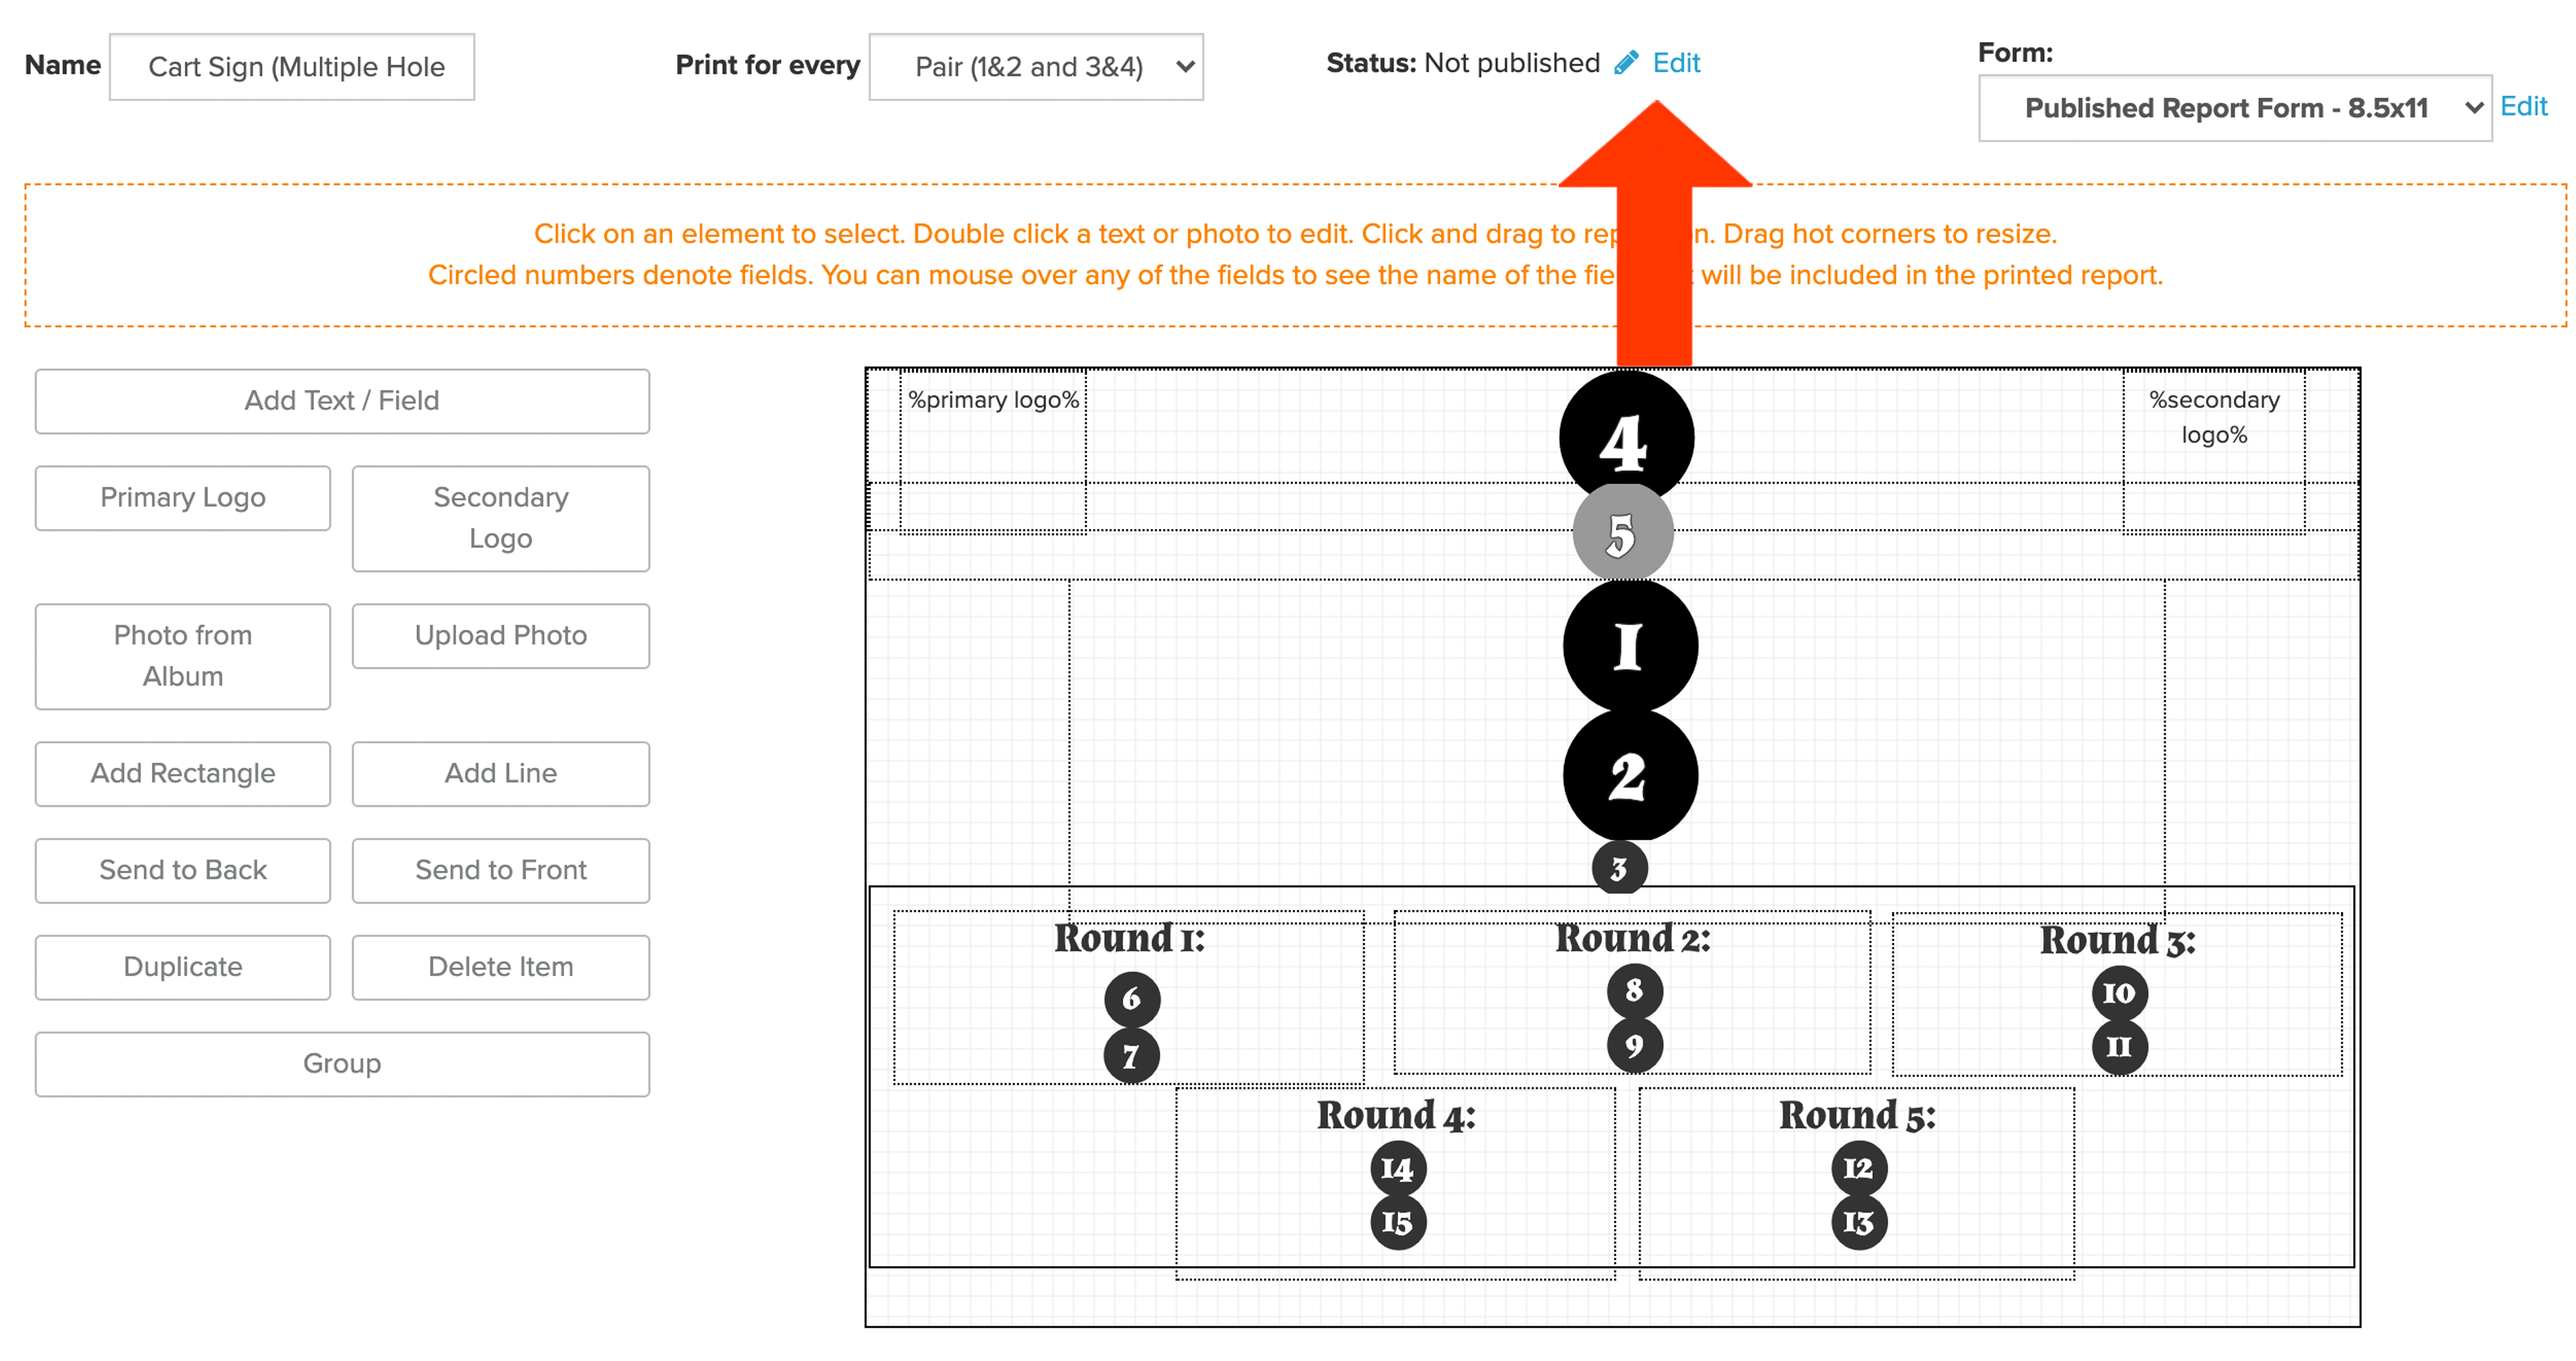
The design area displayed on the right is where you can add content (e.g., images, text, lines). On the left is the available content tool used when designing your report (as shown below).
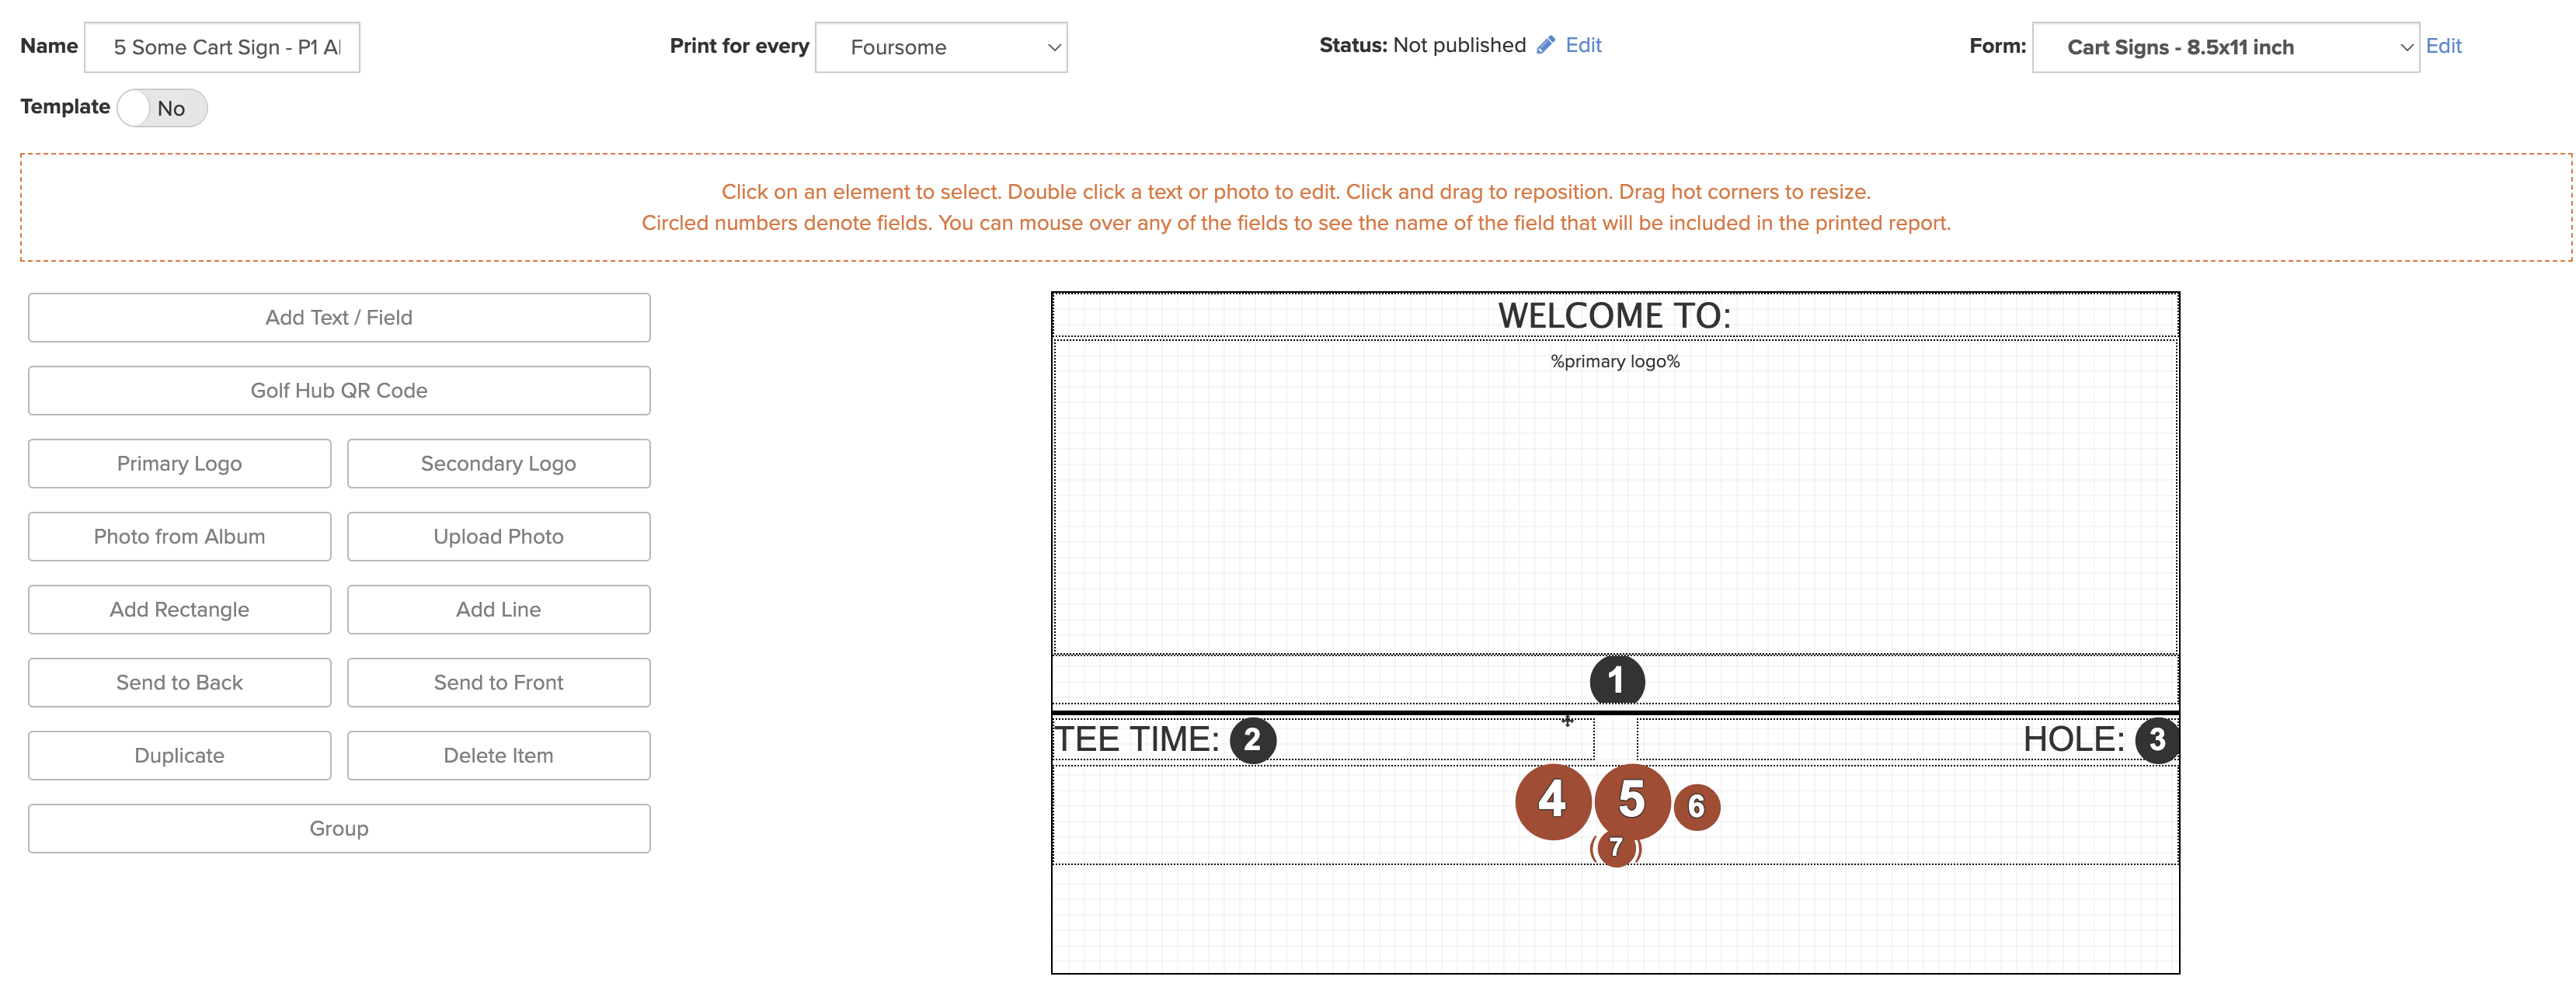
Adding Text / Field
To add content to the report, use the tools on the left. When selecting "Add Text/Field," you will see all the dynamic fields available for the report. When clicking on a dynamic field, it will be inserted at the cursor position as a placeholder. Many types of data fields can be used, including:
Player Related
Roster Custom Fields
Round Custom Fields
Pairings
Division/flights/teams
Handicap
Tournament
etc.
Feel free to change font size, color, and type for all of these placeholders.
As shown below, we are adding the tee time below the starting hole on this cart sign. At the time of printing, these placeholders will be replaced with the actual player names, tee times, and affiliation.
Adding Logos or Photos
You can add your event logos, photos from albums, or even upload photos to a report. Once you have added a photo to the design area, click and drag photos or text (that you've added) to wherever you'd like on the template.
In the sequence below, we've reduced the logos' size to make room for the Event Name being added at the top.
You may be wondering what the numbers stand for. These are placeholders for text that will be inserted into the reports. For instance, in the sequence above, #5 is the Event Name. #1 and #2 are the player names.
Othe Available Tools
There are other tools available to you that should be noted:
Golf Hub QR Code: Adds a scanable QR Code for the event/league Golf Hub Page to the design area.
Add Rectangle: Create a rectangle of any size, change the color, border width, and more. Simply click and drag the corners to re-size. For more info on adding a rectangle, Click Here.
Add Line: Add a line of any length, width, and color. Additionally, you can change the angle if needed. For more info on adding a line, Click Here.
Duplicate: Add a duplicate of any image, rectangle, line, or text box. In the sequence above, we duplicated the club logo.
Send to Back and Send to Front: Images, rectangles, lines, and text boxes may overlap at some point. By clicking on any of them, you can send one or the other to the back. For instance, maybe you have a watermarked image created. It would be a good idea to send that to the back.
Watermarking: Creating watermarks with an image is easy. Add the image on the left, or click on an existing image on the right. Move the image and enlarge it to the size you'd like, then adjust the photo transparency on the left. Send it to the back, so it shows behind all the other content (as shown below).

Finalize the Report
As you are formatting and editing a report, we suggest that you "refresh the preview" after making changes to ensure everything will be as expected when running the report.
Once you are finished designing the content, click "Save and Print."
Sharing Your Report with the Community
You can also publish any of your content in the Community Reports (for others to use) if you would like. To do this, click on "Edit" near status.
For more details on Community Report, Click Here.
Creating a Form
In the initial setup steps of creating content with Page Composer, you are asked to select a form. The form defines the paper size and page proportions of the content. In some cases, the needed form is not available, and you may need to create a new form. To do this, go to Rounds > Report Center > New Document > New Page > Manage Forms > Add New Form.
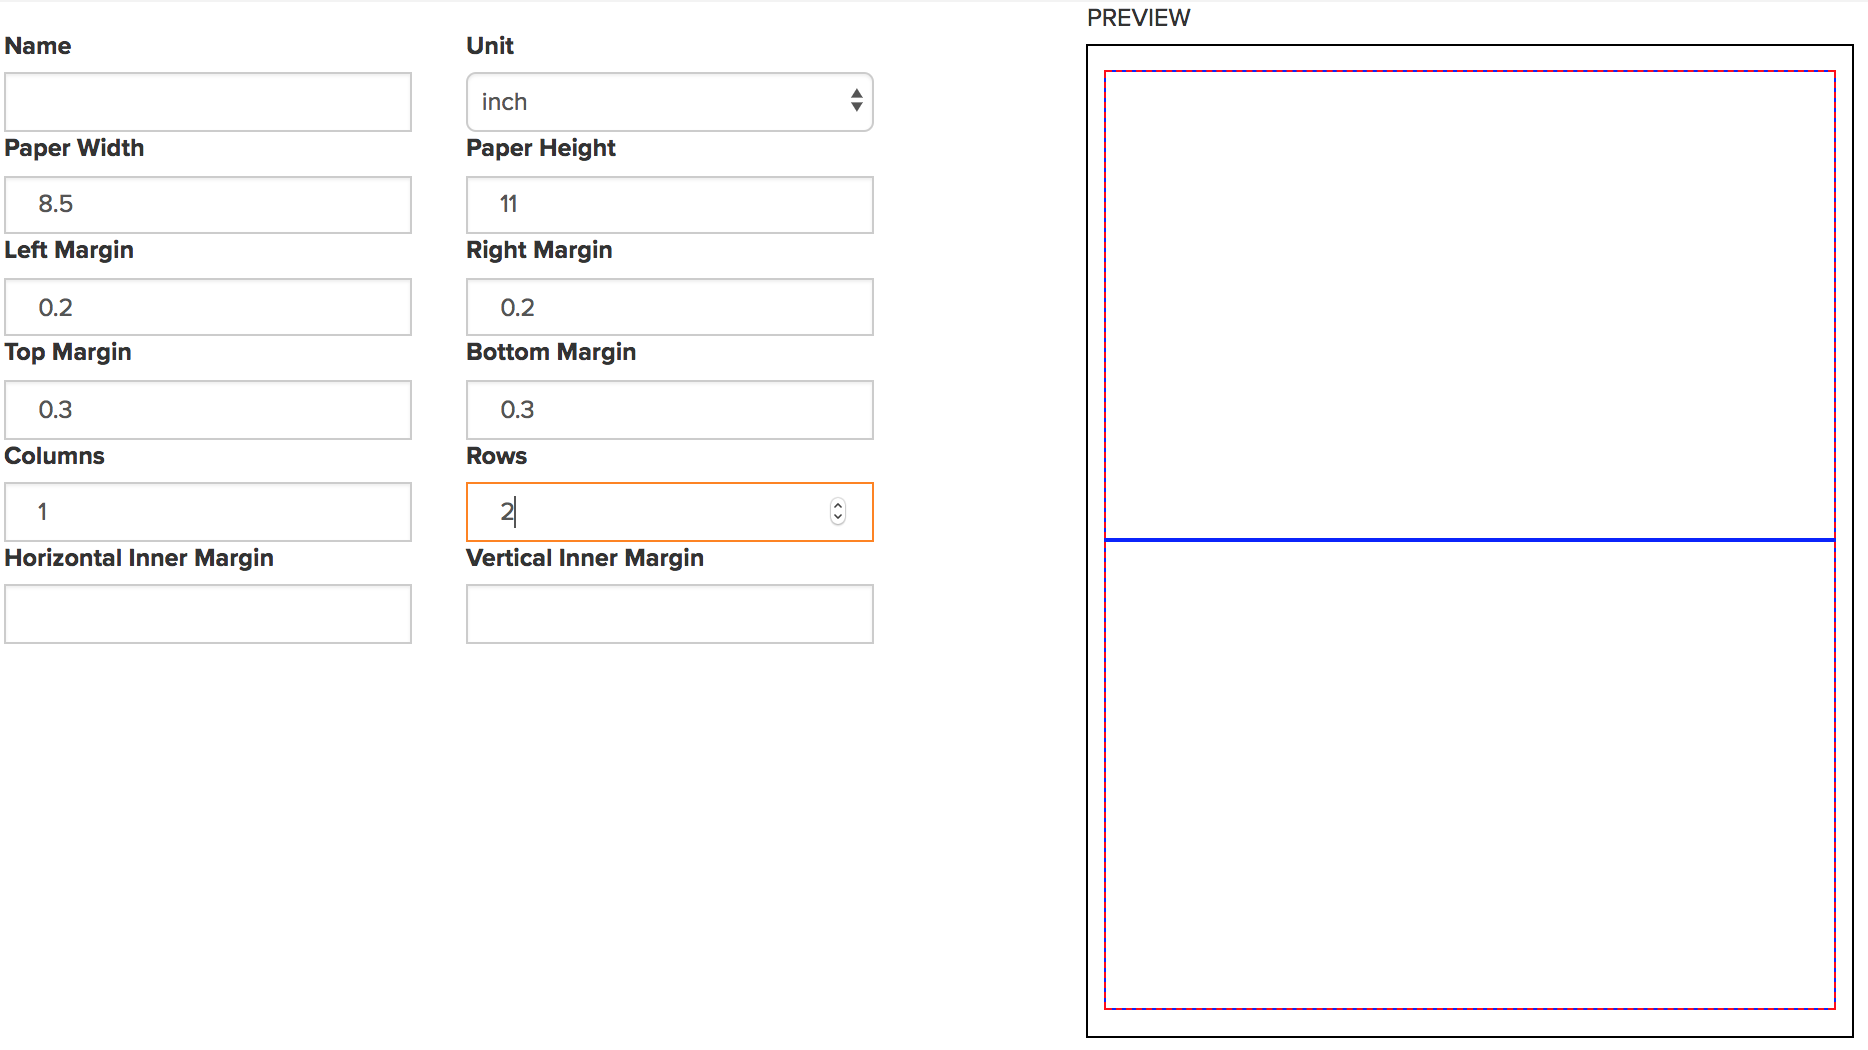
Let's say, for instance, we want to create custom cart signs (2 cart signs per 8.5 x 11 page). In the screenshot above, you will see an example of a form that can be used for the cart signs. Select the paper dimensions (8.5 x 11), the outside margins, and the inside margins. You will see that the preview on the right changes as you change the specs on the left.
Then, select the number of columns and rows. With only two cart signs per page, I will only want 1 column and two rows. You can add any number of columns or rows (Avery 5160 labels use 10 rows and 3 columns, for example).
Once the form is set to what you need, save it. This form will now be saved for all your events and leagues.
Configuring the Report
If you are not creating a new report (e.g., running or copying a report already created), you may need to configure the report to be used for a particular round. To configure the report, go to Round > Report Center, find your report, hover your mouse over it and press "Configure." You will be presented with a popup showing you the dynamic fields, what they are used for and how they are configured. Set the configuration for the proper round (as shown below).

Dynamic data fields are used in all of the reports. They will change depending on the round, course, tournament, or tee. For instance, tee times are dynamic fields and change for players round to round. So it is important to select which round(s) will be used when creating the report. For example, if you made a report in round 1 but also want to use it in round 2, configure the report for round 1, select round 1 dynamic field, and then configure it to be used in round 2.
Scores are another example of a dynamic field. Player and team scores change, depending on the tournament. Maybe you would like to create a report that displays each player's Round 1 score next to their name. In that case, you will need to select the round and tournament to configure the report.
Printing and Filtering the Content
After configuring a report to print, some printing options will be available.
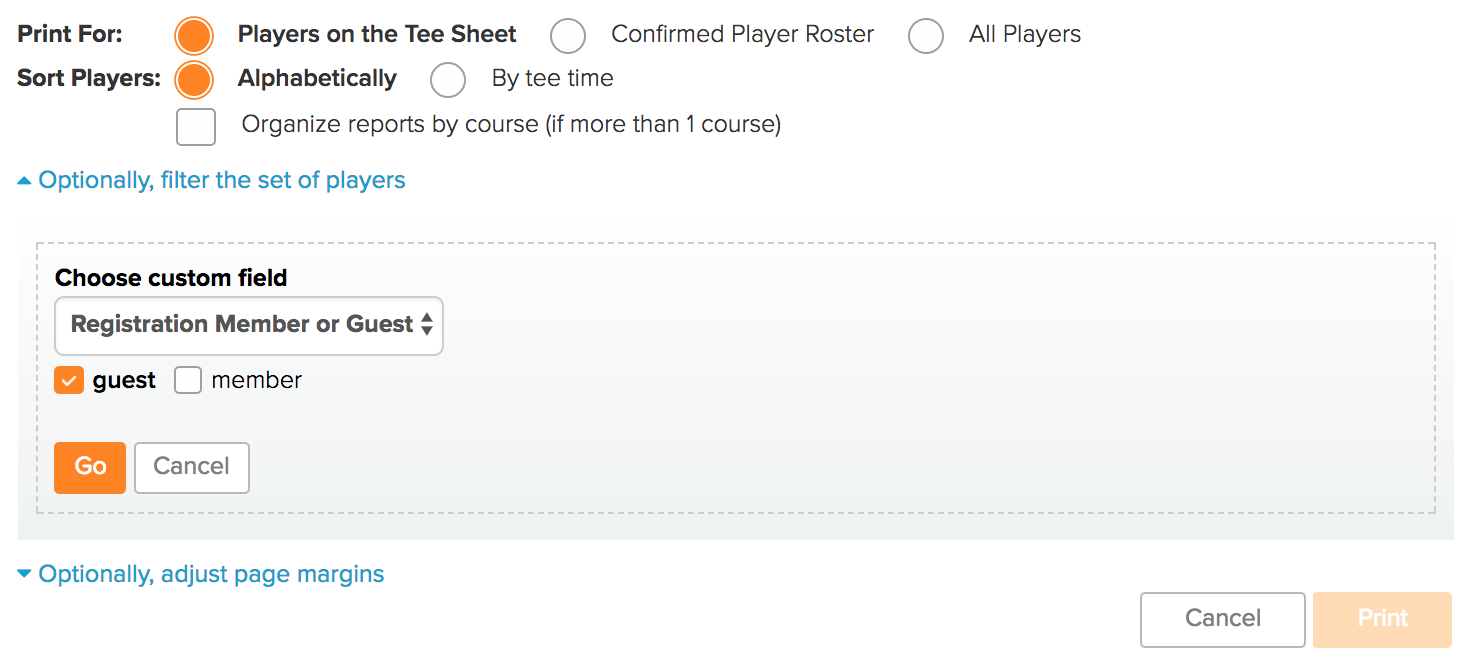
Print For: If the report is to print per player, select to print for every player on that round's tee sheet, round roster, or All the players in the league/event.
Sort Players: if the report is set to print per player, select the order in which the players will be printed on the report.
Organize reports by course: If there is more than one course being played in this round, you can separate them by course.
Filtering: There may be a certain set of players that need to be included in the report. You can define this set of players by using a custom field. Two examples of filtering would be 1) Printing cart signs for Riders Only and 2) Printing bag labels for Guests Only.
Adjust Page Margins: If the report needs to have the margins adjusted vertically to fit the page better, you can manually change the margins.
(Note: On the print options page, make sure you choose actual size and not "fit" or "fit to page." If your labels are not printing correctly on 5160 labels, for example, then your print options are incorrect, or you are printing right from your browser. This is usually not a good idea.)
After clicking "Print," we suggest creating a PDF and then printing.