
This feature is only available with the following products:

Q: We are taking registration using payments, can member(s) or non-member(s) register for an event/league?
A: When setting up event/league registration, you will have the option to allow members or non-members to register for your event or league. This registration type should only be used in the case that members OR non-members can register independently ( ie, non-members can register without the assistance of a member).
In this article, we will cover setting up member(s) or non-member(s) registration using payments.
Enabling Registration with Payments:
The first step is to make sure registration is enabled in the Registration Center. To do this, go to Event/League > Registration Center > Registration Enablement tab.
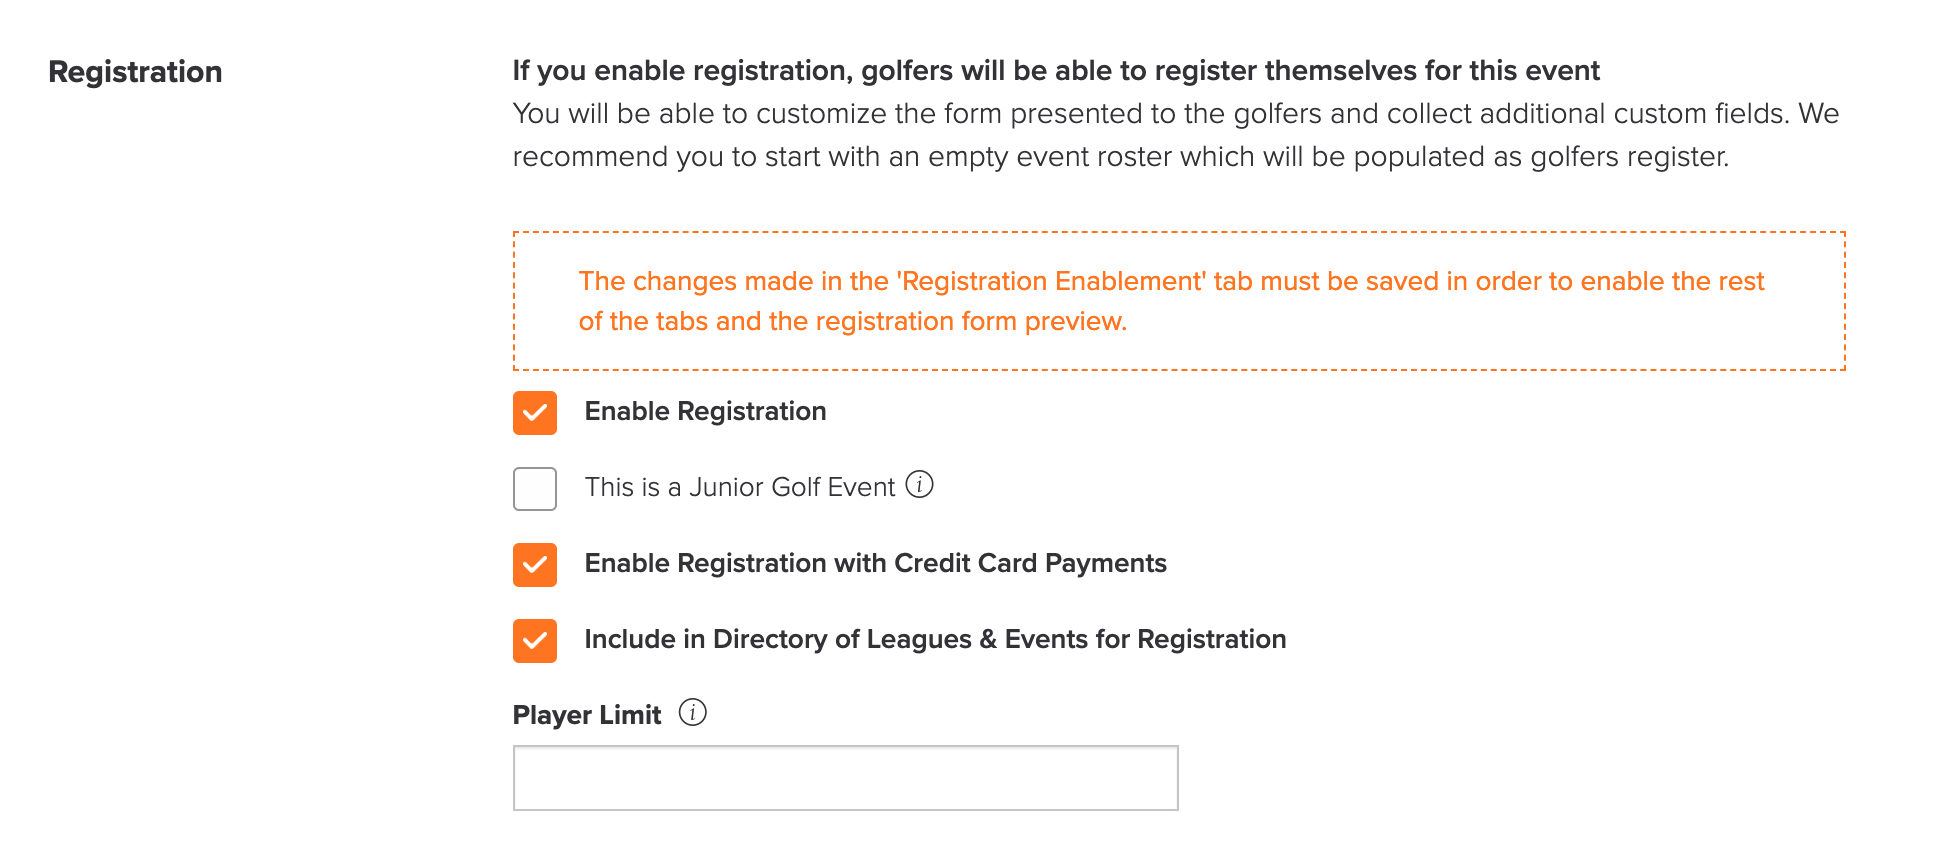
Select "Enable Registration" and "Enable Registration with Credit Card Payments." Then click "Save."
Setting up the Registration Form:
After enabling registration and payment processing, in the Registration Center, go to the "Registration Setup" tab to set up the registration form. You can do this by going to Event/League > Registration Center > Registration Setup tab. types, select "Member(s) or Non-Members(s)(Either a Member or Non-Member can register independently)" (as shown below).

If using Master Roster Registration, you can optionally allow non-members to register to become members in your master roster during the event registration process by checking the box for "Offer non-members the option to become members."
Enabling Verification:
While enabling verification is not mandatory, it is highly recommended to ensure others cannot act on behalf of the member or non-member after they have registered.
When visiting the portals to register, players who are not logged in will be asked if they are a member or non-members. If they select that they are a non-member, they will be prompted to register. During the registration process, non-members will also be asked to create an email and password to access their registration at a later time.
For more details on all the registration options in the Registration Center, Click Here.
Setting up Registration Payment Options:
Note: When using Member or non-Member registration, you will need to create a registration payment option for both members and non-members to allow them to register independently. Details on setting up registration payment options will be outlined later in this article.
Once the registration form is created and saved, and your payment account is setup, Select "New Registration Option." Set up a registration option (as shown below).
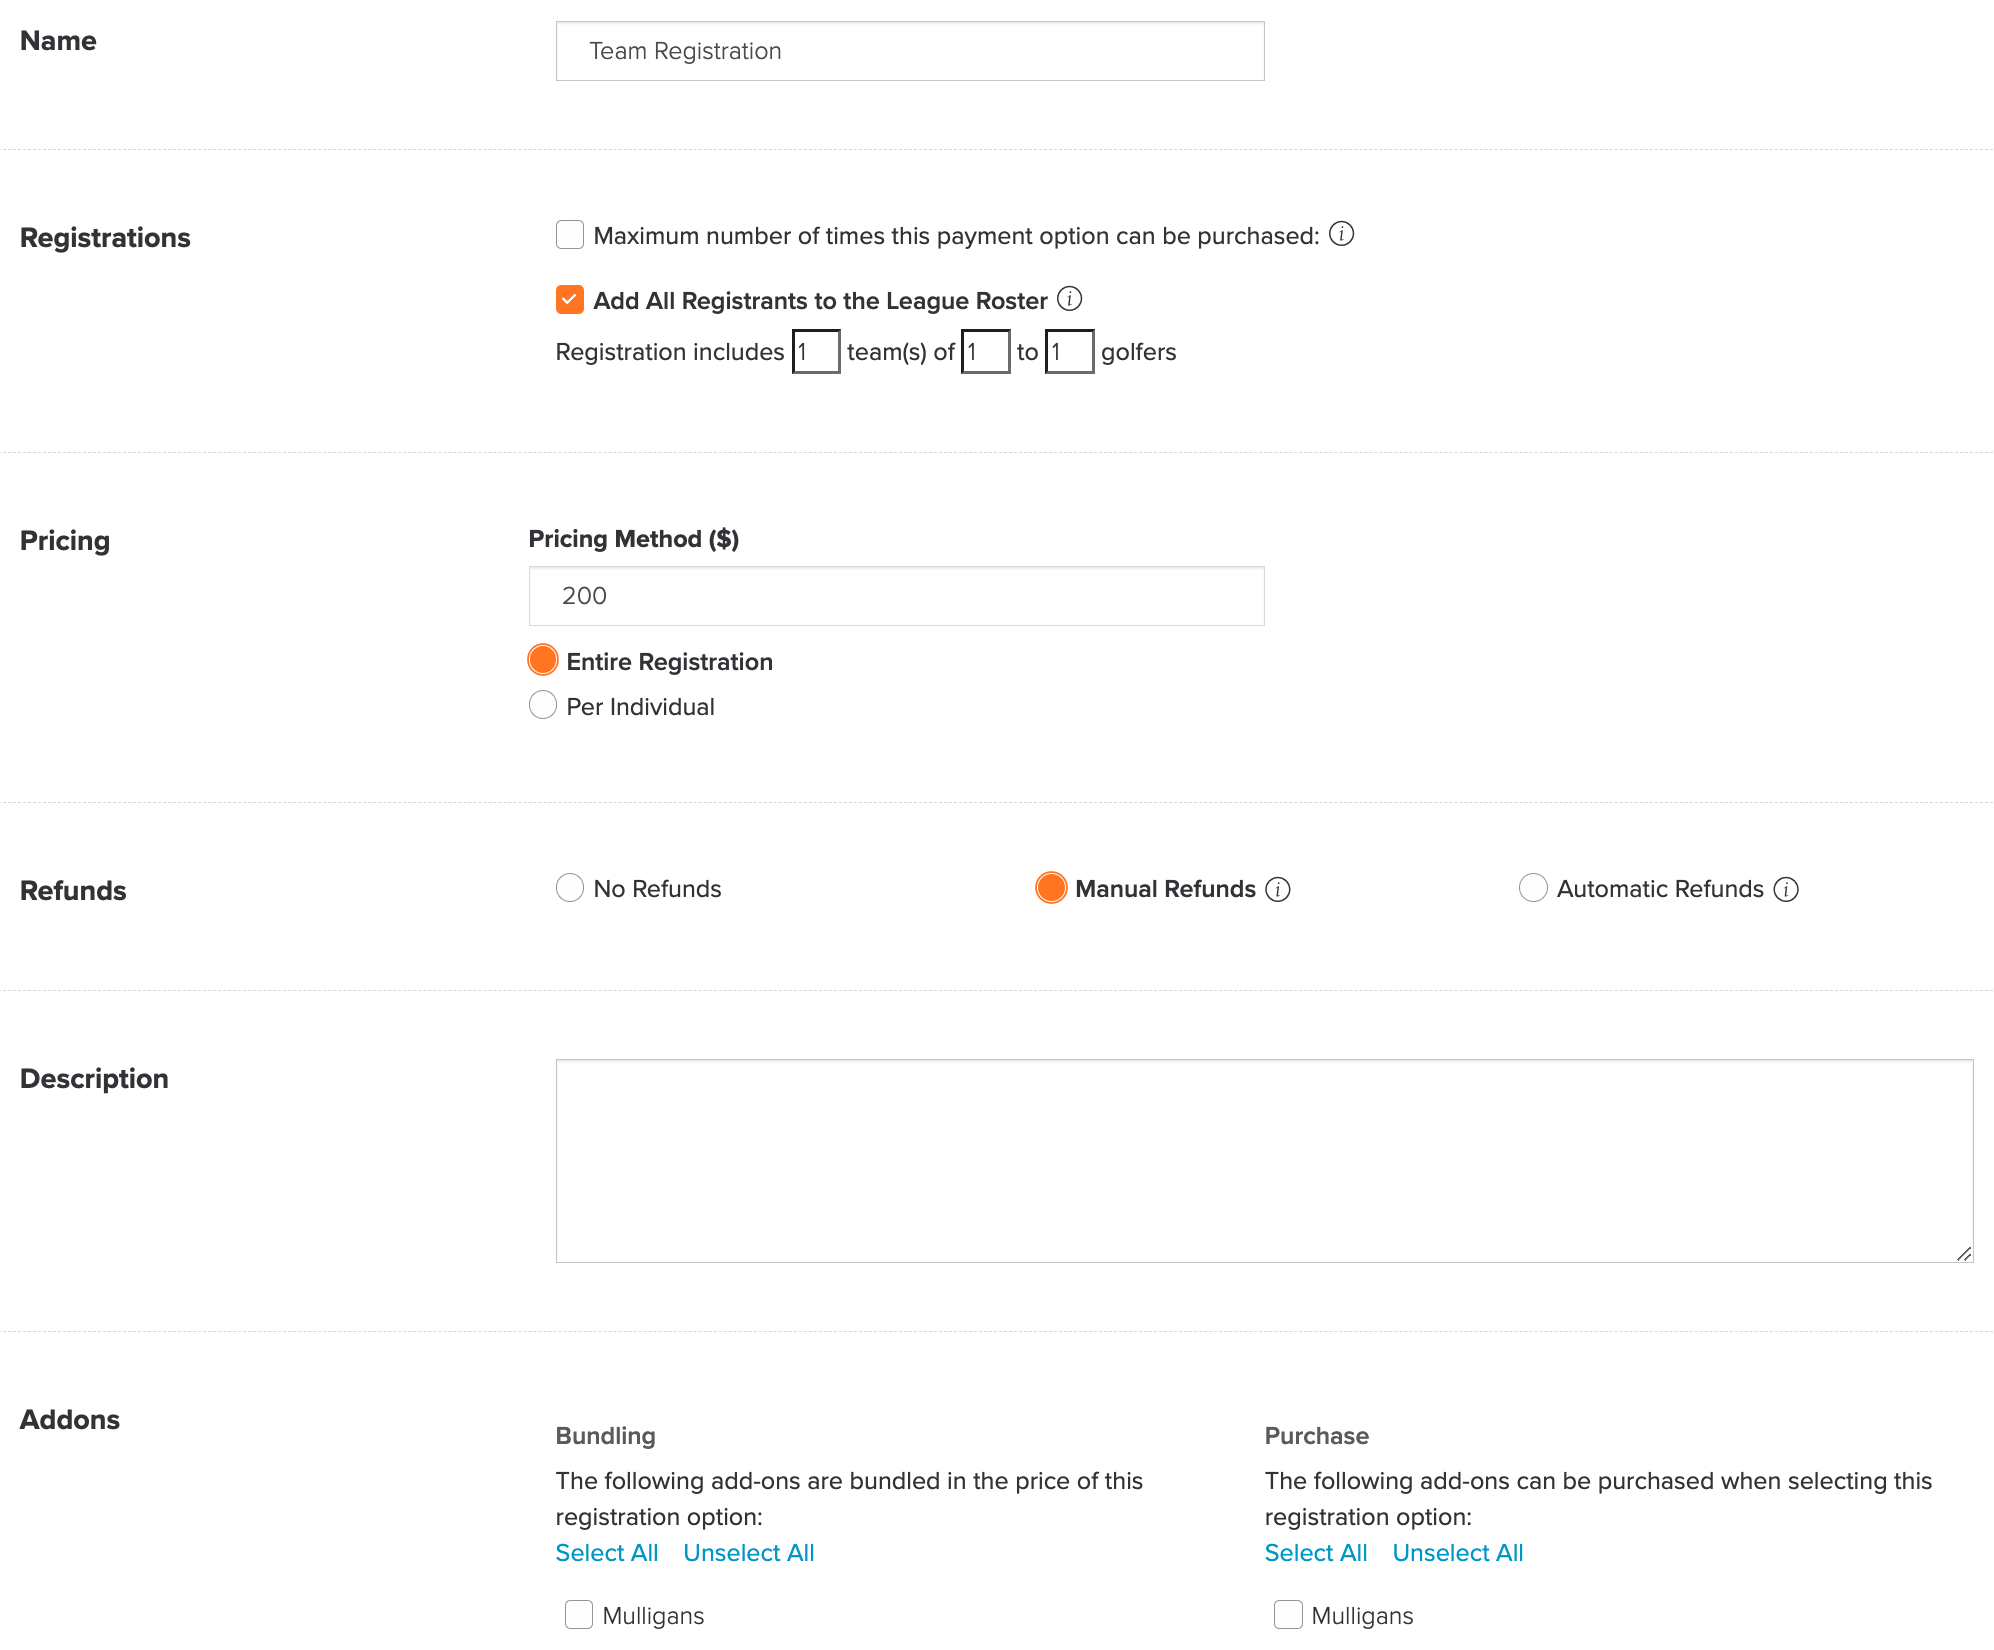
Fields that need to be selected are:
Maximum number of times this payment option can be purchased: If there is a registration limit for this registration option, select this option and enter the limit. Note: The player limit selected in the Registration Center sets the overall limit of players for the event. This limit sets the player limit for this specific registration option.
Add Golfers to the Event/League Roster with this Registration Payment option: In most cases, this option will remain checked. Therefore, by default, this option is already selected. If registrants for this option are not playing golf, and should not be added to the event roster, unselect this option. An example of leaving this option unchecked would be when you are creating a "dinner only" option for an event.
This Registration Includes: Select the number of possible registrants per registration based on your event.
Note: When using "Member or non-Member registration," you will need to create a unique registration payment option for members and non-members to allow them to For example, if this is an individual event, you will need to create a registration for members where teams of 1 to 1 members and 0 and 0 non-members (as shown below).
A second registration option will need to be created for non-members, where teams of 0 and 0 members and 1 and 1 non-members (as shown below).

Pricing Method: Enter the price of the registration. You can enter the flat fee for the entire registration (regardless of how many players are registered) or enter a fee per individual in the registration. If there is no fee for the registration option, Click Here for more details.
If selected, players will receive an individualized payment link via e-mail: The registrant can choose to pay for the entire team, a portion of the team, or split the registration across the entire team during the registration process. Click Here for detail on splitting payments across players.
Divisions: If you are allowing players to select and pay for their player divisions, you can select what divisions are included in this registration option. Click Here for details on division selection during registration.
Membership Program Discounts (Golf Genius TM Association Only): Members of membership programs can receive discounted event entry fees.
Refunds: There are three refund options:
No Refunds: Do not allow refunds.
Manual Refunds: Allow registrants to request refunds. A manager must then approve. Click Here for details.
Automatic Refunds: Use a refund policy to enforce automatic refunds.
Description: Enter some optional text that details and summarizes each option when players register.
Add-ons: If you have already created your add-on, you can select an add-on that is part of the package (Bundling) and an add-on that can be added by purchasing more (Purchase). .


After completing the registration option setup, click "Save."
Add any remaining registration options (if there are multiple registration options).

Setting up Add-on Options:
You can also offer add-ons during registration. An example would be allowing registrants to purchase extra dinner tickets or mulligans for an event. When creating an add-on, you can automatically bundle it with other registration options. on, go to Event/League > Registration Payments and select the "Add-ons" tab, and click "New Add-on."
Set up the add-on option. Below is an example of creating an add-on for purchasing mulligans.
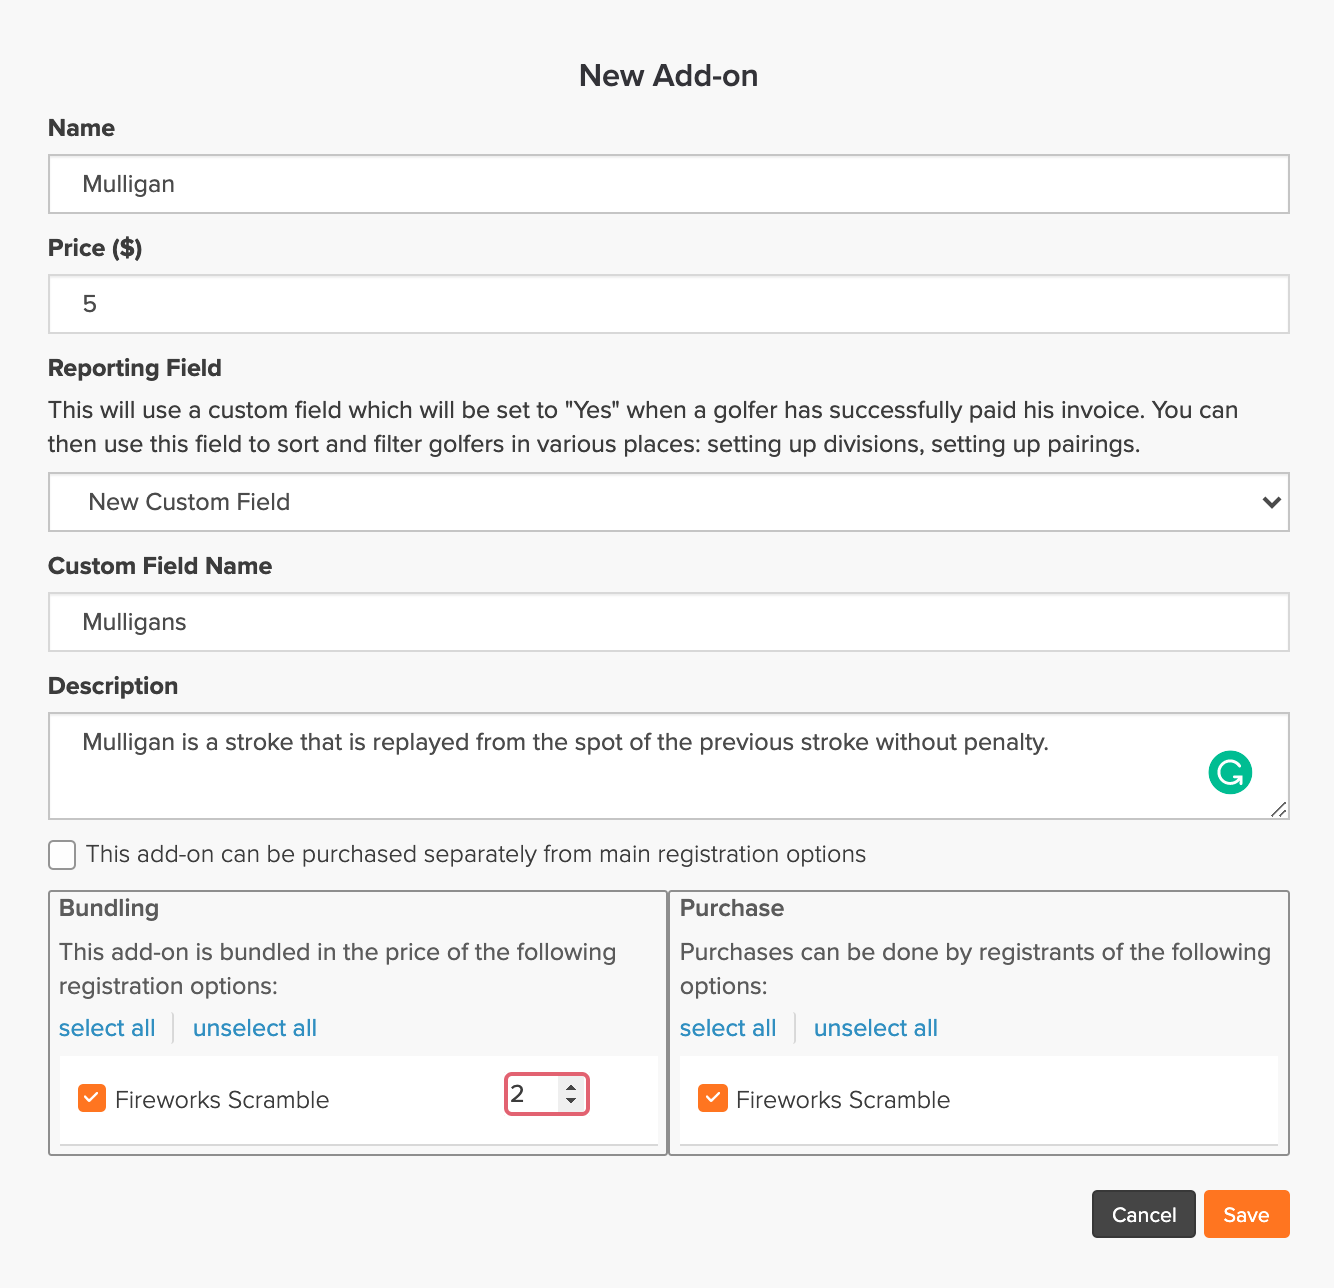
Fields that need to be filled in:
Name: Name given to the add-on.
Price: The price per each additional add-on purchased.
Reporting Field: The reporting field allows the add-on to be noted as purchased in a new or existing custom field in the Player's Roster Profiles. the registration process. For team registration, the custom field will be set to "Yes" for all players on the team if an add-on was purchased during the registration process. in setting up divisions and pairings.
Custom Field Name: You can name the custom field if you choose the "New Custom Field" option in the "Reporting Field" dropdown.
Description: Enter some optional text that details and summarizes each option when players register.
This add-on can be purchased separately from main registration options: If you would like your add-on to be a stand-alone purchase, check this box. The flexibility to offer the Hole Sponsorship without participating in the event and have it on the registration page.
Bundling: When bundling, this item will be bundled into the price of the registration option.
Purchase: You can define if an add-on can be purchased with a particular registration option. When checking a registration option, a player can purchase this add-on during the registration process.
Setting up Additional Options:
To set up Additional Options, go to Event/League > Registration Payments and select the "Additional Options" tab (as shown below).
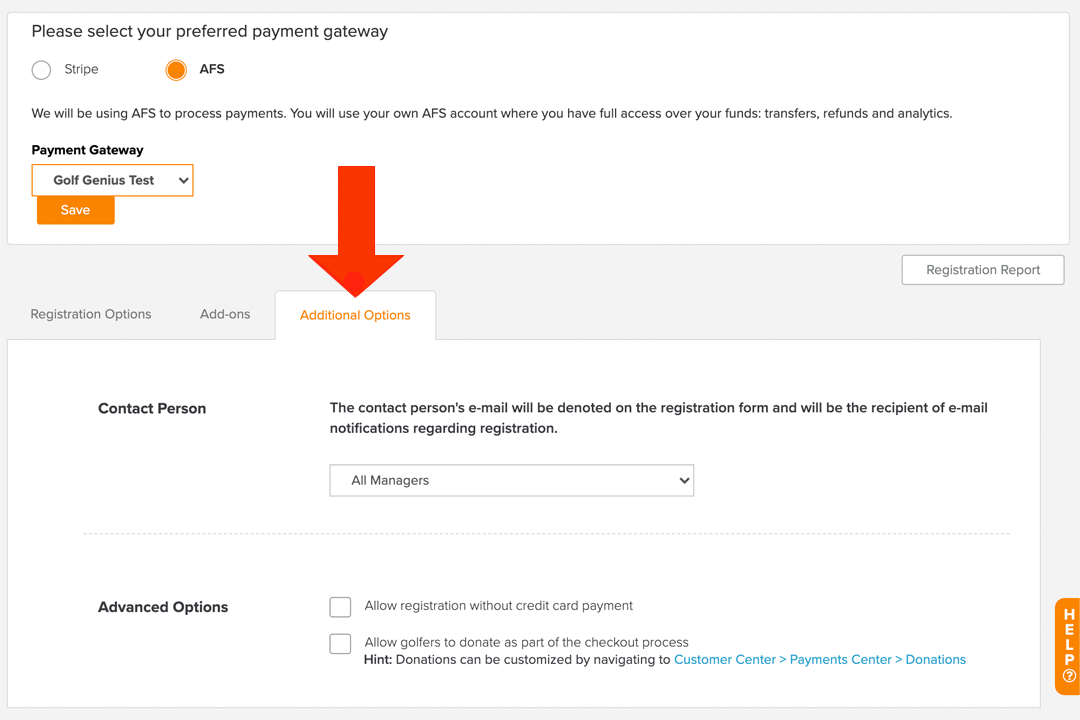
In this tab, you can:
Select the Contact Person: If a registrant has a question during registration, there will be an option for them to email the contact person.
Allow registration without credit card payment: Registrants can optionally bypass the credit card payment of registration.
Allow golfers to donate to a donation program: Click Here for details on donations.
Player Registration Process:
Once registration opens, players can go to the portal, register for the event/league, and pay their fees.

The sequence above shows the registration process. Notice they have two registration options when registering. The last step of the registration process is entering the billing and credit card details.
( Note: The registration process differs if using Multi-Event Registration. Click Here to view the registration process.)
Once players have completed the registration process, they are automatically placed in the event/league roster, and the money is then deposited in your Stripe merchant account. (Exception: If using a waitlist, registrants are not charged until confirmed for the event. Click Here for details on using a waitlist.)
Both the player and manager will receive an email confirming the registration and payment.
Viewing Payment Activity:
You can view registration payment activity by going to Event/League > Payment Center or Event/League > Transaction History.
Refunds and Transfers:
After initial registration, there are sometimes cases where a player needs to cancel their registration.