
Our single round and multi-round event guides are a great resource to assist you when setting up specific types of events. However, these guides assume that only one 18-hole course is being used. In this guide, we will explain the difference in the event setup process when multiple courses are used for a single event.
For events like these, the players are typically separated into "course groups". For instance, one group will play Course A and another group will play Course B. (This is done by creating divisions, which is discussed later in this guide.)
Before going through the event setup process, make sure all of the courses being used have been added to the system. Click Here for instructions on adding the courses.
Managing Event Profile Settings:
Before beginning the setup of an event, go to Event Menu > Event Profile > Handicap Settings. You will most likely want the option "restrict relative par adjustments to a single course" selected (as shown below).
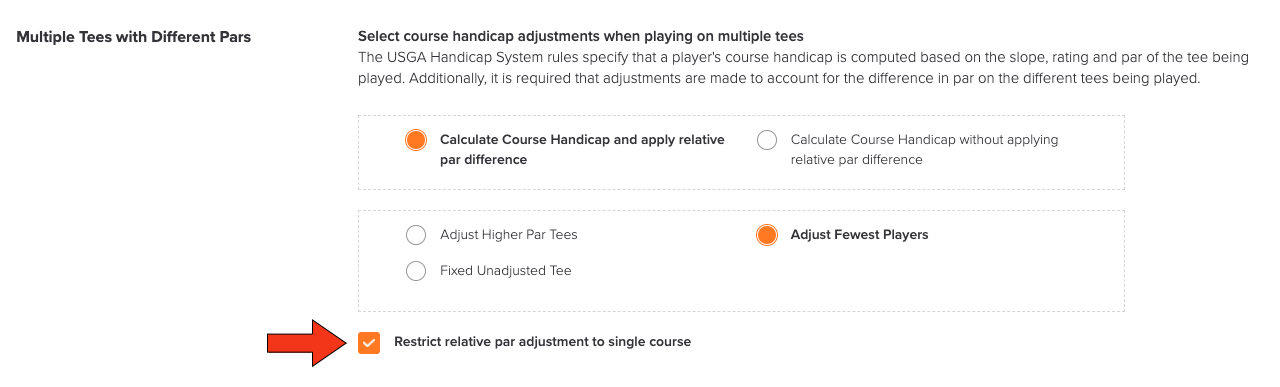
If multiple tees are being played on one (or both) of the courses where the par is different between tees, this will ensure that the proper adjustment is made only within the scope of each course. For instance, if the East Course is using two tees with a different par, the proper par adjustment will be made for the East Course players and will not affect the West Course players.
Go to Event > Event Profile > Rounds & Scheduling. Make sure you select "Pairings should be ordered by division and flight".

This will ensure the "course groups" are organized together in the pairings.
Adding Players:
Click Here for an article on all the available methods for adding players to an event. All of these methods can be used for events using multiple courses as well.
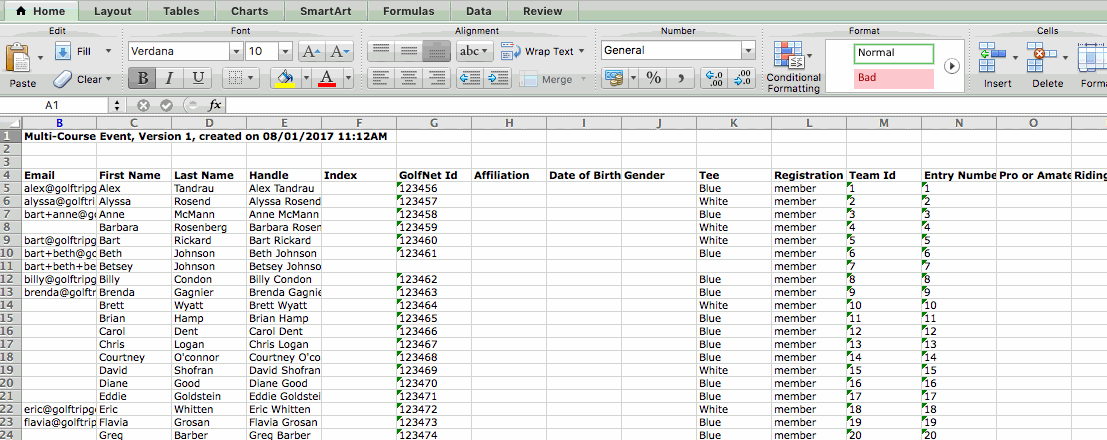
If uploading players to an event via spreadsheet, we suggest adding a custom field that identifies their "course group". This will make it easy to create divisions later.
Add Round(s):
A common misconception with events using multiple courses is that a separate round needs to be created for each "course group". This is usually not the case. If you have a group of players on the East Course and another group on the West Course, you can include all players in a single round. This will allow you to manage both "course groups" within one round. As a matter of fact, if there is an overall competition between the two "course groups", then all of the players MUST be included in the same round.
The only scenario where you will want to have a separate round for each "course group" would be if one "course group" is playing scramble/alt shot and the other "course group" is playing a format where players are playing their own ball (e.g., Four-Ball, Best Ball of four, Individual Stroke Play).
Divisions, Flights, and Teams:
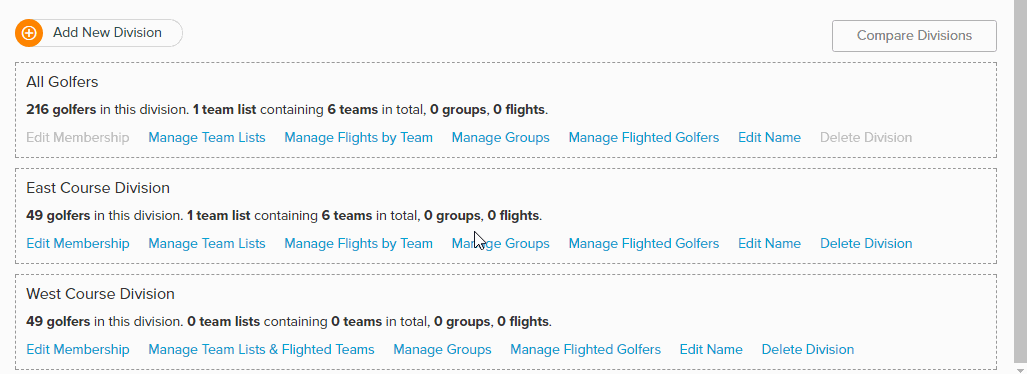
We always suggest creating divisions (Golfers > Event Divisions/Flights/Teams) for each "course group". Click Here for all of the available methods of creating divisions. We suggest one of these two methods:
Create divisions manually: This is simplest way to create the divisions. Click on the players to assign them to their divisions.
Create divisions via custom field: If you've entered a "course group" custom field on the roster spreadsheet before uploading, then use this option will instantly create the divisions. If you did not upload players via spreadsheet, but would still like to enter the divisions via spreadsheet rather than manually, follow this procedure:
Go to Golfers > Download Roster to Spreadsheet. Open up the spreadsheet.
Add the "course groups" custom field and assign the groups to each player. Save the spreadsheet.

Go to Golfers > Upload Roster from Spreadsheet. Upload the spreadsheet back to the event.
Go to Golfers > Event Divisions/Flights/Teams and create the divisions using the "course group" custom field.
After the divisions are created, you can further create flights and teams, if needed (Click Here to find out if you need to create team lists).

Common Question: Should I create flights and teams in the "All Golfers" division or within each division?
Answer: It depends on the scope of the competition.
If playing an overall competition (over all "course groups"), then create the flights/teams in the "All Golfers" Division.
If playing a separate competition within each "course group", then create the flights/teams within each division.
If playing a separate competition for each "course group" AND an overall competition, then create flights/teams in both the "All Golfers" division and the other divisions.
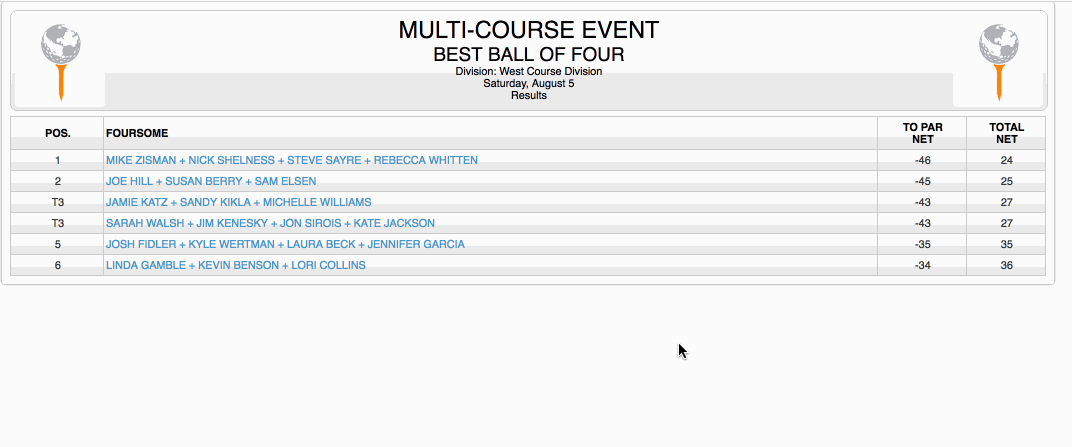
To do this, first create the teams in the "All Golfers" Division. Then, copy the team list from the "All Golfers" division into the other divisions. The example below illustrates a case where we copy the teams from the "All Golfers" division to the "West Course" division.
Creating Tournaments:
Whether creating a multi-round tournament (Event > Multi-Round Tournaments) or single-round tournament (Rounds > Tournaments), there will be an option to select divisions.
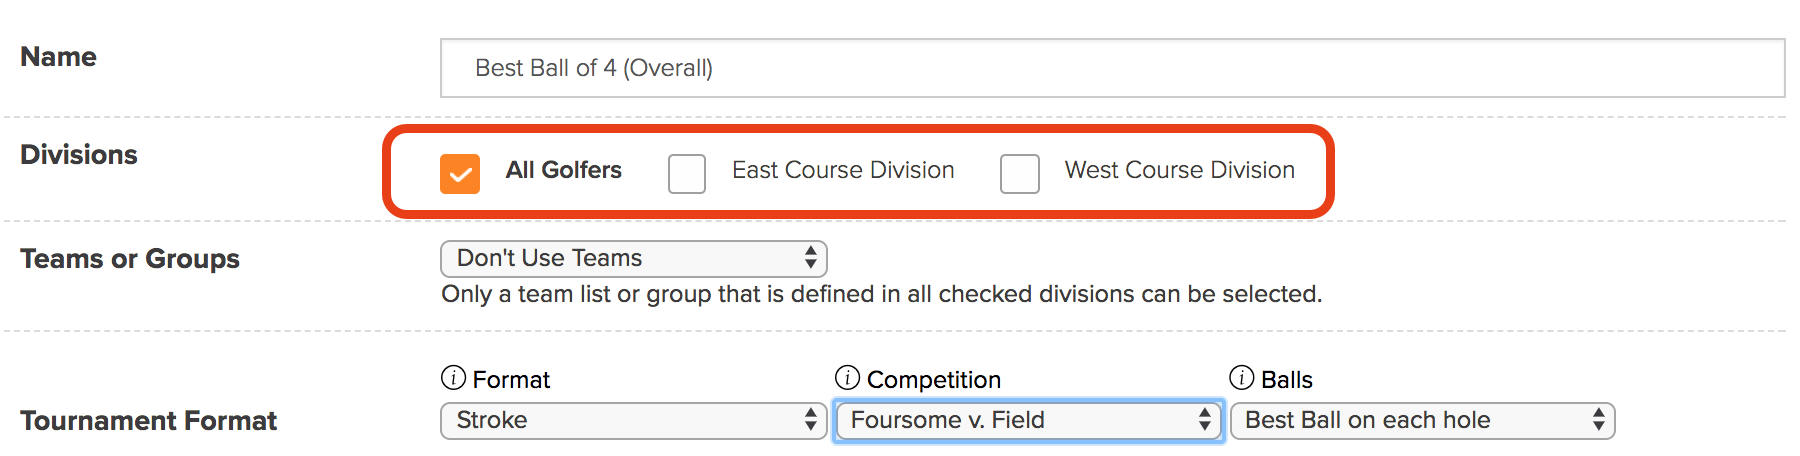
If there is an overall competition, select the "All Golfers" Division and save the tournament. If there is also a separate competition for each division, create another tournament and select those divisions (except "All Golfers").
Creating Pairings:
Before creating the pairings, go to Rounds > Choose Playing Divisions. Select each division being used for the round. Do not select "All Golfers".
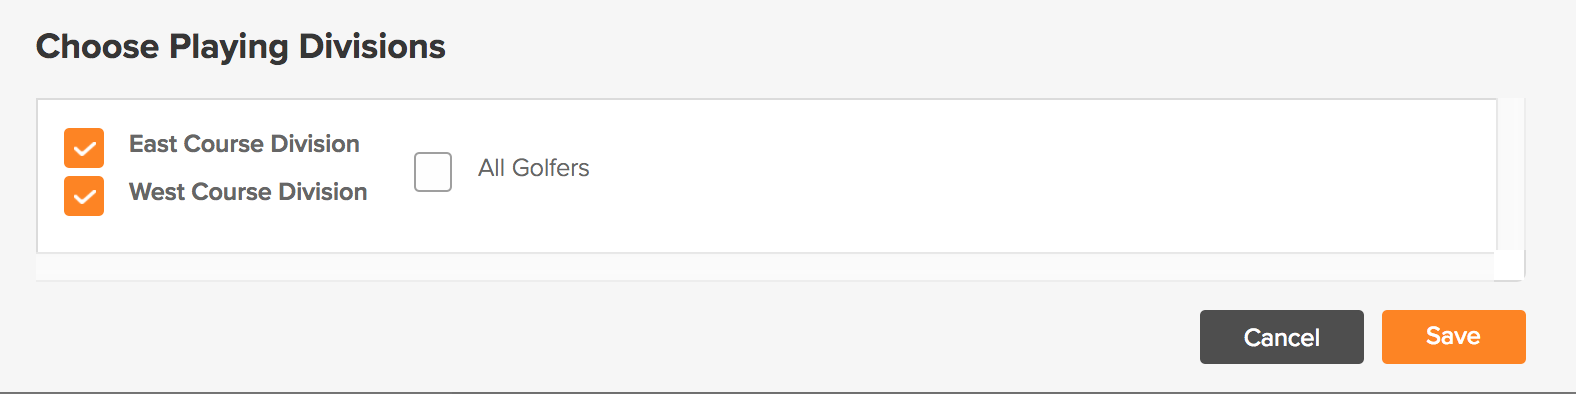
This will ensure the pairings for the round are organized by division. After selecting the divisions, go to Rounds > Create New Pairings. Set the pairing rules for each division. You can create pairings by all of the available methods. Click Here for details on all of the methods.
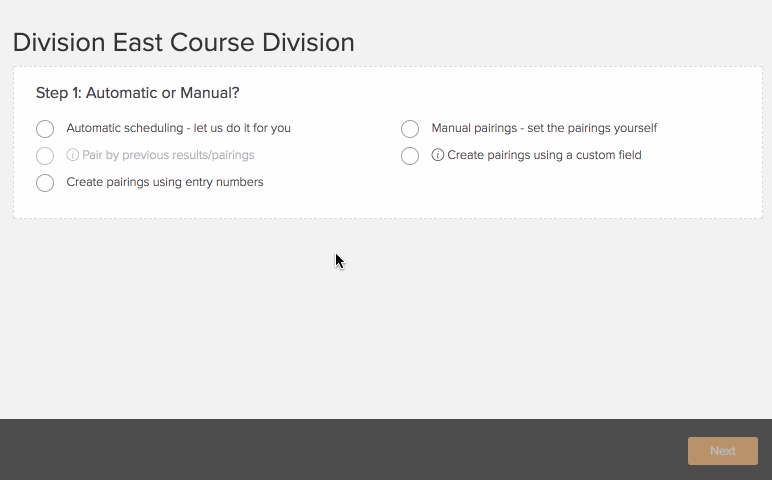
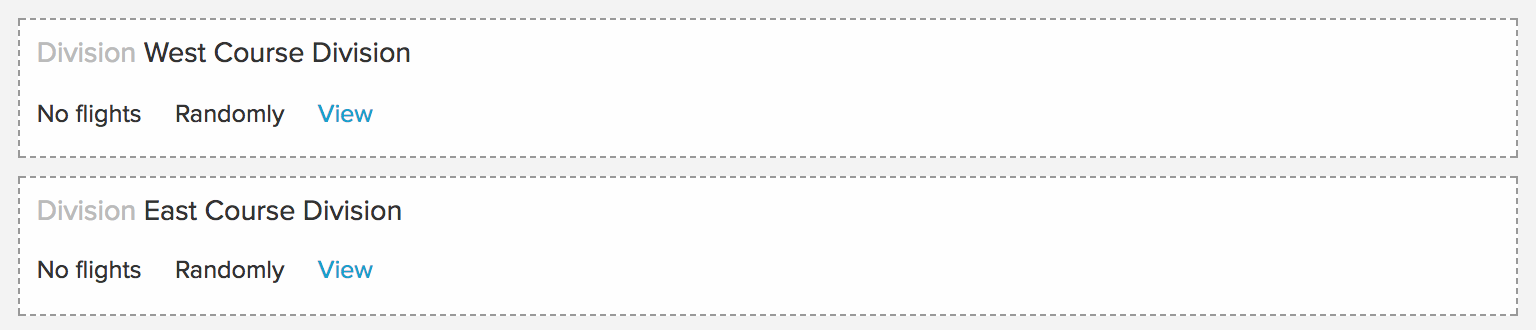
Check out the sequence above as we set the pairing rules for the East Course Division and West Course Division, both randomly. Again, you can also use other methods like "by custom field", manually, etc. Once the scheduling settings are complete for all divisions, you will see a summary of all pairing rules.
Click "Continue" to create the pairings.
Setting Course/Tee & Tee Times:
After creating pairings, you will be directed to the "Edit Existing Pairings" page where you can set course/tee, tee times, and shotgun holes.
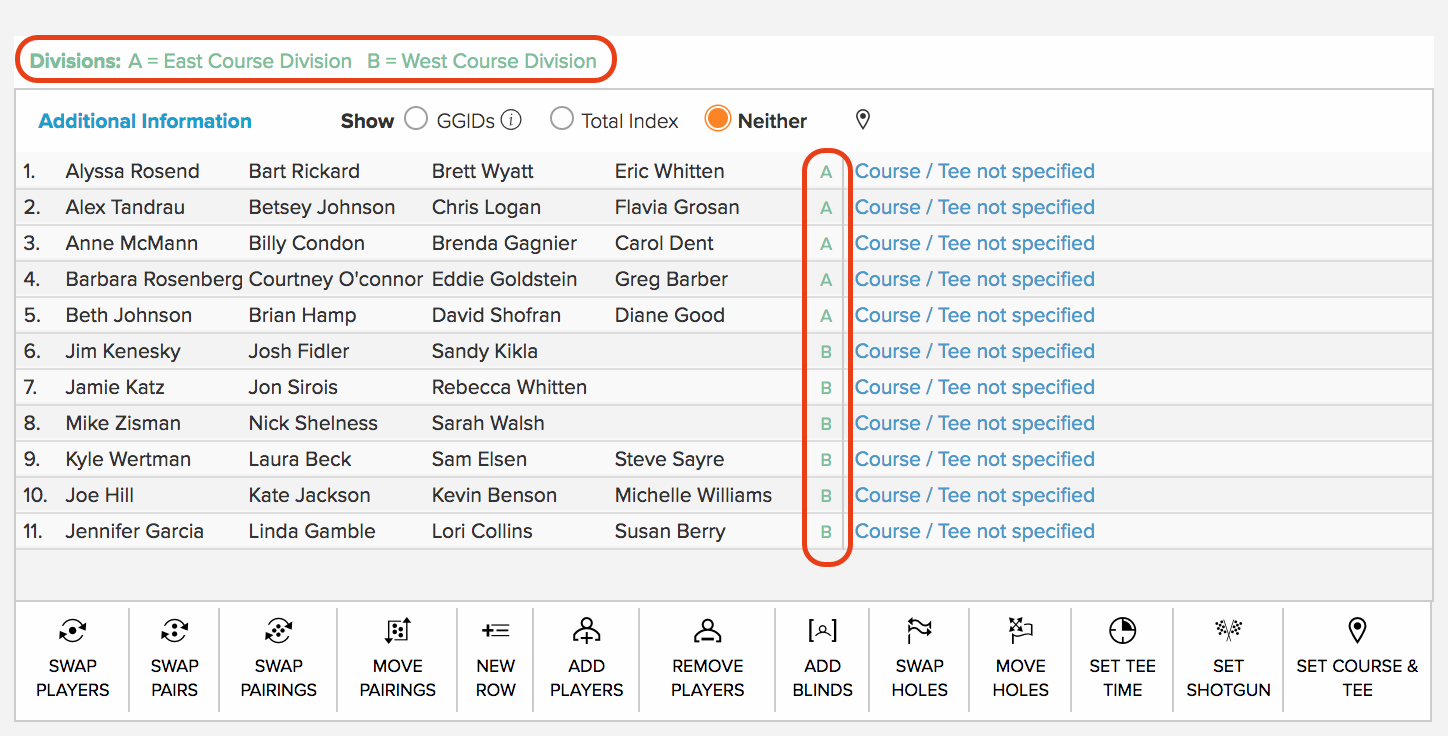
Notice the pairings are organized by division and there is a key identifying what division each pairing group is in. When setting the course/tee, we suggest using the "shift click" method to quickly select the players from each division. Click on the first player in the first pairing group for that division, click and hold the "Shift" key, then select the last player in the last pairing group in that division. All of the players in that division will be selected. Select the course/tee they are playing from, then "Go".
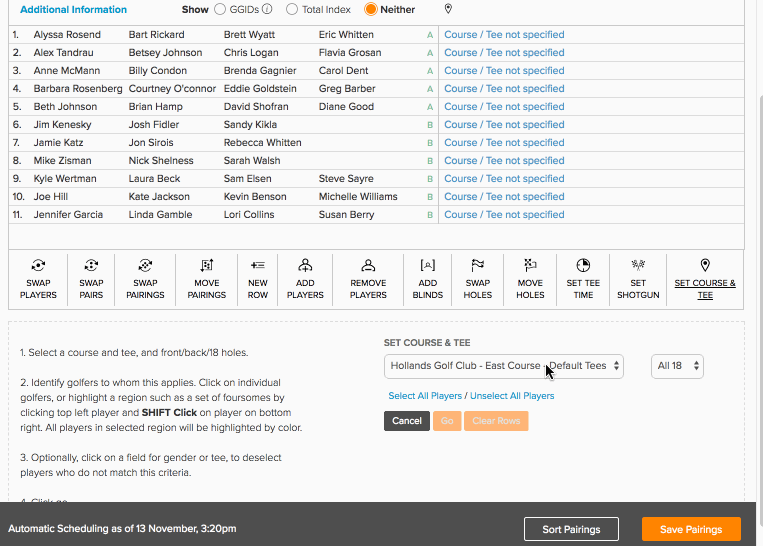
In the sequence above, we are setting the first 5 pairing groups off the East Course and the rest of the pairing groups off the West Course.
Setting the tee times and starting holes can also quickly be done using the "shift click" method. Select the the first pairing group, click and hold the "Shift" key, then select the last pairing group to quickly highlight all the pairing groups for each division.
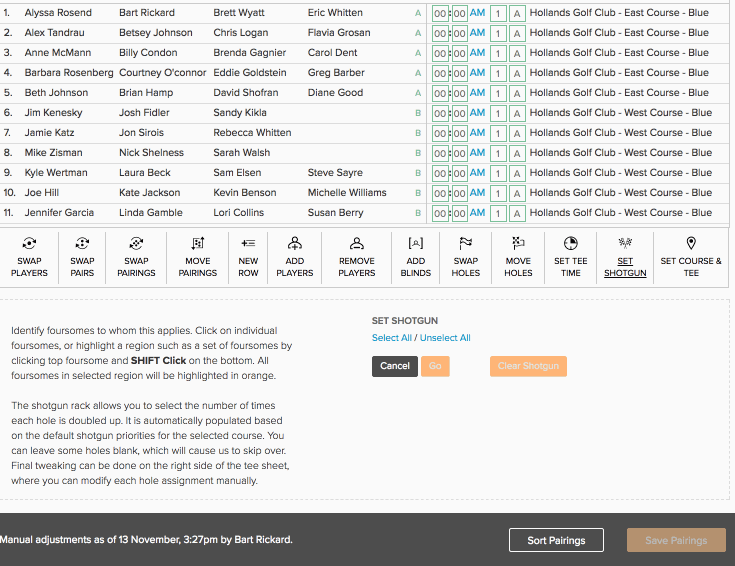
In the sequence above, we are setting a shotgun start for two different courses. The East Course will have a 12:30 PM shotgun start and the West Course will have a 1:00 PM shotgun start.
Make sure to click "Save" when finished.
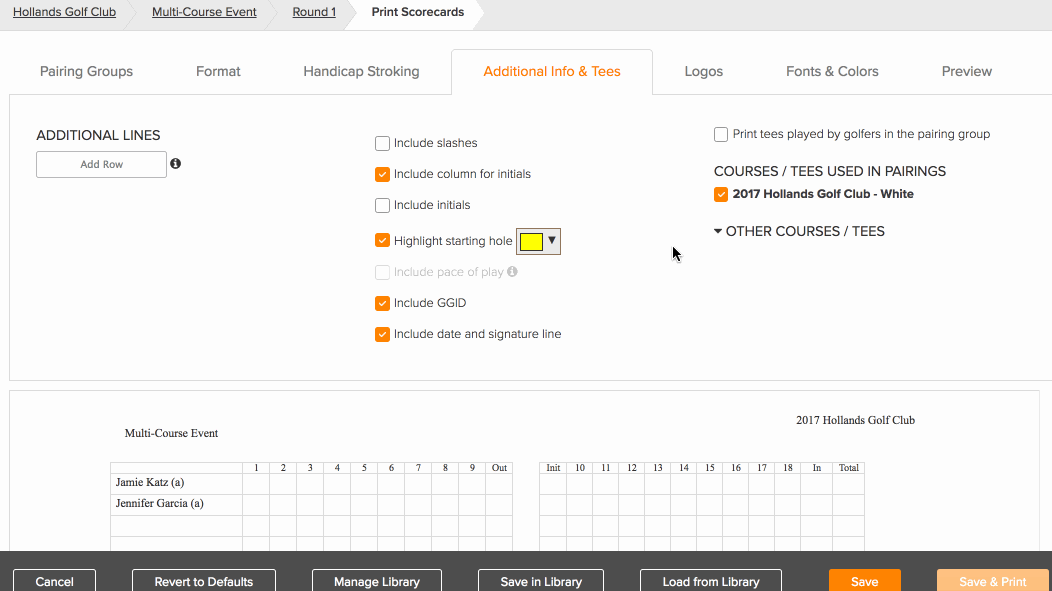
Printing Scorecards:
Some suggestions when printing scorecards for events using multiple courses:
In the "Additional Info and Tees" tab, select to "print tees played by golfers in pairing group".
Always select the proper tournament to use for the scorecards in the "Pairing Groups" tab.
If you'd like the player's division listed on the scorecard as well, you can add it to the header in the "Format" tab.
Look at the sequence below as we 1) select to print tees played by golfers in pairing group 2) Select the tournament to print all scorecards 3) add the division on the header 4) and "Select All" to print all pairing groups.
Other Printed Material:
Tee sheets and alpha lists will be separated by "course groups". If using the Report Composer to build reports, you can:
Filter reports by division.
List the divisions anywhere in a report.
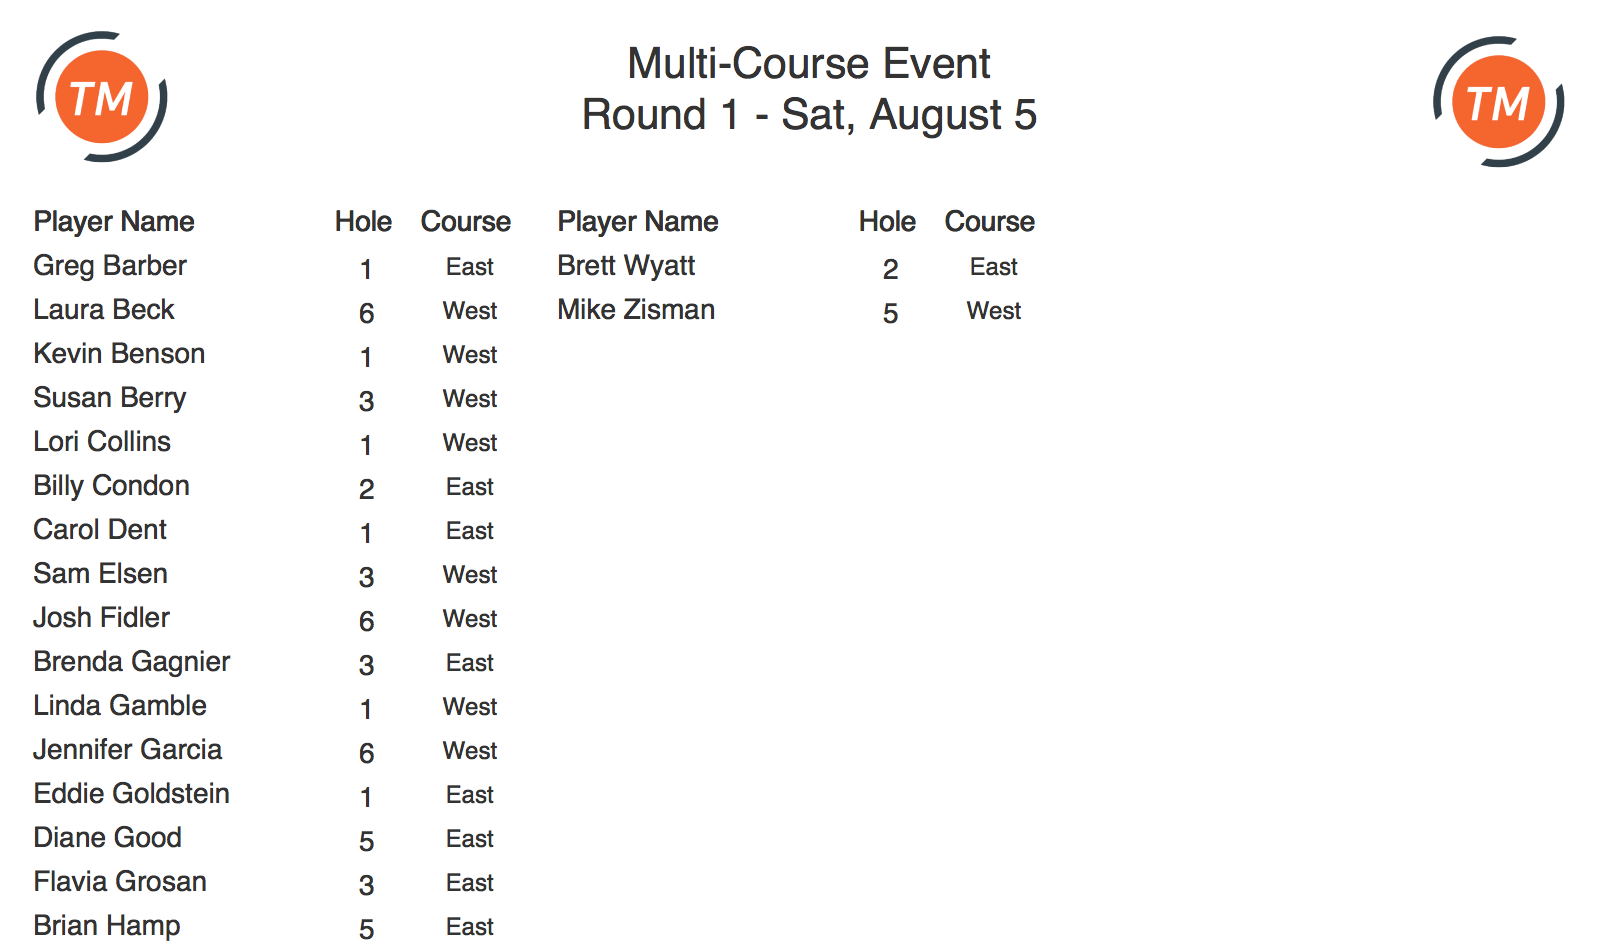
Below is an alpha sheet (listing players from both courses) designed in the Report Composer. The "Course" column lists their divisions.
TV Display:
As certain "course groups" stop by the scoring area, you can selectively hide or display certain leaderboards, if needed. Say for instance that the West Course players will be visiting the TV Display area late morning and the East Course players will be visiting in the early afternoon. You can hide the East Course leaderboard from the West Course players morning and vice versa in the afternoon.
Look at the sequence above for an event with an East Course Division tournament, West Course Division tournament, and an Overall tournament. Because the West Course players are visiting the TV Display first, we are hiding the East Course Division tournament. Keep in mind that hiding and displaying tournaments on one TV will also affect other TVs (if any).
If you have to place the "course groups" in different rounds, and you would like to display the results from these different rounds all on one TV display, then follow the instructions HERE.